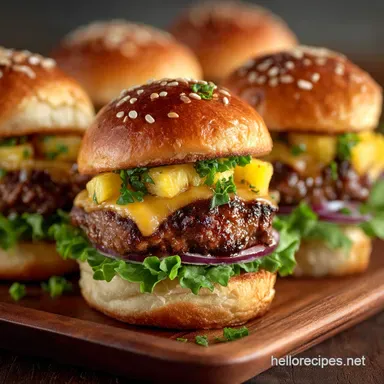
The Ultimate Pubstyle Cheeseburger Sliders Easy Baking Dish Method
- Shrinking the Classic: Why Sheet Pan Cheeseburger Sliders Are King
- Achieving That Deeply Addictive Diner Flavour
- Building the Perfect Bite: Your Essential Shopping List
- The Necessary Gear for Sheet Pan Success
- Pre-Assembly: Preparing the Hearty Filling
- The Critical Layering Sequence
- Baking for Perfection: Achieving the Golden Crust
- Addressing Common Questions About These Cheeseburger Sliders
- Beyond the Recipe: Customizing Your Cheeseburger Sliders Feast
- Recipe FAQs
- 📝 Recipe Card
Shrinking the Classic: Why Sheet Pan Cheeseburger Sliders Are King
There is nothing quite as satisfying as a classic cheeseburger, but when you are entertaining or simply want to streamline weeknight cooking, the traditional patty flipping method becomes inefficient.
Enter the Cheeseburger Sliders , a culinary adaptation that maintains all the juicy, cheesy integrity of the original while drastically simplifying the execution.
This specific approach the sheet pan method transforms the humble burger into the ultimate Party Food Cheeseburger Sliders solution. By baking the entire assembly in a single block within a standard 9x13 inch Cheeseburger Sliders In Baking Dish , we eliminate the need for individual grilling and ensure every single bite is saturated with flavour.
This method not only makes preparation a breeze but guarantees consistently perfect, soft buns, thanks to the trapped steam during the initial bake. This particular cheeseburger sliders recipe is designed to deliver maximum flavour with minimal fuss, making them an indispensable weapon in your entertaining arsenal.
Achieving That Deeply Addictive Diner Flavour
The secret to maximizing that deeply addictive diner taste lies in both the selection of ingredients and the technique of assembly. By layering the components beef, cheese, and the signature garlic butter glaze we ensure the flavours meld and penetrate the fluffy rolls perfectly as they bake in the oven.
The Genius of the Slider Format
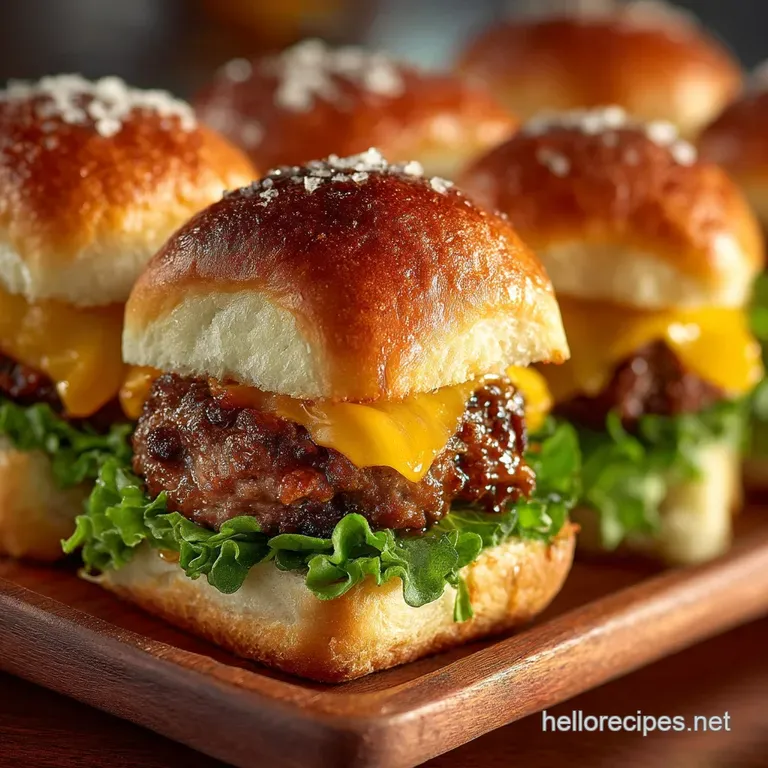
The slider format is inherently brilliant for flavour concentration. Unlike full sized burgers that can dry out quickly, these small, connected Ground Beef Sliders retain incredible moisture.
When nestled shoulder-to-shoulder in the baking dish, the steam and the rendered butter mixture circulate, resulting in buns that are pillowy soft on the inside yet beautifully caramelized and savory on the outside.
This small format also makes them the perfect Cheeseburger Sliders For A Crowd , offering an easy, portion controlled serving that disappears quickly.
Minimal Faff: Mastering the Sheet Pan Assembly
The sheet pan assembly technique using a 9x13 inch casserole dish is the linchpin of this recipe's efficiency. By purchasing pull apart dinner rolls (like Hawaiian or brioche), we treat the entire 12-pack as one giant, continuous sandwich.
We slice the block horizontally, spread the cooked filling, top it with cheese, and replace the lid. This single unit preparation drastically cuts down on the time and labour required, ensuring that these Cheeseburger Sliders In Baking Dish are ready from prep to plate in under 40 minutes.
Building the Perfect Bite: Your Essential Shopping List
To create these irresistible bites, focus on quality fundamentals. You will require approximately one pound (450 grams) of lean ground beef, which provides excellent structure without excessive grease, and one standard package of 12 pull apart dinner rolls.
Crucially, grab 8 to 10 slices of easy melting cheese, such as American or a mild cheddar blend. For the flavour foundation, stock up on yellow onion, Worcestershire sauce, salt, and pepper.
Finally, the defining characteristic of this recipe is the signature butter topping, which requires four tablespoons of unsalted butter, garlic and onion powder, and a touch of Dijon mustard for necessary acidity and tang.
Optionally, some thin sliced pickles are highly recommended for that classic crunch and sour counterpoint.
The Necessary Gear for Sheet Pan Success
Success with this recipe hinges on using the right equipment and making smart ingredient choices that facilitate easy melting and perfect texture when baking the cheeseburger sliders in oven .
You will need a large skillet for pre-cooking the meat, a sharp serrated knife for slicing the rolls evenly, and, of course, the 9x13 inch baking dish and aluminium foil.
The Secret to a Buttery, Soft Bun
The base of this recipe relies heavily on cheeseburger sliders with hawaiian rolls . Their inherent sweetness and soft, airy texture make them ideal, absorbing the savory beef juices and the buttery glaze without becoming dense.
The key is the butter topping itself: four tablespoons of melted butter infused with pungent garlic powder, savoury onion powder, and a teaspoon of sharp Dijon mustard. This glaze is generously brushed over the tops, ensuring a deep golden crust and adding complexity that regular melted butter simply can’t match.
These Hawian Roll Cheeseburger Sliders truly benefit from this simple but effective glaze.
The Right Grind: Choosing Your Beef Mix
We recommend using 85/15 lean ground beef. While a fattier mix (like 80/20) yields more flavour, it also produces significantly more grease, which is the enemy of a perfectly crisp slider bottom.
The minimal fat content in the 85/15 ensures that, even after thorough draining, the meat remains juicy but won't cause the rolls to become soggy and waterlogged during the 25-minute cook time.
The Optimal Cheese Selection for Melting
Forget the fancy aged cheeses here. For the most satisfying texture in these Cheeseburger Sliders , you need high moisture, fast melting processed slices specifically American or a processed Cheddar blend.
These cheeses contain emulsifiers that ensure they spread into a uniform, glorious blanket across the hot beef filling, rather than separating into oil and rubbery curds. A perfect melt is non-negotiable for the proper diner experience.
Related Recipes Worth Trying
- The Ultimate Baked Ham and Cheese Sliders Recipe — Need easy ham and cheese sliders These baked sliders on Hawaiian rolls feature a sticky savoury butter glaze thats utterly addictive Get the foolproof recipe
- How to Bake Mini Bagel Breakfast Sliders: The Ultimate Family Treat! — Craving a delicious start to your day? Try my Bake Mini Bagel Breakfast Sliders filled with fluffy eggs and cheesy goodness. Perfect for families or brunch!
Pre-Assembly: Preparing the Hearty Filling
Preparation begins with the beef filling. Start by preheating your oven to 350° F ( 175° C) and lightly greasing the baking dish.
In a large skillet over medium heat, sauté half a cup of finely diced yellow onion until they turn soft and translucent about five minutes. Add the one pound of ground beef, breaking it up as it cooks. Once the meat is about 80% browned, stir in one tablespoon of Worcestershire sauce, salt, and pepper.
This Worcestershire is critical; it provides a deep, savoury umami base. Remove the skillet from the heat immediately and thoroughly drain off any excess rendered fat. This crucial step prevents the bottom buns from becoming greasy and falling apart.
The Critical Layering Sequence
The layering sequence is what separates successful, stable Cheeseburger Sliders from a soggy mess. Using a long serrated knife, slice the entire block of rolls horizontally, keeping them connected.
Place the bottom half into your prepared Cheeseburger Sliders In Baking Dish . Next, spread the warm, seasoned beef evenly across the bottom layer. Press the meat down lightly to compact it, creating a firm base. If using, a layer of thin sliced pickles goes over the beef.
Finally, arrange the 8 to 10 slices of cheese over the top, making sure they overlap slightly to guarantee full, edge-to-edge coverage. Gently place the top layer of rolls back over the cheese.
Baking for Perfection: Achieving the Golden Crust
The baking process uses a two-stage method: steaming to melt the cheese and soften the buns, followed by uncovered baking for that desirable golden crust.
Seasoning and Browning the Beef
Before layering, ensuring the meat is perfectly seasoned with Worcestershire sauce and properly drained guarantees that the moisture added later comes only from the steam and the buttery glaze, not from residual fat.
This initial seasoning is the final chance to inject profound savoury flavour directly into the core of the Ground Beef Sliders .
Laying the Foundation: Slicing the Rolls
When using the cheeseburger sliders with hawaiian rolls , remember to always slice the entire 12-pack as a single unit. This preserves the structural integrity required for the sheet pan method.
Placing the single bottom layer into the dish ensures that the warm beef and melting cheese adhere uniformly to the bun base.
The Final Glaze: Securing the Top Bun
The crowning glory is the signature glaze. Melt the four tablespoons of unsalted butter, then whisk in the garlic powder, onion powder, and Dijon mustard. Use a pastry brush to apply this mixture lavishly over the top of the assembled rolls, ensuring the glaze drips down into the creases between the individual sliders.
This step not only provides a phenomenal flavour but acts as a 'glue' for the optional sesame seeds, which are added just before baking for a classic finish.
Oven Temperature and Timing Checkpoints
Preheat the oven to 350° F ( 175° C). The first bake is the melting stage: cover the baking dish tightly with aluminum foil and bake for 15 minutes. The foil traps the steam, resulting in spectacularly soft buns and perfectly molten cheese.
Next, remove the foil and return the sliders to the oven for an additional 5 to 8 minutes. This second stage achieves the desired golden brown color and slightly crisp top crust. Let the sliders rest for five minutes after removal before using the serrated knife to cut them apart and serve.
Addressing Common Questions About These Cheeseburger Sliders
One of the most frequent concerns when preparing these Party Food Cheeseburger Sliders is preventing a soggy base. The key tip is non-negotiable: always thoroughly drain the ground beef after browning. Any residual fat will seep into the bottom rolls.
Another vital piece of advice is to use the foil step; covering the sliders initially ensures the internal temperature rises quickly for melting the cheese without drying out the buns.
Finally, do not attempt to separate the rolls until they come out of the oven keeping the block connected is essential for maintaining moisture and structure during the bake.
Beyond the Recipe: Customizing Your Cheeseburger Sliders Feast
These buttery, cheesy Hawian Roll Cheeseburger Sliders are fantastic as is, but their simple foundation makes them ripe for customization, whether you are hosting a gathering or adjusting for dietary needs.
Killer Dipping Sauces and Side Pairings
To elevate the presentation and flavour, offer side accompaniments. Serve alongside classic French Fries or crunchy onion rings for textural contrast. For dipping, consider a sophisticated burger sauce (a mix of mayo, ketchup, and relish) or a creamy sriracha aioli for a kick.
A light, vinegary coleslaw or a simple green salad provides a welcome acidic counterpoint to the richness of the Ground Beef Sliders .
Ingredient Substitutions for Dietary Needs
If you require a leaner option, ground turkey or chicken mince can be substituted for the beef, although they are much leaner and may require a dash more olive oil during browning.
For gluten sensitivities, a good quality gluten-free dinner roll can be used, although you should line the baking dish with parchment paper to ensure easy removal, as these rolls can sometimes stick.
Storage Solutions and Reheating Tips
While these Cheeseburger Sliders are best consumed immediately, leftovers can be stored in an airtight container in the refrigerator for up to three days. To reheat, the oven is your best option.
Place the sliders (separated or in the dish) on a foil lined sheet pan and bake at 300° F ( 150° C) for 10- 12 minutes, or until warmed through. Avoid the microwave, which tends to make the delicious rolls tough and chewy.
Scaling Up or Down for Any Occasion
The beauty of the sheet pan method is its inherent scalability. The Cheeseburger Sliders For A Crowd recipe is based on a standard 12-pack of rolls, fitting perfectly into a 9x13 dish.
If you need to double the quantity for a large event, you can easily use a half sheet pan (18x13 inches) and two packages of rolls, doubling all the ingredient ratios and maintaining the same oven temperature and timing checkpoints.
This consistency makes the cheeseburger sliders in oven method ideal for catering any size party.
Recipe FAQs
Help! My buns always go a bit soggy when I make baked sliders. How do I keep these Cheeseburger Sliders crisp?
The secret to avoiding a damp bottom is rigorous fat drainage. Before assembly, ensure your cooked ground beef is as dry as the Sahara; excess grease is the primary culprit. Furthermore, don’t skip the final 5-8 minutes of baking uncovered this step is crucial as it creates a lovely, crisp, golden top and prevents the bottom layer from going a bit sad and floppy.
Can I prepare these ahead of time if I'm having a big bash?
Absolutely, these are brilliant for getting ahead! You can prepare the meat filling, assemble the layers (meat, cheese, and buns), and wrap the whole baking dish tightly in cling film. Pop it in the fridge for up to 24 hours.
Just remember not to add the buttery garlic glaze until you are literally ready to slide them into the oven, or the rolls will soak up too much liquid and lose their light texture.
I need to feed a massive crowd. Can I double this recipe easily?
It’s dead simple to scale up; the sheet pan method is built for volume! Simply use a larger baking tray (like a half sheet pan) or employ multiple 9x13 dishes.
The main thing is to keep the beef layer relatively thin and even across the bread base, otherwise, the centre might struggle to heat through properly. You may need to add an extra five minutes to the initial covered baking time.
I fancy switching things up what are some clever alternatives to beef mince?
If you fancy a change, ground turkey or chicken mince works perfectly well, though you might want to ramp up the seasoning with extra smoked paprika or herbs like sage. For a proper veggie option, substitute the beef with a hearty mixture of finely chopped, sautéed mushrooms, and lentils seasoned with a dash of Worcestershire or soy sauce.
What's the best way to store any leftovers, and how should I reheat them?
Leftovers should be cooled quickly and stored in an airtight container in the fridge, where they will keep nicely for 3 4 days. To bring them back to life without drying them out, wrap the individual portions tightly in foil and reheat them in a moderate oven (150°C/300°F) for about 10 15 minutes.
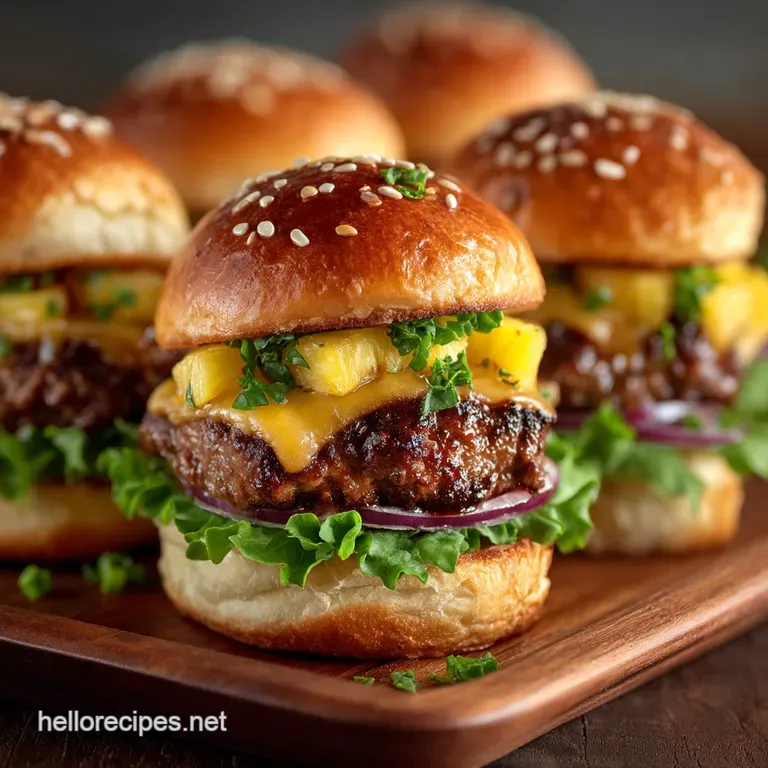
Pubstyle Cheesy Cheeseburger Sliders