The Ultimate 48Hour Simmer Deeply Nourishing Bone Broth
- Beyond Stock: Unlocking the Power of True Liquid Gold
- Why This 48-Hour Simmer Changes Everything About Your Health
- Assembling Your Bone Broth Foundation
- The Sourcing Secret: Choosing Premium Bones
- The Slow and Steady Method: Achieving Unrivaled Clarity
- The Slow and Steady Method: Achieving Unrivaled Clarity (Continued)
- Maximizing Your Homemade Bone Broth Yield and Longevity
- Creative Ways to Incorporate Your Rich Broth
- Choosing Your Bones: The Foundation of Liquid Gold
- The Importance of Roasting Bones (Optional Step)
- The Long Simmer: Maintaining Temperature and Time
- Troubleshooting: The Fog in Your Fond: Cloudy vs. Clear Bone Broth
- Straining and Storing Your Liquid Gold Bone Broth
- Wringing Out Every Last Bit: Tips for Maximizing Gelatin Content
- Frequently Asked Questions
- 📝 Recipe Card
Right then, let's get this show on the road! Creating a truly magnificent Bone Broth is less about flashy technique and more about patience it’s the culinary equivalent of waiting for the kettle to boil, but with much more delicious results.
This isn't just stock, mind you; this is liquid gold, the sort of comforting stuff that puts hairs on your chest (or, you know, helps sort out your tummy!).
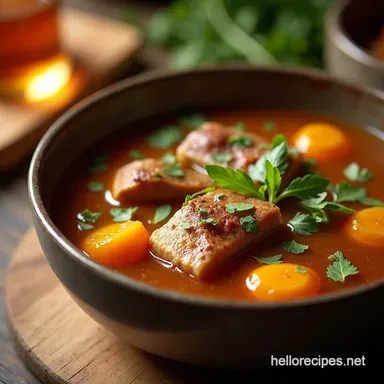
Forget those watery, pale imitations you find in cartons! This recipe dives deep into the traditional method of extracting maximum goodness from bones, yielding a richly gelatinous, deeply savoury broth.
Slow simmered with aromatic vegetables and apple cider vinegar (our little secret weapon for mineral extraction), this Homemade Bone Broth Recipe is perfect sipped straight on a chilly morning, used as the base for spectacular gravies, or as the foundation for a truly restorative meal.
It’s like getting a hug from the inside out.
Beyond Stock: Unlocking the Power of True Liquid Gold
This isn't a quick fix; it’s an investment. I’ve seen so many quick recipes online promising amazing results after just four hours. Honestly? Don't bother. That’s just warm water with bone flavouring. To get that lovely, thick, wobbly texture when it’s cold, you need time.
Distinguishing Broth from Runny Imitations
The biggest confusion I hear is: "What’s the difference between stock and broth, anyways?" Good question. Stock is usually boiled quickly and primarily extracts collagen from connective tissue, making it thinner.
Our goal here is a proper Bone Broth —slow, steady, and packed with everything. When mine is done, if I put a spoonful in the fridge overnight, it should set like jelly.
If yours is still liquid, you haven't gone long enough, or you need more joint bones for your next Crockpot Bone Broth Beef batch.
Setting the Stage for Culinary Patience
Making this takes commitment, I won't lie. While the active work is only about 30 minutes of chopping and scraping, the simmering stage demands space on your hob for 24 to 48 hours. My top tip? Set this up on a Friday morning. By Saturday afternoon, you’ll have enough to see you through most of the next week.
If you're worried about leaving the stove on, remember, a slow cooker or a very reliable crockpot can handle this beautifully while you're out grabbing your Sunday papers.
Why This 48-Hour Simmer Changes Everything About Your Health
Why go to all this bother? Because the long, slow extraction is key to releasing the good stuff. We aren’t just making soup flavour; we’re making medicine, essentially.
The Deep Dive: Gelatin, Collagen, and Gut Repair
When we talk about Bone Broth Benefits , we mean the collagen breaking down into gelatin. This is absolute gold dust for your gut lining. Think of it like patching up little cracks in a wall that's what gelatin does for your digestion.
It’s why I swear by this Healing Bone Broth Recipe when I feel run down. Roasting those bones first (Step 1) is crucial, as it deepens the flavour profile, turning it from basic into a proper Roasted Bone Broth Recipe .
Trust me, after your first sip of this rich liquid, you won't go back to the watery stuff. Getting those amino acids from quality bones, perhaps even using a good Bone Marrow Broth Recipe , is the secret sauce.
Related Recipes Worth Trying
- Best Bone Broth Recipe SlowSimmered Beef Gold — Stop buying watery stock Learn how to make homemade bone broth that sets like jelly This easy recipe guarantees rich flavour for soups and sipping
- The Best Homemade Bone Broth Rich Gelatinous Clear — Forget the watery stuff Learn how to make authentic gelatinous Beef Bone Broth from scratch with this foolproof slowsimmer recipe Perfect for sipping or...
- Tender Chicken Biryani My Familys FallOffTheBone Secret — My Tender Chicken Biryani Recipe is a flavour bomb Ridiculously tender chicken fragrant rice and saffron hues Try this Hyderabadiinspired delight tonight
Right then, let's get this show on the road! Creating a truly magnificent Bone Broth is less about flashy technique and more about patience it’s the culinary equivalent of waiting for the kettle to boil, but with much more delicious results.
This isn't just stock, mind you; this is liquid gold, the sort of comforting stuff that puts hairs on your chest (or, you know, helps sort out your tummy!). Forget those watery, pale imitations you find in cartons!
This Homemade Bone Broth Recipe dives deep into the traditional method of extracting maximum goodness. It’s like getting a hug from the inside out.
Assembling Your Bone Broth Foundation
This recipe is dead easy, really. While the time commitment is huge, the active work is minimal. If you can put a lid on a pot and walk away, you've basically mastered it! We are aiming for that rich, gelatinous result that screams Healing Bone Broth Recipe .
The Core Components for Maximum Nutrient Extraction
You need quality ingredients for a top-tier Bone Broth Protein yield. We’re looking for joints and marrow, not just meaty scraps. For our foundation, grab about 4 lbs (around 1.8 kg) of mixed bones beef knuckle bones are brilliant if you can find them.
If you’re going for a Crockpot Bone Broth Beef , make sure you roast them first if you want that deep colour. We use 2 tablespoons of Apple Cider Vinegar; trust me on this one. It’s our little secret weapon, helping to leach those precious minerals out of the bones.
If you’re out of ACV, try 2 tablespoons of lemon juice, though the vinegar works best.
Vegetable Aromatics: Building Depth of Flavor
Vegetables aren't just filler here; they build the flavour profile. Roughly chop 2 large yellow onions (skin on is fine for colour!), 3 carrots, and 4 celery stalks. We throw in a whole head of garlic, cut in half no need to peel the skin off, honestly!
My biggest lesson learned was not to chop the veg too finely. If they are too small, they break down completely and make straining a nightmare. We want rough chunks that give flavour and then get chucked.
Necessary Equipment for the Long Haul
You need the right gear for this marathon, not a sprint! A large stockpot is essential; I mean proper big, at least 8 quarts (about 8 litres). If you don't have a huge pot, the Crockpot Bone Broth Beef method using a slow cooker is your mate.
You’ll also need a fine mesh sieve for straining. If you want that super clear, restaurant quality Organic Bone Broth , grab some cheesecloth to line your sieve.
The Sourcing Secret: Choosing Premium Bones
This is where the magic truly happens for a proper Bone Marrow Broth Recipe . Don't just use whatever bones you have left from Sunday dinner; for true restorative qualities, sourcing matters.
If you are looking to make this recipe later, remember that blanching the bones first boiling them for 15 minutes then rinsing them thoroughly can help remove impurities, making your final broth cleaner.
This is key if you plan on How To Can Bone Broth later on. Remember, we are aiming for that jiggly, set texture when it’s cold. That wobble means you’ve extracted serious collagen goodness!
Right then, let's get this show on the road! Creating a truly magnificent Bone Broth is less about flashy technique and more about patience it’s the culinary equivalent of waiting for the kettle to boil, but with much more delicious results.
This isn't just stock, mind you; this is liquid gold, the sort of comforting stuff that puts hairs on your chest (or, you know, helps sort out your tummy!). Forget those watery, pale imitations you find in cartons!
This recipe dives deep into the traditional method of extracting maximum goodness from bones, yielding a richly gelatinous, deeply savoury broth. If you’re after a proper Healing Bone Broth Recipe , you’ve come to the right place.
This process takes time, but trust me, the payoff for making Homemade Bone Broth Recipe is brilliant.
The Slow and Steady Method: Achieving Unrivaled Clarity
Making a truly clear, beautiful Bone Marrow Broth comes down to managing the heat. If you rush it, you end up with a cloudy mess. Nobody wants cloudy broth; we want liquid glass, nearly. This is where our initial prep work pays off handsomely.
Initial Roasting: Maximizing Maillard Reaction Benefits
Step 1 is optional, but honestly, skipping it is like ordering a pint and asking the barman to skip the head. We want deep flavour here.
- Toss your 4 lbs of mixed bones with a tablespoon of olive oil and a teaspoon of salt.
- Get them into a preheated oven at 400° F ( 200° C) .
- Roast these beauties for 30 to 45 minutes. You’re looking for a deep, dark brown colour not burnt, mind you, but nicely caramelized. This browning, the Maillard reaction, is where all the serious flavour for your Roasted Bone Broth Recipe lives.
Crucial Stages of the 48-Hour Bone Broth Process
Once those bones are roasted, we move to the pot. This is where the long game begins.
- Transfer those fragrant bones into your largest stockpot. Add your chopped onions, carrots, celery, and the halved head of garlic.
- Now, pour in the 2 tablespoons of Apple Cider Vinegar. Let this sit for 20 minutes. I know, it smells a bit sharp, but that acid is doing the hard work of loosening up all those lovely minerals locked inside the bone structure.
The Slow and Steady Method: Achieving Unrivaled Clarity (Continued)
Once the acid has done its job, we cover the lot with cold water make sure the solids are about two inches submerged. Bring this up slowly to a rolling boil.
The Crucial First Skim: Removing Impurities
This step is non-negotiable if you want that beautiful, clean look. As the water heats up, scum which is basically denatured protein will rise to the top.
- As soon as that vigorous boil hits, immediately reduce the heat until the liquid is barely trembling. I mean barely!
- Grab a ladle and spend about 15 minutes carefully skimming off every bit of grey or brown foam that rises. If you skip this, you’re basically guaranteeing a murky final product. Trust me, I learned this the hard way early on; my first batch looked like dishwater!
Maintaining the Gentle Simmer: Temperature Control Secrets
Once the surface is relatively clean, you add your peppercorns, bay leaves, and that bundle of parsley stems. Now, we wait.
- Reduce the heat until the surface barely shows a ‘blip’ every few seconds. This gentle heat is key to extracting maximum Bone Broth Protein without breaking everything down into a cloudy mess.
- Cover loosely and let this simmer for 24 hours minimum, pushing it to 48 hours for the deepest flavour and gelatin content. If the water level drops too much and the bones peek out, top it up with hot water, but try to avoid excessive topping up.
The Final Strain: Achieving Silky Smoothness
After 48 hours of patient simmering, turn off the heat. The aroma in your kitchen will be incredible that deep, meaty scent of rich Organic Bone Broth .
- Carefully fish out the big solids with tongs and discard them.
- Pour the remaining liquid slowly through a fine mesh sieve into a clean container. For a truly show stopping, crystal clear Bone Broth , line that sieve with a piece of damp cheesecloth. It will take ages, but it’s worth the effort.
Once strained, let it cool on the counter for two hours max before moving it into the fridge. That glorious, jiggly texture when it sets means you’ve nailed it. If you make a massive batch, you can How To Can Bone Broth or freeze it in smaller containers perfect for whipping up a speedy, nourishing dinner when life gets hectic.
This stuff is proper good medicine!
Maximizing Your Homemade Bone Broth Yield and Longevity

Right then, let's get this show on the road! Creating a truly magnificent Bone Broth is less about flashy technique and more about patience it’s the culinary equivalent of waiting for the kettle to boil, but with much more delicious results.
This isn't just stock, mind you; this is liquid gold, the sort of comforting stuff that puts hairs on your chest (or, you know, helps sort out your tummy!). If you’re putting in 48 hours of simmering, you want to make sure every drop counts.
We are aiming for that glorious, jelly like texture that screams quality.
Freezing Techniques for Year Round Nourishment
Storing this liquid gold properly is non-negotiable, especially when you’ve invested so much time. When your Homemade Bone Broth Recipe is fully chilled in the fridge, you’ll see that thick white cap of fat resting on top. Don't chuck that!
That fat is brilliant for frying eggs later it’s flavour central. Scoop that fat off first. Now, for the broth itself, portioning is key. Don’t just freeze one massive tub. Think practically.
I use large, wide mouth mason jars, leaving about an inch of headspace because liquid expands when it freezes, and nobody wants a shattered jar incident. For quick meal additions, use standard ice cube trays for small bursts of flavour perfect for deglazing a pan or adding a little depth to a sauce.
Once frozen, pop those cubes out into a labelled freezer bag. For bigger containers, make sure they are cooled quickly first (don’t put hot liquid straight into the freezer, it messes with everything else!). A Crockpot Bone Broth Beef batch freezes beautifully this way.
Troubleshooting: When Broth Doesn't Set Up Right
This is the moment every home cook dreads: you chill your beautiful creation, and instead of a firm wobble like set jelly, it’s still stubbornly liquid. Don't panic, it happens!
If your Bone Broth doesn't set, it usually means one of two things: not enough collagen rich bones were used, or you didn't simmer it long enough to fully break down that gelatin.
If it’s a bit thin, you have options. If you still have a bit of cooking time left, you can put it back on the lowest simmer, uncovered, for another 4– 6 hours. This concentrates the liquid.
Alternatively, if it’s done and just lacks that wobble, strain it again, return it to the pot, and add a bag of chicken feet or a few raw beef knuckles. Simmer this mixture for another 6– 12 hours.
You're essentially brewing a super concentrated collagen shot to revive the main batch. It’s salvageable, promise!
Flavor Twists: Herbal Infusions for Different Benefits
While our basic recipe gets you a fantastic, foundational Healing Bone Broth Recipe , sometimes you want to tailor it. Think of this as customising your wellness drink!
If you're focusing on deep immune support, try adding a tablespoon of dried ginger root and a few slices of turmeric during the last 12 hours of the simmer. If you’re aiming for a more restful night’s sleep, add a small handful of chamomile flowers in the final hour.
For a savory, restorative experience perfect for making a rich Bone Marrow Broth Recipe base I love adding a dried shitake mushroom and a small square of kombu (seaweed) right at the start.
Just remember to pull those seaweed bits out after 4 hours, otherwise, it can get a bit slimy! These little additions turn a great broth into something bespoke.
Creative Ways to Incorporate Your Rich Broth
So, you’ve got gallons of this glorious stuff, it’s rich, and it’s packed with Bone Broth Protein . What now? This is where the magic happens beyond just sipping it neat.
People often ask me how to use up the bulk, especially after making a big Roasted Bone Broth Recipe batch.
First off, I always recommend trying it straight. Add a splash of sherry vinegar and serve it steaming hot. It's pure comfort. But honestly, this liquid gold elevates everything. Use it instead of water when cooking couscous or quinoa it seriously transforms plain grains.
If you’re making risotto, ditch the plain stock and swap in your Organic Bone Broth ; the texture and depth of flavour are unmatched.
Another tip? When making scrambled eggs or an omelette, use a tablespoon of broth instead of milk or water. They come out unbelievably creamy. My favourite use, though, is in braising meats.
Forget weak wine reductions; a slow braise in Bone Broth turns cheap cuts of meat into fall apart tender masterpieces.
Storage and Reheating Guide
Freshly made, properly cooled, and skimmed, your Bone Broth will keep happily in the fridge for about 5 to 7 days. If you're not going to use it up in that time, move straight to freezing, as discussed.
When it comes to reheating, go slow. If you're taking a frozen jar out, let it thaw overnight in the fridge first. Then, gently warm it on the stovetop over medium low heat. Don't let it come to a rolling boil, especially if you plan to drink it for health benefits, as excessive heat can degrade some of the beneficial compounds.
If you’re using it in a recipe like soup, bringing it to a simmer is absolutely fine. For long term preservation, look into How To Can Bone Broth , but for home cooks, the freezer is usually king.
Pro Tips and Garnish Ideas
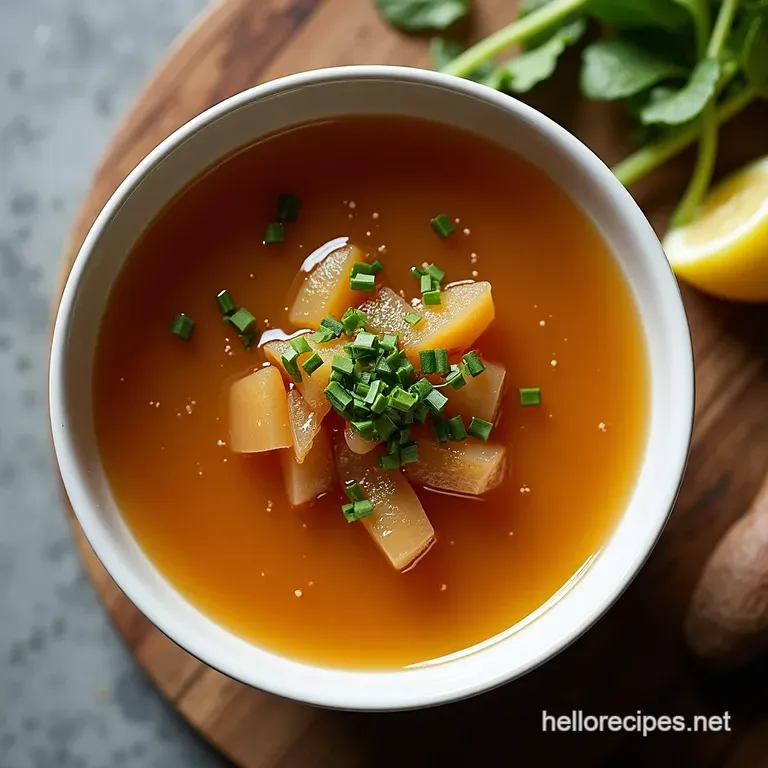
If you’re serving this up as a tonic, the presentation matters! Garnishes aren't just for looks; they add texture and fresh flavour contrast to the deep, slow cooked taste. My go-to garnish is fresh, finely chopped parsley and a drizzle of really good quality extra virgin olive oil right before serving the oil carries the flavour beautifully.
Another trick I learned the hard way (when my first batch tasted a bit flat) is the power of final seasoning. Before you chill it, taste it after straining. It should taste slightly too salty on its own, because when it cools, the flavour mellows.
A tiny pinch of cayenne pepper stirred in just before serving gives a lovely little warming kick, perfect for those winter blues. Honestly, mastering this Bone Broth recipe is a genuine game changer for your kitchen pantry. Give it a go you won't look back!
Choosing Your Bones: The Foundation of Liquid Gold
Right then, let's get this show on the road! Creating a truly magnificent Bone Broth is less about flashy technique and more about patience it’s the culinary equivalent of waiting for the kettle to boil, but with much more delicious results.
This isn't just stock, mind you; this is liquid gold, the sort of comforting stuff that puts hairs on your chest (or, you know, helps sort out your tummy!). Before we even think about chopping onions or finding the biggest pot we own, we need to nail the star ingredient: the bones themselves.
Get this bit right, and the rest is smooth sailing.
Beef vs. Chicken: Which Beast for Your Broth?
Choosing your bones is honestly where the magic starts. You can’t knock out a brilliant Homemade Bone Broth Recipe without selecting the right building blocks. Think about what you want the final product to do .
Do you want something robust, rich, and dark that can stand up to heavy stews? Go beef. Are you aiming for something milder, perhaps for sipping when you’ve got a cold, or as a base for Asian style soups? Chicken is your friend.
Beef bones think knuckles, leg bones, and especially those beautiful marrow bones give you depth. They render a deep, savoury flavour and, crucially, they release tonnes of collagen. When this cools, if you’ve done it right, it should wobble like a newborn jelly.
That wobble is what we’re after; it signifies high Bone Broth Protein . If you opt for a Crockpot Bone Broth Beef , you'll be rewarded with a dark, almost mahogany coloured liquid.
Chicken bones, particularly feet and backs, are fantastic for a quicker (though still long!) simmer. They provide heaps of gelatin, but the flavour profile is lighter. It’s the perfect blank canvas if you plan on flavouring it heavily later on.
My personal favourite, if I’m making a true Healing Bone Broth Recipe , is a mix. A couple of beef marrow bones for backbone, and a pile of chicken backs for that jiggly texture.
The Roasting Decision: Dark vs. Pale
Now, here’s a bit of a crossroads in the world of broth making. You can toss your bones straight into the pot with cold water, or you can give them a proper roasting first. For a basic stock, maybe skip the roast.
But if you are aiming for that deeply savoury, rich flavour profile that makes your kitchen smell like a proper British Sunday roast, you absolutely must roast them.
Roasting, which we’ll cover in detail later, caramelises the proteins and sugars on the bone surface this is called the Maillard reaction, lovely stuff. This transforms your final product from pale yellow liquid to a rich, dark Roasted Bone Broth Recipe beauty.
I learned the hard way years ago; skipping the roast makes a perfectly fine broth, but it tastes a bit… polite. We don’t want polite broth; we want flavour that punches you in the best possible way!
If you are making Bone Marrow Broth Recipe specifically, roasting the marrow bones until they are almost black on the outside is key to developing that huge, earthy depth. Just remember to scrape all those lovely dark bits (the fond) into your stockpot afterwards!
Sourcing Smart: Freshness and Quality Matters
Look, I know we all love a bargain, but when you are simmering something for two days straight, you want quality ingredients. Whatever bones you choose, try to source them from a butcher you trust. They should look clean, not grey or strangely discoloured.
This is especially important if you are trying to make an Organic Bone Broth .
Ask your butcher for soup bones, neck bones, or joint ends. If you're using beef, ask if they have any bones with a bit of meat or cartilage still attached that stuff breaks down beautifully. Never feel awkward asking! A good butcher loves talking about what they have.
Tell them you are making a Bone Broth Protein powerhouse, and they’ll likely give you the best bits.
If you’re feeling flush, or if you are recovering from something (because of those renowned Bone Broth Benefits ), splurge on high-quality, grass fed beef bones. You’ll taste the difference, trust me.
Once you have your chosen treasures, give them a good rinse under cold water before they hit the roasting pan or the pot. We aren't trying to include every little surface impurity. We want clean, pure flavour extraction.
Getting the bones right is half the battle; the rest is just managing the slow simmer and resisting the urge to peek too often! Once you've got your chosen bones be they beef, chicken, or a mix we can move on to getting that acid in there to start the long, patient extraction process.
The Importance of Roasting Bones (Optional Step)
Right then, let's talk about the 'optional' step. I put optional in brackets because, honestly, if you want to make truly magnificent Bone Broth , roasting the bones isn't just a suggestion; it’s the secret handshake.
It’s what separates your humble homemade attempt from that deeply satisfying, restaurant quality stuff.
Why a Good Roast Makes All the Difference
When we're aiming for a rich, dark Roasted Bone Broth Recipe , we're hunting for flavour bombs. Raw bones simmered in water just give you… well, stock. It’s fine, it does the job, but it lacks depth.
Think of it like this: when you roast those bones, you are caramelizing the proteins and sugars on the surface that Maillard reaction, love. That’s where the magic happens.
That deep, savoury, almost meaty taste you crave in a proper Bone Broth Benefits analysis? You’re building that flavour profile right here in the oven, not just relying on a long simmer later. It gives the final product that lovely amber hue, too.
Without this step, you’re heading towards a pale, slightly bland liquid, which defeats the purpose of making this deeply nourishing Healing Bone Broth Recipe in the first place.
Getting That Deep Brown Colour
I learned this the hard way early on. I tried skipping the roast once because I was running late. The resulting liquid was fine for boiling pasta, but it was certainly not the luxurious, gelatinous Bone Broth I was aiming for. It looked like weak tea, frankly!
The goal here is deep browning, not burning. We want rich mahogany, not charcoal. Toss your bones with a tiny slick of olive oil and a pinch of salt just enough to help the surface crisp up. Get them into a hot oven.
We are looking for 30 to 45 minutes at 400° F ( 200° C) . You’ll know they’re ready when your kitchen smells incredible, like a proper Sunday roast is underway, even if you’re just using beef marrow bones.
What About The Leftover Bits?
Don't you dare waste those lovely browned bits stuck to the bottom of your roasting tray! When you transfer the roasted bones to your stockpot, pour in a small splash of water (or even better, some wine or stock if you have it leftover) and scrape up all that caramelised goodness with a wooden spoon.
Get every last molecule into the pot.
These fond bits are concentrated flavour essence. They dissolve slowly during the long simmer, adding incredible backbone to what will eventually become your rich, restorative Crockpot Bone Broth Beef or whatever combination you’ve chosen.
It’s this attention to detail the little extras that might seem fussy that elevates a simple simmer into making a truly superior Bone Marrow Broth that people will beg you for the recipe for.
Remember, whether you’re planning on storing it or learning How To Can Bone Broth later, starting with a flavourful base is key to getting that high-quality Organic Bone Broth flavour profile.
The Long Simmer: Maintaining Temperature and Time
Right then, let's get this show on the road! Creating a truly magnificent Bone Broth is less about flashy technique and more about patience it’s the culinary equivalent of waiting for the kettle to boil, but with much more delicious results.
This isn't just stock, mind you; this is liquid gold, the sort of comforting stuff that puts hairs on your chest (or, you know, helps sort out your tummy!). If you're looking to make a proper Healing Bone Broth Recipe , time is your main ingredient.
We aren't rushing this. My first few attempts were far too quick. I thought, "Surely 12 hours is enough?" Nope. It tasted thin, like slightly meaty water. The secret to unlocking all that gelatin and Bone Broth Protein comes from hours spent gently coaxing the goodness out of those bones.
Patience is a Virtue, Especially for Bone Marrow Broth
When you’re aiming for that rich, jiggly texture the one that tells you you’ve made real Bone Marrow Broth Recipe —you have to commit. I usually go for the full 48 hours when using beef bones. Why?
Because breaking down those tough connective tissues takes ages. If you're using a Crockpot Bone Broth Beef method, just make sure your slow cooker isn't on high; low and slow is the mantra here, mate.
Remember that initial scum we skim off? That’s important. It’s impurities. Once that's gone, we want the liquid barely moving. Think of it as a very gentle hug for your ingredients, not a rolling boil. A rolling boil makes the broth cloudy and breaks down the proteins too fast. We want elegance, not chaos.
Hitting the Sweet Spot on Timing
So, how long is long enough? For chicken, 18 to 24 hours is usually grand. For beef, especially if you want that deep, dark colour for your Roasted Bone Broth Recipe , you need 36 to 48 hours.
I learned the hard way that if you stop at 30 hours with beef bones, you’re missing out on the depth of flavour. It’s the difference between a decent cuppa and a brew strong enough to stand a spoon up in.
If you are worried about leaving the stove on all weekend, that’s fair enough. That’s when the slow cooker comes in handy, or you can even try How To Can Bone Broth later on for storage.
But for this initial cooking, low heat on the hob works a treat, as long as you check it every few hours to top up the water if the bones start peeking out.
The Final Reward: Richness and Clarity
The aroma while this is simmering is unbelievable. It fills the house; it’s genuinely comforting. When it’s done, the liquid should look dark amber, almost brown if you’ve roasted your bones properly.
Strain it well use a fine sieve, perhaps lined with muslin or cheesecloth to ensure you capture all the tiny bits. If you've managed this long simmer correctly, you’ll see a beautiful layer of fat solidify on top once it chills.
This fat cap is a protective layer, but don't forget to scrape it off before using or storing if you want a leaner final product. Every spoonful of this homemade Organic Bone Broth is packed with goodness, trust me. It’s worth every single minute of waiting.
Troubleshooting: The Fog in Your Fond: Cloudy vs. Clear Bone Broth
Right then, let's get this show on the road! Creating a truly magnificent Bone Broth is less about flashy technique and more about patience it’s the culinary equivalent of waiting for the kettle to boil, but with much more delicious results.
This isn't just stock, mind you; this is liquid gold, the sort of comforting stuff that puts hairs on your chest (or, you know, helps sort out your tummy!).
We’ve all been there, haven’t we? You follow the steps for your Homemade Bone Broth Recipe , you’ve got the bones simmering away, perhaps you've even opted for a Crockpot Bone Broth Beef marathon, and when you strain it, you expect shimmering amber liquid.
Instead, you get something that looks like a murky puddle. Panic stations? Not a bit of it! Cloudiness is common, especially when making a robust Healing Bone Broth Recipe . Understanding why it’s cloudy is the key to perfecting your next batch.
Why Didn't My Broth Turn Out Crystal Clear?
When you’re aiming for that postcard perfect clarity, usually seen in those fancy restaurant demi glaces, you’re fighting physics a bit. The main culprit for a foggy or opaque Bone Broth is emulsification .
Think about making a proper gravy. You whisk in fat and liquid, and it thickens up, right? The same thing happens here, just very, very slowly. The cloudiness comes from tiny particles of fat, gelatin, and proteins being suspended in the liquid rather than sinking or floating cleanly.
My biggest lesson learned? Don’t rush the initial boil. If you blast your pot on high heat right away, you essentially whip everything together too quickly. That rapid agitation forces the fats and proteins to break down into tiny droplets that scatter the light hello, cloudiness!
If you're aiming for clarity, that crucial first hour is vital. You must skim off that scum meticulously. Remember, Organic Bone Broth benefits from slow, gentle heating above all else.
Mastering the Gentle Simmer for Clarity
The secret weapon for clear liquid the kind you’d be proud to use for a delicate consommé is temperature control. This is where the 'slow' in slow simmering earns its keep.
For your Bone Marrow Broth Recipe , you want the liquid to do nothing more than tremble . Seriously, barely a bubble should break the surface every few seconds. If it’s bubbling like a proper cup of tea, it’s too hot.
This gentle heat allows the impurities (the stuff that makes it cloudy) to float to the top as foam, which you can then skim off easily. If you skip this meticulous skimming during the first hour, those particles settle back in, and you’re stuck with a cloudy final product.
It won't taste bad, mind you the Bone Broth Benefits are still there but visually, it won't be pristine.
When Cloudiness Actually Means Success (Gelatin Content)
Now, here’s the flip side, and this is important, especially if you’re making this specifically for Bone Broth Protein intake. Sometimes, what looks like cloudiness isn’t a sign of poor technique, but rather a sign of success .
If your broth is deeply rich, opaque, and sets to a solid Jell-O consistency when chilled, that "cloudiness" is actually concentrated collagen and gelatin. That is pure, unadulterated goodness!
For example, if I’m making a batch specifically for winter wellness, I don't mind a slightly more opaque finish if it means maximum gelatin extraction. If you're planning on How To Can Bone Broth for long term storage, high gelatin content is exactly what you want for texture retention.
So, don't sweat the opacity if the flavour and jiggle factor are spot on!
Straining and Storing Your Liquid Gold Bone Broth
Right then, let's get this show on the road! Creating a truly magnificent Bone Broth is less about flashy technique and more about patience it’s the culinary equivalent of waiting for the kettle to boil, but with much more delicious results.
This isn't just stock, mind you; this is liquid gold, the sort of comforting stuff that puts hairs on your chest (or, you know, helps sort out your tummy!).
We’ve simmered this Homemade Bone Broth Recipe for ages. It smells incredible, rich, and earthy. Now comes the bit where we separate the good stuff from the used-up bits. Don't rush this stage; it’s the final hurdle before enjoying all that gelatinous goodness.
The Great Divide: Straining Out the Solids
After that epic simmer, you’ll have a massive pot of beautiful, murky liquid. We need to get those spent bones and soggy veg out cleanly. First things first: turn off the heat. Let the pot sit for about 20 minutes before you touch it.
This allows any fine particles that were still suspended to settle a bit at the bottom.
When you’re ready, take the biggest chunks out first. Use a pair of tongs or a slotted spoon to lift the bones and the whole vegetables it’s like weeding a very heavy garden! Place these solids in a colander to drain any excess liquid back into your pot.
Don’t worry about squeezing them dry; we want all that lovely flavour in the broth.
Now, for the truly fine work. Get your fine mesh sieve ready. If you want the clearest, most pristine Healing Bone Broth Recipe imaginable, line that sieve with a layer or two of cheesecloth. It takes a bit longer, but trust me, it catches everything.
Pour the remaining liquid slowly through the lined sieve into a clean, large bowl or another pot. If you see a tiny bit of fat floating on top, don't stress; that’ll solidify later.
A lesson I learned early on: Don’t try to strain too much liquid at once, or you’ll clog your sieve instantly, and it becomes a right faff. Go steady. Patience is the secret ingredient for even this final step.
Chilling Out: The Essential Cooling Period
This is where food safety comes into play, so listen up, because we don't want any dodgy business here. You cannot just pop a giant, piping hot stockpot straight into the fridge. It raises the temperature of everything else in there, which is a recipe for disaster (and food poisoning).
We need to cool this liquid down fast, but safely. Take the bowl containing your strained Crockpot Bone Broth Beef (or whatever bones you used) and set it on the counter. Allow it to cool at room temperature for no more than two hours.
You can speed this up by setting your bowl into a sink filled with ice water just be careful not to splash water into the broth itself!
Once it’s lukewarm, it's time for the fridge. Divide the broth into smaller, manageable containers. I prefer large glass mason jars, but whatever you use, ensure they aren't filled right to the absolute brim, as liquids expand slightly when they chill. Leave about an inch of headspace.
When your Bone Marrow Broth Recipe has spent a good night in the cold, you’ll see magic happen. If you used good collagen rich bones, the top layer will solidify into a pale, creamy cap of fat. This is nature’s seal!
Storing Your Bounty for Later Use
That fat cap is brilliant protection. You can scoop it off if you are aiming for low-fat, or simply leave it on top of the broth in the fridge; it keeps the liquid underneath fresh for about a week. This beautiful, gelatinous product is the perfect foundation for any meal.
For long term storage, freezing is your best mate. Once the fat is solidified, scoop it off and keep it in a separate jar it’s pure cooking fat, great for sautéing your next batch of veggies. Then, portion your finished Organic Bone Broth into freezer safe bags or containers.
I freeze mine in 1-cup portions so I can just pull out what I need for a sauce or a quick solo sip.
If you're feeling ambitious and have done a massive batch, you might even want to look into How To Can Bone Broth using a pressure canner for shelf stability but for most home cooks, freezing is simpler and just as effective.
Enjoy the rewards of your effort; you’ve made something incredibly nourishing!
Wringing Out Every Last Bit: Tips for Maximizing Gelatin Content
Right then, let's get this show on the road! Creating a truly magnificent Bone Broth is less about flashy technique and more about patience it’s the culinary equivalent of waiting for the kettle to boil, but with much more delicious results.
This isn't just stock, mind you; this is liquid gold, the sort of comforting stuff that puts hairs on your chest (or, you know, helps sort out your tummy!).
When people make a batch of Homemade Bone Broth Recipe and it ends up thin, like tea, they usually blame the bones. Often, the real culprit is impatience or not using the right bits and bobs.
We’re after that satisfying wobble when it cools that’s the sign you’ve nailed the gelatin extraction. Getting that texture means we are unlocking the good stuff for our Healing Bone Broth Recipe .
The Importance of the Right Bones
If you want that jiggly texture the real indicator of high Bone Broth Protein content you absolutely must pay attention to what you put in the pot. It’s not just the meat scraps you’re after here.
Think joints, think connective tissue, think things that move! Knuckle bones are gold dust. If you’re going the beef route, ask your butcher for marrow bones and some joint bones, or even oxtail if you can get it.
If you are making a Crockpot Bone Broth Beef , make sure you have at least 50% joint material versus just pure meat bone.
For chicken, don't chuck those feet! Chicken feet look a bit grim in the supermarket, I grant you, but they are gelatin bombs. They have the most collagen. Honestly, once they’ve simmered for 24 hours in our Roasted Bone Broth Recipe , you won't even notice them, but your final broth will thank you for it.
I learned this the hard way years ago; using just carcass bits gave me weak broth. Now, I always sneak in feet or knuckles game changer, every time.
That Vinegar Trick: Making Minerals Mobile
We bang on about the Apple Cider Vinegar (ACV) in the main steps, but let me explain why it matters so much for our gelatin goals. Gelatin comes from collagen, which is locked tight in the connective tissue.
We need an acid to help gently pry that collagen loose from the bone structure during the long cooking time.
That little splash of ACV we let it sit for about 20 minutes before adding the water it starts the process before the heat is even on. It softens everything up nicely. It’s your natural little unlocking agent.
Don't worry; you won't taste the vinegar in the final product, especially not after 36 hours of simmering! It’s purely functional, helping to release minerals too, which is key for a truly nourishing Bone Marrow Broth Recipe .
The Slowest Possible Simmer is Your Best Mate
This is where most people slip up. They get the broth boiling away happily, then forget it’s on the hob and let it bubble like a proper stew. Stop right there! A rolling boil is your enemy if you want clear, gelatinous results.
When you get that initial froth off the top (skimming is essential for clarity), you need to reduce the heat until the surface is barely moving. I mean barely . If you see a steady stream of big bubbles, turn it down. We are poaching the goodness out, not aggressively boiling it away.
If you boil it hard, the proteins emulsify, and you end up with cloudy liquid that won't set properly.
I always check mine every couple of hours during the first day, just to ensure it’s still at that gentle tremor. This meticulous attention to temperature is what separates a thin soup from a truly rich, set Organic Bone Broth .
If you’re using a How To Can Bone Broth method later, a proper set is vital for safety and sealing. Low and slow keeps everything happy, extracted, and ready for consumption. Stick to this, and you'll have broth so thick you can stand a spoon up in it!
If you're craving more ideas, explore Crockpot BBQ Baby Back Ribs FallOffTheBone Easy , Grandmas Garden vegetable broth soup Recipe Comfort in a Bowl and FallOffTheBone slow cooker bbq ribs So Easy .
Frequently Asked Questions
How do I know if my Bone Broth is ready? I'm worried about simmering it too long.
The tell tale sign that you’ve got proper liquid gold is the "jiggle factor." When chilled in the fridge, a high-quality bone broth should set to a wobble, like set jelly, thanks to all that gelatin.
If it stays watery, give it another 12 hours, or you might need to check if you used enough joint/knuckle bones next time.
Can I just use a slow cooker instead of a stockpot for this Bone Broth recipe?
Absolutely, a slow cooker (or Crockpot) is a brilliant way to manage the long cooking time, especially if you don't want to babysit a stovetop pot all day. Just ensure you use the lowest setting and avoid the highest setting, as that can boil the broth too vigorously, making it cloudy we want a gentle simmer, not a rolling boil.
What’s the deal with the Apple Cider Vinegar? Do I really need it?
That splash of ACV is our little secret weapon, like putting the right biscuit with your tea! The acid helps leach out those precious minerals, like calcium and magnesium, from the bones that water alone struggles to pull out. Don't fret, though; the flavour cooks right out, leaving you with pure nourishment.
How long can I keep homemade Bone Broth in the fridge, and can I freeze it?
In the fridge, properly skimmed and stored broth will generally last about 5 to 7 days it's much better than store-bought, but use it promptly! For longer storage, freezing is the way to go; pour it into ice cube trays or small jars, leaving headspace for expansion, and it will keep beautifully for up to six months.
My broth turned out cloudy, not clear did I muck something up?
Don't get your knickers in a twist; cloudiness usually just means you had a slightly too vigorous simmer, or you didn't skim the initial scum properly. A cloudy broth is still packed with goodness and tastes great, especially for stews or gravies, but if clarity is paramount, try straining it through cheesecloth next time.
If I use chicken bones, do I still need to simmer it for 24 hours?
Chicken bones cook up much faster than dense beef bones, so you can get away with less time, often achieving a decent gelatinous set in about 12 to 18 hours. However, if you want that deep, rich flavour profile we've aimed for, pushing it closer to 24 hours won't hurt the quality, especially if you used feet for extra collagen.
The Ultimate 48hour Simmer Deeply Nourishing Bon