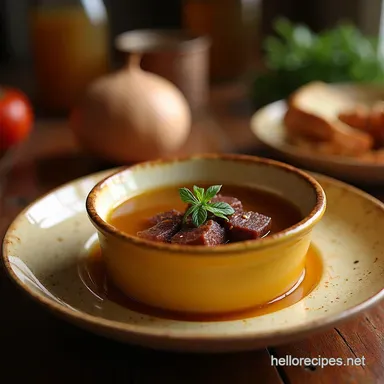
The Alchemists Golden Elixir Slowsimmered Beef Marrow Bone Broth
- Unlocking the Deepest Flavor Profile: Why This Bone Broth Stands Apart
- The Slow-Simmer Philosophy: Patience as the Ultimate Seasoning
- Assembling the Foundation: Sourcing Premium Components
- The Art of Preparation: Setting Up for Success
- The Long Steep: Achieving Maximum Nutrient Extraction
- Maximizing Your Yield: Storage and Culinary Applications
- Choosing Your Bones: The Real Secret to Gold-Standard Bone Broth
- Why That Little Splash of Vinegar is Your Best Mate in Bone Broth Cooking
- The Kitchen Alchemist’s Golden Elixir: Slow-Simmering Techniques: Low and Slow
- The Unsung Hero: Skimming and Clarifying Your Golden Brew
- When Your Golden Elixir Looks More Like Dirty Dishwater: Troubleshooting Cloudy or Weak Broth
- Straining and Storing: Bringing Your Bone Broth Home
- Frequently Asked Questions
- 📝 Recipe Card
Right then, let's get this show on the road! You know that feeling when it’s brass monkey weather outside, and all you crave is something proper to tuck into? That’s where this Bone Broth comes in.
Honestly, forget those sad, pale liquids you buy in a carton; we’re making the real McCoy here. This isn't just stock, this is alchemy in a pot!
Unlocking the Deepest Flavor Profile: Why This Bone Broth Stands Apart
When you see other recipes online, they often rush things. "Two hours!" they cry. Two hours? Bless their cotton socks. If you want that deep, complex flavour that coats your tongue the stuff that makes a simple bowl feel like a hug from your nan you need to commit.
This is how you create a truly exceptional Bone Broth Recipe .
Beyond Stock: Defining Truly Nourishing Liquid Gold
So, What is Bone Broth really? It’s not your standard stock. A typical stock is about extracting flavour from the bones and veg for use in something else, like gravy. This Homemade Bone Broth , however, is about maximum extraction.
We want the collagen, the minerals, the goodness leaching out over a very long time. That’s the difference between a thin liquid and something rich enough to shake hands with.
The Comfort Factor: Why Homemade is Non-Negotiable
Let’s be honest, making this takes commitment. It’s a two-day affair, mostly passive, but still. Why bother? Because the smell alone is worth it! Walking into the kitchen the next morning and smelling that deep, meaty, aromatic steam? It beats any scented candle, hands down.
Plus, knowing exactly what's gone into your food no mysterious additives that’s peace of mind right there. It’s the cornerstone of Healthy Bone Broth .
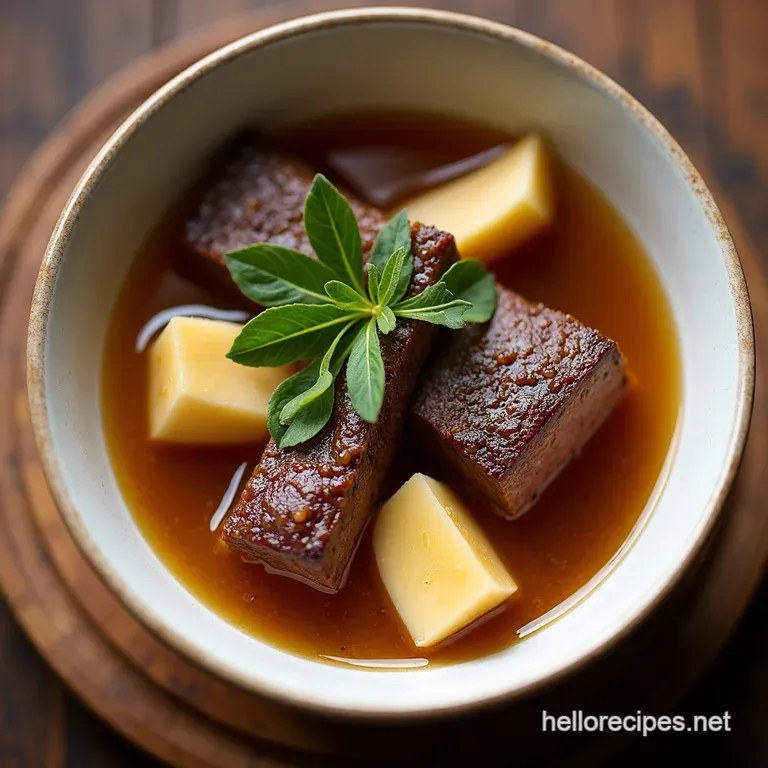
Understanding the Gelatin Magic: What to Expect
This is the part that trips up the newbies. If your cooled broth looks like weak jelly, you've done brilliantly. That jiggle means you’ve successfully extracted the gelatin from the connective tissues.
If it looks like plain water when cold, you’ve rushed the Slow Simmer Bone Broth process or didn't use enough connective tissue bones (like chicken feet or knuckles). Don't panic if it happens once; just aim for that wobble next time!
Getting this right is the key to the Best Bone Broth Recipe .
The Slow Simmer Philosophy: Patience as the Ultimate Seasoning
If you take only one thing away from this, let it be this: time is your main ingredient here. We’re aiming for 18 to 24 hours of gentle bubbling. If you are worried about keeping it at a bare simmer on the hob, feel free to pop it into a large slow cooker after the initial boil and skim it handles the low temperature perfectly.
This is the core of How to Make Bone Broth correctly. Trust me, I learned the hard way that turning the heat up only results in cloudy broth and wasted energy! This long cooking time unlocks all those fantastic Bone Broth Benefits .
This patient approach defines quality Bone Broth Cooking Tips .
Related Recipes Worth Trying
- The Best Homemade Bone Broth Rich Gelatinous Clear — Forget the watery stuff Learn how to make authentic gelatinous Beef Bone Broth from scratch with this foolproof slowsimmer recipe Perfect for sipping or...
- Tender Chicken Biryani My Familys FallOffTheBone Secret — My Tender Chicken Biryani Recipe is a flavour bomb Ridiculously tender chicken fragrant rice and saffron hues Try this Hyderabadiinspired delight tonight
- Crockpot BBQ Baby Back Ribs FallOffTheBone Easy — My secret to the best crockpot baby back ribs This easy recipe delivers falloffthebone tender ribs every time Perfect for BBQ or weeknight dinner Get the...
Right then, let's get this show on the road! There's nothing quite like a proper, slow simmered bone broth to warm the cockles of your heart. It’s the bedrock of so many fantastic dishes, from French Onion Soup to a simple, comforting cuppa on a chilly evening.
This recipe is designed to be straightforward enough for a novice but deep enough in flavour to please a seasoned cook. Forget those watery, insipid cartons from the supermarket shelves! We are aiming for liquid gold here.
Making Homemade Bone Broth is honestly easier than you think, you just need the right bits and patience by the bucketload.
Assembling the Foundation: Sourcing Premium Components
The secret to a superb Bone Broth Recipe isn't fancy technique; it’s starting with quality bits and bobs. Think of this as alchemy, but instead of lead, we are turning bones into something magical. I learned the hard way that skimping on the bones means you end up with thin, sad water.
Never again!
Choosing Your Osseous Heroes: Best Bones for Rich Bone Broth
For a beef broth that truly sings, you need variety. We are using 2 lbs (900g) of knuckle bones these are the gelatin superstars, packing that lovely collagen. Then, grab another 2 lbs (900g) of neck or shank bones. These meaty bones add deep, savoury flavour.
If you can’t find beef knuckles, chicken feet are a brilliant substitute for gelatin, though you’ll want to adjust the cooking time down slightly for a poultry version. Always rinse those bones well before you start; get rid of any dusty residue first.
The Aromatic Trinity: Vegetables That Build Depth
This is where we layer complexity. We aren't aiming for vegetable soup, so we keep it simple. You need one large yellow onion, three medium carrots, and three celery stalks. Chop them roughly; it doesn’t need to be pretty since they’re getting chucked out later. We also toss in four smashed garlic cloves.
My one piece of advice? If you have time, roast your bones first, then briefly sauté these veggies in the leftover fat. It takes an extra ten minutes, but the depth it adds to your final Healthy Bone Broth is miles better than just boiling everything raw.
The Essential Acid Component: Drawing Out the Minerals
This bit always throws people off, but trust me, it’s vital for a truly restorative Bone Broth . You need 2 tablespoons (30 ml) of Apple Cider Vinegar (ACV). Why? The acid helps leach those good minerals and collagen out of the dense bone structure.
Just dump it in the pot with the bones and cold water before you even turn the heat on. If you hate ACV, white wine vinegar works in a pinch, or you could use a small squeeze of lemon juice, though ACV is usually the best bet for that initial 30-minute soak before the long simmer begins.
This small step is key to the Bone Broth Benefits everyone talks about.
Right then, let's get this show on the road! There's nothing quite like a proper, slow simmered bone broth to warm the cockles of your heart. It’s the bedrock of so many fantastic dishes, from French Onion Soup to a simple, comforting cuppa on a chilly evening.
This Bone Broth Recipe is designed to be straightforward enough for a novice but deep enough in flavour to please a seasoned cook. We are aiming for that jiggly, rich elixir that tastes miles better than anything you buy off the shelf.
The Art of Preparation: Setting Up for Success
Getting your ingredients sorted first is half the battle, trust me. If you rush this bit, the rest of the Slow Simmer Bone Broth process will be a nightmare. We need deep colour and clean starting ingredients for the Best Bone Broth Recipe .
Pre-Roasting Protocol: Caramelizing the Flavor Core
This step is non-negotiable, especially if you’re using beef bones. We want flavour, not pale sadness! Roasting the bones creates that deep, mahogany colour and nutty, savoury base flavour that defines true Homemade Bone Broth .
- Rinse and Dry: Give those bones a good rinse under the tap get rid of any bits floating around. Pat them dry. Wet bones steam; dry bones brown.
- Oven Heat: Get your oven cranked up to 400° F / 200° C . Spread the bones on a baking sheet.
- The Wait: Roast them for about 30 to 40 minutes . You want them looking nicely browned, almost burnt at the edges. This caramelisation is your flavour core. Do not skip this it sets the depth for your whole Healthy Bone Broth .
The Initial Scum Skim: Maintaining Clarity Through the Boil
Once those beautifully roasted bones are in your massive stockpot, it’s time to introduce the water and the secret weapon: the vinegar.
- Vinegar Hit: Pour in your two tablespoons of Apple Cider Vinegar. Yes, it smells a bit sharp, but this acid is vital; it helps draw minerals out of the bone.
- The Slow Rise: Cover everything with cold water and bring the pot slowly up to a rolling boil. Don't rush this heating phase.
- First Purge: As it heats, gunk will rise to the surface it looks a bit grey and scummy. Use a big ladle or spoon and skim this off ruthlessly. Throw it out. This process ensures your Bone Broth Cooking Tips result in a clear, clean final product. If you leave this scum, your broth will taste muddy.
The Long Steep: Achieving Maximum Nutrient Extraction
This is where patience pays off. We aren't just making stock; we are extracting gelatin, collagen, and all those good bits we read about in Bone Broth Benefits articles.
Timing the Simmer: When to Know It's Perfectly Done
After you’ve skimmed the worst of the muck, reduce the heat immediately. I mean down low. We want the tiniest, laziest bubbles breaking the surface a gentle "wobble," not a proper boil.
- Start the Clock: From the moment you reduce the heat, you are looking at a minimum of 18 hours . If you have the stamina, push it to 24. Seriously, 24 hours yields a broth so thick it almost sets up on the counter.
- Water Check: Keep an eye on the water level. If it drops significantly (about halfway down the bones), top it up with hot water. Adding cold water will shock the temperature and slow down the extraction.
- The Sensory Check: After 18 hours, lift the lid. Does it smell intensely savoury, like roasting meat and earth? That’s your cue. If it still smells a bit thin, let it go longer.
Cooling and Clarification: The Final Straining Ritual
You’re nearly there. The final stage is about getting that glorious liquid separated from the debris.
- Strain Big Bits: Turn off the heat. Use tongs to pull out the biggest bones and vegetables first.
- The Fine Filter: Now, the main event. Place a fine mesh sieve over a very large bowl or a clean pot. Line that sieve with a layer of cheesecloth if you want it absolutely pristine. Pour the broth through slowly. Discard whatever is left behind it’s done its job!
- The Jiggle Test: This is my favourite part of How to Make Bone Broth . Once the broth has cooled on the counter and spent 8 hours in the fridge , check it. If it’s set like jelly, you have achieved true Bone Broth . If it's only slightly jiggly, that's still brilliant! Scoop off the solidified fat cap before reheating or freezing. That fat is lovely, but we want pure elixir when we sip it.
Maximizing Your Yield: Storage and Culinary Applications

So, you’ve successfully navigated the 24-hour marathon and have gallons of liquid gold cooling on your counter. Brilliant! Making Homemade Bone Broth is brilliant, but knowing what to do with the abundance is half the battle. We don’t want this precious stuff going to waste, do we?
It’s packed with goodness those legendary Bone Broth Benefits —so let’s treat it right. Remember, this isn't just stock; it’s high calibre fuel.
Freezing Techniques: Preserving Peak Freshness
When you make a big batch of this Bone Broth Recipe , you simply cannot use it all straight away. Freezing is your best mate here. I learned the hard way early on, trying to cram half a stockpot into my tiny fridge door. Rookie error!
For best results, first chill the broth thoroughly in the fridge overnight and skim off that thick layer of fat (save that tallow; it’s amazing for roasting spuds, trust me). Once skimmed, portion it out. Don’t just pour it all into one giant container. You rarely need two litres at once.
I love using silicone ice cube trays for small amounts perfect for adding a little boost to a pan sauce or defrosting quickly for a baby’s first solids (if that’s where you’re at!). For larger portions, use freezer safe bags laid flat on a baking sheet before freezing.
Once solid, you can stack them vertically like bricks. Label everything clearly with the date and what it is (Beef Broth 2024). This liquid gold stays happy in the freezer for up to six months, maintaining that incredible Slow Simmer Bone Broth flavour.
Troubleshooting: Dealing with Cloudy or Unset Broth
Now, let’s tackle potential hiccups in your journey to making the Best Bone Broth Recipe . Sometimes, even after 20 hours of simmering, the broth doesn't set into that beautiful jelly we crave. What gives?
The number one culprit is usually boiling too vigorously. If you were having a rolling boil for hours, you boiled off the delicate collagen structure and may have broken down the proteins too aggressively. It happens to the best of us! If your broth looks cloudy but tastes great, don’t panic.
It’s still great for cooking with.
If it refuses to set, you haven't completely failed. You now have a very rich, savoury stock. Use this stock immediately instead of water when making rice or cooking grains like farro or barley.
Alternatively, if you really need that jelly texture for a specific application, you can try adding a teaspoon of powdered gelatin or a few pre-soaked gelatine sheets to the simmering liquid during the last hour of cooking, stirring gently until dissolved.
This is a cheat, but it works in a pinch when you’re aiming for that Healthy Bone Broth jiggle.
Creative Uses: Moving Beyond Simple Sipping
Sipping Bone Broth straight is fantastic, especially when you’re feeling under the weather it’s the ultimate nanny state cure. But the true magic of learning How to Make Bone Broth is unlocking its potential as a foundation for other dishes.
Think of it as flavour insurance. Need to elevate a simple risotto? Swap out some of your cooking liquid for this broth. Making gravy for Sunday lunch? Use this instead of water or thin stock; the gelatin gives your gravy body and shine without needing flour or cornflour it’s a game changer for achieving that professional sheen.
For a quick, flavourful lunch, try this: gently heat your Bone Broth , pour it over some leftover shredded chicken, add a knob of ginger, a dash of tamari, and some wilted spinach. Done. It’s an instant, high protein, soul soothing meal.
Remember, every drop contains the essence of those 24 hours of Bone Broth Cooking Tips you put in. It's pure culinary alchemy.
Choosing Your Bones: The Real Secret to Gold Standard Bone Broth
Right then, let’s get down to brass tacks. If you want that perfect, spoon coating goodness in your Bone Broth , the starting material is everything. This isn't the time to be shy or stingy.
We’re making the Best Bone Broth Recipe here, not some watery disappointment that tastes like hot tap water. Choosing the right mix of bones is probably the single most important step in How to Make Bone Broth that truly hits the spot.
The Magic Ratio: Meat, Marrow, and Knuckle
When I first started dabbling in Homemade Bone Broth , I just chucked in whatever bones the butcher gave me. Sometimes it was brilliant; sometimes, it was... meh. I quickly learned that ratio matters, just like mixing flour and sugar in a decent scone recipe.
For beef, I reckon you need a good balance. Think about structure versus richness. The hard, dense knuckle bones the ones with all that chewy, sticky cartilage attached those are your gelatin superstars. They break down slowly and give you that wonderful wobble when it cools.
I aim for about 50% of these knuckle or joint bones . They might look intimidating, but they deliver the goods, trust me.
The other half should be a mix. Use some beef neck bones or shank bones if you can find them; these usually have a bit more meat clinging on. That meat cooks down and adds tremendous flavour depth to the final Bone Broth Cooking Tips pool.
If you can find marrow bones, great, but don’t just grab the ones cut right across the middle. Those are fantastic for roasting and eating straight, but for the broth, you want the ones that are slightly tougher to chip away at. That’s where the collagen hides!
Why Roasting Them First Is Non-Negotiable
Seriously, don't skip roasting. This is where you turn something that looks a bit sad and raw into something flavourful and ready to sing. Roasting the bones and I mean getting them properly dark brown, not just lightly tanned is called the Maillard reaction. It builds those deep, savoury notes.
If you don't roast them, your final Healthy Bone Broth will look pale and taste a bit dull, like a rainy Tuesday afternoon.
When you put those roasted bones into your pot and add that crucial splash of vinegar, you’ll see bits lift off the bottom of the pot. That sticky brown stuff is flavour dynamite. It contributes massively to the mouthfeel that makes a proper Slow Simmer Bone Broth so rewarding.
Texture Tells the Tale: What is Bone Broth Supposed to Be?
People often ask me what they should expect from this process. If you've done it right, when your 24-hour Bone Broth Recipe simmer is done and it’s chilling in the fridge, it shouldn’t look like watery soup. It should set.
Properly extracted collagen turns the liquid into a solid block of savoury jelly. That jiggle is your trophy! If it doesn't jiggle, you probably didn’t simmer long enough, or perhaps your bone ratio leaned too heavily on lean meat cuts rather than joints.
Don't sweat it if your first attempt isn't perfect; every cook has made a batch of 'not-quite there' stock. Just remember the ratio next time, keep that heat low, and you’ll soon have that liquid gold ready to sip or use in any dish that needs a boost.
Why That Little Splash of Vinegar is Your Best Mate in Bone Broth Cooking
Right then, let’s talk about the secret weapon hiding in your pantry. When you're aiming for that proper, wiggly, deeply nourishing Bone Broth , you might think it’s all about the bones and the time. And yes, they are massive players.
But there’s a little step often overlooked or worse, skipped that makes all the difference between a thin, watery stock and the liquid gold we’re chasing.
I’m talking about acid. Specifically, that humble bottle of Apple Cider Vinegar (ACV).
The Magic of the Acid Kickstart
Honestly, when I first started making Homemade Bone Broth , I thought adding vinegar was daft. I imagined my gorgeous beef bones tasting sharp, like a cheap vinaigrette. Boy, was I wrong! That tiny initial measure is essential.
Think about it: bones are tough, right? They are packed full of minerals, calcium, and collagen locked tight inside dense structure. We need to coax those good bits out during the Slow Simmer Bone Broth process. That’s where the acid comes in.
The vinegar works to gently lower the pH in the water right at the start. This slight acidity acts like a tiny key, unlocking the matrix of the bones. It starts the process of leaching out those essential minerals and softening up the collagen before the heat even properly gets going.
If you skip this, you are banking on time alone to do the heavy lifting, and trust me, time isn't always enough.
My Personal Lesson Learned (Don't Mess About!)
I learned this the hard way, the first time I tried to make a batch of Bone Broth Recipe without it. I simmered for 20 hours, skimmed diligently, and when it cooled, it looked… fine. But it didn't jiggle . It was just savoury water.
A lovely cup of soup base, but not that glorious, thick, gelatinous stuff that coats your spoon.
The next batch? I religiously added my two tablespoons of ACV right after roasting the bones and before adding the cold water. I simmered for 22 hours this time. When that pot chilled, it looked like firm jelly!
That jiggle is what tells you you’ve extracted the goodness the collagen has broken down properly. That’s when you know you have a truly Healthy Bone Broth .
Acidity vs. Flavour: Keeping Things Balanced
Now, a crucial point for anyone nervous about the taste: you add the acid at the beginning, and it essentially cooks itself out or binds with the minerals during that marathon simmer. You absolutely will not taste vinegar in your final product. You are using it as a tool, not a seasoning.
If you want your Best Bone Broth Recipe to shine, treat the vinegar as non-negotiable. It’s a brilliant tip for anyone learning How to Make Bone Broth properly, whether you are after beef, chicken, or even turkey bones.
It ensures that even after hours of dedication to your Bone Broth Cooking Tips , you get that satisfyingly rich texture that makes sipping it straight feel like a genuine comfort. It’s a simple trick, but it takes your efforts from good to absolutely cracking.
The Kitchen Alchemist’s Golden Elixir: Slow Simmering Techniques: Low and Slow
Right then, let's get this show on the road! There's nothing quite like a proper, slow simmered Bone Broth to warm the cockles of your heart. It’s the bedrock of so many fantastic dishes, from French Onion Soup to a simple, comforting cuppa on a chilly evening.
This recipe is designed to be straightforward enough for a novice but deep enough in flavour to please a seasoned cook. Forget those watery, insipid cartons from the supermarket shelves! We are aiming for liquid gold here.
Patience is the Secret Ingredient
When it comes to making the Best Bone Broth Recipe , the most important tool isn’t a fancy gadget. It’s patience. Honestly, if you rush this process, you might as well buy the shop bought stuff.
We need time lots of it to persuade those tough collagen structures in the bones to break down into glorious, jiggly gelatin.
That initial searing of the bones? Crucial step, don't skip it. That browning builds serious flavour depth. But once everything hits the pot with the water and that little splash of vinegar, the hard work is basically done. Now, we enter the realm of the slow simmer.
Getting the Gentle Bubble Right
This is where many people go wrong when learning How to Make Bone Broth . You absolutely cannot have a raging boil. A rolling boil where the whole pot is churning like the North Sea will make your broth cloudy and frankly, it tastes a bit harsh. We are aiming for "barely there" heat.
Think of it as the gentlest possible movement on the surface. Just a lazy bubble breaking every few seconds. I call it the "sleeping giant" simmer. If you see too much activity, turn the heat down until it calms right down. My first few attempts resulted in a cloudy mess because I was nervous the heat was too low!
Learn from my mistake; low and slow ensures that beautiful, clear finish that defines good Homemade Bone Broth .
The Long Haul: Why 18+ Hours Matters
We specify 18 to 24 hours for this beef stock for a good reason. Those dense beef bones need time to release everything worthwhile the minerals, the gelatin, and that deep, satisfying, savoury flavour that screams "nourishment." When you skim that foamy scum off the top initially, you’re getting rid of impurities.
After that, you just let time do its magic.
If you’re worried about evaporation, just keep a kettle of hot water nearby. If the water level drops significantly below the bones, top it up with that hot water. This keeps the temperature consistent and prevents you from having to dramatically reheat the whole thing, which can shock the broth.
When you finally strain it and see that rich, dark amber liquid, and later, when you taste that intensely savoury depth, you’ll understand the value of this long, slow dedication. Trust the process; this truly is the foundation for all Healthy Bone Broth applications.
The Unsung Hero: Skimming and Clarifying Your Golden Brew
Right then, let's get this show on the road! There's nothing quite like a proper, slow simmered Bone Broth to warm the cockles of your heart. It’s the bedrock of so many fantastic dishes, from French Onion Soup to a simple, comforting cuppa on a chilly evening.
This recipe is designed to be straightforward enough for a novice but deep enough in flavour to please a seasoned cook. We’re aiming for that liquid gold, and to get there, we have to deal with the unsightly stuff that floats on top.
The Great Scum Harvest
When you first bring your water and bones up to that initial boil, you'll notice a fuzzy, greyish froth bubbling up. Don’t panic; this is just denatured protein and impurities escaping the bones. If you leave it in, your final product will look cloudy, almost murky. We want clarity, my friends!
This is where we become kitchen alchemists, carefully filtering out the nonsense.
As the liquid heats and I mean before you turn it down to that gentle simmer take a large, shallow spoon or ladle. Skim this scum off the surface repeatedly. Don't be shy about it. Scoop it, lift it out, and chuck it in the sink or bin.
I remember the first time I made Homemade Bone Broth , I got impatient and barely skimmed. The resulting broth tasted... well, a bit flat. Lesson learned: patience here pays dividends later.
This initial clean-up is crucial for achieving that gorgeous, amber hue we associate with a Best Bone Broth Recipe .
Achieving the Slow Simmer State
Once you’ve skimmed off the worst of the debris, it’s time to tame the beast. That aggressive rolling boil needs to drop immediately. We are not making a quick stock; we are making Bone Broth Cooking Tips gold.
Turn the heat right down until you only see the occasional, lazy bubble breaking the surface. Think of it as barely breathing.
This low temperature ensures the collagen breaks down slowly, yielding a silky mouthfeel later, and prevents the broth from becoming cloudy again. If you keep it too hot, you essentially emulsify that remaining fat and protein back into the liquid.
Keep an eye on it, especially during the first few hours of this long journey. This is the main part of How to Make Bone Broth properly it demands respecting the low temperature.
The Final Polish for Clarity
After 18, 20, or even 24 hours once you’ve cooled and chilled your magnificent creation you’ll find a thick layer of fat sitting proudly on top.
If you’re making a very Healthy Bone Broth and watching your saturated fat intake, this is the easiest step: just scrape that solidified fat off and bin it. Underneath, you'll have a clear, deeply coloured liquid that should wobble like jelly when cold.
If you happen to skip the initial skimming, you can strain the hot liquid through a sieve lined with a double layer of cheesecloth right before chilling. It’s a bit more fiddly when hot, but it’s your last chance to get that crystal clear look that truly defines premium What is Bone Broth .
Doing these steps correctly transforms simple bones into potent nourishment.
When Your Golden Elixir Looks More Like Dirty Dishwater: Troubleshooting Cloudy or Weak Broth
Right then, we’ve spent a good chunk of time, patience, and lovely bones creating what should be liquid gold. But sometimes, even when following the Best Bone Broth Recipe to the letter, things don't quite pan out perfectly.
You ladle out your glorious result, expecting that rich, amber colour, and instead, you get something that looks a bit… milky. Or worse, it’s thin as tap water. Don't panic! This is the kitchen sometimes we need to troubleshoot.
Making Homemade Bone Broth is an art, not a strict science, and learning these little quirks is what separates a good cook from a great one.
Why Is My Broth Cloudy? It Looks a Bit Naff!
Cloudiness is the bane of many a broth maker’s existence. If you're aiming for that crystal clear stock favoured by fussy chefs, you might scratch your head when your Bone Broth comes out murky. Usually, this is down to one of two things: rapid boiling or insufficient skimming.
First off, remember Step 6? The aggressive skimming? That white-to-grey scum that rises initially is mostly coagulated proteins and impurities. If you let that boil away into the liquid rather than removing it, it emulsifies and clouds your entire pot.
When you’re learning How to Make Bone Broth , it feels weird scraping off what looks like good flavour, but trust me, it isn't. It’s just the bits you don't want floating around.
Next,, temperature control is everything. We want a Slow Simmer Bone Broth . If the liquid is rolling vigorously, it violently breaks up the fat and proteins, kicking them into suspension. My lesson learned here?
When I first tried this, I got distracted by the telly and let mine bubble away too hard for an hour. It ended up tasting fine, but visually, it was like I’d made milk soup! If you see a proper boil, dial that heat right down until it's barely breathing.
My Broth Has Zero Body: The Weak Flavour Factor
Now for the big one: weakness. You’ve simmered for 20 hours, you’ve used big marrow bones, and yet, when you taste it, it’s bland. What gives? This usually relates to extraction time or lack of acidity.
If you’re looking for that gorgeous, jiggly texture that signals high collagen content, that needs time. The gelatin takes ages to fully release from the connective tissues. If you pull it at 12 hours, you might have decent soup stock, but not true Healthy Bone Broth .
For maximum Bone Broth Benefits , you need that minimum 18-hour commitment.
Another key element in this Bone Broth Recipe is the Apple Cider Vinegar (ACV). That splash at the start isn't just for flavour it’s essential for drawing minerals out of the bones. If you skipped it, you’ve effectively robbed yourself of some key extraction power.
Next time, don’t skip the vinegar; you won't taste it in the final product, I promise! If the flavour is just a bit dull, you can always boost it by reducing the liquid further at the end, or by adding a couple of dried shiitake mushrooms during the simmer to add umami .
That deep, savoury satisfaction is what makes a Homemade Bone Broth truly spectacular. Keep at it; every batch teaches you something new.
Straining and Storing: Bringing Your Bone Broth Home
Right then, you’ve had your bones bubbling away for the best part of a day. Smells incredible, doesn’t it? That deep, earthy aroma is the smell of pure nourishment. But now we’ve reached the moment of truth: separating the liquid gold from the leftovers.
Getting the straining and storing right is crucial, or you’ll end up with murky jars or, worse, broth that spoils too quickly. This isn't just throwing stuff away; it’s the final purification stage of your Bone Broth Recipe .
The Great Separation: Sieve vs. Cloth
The first thing you need is a sturdy setup. You’ll want a massive bowl or pot to catch everything, and sitting atop that, your finest sieve. If you’ve done the long simmer for your Homemade Bone Broth , you’ll have a mountain of soggy vegetables and exhausted bones that need dealing with.
First, use tongs seriously, they’re your best friend here to lift out the large bits. Get rid of the main bones and the thick chunks of carrot and onion. Now, for the final clarity. I always strain through a regular fine mesh sieve first. This gets rid of 99% of the gunk.
But if you want that pristine, crystal clear liquid that looks like amber the stuff you see in fancy health food shops you need cheesecloth.
Line that sieve with a double layer of cheesecloth. Pour the liquid through slowly. Trust me, if you try to rush this, the cloth will tear or block up straight away. Patience, eh? That’s the secret ingredient in How to Make Bone Broth .
The Cooling Test: How to Spot True Gelatin
Once strained, we move onto cooling. This step tells you everything you need to know about your success. Pour the hot liquid into clean, freezer safe containers. Don’t fill them right to the brim; liquid expands when it freezes, and you don't want exploding jars that’s a right mess to clean up!
Here’s a personal tip I learned the hard way years ago: don't try to rush the cooling by plunging the jars into an ice bath if they’re glass. Thermal shock is a nightmare. Just let them sit on the counter until they are lukewarm, and then transfer them to the fridge.
The real magic happens overnight in the cold. If you’ve executed a proper Slow Simmer Bone Broth , the top layer of fat will solidify into a creamy cap, and underneath, the actual broth will have turned into a solid, quivering jelly.
That wiggle, that jiggle that’s the sign of high collagen content. That's the Best Bone Broth Recipe payoff. If it stays liquid, don't panic; it might just mean you need a slightly longer simmer next time, or your bones weren't rich enough in joints.
Storing for the Long Haul
Once chilled and skimmed (always skim that solid fat cap off the top it preserves the broth underneath wonderfully!), your Healthy Bone Broth is ready for storage.
In the fridge, it’ll keep beautifully for about five to seven days. Anything longer, and you must freeze it. I use zip-top freezer bags, lying them flat on a baking sheet in the freezer until solid. Once flat, you can stack them like edible bricks. They take up far less room that way.
Frozen Bone Broth lasts for a solid six months. When you defrost it, you’ll see it turn back into that beautiful liquid again. Keep a few portions small say, half a cup for quick use in sauces. Having a stash of this ready to go is a genuine kitchen game changer.
It makes every stew, gravy, and risotto taste miles better than using mere stock cubes.
If you're craving more ideas, explore Grandmas Garden vegetable broth soup Recipe Comfort in a Bowl and FallOffTheBone slow cooker bbq ribs So Easy .
Frequently Asked Questions
Why does my Bone Broth look watery and not like jelly when it cools down?
That’s the million dollar question! If your broth isn't setting, it means you haven't extracted enough collagen, usually because you didn't simmer it long enough or your heat was too high. For beef broth, aim for 20 hours minimum, keeping the heat at the barest simmer think lazy bubbles, not a rapid boil.
Roasting the bones until they are deeply brown also helps build that gelatinous structure.
How long can I safely keep this homemade Bone Broth in the fridge, and can I freeze it?
Once fully chilled and skimmed of the fat cap, homemade bone broth is generally good in the refrigerator for about 5 to 7 days, provided your fridge is keeping a steady temperature. For longer storage, freezing is your best bet; freeze it in ice cube trays or sturdy jars (leaving headspace!) for up to 6 months.
It freezes beautifully, making batch cooking well worth the effort.
Do I absolutely have to roast the bones before simmering the Bone Broth?
While you technically can skip the roasting, I wouldn't advise it if you're aiming for that deep, rich flavour profile we’re after. Roasting (the Maillard reaction) creates those gorgeous, complex, savoury notes that differentiate a truly great broth from a simple stock.
It also gives the finished product that lovely golden colour.
I’m finding a layer of fat on top after chilling should I leave it on or take it off?
You should definitely skim that fat off before storing the broth long term, especially if you plan to refrigerate it. While some fat is fine for immediate use, removing the excess solid layer prevents a greasy mouthfeel and helps the broth last longer.
However, that layer of fat is excellent for sautéing vegetables or cooking eggs the next morning don't waste it!
When is the right time to add salt, or should I just leave the Bone Broth unsalted?
It’s best practice to leave your primary batch of bone broth completely unsalted until you use it. As the liquid simmers for 24 hours, water evaporates, and salt concentrates rapidly. By salting early, you risk ending up with an overly salty final product.
Season individual servings or the specific recipe (like a soup or gravy) you are making with it later on.
What’s the purpose of adding vinegar right at the start of making the Bone Broth?
That splash of Apple Cider Vinegar is not for flavour, honest! It’s a secret weapon because the acetic acid helps leach minerals and collagen out of the dense bones and connective tissues during the long simmer.
Think of it like a gentle chemical key unlocking all the good stuff trapped inside; you won't taste it in the final product, I promise.
The Alchemists Golden Elixir Slowsimmered Beef M