The Golden Standard Longsimmered Clarified Bone Broth
- Unlocking the Deepest Flavor: Why Homemade Bone Broth Reigns Supreme
- The Ancestral Secret to Gelatinous Goodness
- Sourcing Your Stock: The Anatomy of Great Bone Broth Ingredients
- The Slow Alchemy: Transforming Bones into Liquid Gold
- Achieving Peak Clarity: The Clarification Process
- Maximizing Your Batch: Storage and Culinary Applications
- Troubleshooting Your Simmer: Common Bone Broth Queries
- Choosing Your Bones: The Heart of the Best Bone Broth
- The Long Simmer: Water Ratios and Temperature Control
- The Secret Sauce: Making Your Bone Broth Sing with Flavour
- Straining and Storing Your Glorious Bone Broth
- Troubleshooting: Cloudy Broth or Lack of Gelatin
- Frequently Asked Questions
- 📝 Recipe Card
Right then, let's get this bone broth sorted! There's nothing quite like a deeply flavourful, gelatinous bone broth simmering away on the hob; it's the foundation of so many brilliant dishes, isn't it? It’s a bit of an old-school classic, a real nod to making the most of every ingredient.
We're going to make a recipe that yields something proper rich, clear, and packed with goodness. The smell when this stuff is bubbling away? It's pure kitchen alchemy, I tell ya.
Unlocking the Deepest Flavor: Why Homemade Bone Broth Reigns Supreme
Honestly, if you’re buying broth off the shelf, you’re missing a massive trick. I’ve seen those fancy tins that cost a bomb, claiming to be the "Best Bone Broth ," but they just don’t cut the mustard.
They are usually thin, over salted, and frankly, a bit of a waste of space when you could have this liquid gold on hand. Making your own means control over quality and flavour. Plus, knowing you're getting all that lovely Bone Broth Protein from slow cooked collagen is just good peace of mind.
Setting the Stage: Why We Roast First
This is the non-negotiable step. If you just bung the bones in a pot with water, you’ll get stock, sure, but it won't be that deep, rich colour or flavour we’re after. Roasting the bones until they are nicely browned think a good dark tan, not burnt caramelises the outside.
It’s like searing a steak before stewing it. I learned this the hard way when I first tried making a Beef Bone Broth in a hurry. Lesson learned: take the extra 40 minutes to roast; it pays dividends in the final flavour.
Preheat your oven to 400°F (200°C) and get those bones roasting until they look golden brown.
Defining 'Proper' Broth: Clarity and Concentration
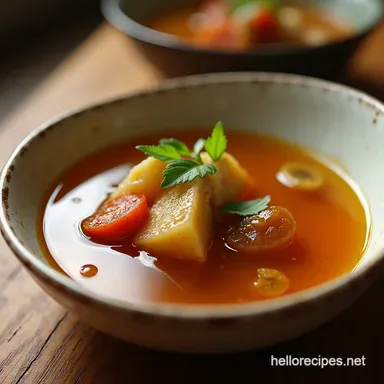
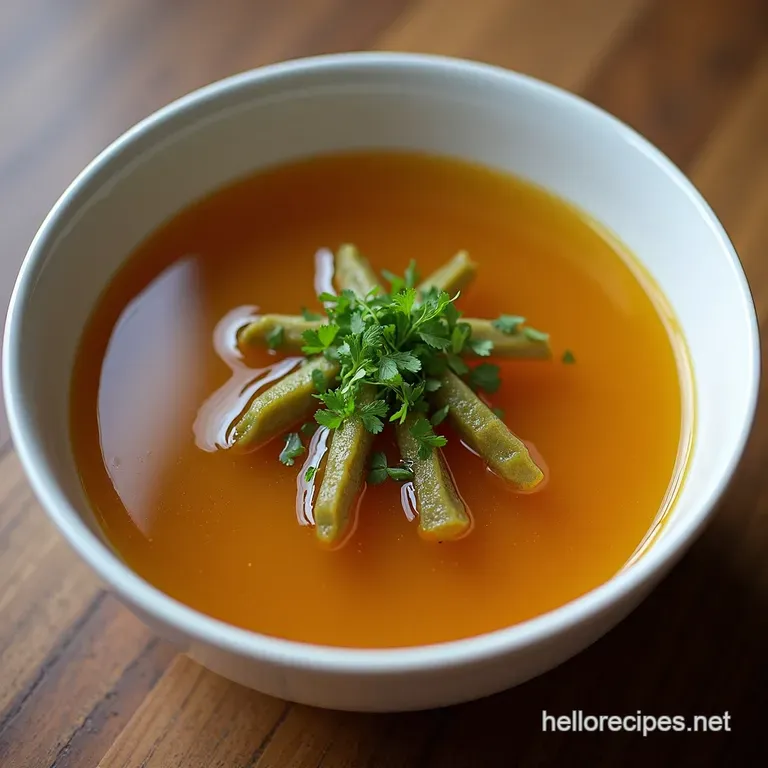
When I talk about a "proper" broth, I mean texture is key. You want that lovely wobble when it’s cold that’s the Gelatinous Bone Broth we’re aiming for, which tells you you’ve extracted maximum goodness. To achieve clarity, you must be patient.
You need to skim off every bit of grey foam that rises when you first heat it up. If you leave that scum in, your Homemade Bone Broth will look murky, no matter how long you simmer it. A vigorous boil is the enemy here; we want a gentle, quiet shiver on the surface for 18 to 24 hours.
The Ancestral Secret to Gelatinous Goodness
The secret weapon in this Bone Broth Recipe is time, combined with a little bit of acid. People often wonder about How to Make Bone Broth that sets up like jelly. It’s all about breaking down those connective tissues.
The Foundation of Flavor: An Overview
We start with quality bones marrow and knuckle bones are brilliant for beef and we give them a good, long soak with apple cider vinegar. That acid starts the extraction process right away, pulling out the minerals and gelatin before the heat even properly kicks in.
We then add simple, earthy veg onion, carrot, celery and keep the whole thing bubbling softly for ages. This low-and-slow approach is what builds the complex flavour profile that blows those quick 'Instant Pot Pho' versions out of the water.
This patient simmering is how you build real Bone Broth Benefits into every spoonful.
Related Recipes Worth Trying
- Tender Chicken Biryani My Familys FallOffTheBone Secret — My Tender Chicken Biryani Recipe is a flavour bomb Ridiculously tender chicken fragrant rice and saffron hues Try this Hyderabadiinspired delight tonight
- Crockpot BBQ Baby Back Ribs FallOffTheBone Easy — My secret to the best crockpot baby back ribs This easy recipe delivers falloffthebone tender ribs every time Perfect for BBQ or weeknight dinner Get the...
- Grandmas Garden vegetable broth soup Recipe Comfort in a Bowl — Missing Grandmas cooking This Garden Veggie Broth Soup is pure comfort Easy vegetarian vegetable broth soup packed with flavor goodness Perfect for a chilly...
Right then, let's get this bone broth sorted! There's nothing quite like a deeply flavourful, gelatinous bone broth simmering away on the hob; it's the foundation of so many brilliant dishes, isn't it? It’s a bit of an old-school classic, a real nod to making the most of every ingredient.
We're going to make a recipe that yields something proper rich, clear, and packed with goodness. This guide will show you exactly how to create the best bone broth , turning what others might chuck away into liquid gold.
Sourcing Your Stock: The Anatomy of Great Bone Broth Ingredients
If you want a truly gelatinous bone broth , the quality of your starting materials is everything. We’re not messing about here; we want maximum flavour extraction, which means big, knobbly bones.
This whole process is about respecting the ingredients, much like your nan did back in the day. Getting this right sets the stage for the whole Bone Broth Recipe .
Primary Components: The Bone Selection Strategy
For this epic Beef Bone Broth , you need substance. I usually aim for about 1.8 kg (4 lbs). The secret here is variety. You must have a mix of marrow bones those lovely, dense ones you can actually crack open and knuckle or joint bones. The joints are where all that collagen hides.
Collagen breaks down during the long cook, giving you that satisfying, wobbly set when it cools. If you can only get chicken bones, use wings and feet; they are packed with the necessary bits for a good Bone Broth Protein boost.
- Substitution Check: If you can’t get beef bones, use turkey necks or chicken feet for poultry versions. If you’re vegetarian (though this is a true Bone Broth guide!), you could use a heavy mix of dried shiitake mushrooms for depth, but the gelatin won't be there, obviously.
Aromatic Support Team: Vegetables for Depth
The veg we use aren't just filler; they are the perfume of the broth. We keep them simple the classic mirepoix trio. You’ll need 2 large onions, 3 carrots, and 3 celery stalks. Chop them roughly; they are getting strained out later, so no need for fancy knife skills!
I always leave the skins on the onions; it adds a lovely golden colour to the final liquid. Don't forget a whole head of garlic, cut in half horizontally. This aromatic base ensures your Homemade Bone Broth smells incredible while it simmers away for hours.
The Acid Element: Essential for Mineral Extraction
This is the bit everyone forgets, and it's why some people end up with thin, flavourless stock. We use 2 Tablespoons (30 ml) of Apple Cider Vinegar (ACV). Why? The acid helps break down the tough connective tissues in the bones, leaching out minerals like calcium and magnesium.
Think of it as jump starting the extraction process. Add this right at the start when the bones go into the cold water. It sounds a bit strange, but trust me, you won't taste it in the final Bone Broth .
Must Have Equipment for Optimal Simmering
You don't need loads of fancy gadgets to learn How to Make Bone Broth , but a few things make life much easier. First up, a massive stockpot at least 11 litres (or 12 quarts). If you don't have that, a big slow cooker works a treat, though you'll need to monitor the water level.
Next,, and this is vital if you want clear results, you need a fine mesh sieve. I always line mine with a layer of cheesecloth when I finally strain the liquid. It catches all the little bits that make your Bone Broth murky.
Right then, let's get this bone broth sorted! There's nothing quite like a deeply flavourful, gelatinous bone broth simmering away on the hob; it's the foundation of so many brilliant dishes, isn't it? It’s a bit of an old-school classic, a real nod to making the most of every ingredient.
We're going to make a recipe that yields something proper rich, clear, and packed with goodness. If you’ve been wondering how to make bone broth that actually sets when it cools, you’re in the right place.
This Bone Broth Recipe is the gold standard for a truly gelatinous bone broth .
The Slow Alchemy: Transforming Bones into Liquid Gold
This process isn't quick; it’s alchemy. We are taking humble bones and, through time and gentle heat, extracting all those wonderful nutrients and that famous Bone Broth Protein . The depth of flavour we achieve comes from two key stages: roasting first, and then the long, slow simmer.
This results in the Best Bone Broth you’ll ever taste.
Phase One: Achieving that Deep Brown Roasting Foundation
First things first, we need colour. If you just throw raw bones into water, you'll end up with a pale, bland stock nobody wants that. Roasting the bones intensifies the flavour beautifully.
- Preheat your oven to 400° F ( 200° C) .
- Spread those beef bones (or chicken carcasses, depending on your preference for Beef Bone Broth or poultry) onto a large baking sheet. Don’t overcrowd them; give them space to breathe and brown nicely.
- Roast them for 30 to 45 minutes . You’re looking for a deep mahogany colour, not burnt, mind you. This caramelisation is where serious flavour lives.
- While they roast, chop your onions, carrots, and celery roughly. Throw the whole head of garlic in too, cut straight across the middle.
This roasting step is non-negotiable for a rich flavour profile. I learned the hard way years ago skipping this it was thin, insipid, and frankly, an insult to the ingredients.
The Initial Simmer: Skimming for Purity
Once those beautifully roasted bones are in your biggest stockpot, cover them with cold, filtered water about an inch above the bones. Now, add the crucial 2 tablespoons of Apple Cider Vinegar. This acid helps leach those essential minerals right out of the bone structure.
- Place the pot over medium high heat. Bring the liquid slowly up to a bare simmer. This slow heating is key.
- As it warms, scum that greyish, foamy muck will rise to the top. This is waste protein and impurities.
- You must meticulously skim this off using a large spoon or ladle. Repeat this process until the liquid running off your spoon is relatively clear. This step directly impacts how clear your final Homemade Bone Broth looks. Don’t rush it; it can take 30 minutes of careful skimming.
The Extended Gentle Cook: Timing for Maximum Yield
Once you’ve skimmed out the majority of the gunk, it’s time to add the rest of your vegetables and herbs the onions, carrots, celery, garlic, peppercorns, and thyme. Now, we drastically reduce the heat.
- Turn the heat right down until the water is barely trembling. I mean, if you see a proper, rolling boil, you’ve gone too far and you’ll cloud the whole batch. It should just be a lazy 'shiver' on the surface.
- Let this gently simmer for a minimum of 18 hours , but honestly, 24 hours is where the magic happens for Bone Marrow Broth . I usually set a timer and check on it every couple of hours.
- Crucially, if the liquid drops below the bones, top it up with hot water never cold to keep everything submerged. This long cook time is what extracts the maximum Bone Broth Protein and collagen.
Achieving Peak Clarity: The Clarification Process
The final phase is all about presentation and preservation. We want a broth so clean you can read a newspaper through it (well, almost!).
Strain and Cool: The Final Step for Perfect Consistency
- Turn off the heat. Let the broth sit for about 30 minutes to cool slightly before handling.
- Carefully strain the entire contents through a large, fine mesh sieve into a clean container. Discard all the spent vegetables and bones. If you want absolute crystal clarity, line that sieve with a layer of damp cheesecloth, though usually, a good sieve does the trick.
- Now, we chill. This is critical for checking consistency and removing the fat. Cover the strained liquid and place it in the fridge for at least 8 hours, or overnight.
- When you check it the next morning, the fat will have solidified into a thick, pale layer on top. Use a spoon to lift that whole layer off and discard it (or save it for roasting the best spuds you’ve ever had a proper British treat!). If you’ve done this right, the liquid underneath should be rich amber and jiggly. That jiggle means you have achieved that sought after gelatinous bone broth . Store in airtight jars. This Bone Broth keeps brilliantly in the fridge for five days, or freeze it in smaller portions for up to six months.
Right then, let's get this bone broth sorted! There's nothing quite like a deeply flavourful, gelatinous bone broth simmering away on the hob; it's the foundation of so many brilliant dishes, isn't it? It’s a bit of an old-school classic, a real nod to making the most of every ingredient.
We're going to make a recipe that yields something proper rich, clear, and packed with goodness.
Maximizing Your Batch: Storage and Culinary Applications

Making a proper batch of Bone Broth is always a bit of an undertaking. You spend hours nursing that pot, so you want to make absolutely sure you're getting the most out of every drop. Trust me, the aroma filling the house while this cooks is worth the effort alone!
Once you’ve got this liquid gold strained and cooled, you need a plan. You don’t want to waste a bit of that hard earned Bone Broth Protein .
Extending Shelf Life: Freezing and Refrigeration Tips
Once you’ve done the crucial chilling phase where all that lovely fat rises to the top and solidifies like a pale yellow shield you’re ready to portion up. Getting the fat off is key if you plan to use it in sauces where you don't want extra richness, but I always save a bit of that beef fat for roasting my spuds!
For the fridge, your Homemade Bone Broth will keep happily for about 5 days in airtight containers. Just make sure the containers are clean. If you're not going through it that quickly, freezing is the way to go.
I use standard freezer safe pots, or even ice cube trays for small concentrated portions. If you freeze it in cube trays, transfer the frozen cubes to a labelled freezer bag. This way, you can pop out a couple of cubes for quick flavour boosting when making a gravy or sautéing greens.
Properly stored, this Beef Bone Broth lasts up to six months, though I find it’s best used within three. Always label what it is and the date, trust me, future you will thank you.
Flavor Twists: Herbs and Spices for Unique Profiles
While the base recipe is robust and traditional, sometimes you fancy a bit of pizzazz. This is where you can really experiment when making your Best Bone Broth . If you want to go for something a bit more Asian inspired, skip the thyme and bay leaf entirely on your next batch.
Instead, throw in some charred ginger and spring onion ends for the last few hours. A couple of star anise goes a long way, too.
For a more Mediterranean vibe, try adding a sprig of fresh rosemary towards the end of the cook, maybe with a pinch of dried oregano. The key here is restraint. Because this Bone Broth Recipe is so concentrated, you don't want to overpower the natural savoury depth. My personal favourite trick?
I add a tiny pinch of smoked paprika right at the very end of the simmer it adds a lovely, almost campfire like background note without tasting overtly smoky.
Understanding the Jiggle: What Causes the Gelatin
Ah, the Jiggle. This is the true indicator that you've cracked the code on making Gelatinous Bone Broth . If your broth sets firm like jelly in the fridge, you’ve done brilliantly. This happens because of the long, slow extraction of collagen from the connective tissues and marrow bones.
When you simmer those bones gently for 20 hours, that tough collagen breaks down into usable gelatin.
If yours isn't setting up much, don't fret too much, especially if you used mostly muscle meat bones instead of knuckle or joint bones. It still has all the amazing Bone Broth Benefits and amino acids.
But if you really want the wobble next time, make sure you include plenty of feet (chicken or pig) or joint bones, and definitely ensure you are using that splash of ACV. That acid is brilliant at helping to break down those collagen structures.
The gelatin content is what delivers that amazing, satisfying mouthfeel.
Troubleshooting Your Simmer: Common Bone Broth Queries
Look, nobody’s first attempt at a 24-hour simmer goes perfectly. There are always little hiccups. Over the years, I’ve learned to watch out for a few common pitfalls when making How to Make Bone Broth . Don't panic if you hit a snag; usually, it’s an easy fix.
My biggest personal lesson learned? Never walk away for too long! I once nearly scorched the bottom because I got distracted mid-afternoon. Keep that heat low, lower than you think you need to.
Clarifying Cloudy Broth
If you’ve ended up with a slightly cloudy broth, don’t worry, it’s still nutritious. Usually, cloudiness comes from boiling too vigorously (emulsifying the fat) or not skimming thoroughly enough at the start. If it’s already cooked, you can try to clarify it now.
Let it cool slightly, then strain it again through a sieve lined with a layer of damp cheesecloth. This acts like a very fine filter, catching the tiny suspended particles. You might lose a little liquid, but you’ll gain clarity.
For soup making, cloudiness isn't a huge issue, but if you want a clear sipping Bone Marrow Broth , this re-straining step is your mate.
What If I Forgot to Add Water?
If you check on your broth after 18 hours and the liquid level is seriously low meaning the bones are nearly exposed you must top it up. Always add hot or simmering water, not cold.
Adding cold water suddenly drops the overall temperature, which can shock the mixture and potentially affect the extraction process. Just pour in enough hot water to cover the solids again and let it continue its gentle simmer until you reach your target time.
Storing and Reheating Guide
Reheating is super simple. If you’ve refrigerated it, you’ll notice that solid layer of fat on top. You can either gently scrape that off before reheating, or just reheat the whole thing slowly on the stovetop.
If you reheat it slowly, the fat will melt back into the broth, which is fine if you want the richness.
When I’m making something quick, like a speedy bowl for lunch, I often reheat just a frozen cube or two in a small saucepan with a splash of water or wine, adding whatever leftover veg I have kicking about. It turns into a decent little vegetable soup base in about ten minutes flat!
Remember, this concentrated Bone Broth is often much stronger than store-bought stock, so you might need to dilute it slightly depending on what you're using it for. Sip it, cook with it, love it you’ve made something truly great here.
Choosing Your Bones: The Heart of the Best Bone Broth
Right then, let's get down to brass tacks. If you want a truly proper, deeply flavoured Bone Broth , the quality of your starting material is absolutely non-negotiable. You can’t just chuck any old carcass bits in the pot and expect liquid gold to emerge, can you?
This is where the magic or the disappointment begins. Choosing your bones is the first, and frankly, the most crucial step in your Bone Broth Recipe .
We are aiming for that thick, wobbling, Gelatinous Bone Broth once it cools. To get that, we need connective tissue, cartilage, and marrow. If you’re aiming for health Bone Broth Benefits , you want the stuff that breaks down into glorious collagen.
Beef Bones: The King of Depth
When I want a deep, robust flavour the kind that stands up to anything you throw at it I always reach for beef bones. This is what makes a legendary Beef Bone Broth .
Think about the anatomy here. You want a mix. Knuckle bones are brilliant because they are packed with cartilage, which melts down beautifully. Marrow bones, the long ones you might have bought specifically for soup, are essential too.
The marrow itself adds a richness and fat content that you can skim off later, leaving behind that beautiful collagen structure.
My top tip? If you can get them, ask your butcher for feet bones or neck bones as well. They are often cheaper, but they are absolute powerhouses for gelatin. When I first started making Homemade Bone Broth , I just grabbed whatever chucks were left over.
It was okay, but once I started specifically asking for marrow and joints, the difference was night and day. It went from tasting like slightly meaty water to something you could almost chew!
When roasting these beef bones which we always do first, remember, for that deep flavour make sure they get properly browned, but not burnt to a crisp. A good, deep roast really sets the stage for the long simmer.
Chicken Bones: Light, Versatile, and Quick
Chicken bones are the workhorses of the kitchen, aren't they? They are perfect if you’re looking for something a bit lighter, perhaps for sipping during a cold, or as a base for delicate sauces or Asian inspired dishes.
For a good Bone Broth Protein content in a lighter broth, you need a lot of chicken feet. Seriously. Chicken feet are like nature’s little gelatin sachets. If you see them at your local market, grab a bag!
Unlike beef, which can happily simmer for 24 hours, chicken doesn't need that long. Simmering chicken bones for too long often releases too much fat and can sometimes lead to a slightly murky, fatty result, even if you skim well.
For chicken, I usually aim for 8 to 12 hours max.
If you use whole roasted chicken carcasses after a Sunday dinner, that’s fantastic for flavour, but remember to remove as much skin and visible meat as you can before boiling. Too much meat floating around tends to give you a cloudy broth faster than the bones themselves.
Fish Bones: The Speedy Elixir
Now, fish bones are an entirely different kettle of fish, pardon the pun. This is the quick fix option for How to Make Bone Broth . If you ask your fishmonger for heads, frames, or collars (especially from firm white fish like cod or snapper), you’ve got the makings of a fantastic fish stock in minutes.
Here’s the massive caveat, though: fish bones cook incredibly fast. You should never simmer fish bones for more than 2– 4 hours, tops. Any longer, and you risk pulling out bitter, slightly metallic flavours, and it just won't taste right.
It’s all about speed and precision.
Because they cook so fast, fish bones release less collagen than beef or even chicken over the long haul. So, while it’s a wonderful stock, it might not give you that signature, thick, jiggly texture we associate with the Best Bone Broth .
It's great for poaching, chowders, or seafood risottos, but if you are chasing maximum gel, stick to beef or chicken feet.
Ultimately, the bones you choose dictate the character of your final product. Take the time to source good ones ask around, ring ahead to the butcher it makes all the difference between a passable stock and that deeply satisfying, nourishing Bone Broth you’ll be proud to call your own.
The Long Simmer: Water Ratios and Temperature Control
Right then, let's get down to the nitty gritty of making a truly proper Bone Broth . If you’ve ever made stock before, you'll know this part the simmering is where the magic really happens. It’s not just about boiling things for hours, mind you.
It’s about coaxing all those lovely collagen strands and minerals out of the bones. If you treat it mean, you’ll get a thin, disappointing result. Treat it nicely, and you’ll get that gorgeous, thick, gelatinous Bone Broth that wobbles like jelly when cold. That wobble?
That’s your prize right there.
The Water Dance: Knowing Your Ratios
When learning How to Make Bone Broth , the first thing people mess up is the water level. Too little, and you risk scorching the bottom of your pot; too much, and you end up with something barely flavoured basically glorified salty water.
We aren't measuring precisely here; we’re looking for coverage. Once you’ve roasted and added your bones to the pot, cover them completely with cold water. I usually aim for about an inch or two of water sitting above the highest bone.
Remember, this is a very long process, so the water level is bound to drop significantly. That’s why we have to top it up.
My personal rule of thumb, honed over many failed batches back in the day (when I thought 8 hours was enough ha!), is this: If the liquid level drops by a third during the simmer, it’s time to top it up. Crucially, always use hot water when topping up.
Adding cold water midway through a long simmer will shock the temperature and interrupt that delicate extraction process. We want consistency. This vigilance is what separates an average stock from the Best Bone Broth you’ve ever made.
Temperature is Everything: The Gentle Shiver
This is the absolute key to achieving high Bone Broth Protein content without turning your beautiful stock cloudy. If you bring your pot to a rolling boil like you would for pasta you are essentially beating the flavour out of it.
That violent bubbling emulsifies the fats and proteins floating on top, making them impossible to remove, leaving you with a murky, dull Beef Bone Broth .
What we need is a simmer so gentle it barely registers. Think of it as a ‘shiver’ rather than a bubble. If you watch the surface, you should see maybe one or two tiny disturbances every five or ten seconds. That is the sweet spot.
This slow heat allows the collagen to break down into glorious gelatin over time without scrambling the other components.
When I first started making Homemade Bone Broth , I used to crank the heat up too high, thinking 'more heat equals faster results.' Wrong! I ended up with a pale, slightly oily mess. Now, I maintain the temperature so low that sometimes I have to double check the hob is even on!
The long cook time (18 to 24 hours for Bone Broth ) is there to compensate for the very low temperature. Patience, dear friend, is the number one ingredient.
Why Acid Matters for Mineral Release
You’ll notice we add a splash of Apple Cider Vinegar right at the start, even before heating things up properly. This isn’t just for flavour; it’s a scientific helper! Bones are full of minerals locked away in their structure.
That slight acidity helps gently leach those minerals, calcium, and magnesium, out of the matrix of the bone structure and into your water.
Don't worry; you won't taste the vinegar in the final product. By the time you strain everything, the small amount we add has done its job and mostly cooked off. It’s a traditional trick that dramatically increases the perceived richness and the actual Bone Broth Benefits .
It’s a small addition with a massive payoff in terms of flavour depth and nutritional profile. When you finally taste that rich, mouth coating elixir, you’ll understand why people rave about making their own Bone Marrow Broth .
It’s worth every minute of that slow, comforting simmer.
The Secret Sauce: Making Your Bone Broth Sing with Flavour
Right then, let's chat about the bits that turn good ingredients into a spectacular great one. You can have the fanciest beef bones in the world, but if you just chuck them in water, you’ll end up with something a bit... meh.
We’re making the Best Bone Broth here, which means we need to layer the flavour properly. That's where our humble aromatics and vegetables come into play. They aren't just filler; they are the backbone of the flavour profile in any decent Homemade Bone Broth .
Aromatics: The Unsung Heroes of Umami
When I first started out trying How to Make Bone Broth , I honestly thought you just needed the bones and water. Dead wrong. I ended up with a thin, bland liquid that tasted mostly of boiled bone. Lesson learned, mate!
The onion, the carrot, the celery the classic mirepoix —are essential for creating depth.
For this Bone Broth Recipe , we’re using traditional players but treating them right. Onions, especially with the skin left on, provide a lovely, subtle sweetness and that rich golden colour we all crave in a Gelatinous Bone Broth .
Garlic, halved but unpeeled, adds a mellow, sweet undertone when simmered for hours; if you added it peeled too early, it'd turn bitter on you.
My personal trick? Don't chop these vegetables too finely. Remember, they are going to be in the pot for nearly a day! If they are too small, they break down into sludge, making straining a nightmare. Rough, hearty chunks are all you need.
They give off their lovely flavour compounds slowly, which is exactly what we want when building flavour for a proper Beef Bone Broth .
Veggie Power: Why We Roast First
Now, here’s the crucial bit that separates amateurs from aficionados: we are going to roast those bones and those root vegetables. Yes, it adds a step, but honestly, it's worth every minute.
Roasting the onions, carrots, and celery alongside the bones before they even see the water is non-negotiable if you want that deep, satisfying flavour.
When you roast vegetables, you caramelise their natural sugars that’s the Maillard reaction, for those who like the science bit. This process creates hundreds of new flavour compounds.
When those roasted veggies hit the simmering water later, they infuse the liquid with a rich, almost savoury sweetness that you simply cannot achieve by just boiling them raw. It’s the difference between a pale watercolour and a deep oil painting.
This technique ensures your final Bone Broth is rich, dark, and deeply satisfying.
The Acidic Kick: Unlocking the Good Stuff
I know, I know, adding vinegar to soup sounds crackers. But trust me on this one. That splash of Apple Cider Vinegar (ACV) we add right at the start is vital for our Bone Broth Benefits . Why?
Because the acid helps break down the tough connective tissues on the bones, liberating all that glorious collagen. That collagen is what turns into the gelatin once cooled, giving you that coveted, wobble-in-the-pot texture.
It sounds counterintuitive, but after 20 hours of slow cooking, you won't taste the vinegar at all it evaporates or neutralises. What you will taste is the difference in richness and the superior mineral content.
It's a small step, but it’s the key to unlocking maximum Bone Broth Protein from your stock. If you're striving for that perfect, nourishing liquid, make sure that vinegar goes in before you start the heat. It truly is the foundation for superior Bone Marrow Broth .
Straining and Storing Your Glorious Bone Broth
Right then, you’ve had your bones bubbling away for the best part of a day. You’ve tended to it like a nervous new parent, skimming that grey froth and keeping the temperature just so. Now comes the moment of truth: separating the liquid gold from the soggy, spent bits.
Don’t rush this bit; how you strain and store your Bone Broth sets the stage for how brilliant it tastes later.
This isn't just about getting the rubbish out; it’s about capturing that beautifully clear liquid. If you’ve done it right, when this cools, it’ll wobble like jelly that beautiful gelatinous bone broth we were aiming for.
The Crucial Strain: Getting Clarity
First things first, turn the heat off. Let the pot sit for about half an hour. Why? If you try to strain it scalding hot, you’ll just burn yourself and knock all the sediment straight through. Patience, my friend, patience!
Take a large colander or sieve and line it with a double layer of good quality muslin or cheesecloth. If you don't have cheesecloth, a very fine mesh sieve will do, but you might lose a touch of clarity. Place this setup over your biggest clean bowl or pot.
Carefully ladle the broth through the sieve. Don't just dump the whole thing in, or you'll clog your filter instantly. Scoop out the liquid bits first. Once you’ve got most of the liquid out, you can try tipping in the solids, but be gentle. We are aiming for a pristine liquid here. That sludge left behind?
Chuck it; it’s done its job beautifully. If you want the Best Bone Broth possible, you'll notice a difference by stopping here before the chilling stage.
The Chill Factor and Skimming the Fat
This is where a bit of culinary magic happens, and where many people make a rookie error. You must let this Homemade Bone Broth cool down before you stick it in the fridge. Leave the strained broth on the counter until it’s just warm to the touch about an hour or so.
Then, cover it loosely and transfer it to the fridge. Now, this is the crucial bit: you absolutely must let it chill completely, ideally overnight. When you go to check it the next morning, you’ll see a thick, pale yellow or white layer of fat congealed right on top.
That’s your sacrificial layer.
Use a large spoon or, if you’re feeling fancy, a fat separator to lift and scrape off all that fat. While fat is flavour, we want to remove most of it now so our final Bone Broth Recipe is clean and easily added to anything without leaving an oily slick. That removed fat?
It’s fantastic for roasting potatoes, by the way zero waste in this kitchen! What’s left underneath is pure, collagen rich goodness.
Storing Your Liquid Gold
Once skimmed, your Beef Bone Broth (or whatever you made) is ready for storage. This is the time to taste it and add salt if you like, but honestly, I prefer it unsalted so I can control the seasoning depending on what I’m cooking next.
For short term use, airtight containers in the fridge will keep this fresh for about five days. If you’ve made a proper bumper batch and you usually do when you commit to How to Make Bone Broth —you need to freeze it.
I find that freezing it in one-cup measures (about 250ml) is the most practical. You can use silicone muffin trays for this, or old clean yogurt pots. Once frozen solid, pop those pucks into a heavy duty freezer bag. This way, you just defrost exactly what you need for your next sauce, gravy, or instant health boost.
Knowing you have jars of this rich, ready-made stock waiting for you makes facing a tough week feel so much easier. It’s the ultimate prep hack. You’re not just making food; you’re building flavour resilience!
Remember, the high Bone Broth Protein content means it’s good fuel, too.
Troubleshooting: Cloudy Broth or Lack of Gelatin
Right then, you’ve been patient. You’ve tended your pot like a nervous new parent for twenty hours, and now you’re peering at the results. Sometimes, despite our best intentions, our beautiful Bone Broth looks a bit… murky.
Or perhaps, when it chills, it’s just liquid, not that glorious, wobbly jelly we were hoping for. Don't chuck it! This is where the home cook really earns their stripes. Every batch of Homemade Bone Broth teaches you something new. Let’s sort out those common hiccups.
Why Is My Broth Murky? The Great Cloudiness Conundrum
If your Beef Bone Broth looks more like dishwater than clarified gold, nine times out of ten, it’s down to one thing: heat control. Remember how I stressed that bare simmer? A rolling boil is the mortal enemy of clear broth.
When the water bubbles hard, it forces fat and tiny particles of protein to emulsify right into the liquid, turning it opaque. It’s like trying to make a smooth gravy when you’ve accidentally scorched the bottom it ruins the texture.
Another culprit is skimming. If you didn’t meticulously skim that initial greyish foam that rises in the first hour that’s coagulated impurities they remain suspended, causing cloudiness.
It’s a pain, I know, standing there with a ladle, but it makes all the difference between a standard stock and the Best Bone Broth . My advice? If it’s already cooked and cloudy, you can try straining it again through a layer of damp cheesecloth.
It might pull out some of the fine cloudiness, though it won't fix the underlying emulsification. Don't stress too much; cloudy broth still packs the Bone Broth Protein ; it just won't look as pretty for sipping straight.
The Jelly Test: Where Did All That Gelatin Go?
So, you pull your pot out of the fridge, and instead of a solid block, it’s just liquid. This is the biggest panic point for anyone attempting a truly Gelatinous Bone Broth . Fear not, this is usually solvable!
Gelatin comes from breaking down the collagen in connective tissues and bones especially those lovely knuckle and joint bones you used. To extract that collagen, you need two things: time and acid. Did you use the Apple Cider Vinegar?
That acid is crucial; it softens the dense collagen structure, letting it dissolve into the water over many hours. If you skipped the ACV, you likely didn't pull enough out.
The other major factor is the simmer time itself. For a truly rich Bone Marrow Broth , you need at least 18 hours, sometimes 24, especially with larger beef bones.
If you cut the simmer short say, only 12 hours the collagen might not have fully converted. The good news? If it’s still liquid but tastes rich, you haven't wasted it! You can absolutely use this less gelatinous batch for cooking.
Just remember it for your next attempt at How to Make Bone Broth . Next time, add another 4– 6 hours to that simmer, keeping that heat whisper low.
My Personal Lesson Learned: The Slowest Heat Wins
When I first started making this, I thought "low simmer" meant "just barely bubbling." I was wrong. I ended up with a slightly cloudy broth because my hob, even on its lowest setting, still produced a gentle, constant surface ripple.
It took me two attempts to realise I had to manually adjust the burner every hour or so to make sure the water was barely moving just a tiny internal swirl. That quiet, slow extraction process is the secret sauce. It's meditative, really.
Once you master that low, slow heat, achieving those deep Bone Broth Benefits becomes second nature, and you’ll nail that perfect wobble every single time you brew up your next batch.
If you're craving more ideas, explore FallOffTheBone slow cooker bbq ribs So Easy .
Frequently Asked Questions
Why does my Bone Broth look cloudy instead of clear?
The main culprit is usually bringing the liquid to a full, rolling boil early on; this scrambles the proteins and fats, making it opaque. Remember, we want a gentle ‘shiver,’ not a robust bubble! Also, make sure you meticulously skim off that greyish scum right at the beginning.
How do I know if my Bone Broth has enough gelatin?
The real test is when it’s cold! A properly extracted, gelatinous broth should set firm, almost like a soft jelly, in the fridge. If it remains purely liquid when chilled, it means the collagen extraction wasn't maximal, possibly due to insufficient simmering time or not using enough joint/knuckle bones.
Can I skip roasting the bones? What happens if I do?
Technically, yes, you can skip roasting, especially if you are making a very pale poultry broth. However, for beef Bone Broth, roasting the bones first creates a significantly deeper, richer, nuttier flavour it’s what gives you that deep, satisfying mahogany colour.
Skipping it just yields a lighter, simpler taste.
What's the best way to store this massive batch of Bone Broth?
Once completely cooled, you must skim off that thick layer of fat sitting on top that keeps the broth fresher longer in the fridge. For anything you won't use within 5 days, portion it into freezer safe containers or ice cube trays (great for quick additions to sauces) and freeze for up to six months.
It’s liquid gold, so don't let it go to waste!
My recipe calls for 24 hours, but I only have 12 will it still work?
It will work, but it will be more of a stock than a true, heavily collagen laden Bone Broth. Twelve hours will certainly extract plenty of flavour from the vegetables and bones, but the long, slow simmer is what truly breaks down the connective tissue into gelatin.
Aim for at least 18 hours for beef to get that lovely mouthfeel.
Do I need to add salt during the long cooking time?
Absolutely not! It’s best practice to leave the broth completely unsalted during the entire simmer. As the water evaporates over 20 hours, the salt concentration increases dramatically, which can result in an almost unbearably salty finished product.
Salt it only after you have strained and cooled the final, reduced broth.
The Golden Standard Longsimmered Clarified Bone