The Proper Posh Deviled Eggs Silky Filling with a Dijon Kick
- Elevating the Appetizer Game: Why This Deviled Eggs Recipe Reigns Supreme
- The Anatomy of a Perfectly Balanced Bite
- Assembling the Components for Culinary Perfection
- Essential Tools for Flawless Execution
- Step-by-Step Guide to Achieving Velvety Yolk Centers
- The Art of Presentation: Piping and Garnishing Like a Pro
- Troubleshooting and Advanced Tips for Your Deviled Eggs
- Making Ahead: Timing Your Appetizer Production
- Recipe FAQs
- 📝 Recipe Card
Elevating the Appetizer Game: Why This Deviled Eggs Recipe Reigns Supreme
Deviled eggs the quintessential party nibble, the cornerstone of any decent picnic spread, and frankly, a dish that deserves a bit more respect than it sometimes gets. Forget those dry, slightly sad versions you sometimes see lurking on a buffet table.
We’re going to elevate the humble egg to the absolute zenith of deliciousness with what I call "The Proper Posh Deviled Eggs." Think of this Deviled Eggs Recipe as the definitive Sunday roast of appetizers: familiar, deeply satisfying, and executed flawlessly.
This method guarantees a filling so velvety smooth it's practically scandalous, perfectly balancing the richness of the yolks with a sharp, vinegary tang.
The Anatomy of a Perfectly Balanced Bite
Achieving culinary perfection with these bites relies on respecting a few core ratios and techniques. The goal is far beyond simply mixing yolks with mayo; it’s about layering subtle, complementary flavours that make each half irresistible.
Why These Are the Definitive Party Nibble
The magic of Classic Deviled Eggs lies in their versatility and nostalgic appeal. They are deceptively simple, requiring just 12 large, free range eggs initially, yet they deliver complex, moreish flavour that appeals across generations.
They are the perfect welcome bite easy to handle, packed with protein, and always the first thing to disappear from the platter. This recipe strips away the overly sweet or overly sharp flavours, honing in on pure, comforting deliciousness.
Our Secret Weapon: The Dijon Infusion Technique
Many recipes rely solely on standard yellow mustard, which can leave the flavour profile a little flat. Our secret weapon for this Easy Deviled Eggs approach is incorporating a generous measure of high-quality Dijon Mustard, alongside a splash of sharp Apple Cider Vinegar.
This combination provides a bright, vinegary counterpoint to the egg yolk's inherent richness. The Dijon, combined with a measured teaspoon of Worcestershire Sauce, provides that essential umami depth that distinguishes truly great deviled eggs.
Setting the Stage: What Makes These 'Posh'?
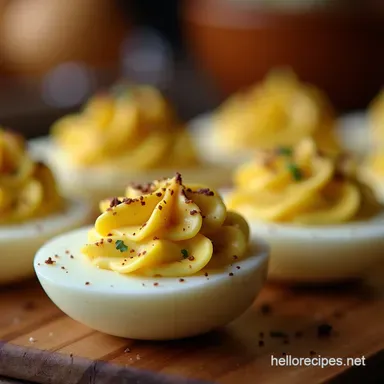
The 'posh' element in this Best Deviled Eggs Recipe comes from two areas: technique and finish. We move beyond merely spooning the filling into the whites. By achieving an incredibly smooth yolk base and presenting the finished product in elegant swirls using a piping bag fitted with a star tip, we instantly upgrade the aesthetic.
On top of that,, the final garnish freshly chopped chives and a dusting of smoked paprika adds a professional pop of colour and a subtle layer of flavour complexity.
Assembling the Components for Culinary Perfection
Before we get to the heat, we need to assemble our core Deviled Eggs Ingredients and ensure we have the right tools to handle them. For this recipe, designed to yield 24 halves (12 full eggs), precision in measurement is key to that perfect emulsion.
We need six large egg yolks, paired with 1/3 cup of full fat mayonnaise please, do not skimp on quality here, as the mayo forms the bulk of our creamy base. To that, we add our flavour trifecta: 2 tablespoons of smooth Dijon mustard, 1 tablespoon of sharp apple cider vinegar, and the crucial teaspoon of Worcestershire sauce for depth.
Seasoning involves just 1/2 teaspoon of fine sea salt and 1/4 teaspoon of freshly ground black pepper.
Essential Tools for Flawless Execution

Having the right equipment doesn't complicate things; it ensures repeatability and that consistent, professional texture we are aiming for.
The Core Elements: Eggs, Mayo, and Mustard Ratios
The foundational elements must be perfectly proportioned. We rely on a ratio where the yolks (around 108g for 6 yolks) are richly enveloped by the fat of the mayonnaise (80ml) and sharpened by the dual vinegars.
This ratio prevents the filling from becoming either too wet or too dry the bane of many attempts at Southern Deviled Eggs .
Beyond the Basics: Premium Flavor Enhancers
While the base recipe is stellar, understanding flavour enhancement is part of mastering this dish. The choice of vinegar matters; Apple Cider Vinegar offers a fruitier tang than plain white vinegar.
The Worcestershire sauce cannot be substituted if you want that classic, subtle savoury undertone that elevates these from simple egg salad to Elevated Deviled Eggs .
Necessary Equipment for Silky Smooth Filling Preparation
For the ultimate velvety texture, a simple fork, while effective, requires significant elbow grease. For truly lump free results, consider a potato masher used rigorously, or for the absolute smoothest possible outcome, briefly pulse the finished mixture in a small food processor or, even better, press it through a fine mesh sieve.
For assembly, a piping bag fitted with a large star tip (like a Wilton 1M) is your best friend for clean, attractive presentation.
Related Recipes Worth Trying
- The Grand Overnight Eggs Benedict Casserole Recipe — Prep this showstopping make ahead Eggs Benedict Casserole the night before Wake up to perfect cheesy custard layers for an easy brunch
- Foolproof Eggs en Cocotte Elegant Baked Egg Preparations — Master these perfectly baked eggs in ramekins A simple twist on classic Egg Preparations for a weekend breakfast that looks fancy but takes minutes
- My Secret for the Best Homemade Eggs Benedict Recipe — Want the Best Homemade Eggs Benedict This easy recipe complete with foolproof hollandaise will wow your brunch guests Get perfect poached eggs every time
Step-by-step Guide to Achieving Velvety Yolk Centers
The Deviled Eggs Preparation begins well before mixing. First, gently place your 12 large eggs in a medium saucepan and cover them with cold water, ensuring the water level sits at least an inch above the eggs.
Add a teaspoon of white vinegar to the water this simple addition helps the whites seal quickly should any shell crack during the boiling process. Bring the water rapidly to a rolling boil over high heat.
As soon as it boils vigorously, immediately turn off the heat, cover the pot tightly, and let it stand undisturbed for precisely 10 minutes.
The next critical step is shocking the eggs. Transfer them immediately into a large bowl filled with ice water. This rapid cooling halts the cooking process, ensuring the yolks remain bright yellow and preventing that unattractive greenish grey ring from forming around them.
Let them cool completely, about 15 minutes. Once cool, carefully peel the eggs. Slice each one cleanly in half lengthwise. Gently scoop all those perfectly cooked yolks into your mixing bowl, leaving the pristine white halves ready on your serving platter.
The Art of Presentation: Piping and Garnishing Like a Pro
The magic happens when texture meets presentation. Now we focus on turning those mashed yolks into the luxurious filling that defines this Deviled Eggs Recipe .
Mashing Techniques for an Ultra Creamy Base
Begin by thoroughly mashing the yolks with a fork until they are completely broken down into fine, consistent crumbs. This initial breakdown is crucial. Once you have the crumbly base, introduce the wet ingredients: the mayonnaise, Dijon mustard, apple cider vinegar, Worcestershire sauce, salt, and pepper.
Mix vigorously until the mixture is homogenous and flawlessly smooth. Remember the pro tip: for guaranteed silkiness, push this mixture through a fine mesh sieve before transferring it to your piping bag.
Mastering the Fill: From Bowl to Egg White Cavity
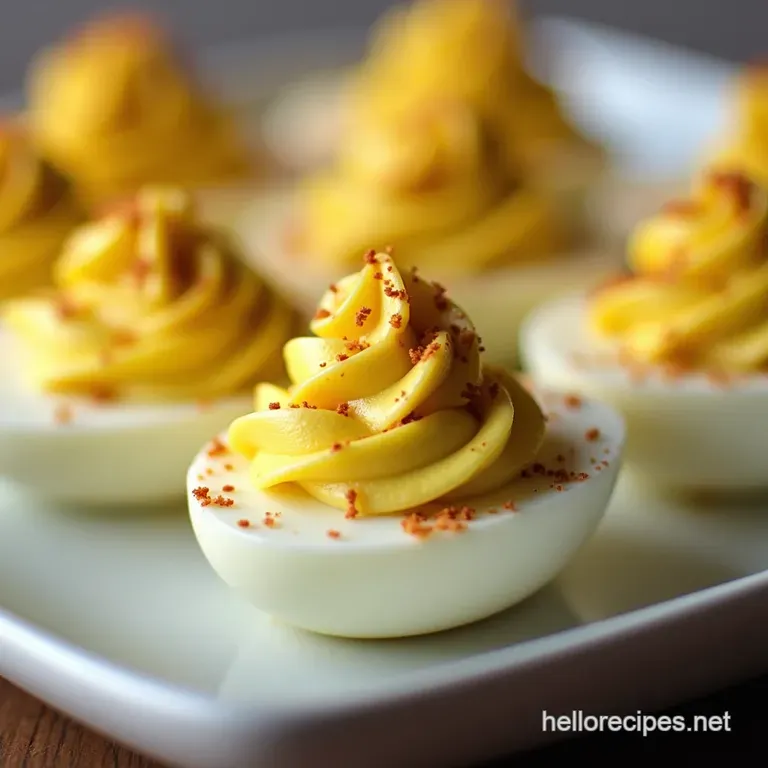
Transfer the velvety yolk mixture into your piping bag fitted with that decorative star tip. Holding the bag vertically over each empty egg white cavity, apply even pressure to pipe a beautiful swirl or mound of filling.
This technique uses the right amount of filling for each half, creating a visually appealing height that spoons simply cannot replicate.
Final Touches: The Paprika Dusting Ritual
Once all 24 halves are filled, do not serve immediately! Cover the platter loosely and refrigerate for a minimum of 1 hour. This chilling time is non-negotiable; it allows the flavours to fully marry and helps the filling set slightly, ensuring stability when handling.
Just before serving, perform the final, defining step: sprinkle lightly but evenly with your chosen paprika smoked paprika offers a lovely warmth and scatter the finely chopped fresh chives over the top.
Troubleshooting and Advanced Tips for Your Deviled Eggs
If your filling seems slightly grainy, it likely means the yolks weren't mashed finely enough before the liquids were added. Try the sieve trick! If your filling is too loose, incorporate one extra teaspoon of mayonnaise or, alternatively, a small amount of softened cream cheese to bind it further.
For those who love Deviled Eggs with Bacon , ensure the bacon is cooked until perfectly crisp and crumbled very finely before folding it into the finished filling mixture.
Making Ahead: Timing Your Appetizer Production
These are fantastic for advance preparation. You can complete steps 1 through 6 boiling, peeling, making the filling, and piping up to 24 hours in advance. The key is careful storage: cover the platter tightly with plastic wrap and refrigerate promptly.
Wait until the very last minute before serving to apply the paprika and chives, as moisture from the fridge can cause the paprika to clump or bleed colour.
Advanced Flavor Variations to Explore Next Time
Once you master this classic foundation, feel free to experiment. A sophisticated alternative involves folding in two tablespoons of finely minced smoked salmon and substituting the chives with fresh dill for a brilliant seafood note.
Alternatively, for a kick beloved in Southern preparations, incorporate a dash of cayenne pepper or a teaspoon of finely minced jalapeño for a lively heat profile.
Tips for Serving the Best Deviled Eggs in a Crowd
When serving a large number, it is best practice to keep the platter chilled right up until guests arrive. Arrange them artfully on a bed of crisp lettuce or on a tiered serving tray to maximize visual impact. Because they are such a highly desired item, plan on making more than you think you need!
Optimal Chilling Times for Maximum Flavor Fusion
While you can serve these after just 30 minutes of chilling, the flavour truly deepens after 2 to 3 hours in the refrigerator. This resting period allows the sharpness of the vinegar and mustard to mellow slightly, integrating seamlessly with the richness of the yolk and mayo.
Aim for that one-hour minimum, but know that longer resting times usually improve the final product.
Nutritional Snapshot of This Crowd Pleasing Dish
While undeniably decadent due to the mayonnaise, Deviled Eggs offer substantial nutritional value derived from the yolks, which are rich in choline, supporting brain health.
On average, one half of these 'Posh Deviled Eggs' contains approximately 90 to 100 calories, with about 8 grams of fat, largely derived from the egg and mayo, and around 4 grams of high-quality protein. Enjoy them mindfully as the perfect, satisfying starter.
Recipe FAQs
How do I stop my hard boiled eggs from getting that nasty green ring around the yolk when making Deviled Eggs?
That greenish grey film is caused by overcooking; it’s just a harmless reaction between sulphur in the white and iron in the yolk. The secret is to move the eggs quickly from boiling water straight into an ice bath for at least 15 minutes to stop the cooking process instantly.
Remember, rapid cooling is key to keeping those yolks bright yellow!
My filling is a bit lumpy; how can I get that truly silky texture like you described for these Deviled Eggs?
Ah, the lumps are the bane of a decent deviled egg! To avoid them, ensure your yolks are crumbled very finely before adding any liquid. For truly professional smoothness, push the mashed yolks through a fine mesh sieve before mixing in the mayo and mustard it takes a moment longer, but the result is utterly velvety.
Can I make the filling for these Deviled Eggs ahead of time, and how long will they keep in the fridge?
Yes, you can certainly make the filling a day ahead and store it snugly in the fridge; just make sure it’s covered tightly to prevent a skin forming. However, for the best presentation, it’s highly recommended to pipe the filling just a few hours before serving.
They’ll keep well filled for up to two days, provided they are well covered.
I'm hosting a large gathering; what are the best ways to keep Deviled Eggs chilled and safe on a buffet table?
Because they contain mayonnaise, you must keep them cool, especially if they’re out for a few hours. A great trick is to serve them on a chilled platter place your serving dish on top of a larger dish filled with ice, hiding the ice underneath with a decorative cloth or some greenery.
Don't leave them out at room temperature for more than two hours, or it’s time to pack them away!
What’s a good variation if I want to add a bit of a kick without using too much traditional mustard?
If you want to skip the heavy Dijon but still want some excitement, try adding a touch of heat! A quarter teaspoon of smoked paprika (as suggested) adds lovely depth, but for real zing, mix in a tiny drizzle of your favourite hot sauce or a pinch of finely minced jalapeño (seeds removed, mind you!).
That offers a nice, modern twist on the classic.
Posh Deviled Eggs Recipe