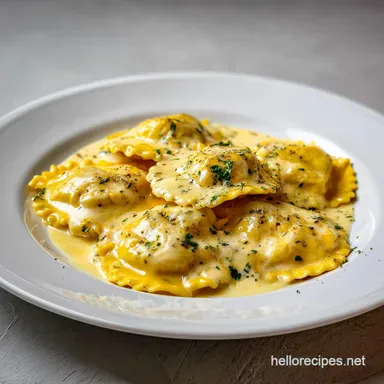
Creamy Baked Garlic Ravioli: One-Pan Dinner
- Time:5 minutes prep + 15 minutes cook = 20 minutes total
- Flavor/Texture Hook: Silky garlic cream with a browned, bubbly cheese crust
- Perfect for: Exhausted weeknights or a low effort cozy date night
Easy One Pan Creamy Baked Ravioli Recipe with Garlic
That first sizzle of butter hitting the pan, followed by the pungent, sharp aroma of minced garlic, is honestly my favorite part of this whole process. I remember one rainy Tuesday when I was completely drained from work and had absolutely zero energy to boil a giant pot of water or scrub three different pans.
I had a bag of frozen cheese ravioli in the freezer and just decided to wing it by simmering them straight in cream.
The result was a total shock. Instead of the pasta getting mushy, it absorbed the garlic infused cream, and the sauce became thick and glossy without any extra effort. This Easy One Pan Creamy Baked Ravioli Recipe with Garlic is the perfect comfort meal for a busy weeknight.
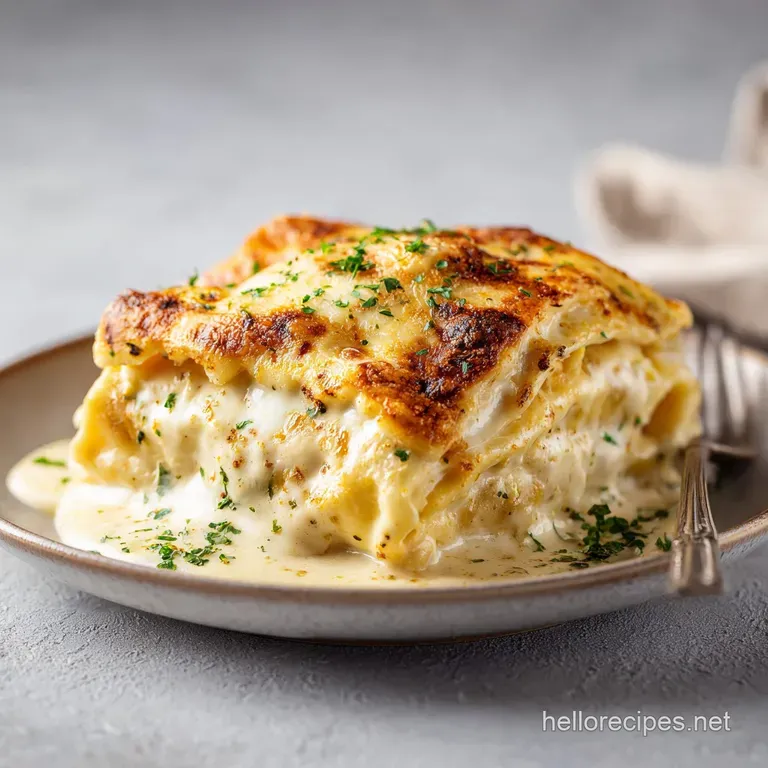
It's the kind of dish that feels like a warm hug in a bowl, especially when the cheese hits that golden brown state under the broiler.
You can expect a meal that balances the richness of heavy cream with the bite of fresh garlic and the saltiness of Parmesan. It's a one pan wonder that saves your sanity and your dishwasher. Let's get into how to make this happen without any stress.
The Secrets to Velvety Sauce
I used to think I needed to make a formal roux with flour and butter to get a thick sauce, but this recipe proves that's not the case. When you use frozen ravioli, they release a small amount of starch directly into the liquid as they thaw and cook.
This starch acts as a natural thickener, binding the heavy cream and chicken broth into a cohesive, silky glaze that clings to every single piece of pasta.
If you enjoy this kind of creamy base, you'll probably love the technique used in my Pasta Linguine Alfredo for that same luxurious mouthfeel. The addition of chicken broth is also a key move here. It thins the cream just enough so the ravioli can simmer without the sauce breaking or becoming an oily mess, while adding a layer of savory depth.
- Starch Binding
- Pasta starch emulsifies with the fats in the cream, preventing the sauce from separating.
- Liquid Balance
- The broth lowers the viscosity of the cream, allowing the pasta to cook through evenly.
- Temperature Control
- Low heat prevents the dairy from curdling while the ravioli gently thaw.
| Method | Time | Texture | Best For |
|---|---|---|---|
| Stovetop Only | 12 mins | Silky & Fluid | Quick lunch |
| Oven Broiled | 15 mins | Bubbly & Crusty | Cozy dinner |
| Slow Cooker | 3 hrs | Soft & Stew like | Meal prep |
The choice between finishing on the stove or under the broiler really depends on your mood. I always go for the broiler because that toasted cheese crust adds a necessary contrast to the creamy interior.
Breaking Down the Ingredients
Getting the right components is half the battle. I don't believe in "fancy" ingredients for this, but the quality of your cheese really makes a difference. Honestly, don't even bother with pre shredded cheese if you have the time to grate your own, as the store-bought stuff is coated in potato starch that can make the melt a bit grainy.
| Ingredient | Science Role | Pro Secret |
|---|---|---|
| Frozen Ravioli | Structure/Starch | Don't thaw them first; cook from frozen to keep shape |
| Heavy Cream | Fat Base | Room temp cream blends faster into the broth |
| Garlic | Aromatic | Mince finely for an even, non bitter distribution |
| Mozzarella | Binder | Use low moisture mozzarella for a better brown |
The combination of mozzarella and Parmesan is what gives the top that professional look. The mozzarella provides the pull, while the Parmesan adds the salty, nutty punch that cuts through the heavy cream.
Essential Gear for One Pan
You don't need a kitchen full of gadgets for this, but the pan choice is non negotiable. You need something that can transition from the stovetop to the broiler without cracking. A 12 inch oven safe skillet is the sweet spot.
Cast iron is a great choice here because it holds heat evenly, though a stainless steel pan with a metal handle works just as well.
If you use a non stick pan, double check that the handle is oven safe. I've seen too many people melt their plastic handles because they forgot the pan was headed for the broiler. A sturdy lid is also essential; without it, the liquid will evaporate too quickly, and your ravioli will stay hard in the center while the sauce vanishes.
Step-by-step Cooking Guide
Right then, let's get cooking. Make sure your pan is ready and your garlic is minced before you turn on the heat.
Sautéing the Aromatics
Place a 12 inch oven safe skillet over medium heat. Melt the 2 tbsp unsalted butter until it starts bubbling, then stir in the 4 cloves of minced garlic. Sauté for 30 60 seconds until it smells fragrant and looks pale gold.
Be careful not to let the garlic turn dark brown, as that will make the whole dish taste bitter.
Building the Sauce
Whisk in the 1 cup heavy cream, 1/2 cup chicken broth, 1/2 tsp salt, 1/4 tsp black pepper, and 1/2 tsp onion powder. Bring the mixture to a gentle simmer. You're looking for small bubbles around the edges, not a violent boil.
Simmering the Pasta
Stir in the 20 oz frozen cheese ravioli. Lower the heat to medium low, cover the pan with a lid, and simmer for 5–7 minutes until the sauce thickens and the ravioli feel tender. The lid is what traps the steam to cook the pasta through.
Adding the Cheese
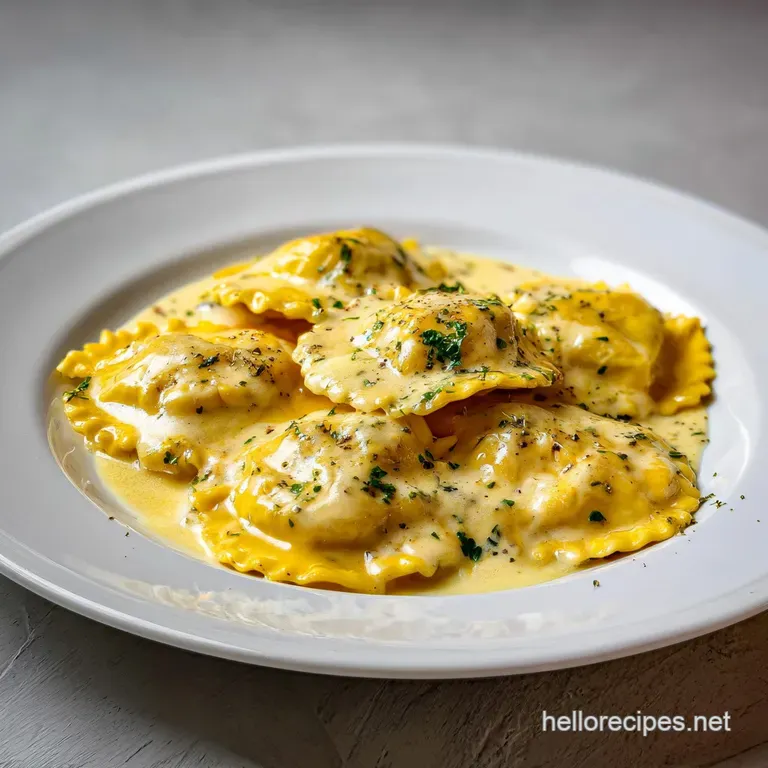
Remove the lid and sprinkle the 1 1/2 cups shredded mozzarella and 1/4 cup grated Parmesan cheese evenly over the top. Try to cover the edges of the ravioli so you get a seamless blanket of cheese.
The Final Brown
Transfer the skillet to the oven under the broiler for 2–4 minutes. Watch it like a hawk until the cheese is bubbly and browned in spots. It happens fast, so don't walk away.
Finishing Touches
Remove from the oven and garnish with 1 tbsp fresh chopped parsley. The green pop of color makes the dish look vibrant against the white and gold of the cheese.
Avoiding Common Cooking Errors
The most common issue I see with baked ravioli is the sauce becoming too thick or the pasta staying raw. If the sauce looks like paste before the ravioli are done, just splash in another tablespoon of broth. It's all about managing that liquid ratio.
Why Your Sauce Split
If you see little beads of oil floating on top, the sauce has likely broken. This usually happens if the heat was too high or if you used a low-fat cream. You can often fix this by whisking in a tiny bit of cold water or broth and stirring vigorously over low heat.
Why Your Ravioli Are Mushy
Overcooking is the enemy. If you simmer them for too long before adding them to the oven, they lose their structural integrity. Stick to the 5-7 minute window and trust that the broiler will finish them off.
| Problem | Root Cause | Solution |
|---|---|---|
| Sauce too thin | Not simmered long enough | Simmer 2 mins longer without lid |
| Burnt cheese | Broiler too hot/too long | Set timer for 2 mins and watch |
| Raw pasta center | Lid wasn't tight enough | Ensure lid seals to trap steam |
Chef's Note: If you're using jumbo ravioli, add 2 minutes to the simmer time. Larger pasta takes longer for the heat to reach the center.
- ✓ Pat your parsley dry before chopping to avoid clumps.
- ✓ Use a wide skillet to prevent the pasta from piling too high.
- ✓ Keep a close eye on the broiler; every oven is different.
- ✓ Stir gently to avoid tearing the delicate pasta skins.
- ✓ Melt butter fully before adding garlic to prevent scorching.
Switching Up the Flavors
This recipe is a fantastic base for other ingredients. If you want to add some greens, stir in two handfuls of fresh baby spinach during the last 2 minutes of simmering. The heat of the sauce will wilt the spinach perfectly without overcooking it.
For those who want something heartier, you can add sliced grilled chicken or sautéed shrimp. If you're looking for a different vibe entirely, try a version with a red sauce, similar to my Baked Tortellini Meat Sauce. It uses a similar one pan logic but swaps the cream for a rich marinara.
- Making it Zesty
- Add a pinch of red pepper flakes to the garlic butter for a subtle heat.
- Adding Umami
- Stir in a teaspoon of Dijon mustard into the cream for a tangy, deeper flavor.
- Veggie Boost
- Sauté diced mushrooms with the garlic for an earthy twist.
If you're serving this as part of a bigger spread, a side of roasted asparagus or a simple Caesar salad balances the richness of the cream. Some people also love pairing this with Easy Cheesy Scalloped Potatoes if they're going for a full on comfort feast.
Keeping Leftovers Fresh
Since this is a cream based dish, storage requires a bit of care to ensure it doesn't separate. Store any leftovers in an airtight container in the fridge for up to 3 days. The sauce will thicken significantly as it cools, almost becoming a solid block, which is normal.
Avoid freezing this dish. The frozen ravioli were great for the initial cook, but once they've been simmered in cream and baked with cheese, the texture doesn't hold up well in the freezer. The cream can break, and the pasta often becomes grainy upon thawing.
To reheat, I recommend using the stovetop. Add a splash of milk or broth to the pan over low heat and cover it. This re emulsifies the sauce and brings back that velvety texture. If you use a microwave, do it in 30 second bursts, stirring in between to avoid hot spots.
Serving Your Creamy Bake
The best way to enjoy this is straight from the skillet. I love to serve it in shallow bowls, making sure everyone gets a bit of that browned cheese crust from the edges. The contrast between the molten cheese and the silky sauce is the whole point.
To cut through the richness, I suggest a squeeze of fresh lemon juice over the top right before eating. The acidity brightens the garlic and cream, making the flavors pop. A sprinkle of extra black pepper or some shaved Parmesan adds a nice final touch.
Because this dish is so rich, it's best enjoyed with a crusty piece of sourdough or a slice of toasted baguette to soak up the remaining sauce. Trust me, you'll want every last drop of that garlic cream.
Recipe FAQs
Can I use fresh ravioli instead of frozen?
Yes, but reduce the simmer time. Fresh pasta cooks significantly faster, so simmer for only 2 3 minutes before adding the cheese to avoid overcooking.
How to prevent the garlic from burning?
Sauté for only 30 60 seconds. Keep the skillet over medium heat and stir constantly until the garlic is pale gold before immediately adding the liquids.
Is it true that ravioli must be boiled before adding to the pan?
No, this is a common misconception. The frozen ravioli cook directly in the cream and broth mixture, which allows them to absorb more flavor while keeping the sauce rich.
Why is my sauce too thin after simmering?
Simmer without the lid for an extra minute. If the sauce hasn't thickened enough after 5 7 minutes, removing the lid allows excess moisture to evaporate more quickly.
How to store and reheat leftovers?
Store in an airtight container in the fridge for up to 3 days. Reheat on the stovetop over low heat with a splash of chicken broth to restore the creamy consistency.
What is the best way to serve this dish?
Serve immediately with a side of crusty bread. If you enjoyed the creamy texture here, you can apply the same sauce thickening logic found in our pumpkin stovetop mac.
Can I use milk instead of heavy cream?
No, the sauce will not thicken properly. Heavy cream provides the essential fat content needed to create a stable emulsion that holds up under the broiler.
Creamy Baked Garlic Ravioli