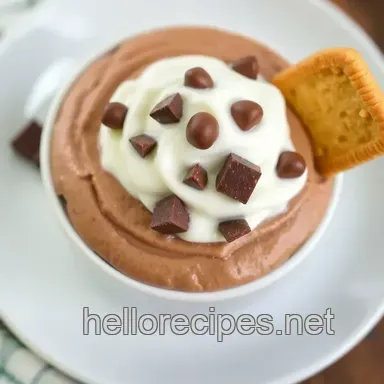
Whip Up Hello Panda Chocolate Delight: a Layered Chocolate Dessert
- A Sweet Beginning: My Hello Panda Dream
- The Chocolatey Goodness Unfolds
- Why You’ll Love This Recipe
- Let’s look into Into Ingredients Next!
- Essential Ingredients Guide for Your Sweet Treats
- Mastering the Art of Professional Cooking
- Pro Tips & Secrets
- Perfect Presentation
- Storage & Make-Ahead
- Creative Variations
- Complete Nutrition Guide
- Frequently Asked Questions
- 📝 Recipe Card
A Sweet Beginning: My Hello Panda Dream
Oh my gosh, let me tell you about the time i nearly burnt my kitchen down trying to recreate a dessert i saw online.
It was a fancy chocolate mousse, and i had visions of grandeur. but, let’s be real, i ended up with a mess instead of the light, fluffy treat i’d hoped for.
Why bring this up? because now, i’m all about easy dessert ideas , and that’s why i can’t wait to share my latest obsession: whip up hello panda chocolate delight .
If you have a sweet tooth like me (and who doesn't?), this creamy chocolate dessert is about to become your new go-to.
The Chocolatey Goodness Unfolds
Now, let’s talk about where this delightful dessert lands in the culinary world. the hello panda dessert is a playful nod to those adorable little japanese cookies filled with chocolate.
They’ve been around since i was a kid, and they've always made snack time a good time. pairing these cookies with a rich and airy chocolate mousse? genius.
So, grab your mixing bowls and prepare for some sweet fun! this treat takes about 25 minutes to prep and then needs to chill for an hour.
No baking, folks. it’s a no-bake chocolate dessert , and honestly, anyone can whip it up. the yield is about six servings, perfect for a family gathering or a cozy night in with your besties.
Why You’ll Love This Recipe
Now, let’s dig into why you’ll fall head over heels for this dessert. first off, the health benefits! okay, let’s not kid ourselves; chocolate mousse isn’t exactly a salad.
But it’s made with high-quality chocolate , which actually has some antioxidants. and, if you’re crafty with your servings, this can be part of a balanced diet.
Plus, who doesn’t love a dessert that can cater to special occasions? whether it’s a birthday bash or just a tuesday that needs some pizzazz, this layered chocolate dessert is the way to go.
It stands out against the usual cake and ice cream combo and feels so elegant, even if it’s a simple recipe.
And don’t even get me started on the crunch factor from those hello panda cookies. the contrast between the rich, creamy mousse and the crunchy treats creates a unique chocolate dessert experience.
You can impress your friends without breaking a sweat total win!
Let’s look into Into Ingredients Next!
Now that you’re convinced this is the next big thing in your dessert arsenal, let’s gather the ingredients that make this chocolate lover's dream come true! it’s all about combining those rich flavors with that irresistible crunch.
Stay tuned for the ingredient breakdown, and remember, cooking should be fun, so let’s make this easy and creative. Trying new things in the kitchen is half the joy, and I can’t wait for you to Whip Up Hello Panda Chocolate Delight yourself!
Essential Ingredients Guide for Your Sweet Treats
Let’s talk about the essentials that’ll make your kitchen a happy place when you whip up something delicious. from chocolate desserts to quick treats, knowing what to buy and how to store it is key.
Grab your favorite mug of coffee, and let’s dive right in!
Premium Core Components
First things first, measuring your ingredients correctly is a game changer. for most recipes, especially those tricky chocolate mousse recipes, you’ll want to keep those measurements on point.
Here’s a quick cheat sheet for both us & metric systems:
- 1 cup = 240 ml
- 1 tablespoon = 15 ml
You’ll want quality chocolate that’s at least 60-70% cocoa for that rich flavor. Look for a nice sheen on the bar if it’s dull, keep searching!
When it comes to storage, chocolate likes cool, dark places. Ideally, it’s good for about 6-12 months when stored right. But you’ll probably use it long before that!
And for freshness? Always check the expiration date. A good rule of thumb is to trust your senses: if it smells off, don’t risk it!
Signature Seasoning Blend
Let’s spice things up! to really elevate that chocolate mousse with cookies , having the right seasoning can make a world of difference.
Try incorporating vanilla extract it brings out chocolate’s richness like a boss.
For my favorite signature seasoning blend, I go with:
- 1 tsp cinnamon for warmth
- A pinch of sea salt to enhance sweetness
Don’t forget to play around with regional vibes! If you’re feeling adventurous, a dash of chili powder gives a delightful kick to your chocolate.
Smart Substitutions
We’ve all found ourselves in a pinch, right? No heavy cream? No sweat! You can easily swap in coconut cream for a vegan mousse.
And if you don’t have those adorable Hello Panda cookies ? Crushed Oreos work like a charm! They’ll give you that delightful chocolate crunch that pairs wonderfully with your decadent mousse.
For dietary modifications, consider using aquafaba in place of egg whites if you’re going the vegan route. It adds that airy lift we all love in a mousse!
Kitchen Equipment Essentials
Got your ingredients lined up? Great! Now, let’s talk tools. Here is what you need to tackle that no-bake chocolate dessert :
- Mixing bowls
- Hand mixer (a must for whipped cream)
- Rubber spatula (for folding like a pro)
- Heatproof bowl (for melting chocolate; safety first)
- Serving glasses (let’s make ‘em pretty!)
If you’re low on gadgets, don’t stress just grab some sturdy bowls and whisk it out! Missing a rubber spatula? Use a wooden spoon to fold instead.
Wrap it Up
Now that we’ve covered the nitty gritty of essential ingredients and tools, you're all set to create a delightful dessert. next up, we’ll dive into the step-by-step instructions to whip up hello panda chocolate delight .
Trust me, you’ll be impressing your friends and satisfying that sweet tooth in no time! let’s get cooking!
Mastering the Art of Professional Cooking

Cooking can feel like a dance, right? it’s all about rhythm, timing, and flair! if you want to whip up some serious skills in the kitchen, let’s dive into some essential preparation steps.
Get ready to elevate your game.
Essential Preparation Steps
Mise en place now, this fancy french term just means “everything in its place.” gather all your ingredients before you start cooking.
Chop, measure, and mix before you turn on the heat. trust me, this will save your sanity! nothing kills the mood like searching for that one spice after you’ve already started cooking.
Time management tips you ever find yourself scrambling to get a meal finished on time? yeah, we’ve all been there.
Set a timer for each part of your preparation. this keeps things moving smoothly. cooking’s not just about following recipes it’s about precision and flow.
Organization strategies use separate cutting boards for veggies and meats. it helps keep flavors distinct and, more importantly, it’s a safety thing! plus, keeping your workspace neat makes everything faster.
More zen, less chaos.
Safety considerations speaking of safety, remember to wash your hands regularly, especially when switching between raw ingredients. don’t forget to adjust that temperature on the stove.
Higher isn’t always better; for example, most meats cook best at around 165° f to be safe to eat.
Step-by-step Process
Now that your prep is solid, let's break down the steps like a champ:
- Plan Your Dish – Decide on what you want to make.
- Gather Ingredients – Pull everything together; this is your mise en place moment!
- Clear Workstation – Clean surfaces mean fewer accidents.
- Temperature Control Points – Different foods have different cooking needs. For a nice steak, aim for around 140° F for medium rare.
- Timing Precision – Use that timer to keep an eye on cooking times. A baked potato needs about 45 minutes at 400° F . Perfect timing is key!
- Visual Cues for Doneness – Look for that golden brown crust or the bubbly cheese. You can tell a lot from those visual signs.
Expert Techniques
Alright, if you wanna wow your friends, try these expert techniques:
- Professional Methods – Learn about sous vide cooking if you want to elevate your meat game. It’s fancy and oh-so-tender.
- Critical Steps Explained – Master the art of deglazing your pan to create delicious sauces.
- Quality Checkpoints – Use a meat thermometer! It takes the guesswork out and ensures you serve up those perfectly cooked meals.
- Troubleshooting Tips – Is your sauce too salty? Add a pinch of sugar. Been there, done that!
Success Strategies
Don’t be discouraged by little hiccups. Here are some success strategies for you:
- Common Mistakes to Avoid – Skipping the mise en place tops the list. Seriously, don't do it!
- Quality Assurance Tips – Always taste as you go! Adjust seasoning on the fly.
- Perfect Results Guide – Aim for balance; sweet, salty, sour, and umami should all be present in your dish.
- make-ahead Options – Prep your ingredients a day beforehand when possible. It cuts down on stress and makes you look like a superstar host!
So there you have it! with these tips in hand, you can easily whip up a masterpiece. speaking of masterpieces, if you’re craving something sweet, why not whip up hello panda chocolate delight ?
This decadent dessert really is the perfect blend of creamy chocolate and crunchy fun, thanks to the japanese hello panda cookies.
Keep it simple, and you’ll have a delightful chocolate mousse recipe that’s sure to impress anyone.
Additional Information
Stay tuned! I’ve got more creative dessert ideas coming your way, and trust me, you won't want to miss them. Perfect for the next gathering or just to satisfy that sweet tooth!
Pro Tips & Secrets
Alright, let's dive into the secrets to whip up this Hello Panda Chocolate Delight and impress your family and friends, ya know? I mean, who doesn’t want to be the star of the dessert table? Here are some of my favorite tips:
Chef's Personal Insights
First things first, use high-quality chocolate. dark chocolate with 60-70% cocoa hits that sweet spot for rich flavor without being too bitter.
If you go for the cheap stuff, you might as well call it a day and just grab a candy bar.
Time Saving Techniques
No time? No problem! Make your chocolate mousse ahead of time. You can whip it up a day before and let it chill overnight. It actually gets better with time!
Flavor Enhancement Tips
Feeling adventurous? Toss in a pinch of sea salt or a splash of espresso liquid when melting the chocolate. It’ll amp up those chocolate flavors like nobody’s business!
Presentation Advice
Don’t underestimate the power of presentation. a simple dollop of fresh whipped cream and a sprinkle of crushed hello panda cookies on top can elevate your dessert from drab to fab.
You want those “oohs” and “aahs” when you serve it!
Perfect Presentation
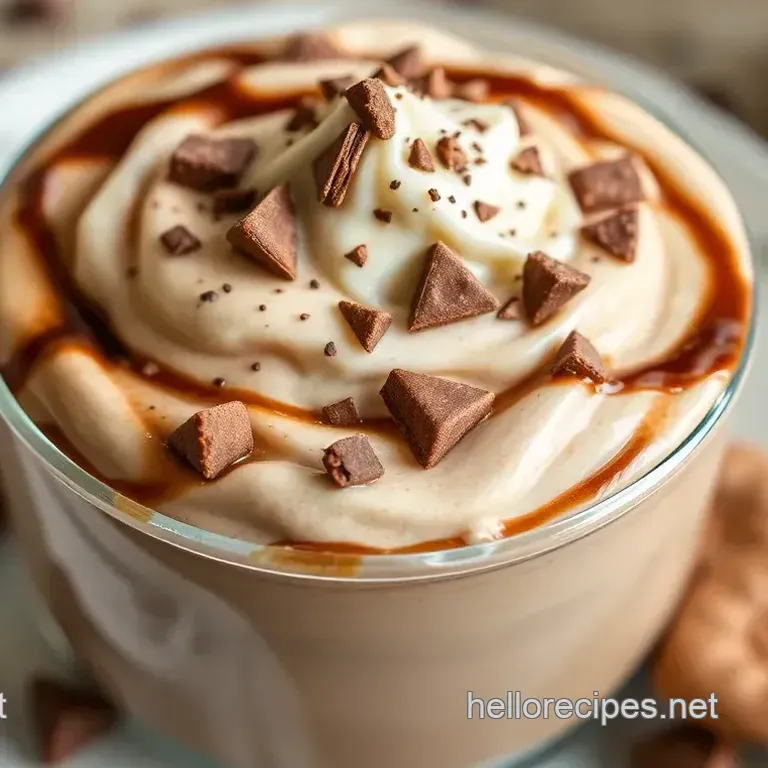
Now let’s get to the fun part: presentation. Here’s how to make your layered chocolate dessert look like it belongs in a fancy restaurant.
Plating Techniques
For a stunning look, layer the mousse and cookie crumbles in clear glasses. It allows the beautiful chocolate layers to shine through.
Garnish Ideas
Top off your dessert with extra whipped cream, maybe a mint leaf or a sprinkle of cocoa powder. Just make sure it isn’t overdone; you want that balance!
Color Combinations
Choco dreamy layers of dark mousse and crunchy, light colored Hello Pandas just pop together. Think contrast! The chocolate against the cream is just a sight for sore eyes.
Visual Appeal Tips
Use bowls or glasses in various sizes. A staggered effect will add depth and make your dessert look more artistic rather than flat and boring. Trust me; it’s all in the look!
Storage & make-ahead
So, you made this dreamy chocolate dessert and now you’re wondering how to keep it? Here’s the deal:
Storage Guidelines
Store your Hello Panda Chocolate Delight in the fridge covered with plastic wrap. It’ll stay fresh and keep those flavors locked in.
Preservation Methods
If you're dealing with leftovers (which can be hard to imagine, right?), keep layers separate until you’re ready to serve. Otherwise, the cookies might get soggy. Yikes!
Reheating Instructions
Good news: this is a no-bake chocolate dessert , so there’s no reheating needed! Just enjoy it chilled.
Freshness Duration
If you follow storage instructions, your dessert should be good for up to 3 days in the fridge. However, it’s always better fresh, so eat up!
Creative Variations
Feeling playful? Here are some intriguing twists to keep your chocolate dessert recipes fresh and exciting:
Flavor Adaptations
Want something minty? Add some peppermint extract for a holiday twist. Or if you're feeling tropical, throw in some coconut for a sweet and creamy fusion!
Dietary Modifications
Making a dairy-free dessert ? Swap in coconut cream instead of heavy cream and dairy-free chocolate. This recipe can work for just about everyone!
Seasonal Twists
In the fall, feel free to mix in pumpkin spice or even a layer of spiced apples for that sweet and comfy vibe!
Regional Variations
Why not try an international spin? How about an Asian inspired version using matcha green tea powder layered with the mousse? Super innovative!
Complete Nutrition Guide
This part’s for all you health conscious folks out there. Let’s break it down:
Detailed Breakdown
Each serving of this creamy chocolate dessert has about 320 calories , 5g of protein, and 22g of fat thanks to the glorious heavy cream.
Health Benefits
Dark chocolate has tons of antioxidants, making it not just tasty, but a tiny bit healthy! It’s all about balance, right?
Dietary Considerations
Keep in mind if making for dietary needs; you’ve got options to swap those ingredients seamlessly with friendly alternatives.
Portion Guidance
Each recipe yields 6 servings . Perfect for sharing but small enough that you won’t feel guilty after a two-serving heist!
In the end, make sure to keep creating and experimenting with recipes like this hello panda chocolate delight . find what works for you and your crowd.
Trust me, there’s magic in cooking up something that not only tastes good but also looks great! get into your kitchen, let your imagination run wild, and enjoy every delicious bite!
Frequently Asked Questions
How do I whip up Hello Panda Chocolate Delight without deflating the mousse?
To maintain the light and airy texture of your mousse in the "Whip Up Hello Panda Chocolate Delight," it’s crucial to gently fold the whipped cream and egg whites into the chocolate mixture. Use a rubber spatula and employ a bottom-to-top folding motion rather than stirring to keep the mousse buoyant.
Can I make Whip Up Hello Panda Chocolate Delight ahead of time?
Yes! You can prepare the "Whip Up Hello Panda Chocolate Delight" a day in advance. Simply layer and refrigerate as directed, and it will be perfectly set and ready to serve the next day, making it an excellent option for parties or gatherings.
What are some variations I can try with the Hello Panda Chocolate Delight recipe?
You can easily customize the "Whip Up Hello Panda Chocolate Delight" by adding different extracts, such as mint for a mint chocolate version, or incorporating layers of fresh fruits like raspberries or bananas for a refreshing twist. For a lighter dessert, try substituting dark chocolate with white chocolate.
How long can I store leftovers of Whip Up Hello Panda Chocolate Delight?
Leftover "Whip Up Hello Panda Chocolate Delight" can be stored in the refrigerator for up to 3 days. Make sure to cover it tightly with plastic wrap to prevent it from absorbing other fridge odors and maintain its best texture.
Can I make a dairy-free version of Hello Panda Chocolate Delight?
Absolutely! You can substitute heavy cream with coconut cream and dairy-free chocolate for a delicious dairy-free "Whip Up Hello Panda Chocolate Delight." Additionally, instead of egg whites, using aquafaba can help achieve the same airy texture.
What are some tips for perfecting the chocolate mousse in this recipe?
For a perfect chocolate mousse, use high-quality dark chocolate and ensure your bowls and mixers are completely clean and dry for whipping egg whites. Chill your mixing equipment before whipping cream and avoid overmixing; gentle folding is key to maintaining the mousse's lightness.
Whip Up Hello Panda Chocolate Delight