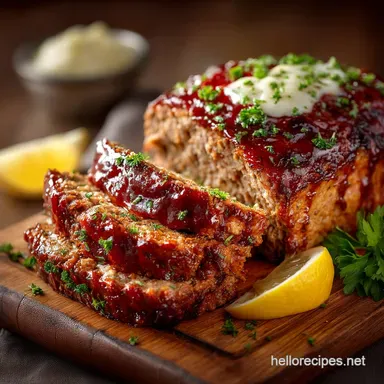
The Sunday Best Meatloaf Sticky Glaze Ultimate Comfort
Elevating the Classic: Why This Meatloaf with Glaze Will Be Your New Sunday Staple
For decades, the meatloaf has held a complicated spot in the culinary canon: beloved for its comfort but often criticized for being dry or bland. This recipe changes that narrative completely.
We’ve meticulously engineered every step to ensure not just satisfaction, but excellence, resulting in the Best Meatloaf you will ever serve. This is a robust, flavor packed Classic Meatloaf Recipe elevated by technical precision, delivering a texture so tender it practically melts.
The secret to its success lies in two key areas: the moisture retaining binder and the signature sticky, tangy Meatloaf with Glaze topping that seals the deal. This approach transforms a simple weeknight meal into a worthy centerpiece for any Sunday dinner.
Decoding the Secret Binder for Maximum Juiciness
The fear of a dense, dry loaf often keeps cooks from attempting this dish, but the solution is surprisingly simple: the panade. Our recipe utilizes a mixture of fresh bread crumbs (or panko) soaked in half a cup of whole milk or buttermilk for about five to seven minutes.
This step is critical because the moistened crumbs expand, effectively cushioning the meat fibers. When the meat cooks and begins to contract, this binder traps the released fats and juices within the loaf structure.
Combined with the use of two large eggs, this technique acts as an internal moisture reserve, guaranteeing that your Homemade Meatloaf remains exceptionally tender and moist even when fully cooked.
Balancing Sweet and Tangy in the Signature Glaze
A truly great meatloaf requires an equally phenomenal topping, and ours is engineered for maximum flavor impact. This meatloaf with glaze recipe is carefully balanced, ensuring the final product avoids being overly sweet or aggressively acidic.
We use a classic ketchup base for body, then introduce richness with a generous quarter cup of packed light brown sugar . The complexity comes from the addition of apple cider vinegar, which provides the necessary bright tang to cut through the richness of the meat, alongside a dash of dry mustard powder for a subtle, earthy bite.
This combination creates the ultimate meatloaf glaze with worcestershire and brown sugar , resulting in a beautifully caramelized and irresistible crust.
The Core Ingredients: Building Blocks for Superior Flavor and Texture

While simple comfort food, the quality and preparation of the ingredients are non-negotiable for achieving this level of flavor. We focus on complementary fats, fresh aromatics, and a specific combination of liquids and seasonings to build a deep umami base before the mixing even begins.
Selecting and Preparing the Ideal Meat Combination
The foundation of a moist meatloaf rests squarely on the fat content. We specifically call for a lean ground beef blend of 80/20 meaning 80% lean muscle and 20% fat totaling 1 1/2 pounds. This fat is essential for flavor and juiciness.
To enhance richness and add depth, we recommend incorporating a half pound of ground pork. Pork contains slightly different fats and connective tissues, resulting in a more complex flavor profile and an even more delicate final texture than beef alone.
If pork is unavailable, sticking to a full two pounds of 80/20 beef is the next Best Meatloaf option.
Essential Pantry Items for the Signature Glaze
The goal of the glaze is to provide a sticky, beautiful finish. The key component is the ketchup, which not only provides a concentrated tomato flavor but also essential structure.
Beyond the primary sweet components of ketchup and brown sugar, we use Worcestershire sauce twice in this recipe once in the loaf mixture to boost umami, and a second teaspoon in the glaze itself.
This infusion of savory notes ensures the meatloaf with glaze topping is flavorful, rather than just sugary. The addition of apple cider vinegar provides the crucial acidic counterpoint that makes the finished dish bright and balanced.
Quick Checklist of Prep Tools and Bakeware
Successful baking relies on having the right equipment ready. For this recipe, you will need a standard 9x5-inch loaf pan to help maintain the loaf’s shape and moisture. A medium skillet is required for softening the aromatics. However, the most vital tool is the instant read digital thermometer.
Relying on time alone is dangerous in meatloaf baking; a thermometer is the only way to accurately ensure safe consumption without accidentally overcooking the interior. We also highly recommend lining your loaf pan with parchment paper, leaving an overhang, which makes lifting the finished, sticky loaf out for slicing incredibly easy.
Related Recipes Worth Trying
- Ultimate Slow Cooker Beef Curry Tender Madras Style with Coconut Milk — This Homemade Beef Curry Recipe delivers tender beef in a rich velvety sauce Prep in 20 minutes then let the slow cooker work its magic for proper comfort grub
- Foolproof Classic Thanksgiving Stuffing Recipe with Sage Thyme — The only Classic Thanksgiving Stuffing recipe you need Baked as a dressing for that gloriously crisp buttery crust and a perfectly moist sageinfused...
- Foolproof Homemade Churros Recipe with Velvety Spanish Chocolate Sauce — Learn to make the ultimate Homemade Churros Recipe Churros y chocolate Achieve that perfect crunch every time with my star nozzle trick Absolute comfort food
Step-by-step Guide: Assembly, Shaping, and the Perfect Bake
Creating a perfect loaf involves carefully choreographed steps that maximize flavor infusion and maintain texture integrity. The total active prep time is about 25 minutes, followed by the specific baking and glazing intervals.
Sautéing and Cooling the Aromatics Before Mixing
The most common mistake home cooks make is adding raw onion and garlic directly to the meat mixture. This leads to crunchy textures and uneven distribution of flavor. Instead, we gently sauté the finely diced yellow onion and optional celery in olive oil or butter until they are translucent and tender about five to seven minutes.
The minced garlic is added only for the final minute. This process softens the flavors and removes harsh notes. Critically, this aromatic mixture must be allowed to cool slightly before combining it with the meat and eggs.
Introducing hot ingredients will prematurely cook the egg binder and melt the fat in the ground meat, compromising the final texture.
Gently Integrating the Ingredients (Do Not Overwork)
Once the binder is soaked, the aromatics are cooled, and the dry seasonings (thyme, salt, pepper) and wet ingredients (Worcestershire, eggs) are combined in the mixing bowl, it is time to introduce the meat.
Add the beef and pork, then use your hands the best tools for gentle mixing to fold everything together. This is where patience pays off. You are aiming for uniform distribution, not homogeneity. Stop mixing the moment you no longer see large pockets of raw seasoning or dry breadcrumbs.
Overworking the mixture develops the protein, resulting in a dense, tough, and compacted final product.
The Critical Step: Forming the Loaf for Even Cooking
Transfer the gently mixed meat to your prepared 9x5-inch loaf pan. Use a light hand to press the mixture into the pan, ensuring there are no large air pockets, particularly in the corners. However, avoid compressing the mixture heavily.
A lightly packed loaf will rise slightly and remain more tender than a densely packed brick. Maintaining a consistent, uniform height across the top allows the loaf to cook evenly through the center, guaranteeing success in this meatloaf with glaze recipe .
Calibrating Doneness: Using the Internal Temperature Probe
Our initial baking phase begins with the oven preheated to 350° F ( 175° C). The meatloaf bakes uncovered for 35 minutes before the first glaze application.
After the glaze is applied, it returns to the oven for another 25 to 35 minutes. Crucially, the loaf is finished not when the clock stops, but when the internal temperature, taken at the thickest part of the center, reads 160° F ( 71° C).
Once removed from the heat, the residual temperature will climb to the safe 165° F ( 74° C) during the vital resting period.
Applying the Second Coat: Achieving that Sticky Meatloaf with Glaze Finish
The strategic application of the glaze is what gives this recipe its glossy, sticky exterior. We use only half of the glaze mixture when the loaf is pulled out at the 35-minute mark. This initial layer caramelizes beautifully but doesn't burn during the remaining cooking time.
Once the loaf hits 160° F and is removed from the oven, we immediately brush the remaining reserved glaze over the top. This second coating provides a fresh, bright sheen and prevents the glaze from becoming overly dry or crusty, resulting in the desired, deeply flavorful meatloaf with glaze topping .
Allow the loaf to rest for 10 to 15 minutes before slicing; this allows the internal juices to resettle, enhancing tenderness.
Advanced Tips and Troubleshooting for Ultimate Success
Even with the best instructions, minor issues can arise in the kitchen. Here are our expert solutions to common pitfalls and tips for customizing the experience.
Preventing a Dry Loaf: Common Mistakes and Corrections
The primary culprits for a dry meatloaf are using meat that is too lean, overmixing the ingredients, or overbaking the loaf. Always adhere to the 80/20 fat ratio. If you must use leaner meat, compensate by adding an extra tablespoon of butter or olive oil to the initial sauté, increasing the overall fat content.
The key correction, however, is vigilant temperature monitoring. Pull the loaf precisely at 160° F ( 71° C) to ensure peak juiciness.
Adjusting Baking Time for Alternative Loaf Pan Sizes
The 9x5-inch loaf pan is standard, but if you use a wider, shallower pan, the cook time will likely decrease by 5 to 10 minutes, as the heat penetrates faster. Conversely, if you opt to form a thick, free form loaf directly on a baking sheet, it may require slightly longer.
Regardless of the pan size, the baking strategy remains the same: use the 350° F oven setting, apply the glaze halfway through, and remove the Meatloaf with Glaze when the internal temperature hits 160° F.
The Best Strategy for Freezing Raw and Cooked Meatloaf
This recipe freezes exceptionally well, both before and after baking. To freeze raw, shape the loaf gently in the pan, then remove it and wrap it tightly in plastic wrap, followed by aluminum foil. Label and freeze for up to three months. Thaw overnight in the refrigerator before baking as directed.
To freeze cooked meatloaf, allow it to cool completely, then slice it into individual portions. Wrap the slices tightly and freeze. Reheat covered in the oven or microwave to maintain moisture. Always apply the fresh second coat of glaze after reheating if freezing cooked portions.
Nutrient Profile and Smart Swaps (dairy-free or gluten-free)
While this is a rich, satisfying comfort dish, smart substitutions can easily adapt it for dietary needs. For a dairy-free binder, substitute the whole milk with an equal amount of high-quality beef stock or even water; the stock will add slightly more savory depth.
To make this a gluten-free Homemade Meatloaf , simply ensure you use gluten-free panko or, alternatively, replace the bread crumbs with a quarter cup of quick cooking oats soaked in the binder liquid.
The Best Side Dishes to Serve with This Glazed Meatloaf
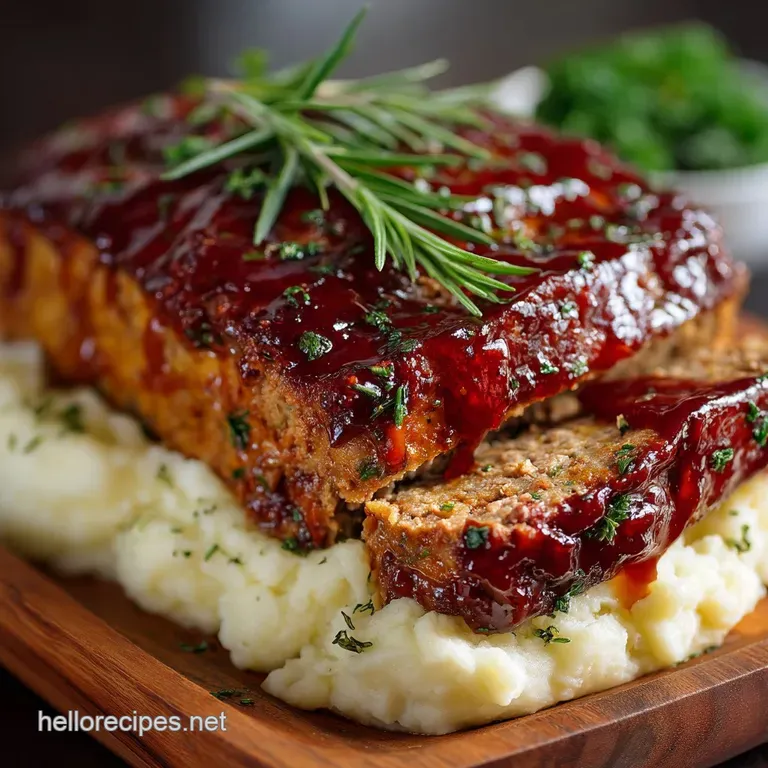
The sweet and tangy nature of the glaze pairs beautifully with classic, comforting sides. Creamy mashed potatoes, whipped with plenty of butter and cream, are the quintessential accompaniment, providing a soft contrast to the crisp crust.
For a touch of freshness, serve roasted green beans or blanched tenderstem broccoli tossed with lemon zest; the bright acidity beautifully cuts through the richness of the meat. Finally, for an extra indulgent Classic Meatloaf Recipe , consider serving rich onion gravy on the side for those who prefer savory richness over sweetness.
For textural contrast and added flavor, a few strips of crispy meatloaf with glaze and bacon on the side is always a welcome addition.
Recipe FAQs
Why does my meatloaf always turn out tough or crumble like a biscuit?
The main culprit for a tough loaf is often overmixing think of it as turning the mixture into a rugby ball! We recommend mixing just until the ingredients are combined, handling the meat gently so you don't activate the proteins too much.
Crumbling, conversely, usually means a lack of binder or fat; ensure you use the full measure of the soaked breadcrumbs and eggs, and stick to the recommended 80/20 beef/pork blend for optimal structure and moisture.
I need a quick win for Sunday dinner. Can I prepare the Meatloaf with Glaze ahead of time?
Absolutely, prepping ahead is a brilliant idea, especially for a proper Sunday spread. You can fully assemble the raw Meatloaf with Glaze, wrap it tightly in the loaf pan, and store it in the refrigerator for up to 24 hours.
Just remember that a cold loaf will need slightly longer in the oven add about 10 15 minutes to the initial baking time before you apply the first layer of glaze.
My ketchup glaze usually burns before the meatloaf is fully cooked. What am I doing wrong?
This is a common pickle! If you apply all that lovely sugary glaze right at the start, it caramelises (and then burns) long before the centre of the meatloaf reaches temperature. The secret is the split application method.
We use half the glaze after 35 minutes of cooking and the remaining half only after the loaf is fully baked and resting; this ensures a sticky, glossy finish without the charred edges.
I only have ground beef. Can I skip the ground pork mixture for the meatloaf?
While the beef/pork combination provides the ultimate richness a bit like the perfect sausage mix you can certainly use 100% ground beef if needed. Just make sure the beef is 80/20 blend (not too lean) to keep things moist.
If you're using lean beef, you might want to sauté your aromatics (onion/celery) in an extra tablespoon of butter to help compensate for the lower fat content, ensuring a tender bite.
How should I store meatloaf leftovers, and what’s the best way to reheat them?
Leftovers should be stored in an airtight container in the fridge and are good for 3 4 days it makes a phenomenal cold sandwich the next day, by the way! The best reheating method is in the oven.
Slice the portions, place them in an ovenproof dish with a splash of water or gravy, cover loosely with foil, and warm at 300°F (150°C) until piping hot. This gentle heat keeps the meat from drying out, which often happens in the microwave.
The Best Meatloaf With Sticky Glaze