Rosca De Reyes Con Sabor Y Tradición Para Toda La
- Time: Active 1 hour, Passive 3 hours, Total 4 hours
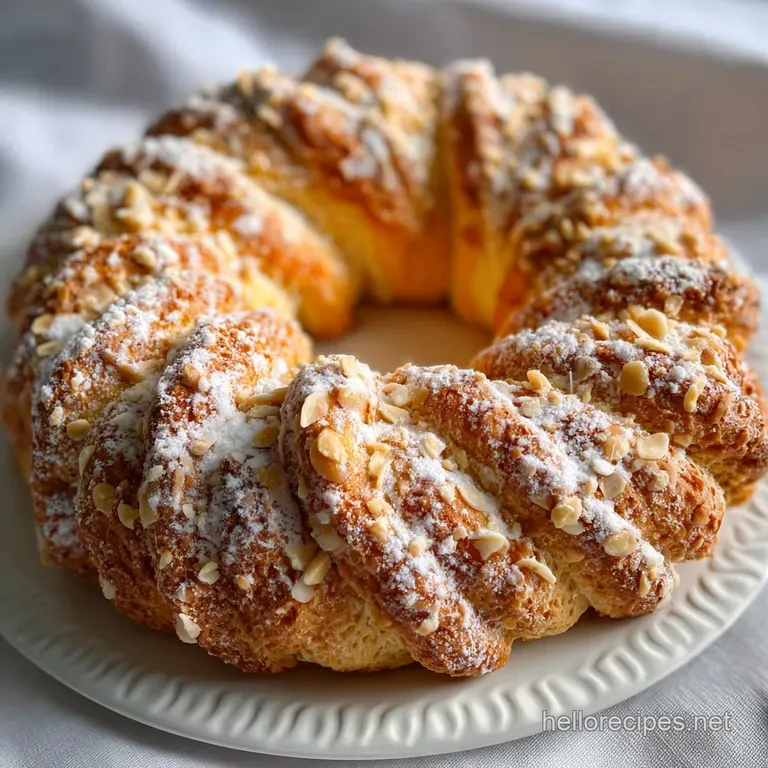
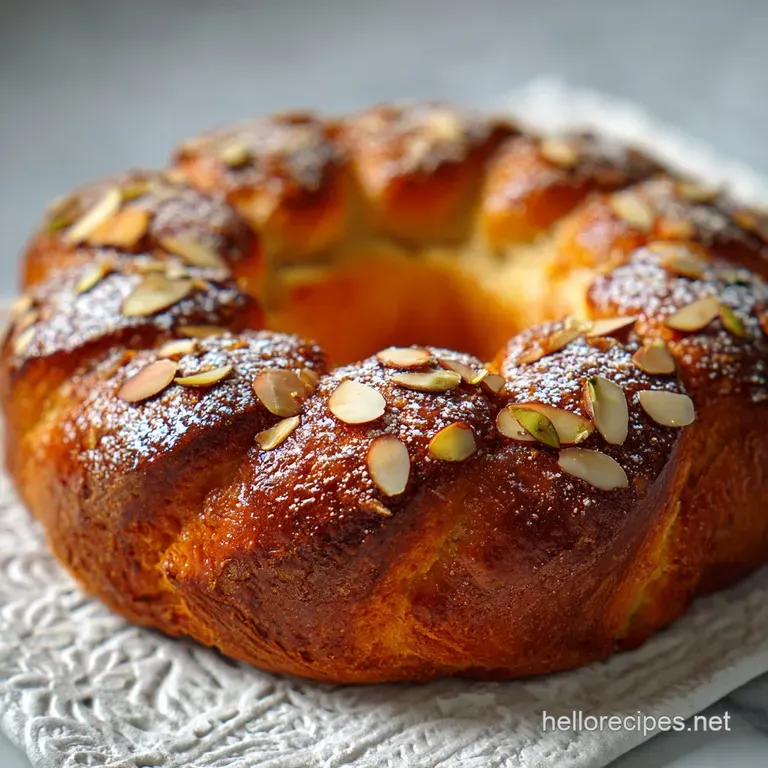
- Flavor/Texture Hook: Silky, citrus scented crumb with a sugary, shattering crust
- Perfect for: Festive family gatherings and holiday brunch celebrations
- Rosca de Reyes con sabor y tradición para toda la
- Science Behind the Softest Holiday Brioche Crumbs
- Essential Timing and Yield for Holiday Baking
- Selecting Premium Ingredients for Gastronomic Depth
- Necessary Tools for a Seamless Kneading Process
- Stepping Through the Dough Transformation Process
- Solving Common Holiday Bread Baking Struggles
- Adjusting Ingredients for Special Dietary Needs
- Proper Storage Methods to Maintain Softness
- Best Ways to Enjoy Your Holiday Crown
- Common Queries for Successful Bread Making
- Recipe FAQs
- 📝 Recipe Card
Can you smell that? The heady, floral scent of orange blossom water mixing with fresh zest always takes me back to my first attempt at this holiday crown. I remember hovering over the oven, watching the sugar crust expand and crackle into those iconic white stripes, praying the hidden figurines wouldn't melt.
This recipe brings you a flavorful and traditional Rosca de Reyes, perfect for sharing with your whole family.
We aren't just making bread here; we are engineering a gastronomic centerpiece that balances sweetness with a complex, fermented depth. If you have ever struggled with a dry, bready loaf that feels more like a chore to eat than a treat, you are in the right place.
We are going to fix that with a few technical tweaks that prioritize moisture retention and structural integrity.
Trust me, the secret isn't in some "magic" ingredient, but in how we handle the fat and the flour. We're going to build layers of flavor from the very first bloom of the yeast to the final placement of the candied fruit.
It's a process that requires patience, but the result is a velvety texture that beats any store-bought version you've ever had.
Rosca de Reyes con sabor y tradición para toda la
To understand this loaf, we have to look at it through the lens of food science. We are essentially making an enriched brioche dough, which means we are loading it with 150g Unsalted butter and 3 Large eggs.
This high fat content usually threatens to weaken the gluten, but we use technology like a stand mixer or precise hand kneading to ensure the 500g All purpose flour develops enough strength to hold its shape.
The citrus notes are not just for aroma; the acidity in the 1 tbsp Fresh orange zest actually helps slightly condition the dough, while the 2 tbsp Orange blossom water provides a volatile aromatic profile that hits the palate before you even take a bite.
This isn't just a sweet bread; it's a sensory experience designed to be shared. The 11g Active dry yeast works overtime to lift this heavy, butter rich dough, creating those tiny, uniform air pockets that define a high-quality crumb.
Science Behind the Softest Holiday Brioche Crumbs
Understanding the "why" behind your dough behavior changes everything in the kitchen. When we mix the 120ml Whole milk with the yeast, we are rehydrating dormant cells to kickstart fermentation.
- Lipid Interference: The 150g Unsalted butter coats flour proteins, limiting gluten development for a more tender, velvety bite.
- Enzymatic Activity: Amylase in the flour breaks down starches into simple sugars, fueling the 11g Active dry yeast and deepening the golden color of the crust.
- Protein Denaturation: The 3 Large eggs provide structure through heat set proteins, ensuring the "crown" doesn't collapse during the bake.
- Starch Gelatinization: As the internal temperature hits 180°F, starches absorb moisture and set the final crumb structure.
Much like the technique used in The Crumb Light recipe, we are looking for a specific hydration balance. If the dough is too wet, the crown flattens; too dry, and it loses that signature silkiness. I once made the mistake of adding all the butter at the start, which resulted in a greasy mess. Now, I wait until the gluten is partially formed before incorporating the fat.
| Ingredient | Science Role | Pro Secret |
|---|---|---|
| Whole Milk (120ml) | Hydration and Sugar source | Keep at 105°F to optimize yeast activity without killing it. |
| Unsalted Butter (150g) | Shortens gluten strands | Use room temp butter to create a stable emulsion in the dough. |
| Orange Blossom Water | Aromatic complexity | Add at the end of kneading to preserve volatile oils. |
| Large Eggs (3) | Emulsifier and structure | High lecithin content in yolks keeps the crumb moist for days. |
The interaction between the sugars and proteins during the bake creates the Maillard reaction, giving us that deep mahogany finish on the exposed dough. Meanwhile, the sugar crust acts as a moisture barrier, protecting sections of the bread from drying out in the dry heat of the oven.
Essential Timing and Yield for Holiday Baking
Precision is your best friend when working with enriched doughs. I always use a digital scale because 500g of flour can vary wildly by volume depending on how humid your kitchen is or how tightly you pack your measuring cup.
- Active Prep: 1 hour (kneading and shaping)
- Proofing Time: 3 hours (divided into two rests)
- Baking Time: 30 minutes
- Yield: 15 generous servings
- Internal Doneness: 190°F (use a probe thermometer!)
| Element | Fresh Scratch Dough | Pre made Brioche Dough |
|---|---|---|
| Aroma | Potent orange blossom and zest | Mild yeast and butter |
| Texture | Silky, long strand gluten | Dense, cake like crumb |
| Flavor | Layered citrus and fermented notes | Standard sweet bread |
If you are in a rush, you might be tempted to use a shortcut, but the depth of flavor from a slow fermented dough is incomparable. The 11g Active dry yeast needs that time to create organic acids that tickle the back of your throat in the best way possible.
Selecting Premium Ingredients for Gastronomic Depth
Sustainable baking starts with high-quality components. I prefer using local, pasture raised eggs when possible because the darker yolks provide a richer color to the dough.
- 500g All purpose flour: Provides the mid range protein needed for a soft but sturdy loaf. Why this? Higher protein bread flour can make the Rosca too chewy.
- 150g Unsalted butter: Ensure it's softened, not melted. Why this? Melted butter destroys the emulsion, leading to a heavy crumb.
- 120ml Whole milk: Use full fat for the best mouthfeel. Why this? Fat in milk contributes to the "tender" pull of the bread.
- 11g Active dry yeast: Check the expiration date! Why this? Old yeast is the #1 cause of "brick like" holiday bread.
- 150g Candied fruit strips: Look for "Ate" (quince or guava paste) for authenticity. Why this? These hold their shape and provide a gummy contrast to the bread.
For the sugar crust which is arguably everyone's favorite part you'll need 100g All purpose flour, 100g Confectioners sugar, 100g Vegetable shortening, and 1 Egg yolk. This creates a shortbread like texture that shatters when you bite into it.
I’ve found that using shortening here instead of butter prevents the crust from melting away into the dough during the bake.
Necessary Tools for a Seamless Kneading Process
You don't need a professional laboratory, but a few specific tools will make this much easier. A stand mixer (like a KitchenAid) is a lifesaver here because kneading 150g of butter into 500g of flour by hand takes significant stamina.
- Digital Scale: For measuring the 500g flour and 150g butter accurately.
- Bench Scraper: Essential for handling the sticky, enriched dough without adding too much extra flour.
- Probe Thermometer: To ensure the milk is exactly 105°F and the bread hits 190°F.
- Large Baking Sheet: A heavy duty rimmed sheet prevents the bottom from scorching.
- Plastic Figurines: 4 Small plastic Niño Dios figurines (hide these well!).
If you are kneading by hand, use the "slap and fold" method. It looks messy, but it builds tension without drying out the dough. Avoid the urge to dump more flour on the table; the stickiness is what keeps the final product from becoming a paperweight.
Stepping Through the Dough Transformation Process
Let's get into the thick of it. This is where we build those flavor layers.
- Bloom the yeast: Whisk 11g Active dry yeast into 120ml warm milk (105°F) with 1 tbsp of the sugar. Wait 10 minutes until foamy.
- Combine solids: In your mixer, combine 500g flour, remaining 100g sugar, 1 tsp salt, and 1 tbsp orange zest.
- Integrate liquids: Add the yeast mixture, 3 eggs, and 2 tbsp orange blossom water to the flour. Mix on low until a shaggy mass forms.
- Incorporate butter: Add the 150g softened butter one tablespoon at a time. Wait until each piece is absorbed before adding the next.
- Develop gluten: Increase speed and knead for 10-12 minutes. Wait until the dough pulls away from the sides and passes the windowpane test.
- First rise: Place in a greased bowl, cover, and let rest in a warm spot. Wait 1 hour 30 mins until doubled in size.
- Shape the crown: Punch down the dough and form into a long log. Join the ends to create a large oval on your baking sheet.
- Hide the surprise: Lift sections of the dough and tuck the 4 figurines inside. Pinch the seams shut to hide them completely.
- Prepare the topping: Mix the 100g flour, 100g confectioners sugar, 100g shortening, and 1 egg yolk into a thick paste. Flatten into strips and place over the dough.
- Final bake: Brush with egg wash, add 150g candied fruit and 1 tbsp pearl sugar. Bake at 350°F for 30 minutes until golden and resonant when tapped.
Chef's Tip: Freeze your vegetable shortening for 10 minutes before mixing the sugar crust. This keeps the fat from emulsifying too early, resulting in a much flakier, "shatter prone" topping.
Solving Common Holiday Bread Baking Struggles
Even experienced bakers run into trouble with enriched doughs. The most common issue is the dough simply refusing to rise, which is usually a temperature or yeast viability problem.
The Mystery of the Dense Crumb
If your Rosca feels heavy like a muffin rather than light like a cloud, you likely under kneaded. Enriched doughs need a strong gluten network to support all that butter and sugar. If you don't knead until the dough is smooth and elastic, the air bubbles will collapse under the weight of the fat.
Why Your Sugar Topping Melted
It's heartbreaking to open the oven and see your beautiful white stripes have turned into a translucent puddle. This happens if the oven isn't hot enough or if the shortening was too soft.
| Problem | Root Cause | Solution |
|---|---|---|
| Dough won't rise | Milk too hot (>115°F) | Use a thermometer; yeast dies at high temps. |
| Bottom is burnt | Thin baking sheet | Use a heavy duty pan or double up your sheets. |
| Figurines are visible | Seams didn't seal | Pinch the dough with a drop of water to "glue" it. |
The "Yeast Kill" Mistake
A lot of people think "warm milk" means "hot milk." If you can't comfortably keep your finger in the milk, it’s too hot for the yeast. The 11g Active dry yeast is a living organism; treat it with a little gentleness, and it will reward you with a beautiful rise.
Adjusting Ingredients for Special Dietary Needs
While this is a classic recipe, we can use modern gastronomy to adapt it. If you are looking for a savory contrast to serve alongside this, you might enjoy pairing the leftovers with a Savory Breakfast Cheddar recipe for a full holiday spread.
- dairy-free Swap: Use a high-quality vegan butter block (not tub margarine) and almond or soy milk. Note: The crumb will be slightly less "stretchy" but still delicious.
- Egg Free Alternative: Use a commercial egg replacer or aquafaba. Note: You will lose some of the rich yellow color and the structure may be more fragile.
Decision Shortcut: If you want a lighter crumb, knead for an extra 5 minutes past the "smooth" stage. If you want a crispier crust, sprinkle extra pearl sugar over the egg wash. If you want faster rising, place the bowl in a cold oven with a pan of boiling water on the rack below.
Proper Storage Methods to Maintain Softness
Enriched breads like this tend to go stale faster than lean breads because the fat eventually begins to oxidize and the starches undergo retrogradation.
Storage: Wrap the Rosca tightly in plastic wrap or store in an airtight container at room temperature for up to 3 days. Do not refrigerate, as this actually accelerates the staling process.
Freezing: You can freeze the baked Rosca for up to 2 months. Slice it first, wrap individual pieces in foil, and place them in a freezer bag.
Zero Waste Tip: If your Rosca does get a bit dry, don't toss it! It makes the most incredible French toast or bread pudding. The orange blossom notes pair beautifully with a maple syrup or a vanilla bean custard. You can even dry out the scraps to make sweet breadcrumbs for topping fruit crumbles.
Best Ways to Enjoy Your Holiday Crown
In our house, the Rosca is never eaten alone. It is almost a requirement to serve it with a big pot of Mexican hot chocolate or "Champurrado." The spicy cinnamon in the chocolate cuts through the rich, buttery dough perfectly.
For a more innovative approach, I like to slice a wedge and lightly toast it in a pan with a tiny bit of butter until the edges are crispy. Then, I top it with a dollop of mascarpone cheese and a drizzle of honey. It turns a simple piece of bread into a plated dessert that feels very high end.
If you are hosting a large group, consider making two smaller Roscas instead of one giant one. This ensures more people get the "crunchy" ends and makes it easier to manage on standard baking sheets. Plus, it gives you more opportunities to hide those Niños Dios!
Common Queries for Successful Bread Making
Can I use instant yeast instead of active dry? Yes, you can swap them 1:1 in this recipe. Just skip the 10 minute "blooming" phase and mix the instant yeast directly into the flour. Keep an eye on the rise, as instant yeast often works about 25% faster.
What if I can't find Ate or candied fruit? You can use dried apricots, glacé cherries, or even thick strips of orange marmalade peel. The goal is to provide a chewy, sweet contrast to the soft bread. Some modern versions even use pecans or chocolate chips!
How do I know if I've kneaded enough? Use the windowpane test. Take a small piece of dough and gently stretch it between your fingers. If it can stretch thin enough to see light through it without tearing, the gluten is ready. If it snaps immediately, keep kneading.
Can I make the dough the night before? Absolutely. In fact, a cold ferment in the fridge overnight (after the first 30 minutes of room temp rising) actually improves the flavor. The yeast produces more complex esters in the cold, making the bread taste even better.
Just let it come to room temp for an hour before shaping.
Why did my Rosca split on the sides? This usually means the dough was under proofed when it went into the oven. The "oven spring" was too aggressive for the structure.
Next time, let it rise for an extra 15-20 minutes during the second proof until it looks very puffy and leaves a slight indentation when poked.

Recipe FAQs
What is the purpose of the high fat content in this Rosca de Reyes?
It creates a tender, velvety crumb. The butter and eggs coat the flour proteins, limiting gluten development for a more delicate texture that stays soft for days.
How do I ensure my Rosca doesn't turn out dry?
Control the hydration and avoid overbaking. Use accurate measurements for flour and liquid, and bake only until the internal temperature reaches 190°F. Storing it properly also helps maintain moisture.
What's the best way to incorporate the butter into the dough?
Add softened butter gradually after initial gluten development. This method helps create a stable emulsion, preventing a greasy crumb and ensuring a better texture, much like the technique used in mastering dough handling for our Island Getaway My Easy Coconut Bread Recipe.
Why is my sugar crust melting into the dough?
This is likely due to the shortening being too soft or the oven temperature being too low. For a shatter prone topping, chill the shortening briefly before mixing and ensure your oven is preheated accurately.
Can I use instant yeast instead of active dry yeast?
Yes, you can substitute them 1:1. Simply mix the instant yeast directly into the dry ingredients and skip the blooming step. The dough might rise a bit faster.
How should I store leftover Rosca de Reyes?
Wrap it tightly in plastic wrap or store in an airtight container at room temperature. Avoid refrigerating, as this can actually speed up the staling process. It will stay fresh for up to 3 days.
What can I do if my Rosca becomes slightly dry?
Transform it into French toast or bread pudding. The residual moisture and flavors, especially the orange blossom, make it perfect for these applications, offering a second life to any leftovers.
Rosca De Reyes Sabor Tradicional

Ingredients:
Instructions:
Nutrition Facts:
| Calories | 395 kcal |
|---|---|
| Protein | 6.8 g |
| Fat | 17.1 g |
| Carbs | 52.3 g |
| Fiber | 1.6 g |
| Sugar | 18.2 g |
| Sodium | 208 mg |
