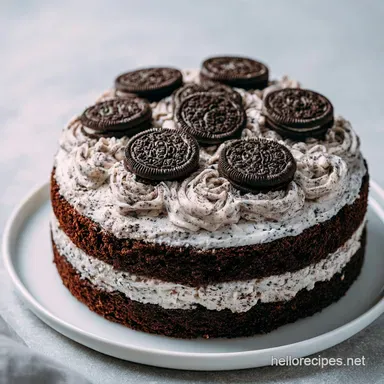
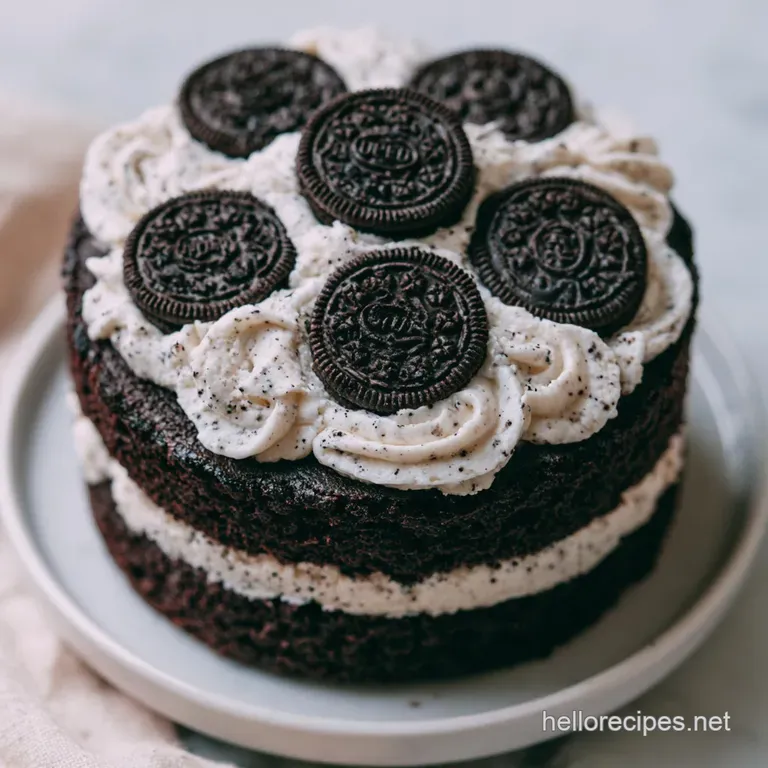
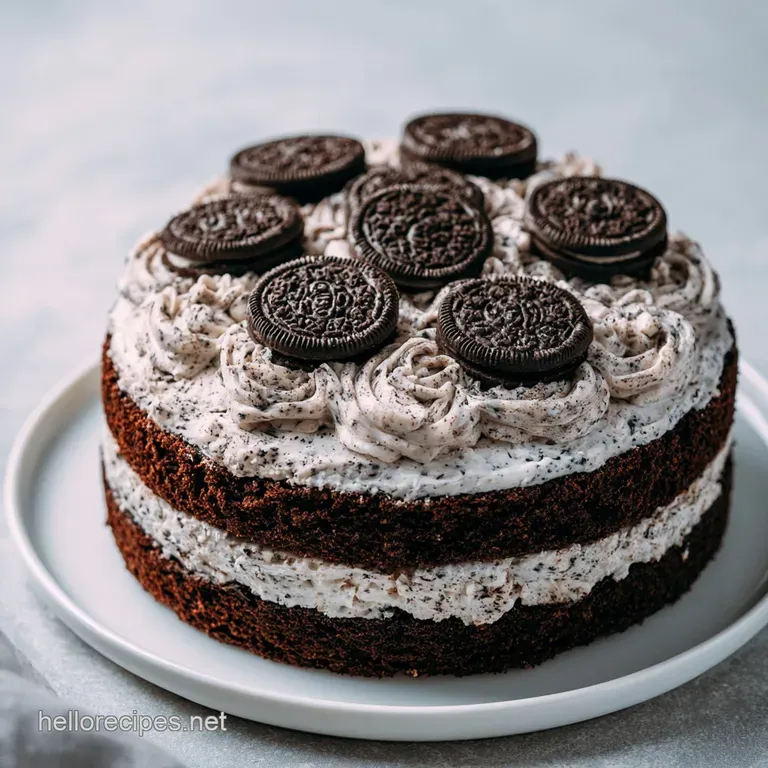
Oreo Cake with Cookies and Cream Frosting: Moist and Silky
- Time: 30 min active + 2 hours chilling = Total 3 hours
- Flavor/Texture Hook: Deep cocoa layers with a silky, Oreo studded frosting
- Perfect for: Birthday parties, chocolate lovers, or a high impact dessert for beginners
- Oreo Cake with Cookies and Cream Frosting
- The Secret to a Moist Sponge
- Breakdown of the Components
- The Building Blocks
- Equipment Needed
- Step-by-Step Instructions
- Avoiding Kitchen Disasters
- Troubleshooting Common Issues
- Mix It Up
- Adjusting the Batch Size
- Common Baking Misconceptions
- Storage Guidelines
- Serving Suggestions
- Recipe FAQs
- 📝 Recipe Card
That sharp, sweet scent of cocoa hitting the hot oven air is honestly my favorite part of the whole process. I remember the first time I tried to make a cookies and cream dessert, I just threw whole cookies into a batter and ended up with something that felt more like a chunky granola bar than a cake.
It was a mess, but it taught me that texture is everything when you're working with something as iconic as an Oreo.
This is the ultimate recipe for Oreo Cake with Cookies and Cream Frosting. We're talking about a cake that feels like a nostalgic hug, blending that classic American cookie culture with a sophisticated, velvety finish.
It's a vibrant celebration of chocolate and cream that doesn't require a professional kitchen to get right.
You can expect a cake that is deeply moist, not overly sweet, and structurally sound enough to hold a generous amount of frosting. We're going to build this in layers, focusing on the contrast between the springy sponge and the rich, buttery cream.
Trust me on this, the chilling time at the end is not optional, it's what turns this from a "home cake" into something that feels like it came from a high end bakery.
Oreo Cake with Cookies and Cream Frosting
When you think of the Oreo, you're thinking of a global phenomenon. It's more than just a cookie, it's a ritual of twisting and dunking that spans across different cultures and generations.
Bringing that experience into a cake format means we have to replicate those specific flavor notes - the dark, slightly bitter cocoa and the sweet, creamy filling - throughout the entire dessert.
The beauty of this specific approach is how it plays with temperature and texture. By folding crushed cookies into the batter and pulsing them into the frosting, we create a multi dimensional experience.
You get the softness of the cake, the silkiness of the cream cheese, and the occasional crunch of a cookie bit that shatters as you bite into it.
Right then, let's get into the details. This isn't just about mixing ingredients, it's about managing moisture. The goal is a sponge that stays moist for days and a frosting that holds its shape without feeling like a block of cold butter.
We'll use a few specific tricks to make sure the Oreo pieces don't all sink to the bottom of your pans.
The Secret to a Moist Sponge
Instead of a traditional creamed butter cake, we're using a liquid fat method. This keeps the crumb tender and prevents the cake from drying out in the oven.
- Acidic Activation: The buttermilk reacts with the baking soda to create tiny air bubbles, which makes the cake springy.
- Fat Distribution: Using vegetable oil instead of butter ensures the cake stays moist even when stored in the fridge.
- Cookie Suspension: Folding in the crushed Oreos at the very end prevents them from over saturating and becoming mushy.
- Temperature Balance: Room temperature eggs and buttermilk blend more easily, preventing the batter from curdling.
Choosing Your Bake Method
Depending on your goals, you might want a different approach to the heat. While the oven is the standard, some people prefer alternative methods for the base.
| Method | Time | Texture | Best For |
|---|---|---|---|
| Standard Oven | 30 mins | Springy & Airy | Classic layered cakes |
| Stovetop Steam | 45 mins | Dense & Fudgy | Moist, pudding like cakes |
| Slow Cooker | 2 hours | Extremely Moist | Effortless, rustic cakes |
But what about the sogginess? We'll get to that in the troubleshooting section. For now, stick with the oven for that classic, structured layer cake.
Breakdown of the Components
Before we dive into the mixing, it's helpful to understand what each part is actually doing. This isn't just a list of items, it's a system of flavors and structures.
| Ingredient | Science Role | Pro Secret |
|---|---|---|
| Buttermilk | Tenderizer | Adds a subtle tang that cuts through the heavy sugar |
| Cocoa Powder | Flavor Base | Sift it to avoid those annoying dark clumps |
| Cream Cheese | Stability | Prevents the frosting from melting at room temp |
| Oreo Crumbs | Texture | Pulse to two different sizes for more variety |
The interaction between the cocoa and the buttermilk is where the magic happens. According to Serious Eats, using an acidic component with cocoa powder can help brighten the chocolate flavor and ensure a more uniform rise.
The Building Blocks
Here is everything you'll need to get this on the table. I've included a few swaps if you're missing something in the pantry.
For the Cake: 2 cups (250g) All purpose flour Why this? Provides the necessary structure (Sub: 1:1 gluten-free flour blend) ¾ cup (150g) Granulated sugar Why this? Sweetens and tenderizes (Sub: Coconut sugar for a deeper taste)
½ cup (45g) Unsweetened cocoa powder Why this? Deep chocolate profile (Sub: Dutch processed cocoa for a darker look) 1 tsp (5g) Baking soda Why this? The primary leavening agent (Sub: 3 tsp baking powder) ½ tsp (3g) Salt Why
This? Balances the sugar (Sub: Sea salt) 1 cup (240ml) Buttermilk, room temperature Why this? For a tender, tangy crumb (Sub: Milk + 1 tbsp lemon juice) ½ cup (120ml) Vegetable oil Why this? Keeps the cake moist (Sub: Melted coconut
Oil) 2 Large eggs, room temperature Why this? Binds everything together (Sub: Flax eggs for a plant based twist) 1 tsp (5ml) Vanilla extract Why this? Enhances the chocolate (Sub: Maple syrup) 1 cup (115g) Finely crushed Oreo cookies Why
This? Adds textural contrast (Sub: Any chocolate sandwich cookie)
For the Frosting: 1 cup (225g) Unsalted butter, softened Why this? Creates the creamy base (Sub: Vegan butter sticks) 4 oz (115g) Cream cheese, softened Why this? Adds tang and stability (Sub: Mascarpone for extra richness) 3 ½ cups (420g) Powdered sugar Why this? Sweetens and thickens (Sub: Homemade powdered sugar) 1 tsp (5ml) Vanilla extract Why this? Classic aromatic (Sub: Almond extract) 2 tbsp (30ml) Heavy cream Why this? Adjusts the consistency (Sub: Full fat coconut milk) 8 oz (225g) Oreo cookies, pulsed into fine crumbs Why this? The signature flavor (Sub: Extra cocoa powder + crushed wafers)
If you're looking for a different frosting style, you might want to check out a smooth American buttercream, but for this recipe, the cream cheese is key to balancing the Oreos.
Equipment Needed
Don't start until you have these ready. It saves so much stress when you're in the middle of the process.
- Two 8 inch round cake pans (stainless steel or aluminum)
- Parchment paper (non negotiable for easy release)
- Electric hand mixer or a stand mixer (like a KitchenAid)
- Sifter or fine mesh strainer
- Food processor or a heavy duty zip top bag and rolling pin
- Wire cooling racks
- Offset spatula for that smooth frosting look
Chef's Note: If you don't have a food processor for the cookies, put them in a bag and smash them with a rolling pin. But be careful - you want some fine dust and some tiny shards, not giant chunks.
Step-by-step Instructions
Let's crack on with the actual baking. Pay attention to the cues, not just the timer.
Phase 1: Baking the Sponges
- Preheat your oven to 350°F (175°C). Grease two 8 inch round cake pans and line the bottoms with parchment paper. Note: This prevents the cake from sticking to the bottom
- Sift flour, sugar, cocoa, baking soda, and salt into a large mixing bowl. Whisk until the color is a uniform light brown and no lumps remain.
- Whisk in the buttermilk, oil, eggs, and vanilla until the batter is smooth. Mix until just combined - don't overwork it or the cake will be tough.
- Gently fold in the 1 cup of crushed Oreo cookies until evenly distributed. Note: Use a spatula, not a whisk, to keep the cookies intact
- Divide the batter equally between the two pans. Bake for 28-32 minutes until a toothpick inserted comes out clean or with just a few moist crumbs.
- Let the cakes rest in the pans for 10 minutes before transferring to a wire rack to cool completely. Wait until they are totally cold before frosting, or your butter will melt.
Phase 2: Whipping the Frosting
- Beat the softened butter and cream cheese together using an electric mixer until pale and fluffy (about 3 minutes). Look for a light, airy texture that looks like whipped cream.
- Slowly add powdered sugar one cup at a time on low speed, then increase to medium. Beat until the sugar is fully integrated and no white streaks remain.
- Mix in the vanilla extract and heavy cream until the frosting reaches a spreadable, velvety consistency. Add cream one tablespoon at a time until it feels smooth.
- Gently stir in the 8 oz of pulsed Oreo crumbs. Do this by hand to avoid over mixing and turning the frosting grey.
Phase 3: Assembling the Cake
- Frost the cooled cake layers and chill for 2 hours before serving. Apply a thick layer of frosting between the layers and a thinner layer on the outside.
- Oven Temp
- 350°F (175°C) - verify with an oven thermometer if you have one.
- Bake Time
- 30 minutes is the sweet spot; check at 28.
- Chill Time
- Exactly 2 hours in the fridge for structural integrity.
Avoiding Kitchen Disasters
Even the best of us mess up. Here's how to handle the common hiccups that come with an Oreo Cake with Cookies and Cream Frosting.
Troubleshooting Common Issues
| Issue | Solution |
|---|---|
| Why Your Cake Sinks in the Middle | This usually happens if the oven door was opened too early or the baking soda is expired. The sudden drop in temperature causes the air bubbles to collapse before the structure is set. |
| Why Your Frosting is Too Soft | Warm butter or too much heavy cream are the usual suspects. If your frosting is sliding off the cake, it needs more chilling time or a bit more powdered sugar. |
| Why the Oreos Became Soggy | Over mixing the batter is the culprit here. The longer the cookies sit in the wet ingredients, the more they absorb liquid. |
Common Mistakes Checklist:
- ✓ Did you sift the cocoa powder? (Lumps = bitter pockets)
- ✓ Is the butter truly softened? (Cold butter = lumpy frosting)
- ✓ Did you wait for cakes to cool? (Warm cake = melted frosting)
- ✓ Did you use room temperature eggs? (Cold eggs = broken emulsion)
- ✓ Did you fold the cookies gently? (Over mixing = gummy texture)
Mix It Up
Once you've nailed the basic Oreo Cake with Cookies and Cream Frosting, you can start playing with the flavor profiles.
For a Minty Twist
Replace the vanilla in the frosting with a drop of peppermint extract and add a few crushed mint chocolate chips to the cake batter. It tastes like a thin mint in cake form.
For a Peanut Butter Kick
Swirl two tablespoons of creamy peanut butter into the center of the cake layers before frosting. The salty sweet combo with the Oreos is a total winner.
For a Vegan Friendly Version
Use a high-quality vegan butter and a plant based cream cheese alternative. Replace the buttermilk with soy milk and a teaspoon of apple cider vinegar. According to King Arthur Baking, vegan substitutions often require slightly more binding, so ensure your flax eggs are well set.
For a Reduced Sugar Profile
Reduce the powdered sugar in the frosting by half a cup and add a pinch of extra salt. The cream cheese will provide enough tang to keep it tasting rich without being cloying.
Adjusting the Batch Size
Depending on the party, you might need to scale this up or down. Just remember that baking is a bit like a lab experiment - you can't always just double everything and expect it to work the same way.
Scaling Down (Half Batch): Use two 6 inch pans instead of 8 inch. Reduce the baking time by about 20%, checking at 22 minutes. For the egg, beat one large egg in a bowl and use exactly half of it by weight.
Scaling Up (Double Batch): Work in batches if your mixer is small. For the spices and salt, only increase them by 1.5x to avoid an overpowering taste. When doubling the cake, lower the oven temp to 325°F (160°C) and extend the bake time by 5-10 minutes to ensure the center cooks without burning the edges.
Decision Shortcut: If you want a taller cake → use 6 inch pans and 1.5x the batter. If you want a sheet cake → use a 9x13 pan and bake for 35-40 mins. If you want mini cakes → use a cupcake tin and bake for 18-22 mins.
Common Baking Misconceptions
Let's clear some things up. There's a lot of advice floating around that just isn't true.
"You must use expensive European butter for frosting." Not true. While high fat butter is nice, the cream cheese in this recipe provides the necessary richness and stability. Any unsalted butter will work as long as it's softened.
"Sifting flour is a waste of time." For most cakes, maybe. But for a chocolate cake using cocoa powder, it's mandatory. Cocoa powder is notorious for forming tiny, stubborn clumps that won't disappear during mixing.
"The cake is done when it smells like chocolate." Smell is a great indicator that it's near done, but it's not a precision tool. Always use the toothpick test or a digital thermometer (aim for 205-210°F internal temp).
Storage Guidelines
Keep your cake fresh without letting it dry out or the frosting lose its edge.
Fridge Storage: Store the cake in an airtight container or a cake dome in the fridge for up to 5 days. Because of the cream cheese in the frosting, this cake must be refrigerated. Let it sit at room temperature for 30 minutes before eating for the best texture.
Freezer Storage: You can freeze the unfrosted layers wrapped tightly in plastic wrap and foil for up to 3 months. If freezing the whole cake, freeze it for 2 hours first to set the frosting, then wrap it. Thaw slowly in the fridge overnight.
Zero Waste Tips: Don't throw away the leftover Oreo crumbs! Use them to top a bowl of vanilla ice cream or stir them into a morning smoothie for a treat. If you have leftover frosting, freeze it in small dollops on parchment paper, then pop them into a bag for quick cupcake topping.
Serving Suggestions
To make this feel like a real event, the presentation matters as much as the taste.
The Classic Slice: Use a hot knife (dip it in boiling water and wipe dry) to get those clean, sharp layers. This prevents the frosting from dragging into the cake.
The Plating: Serve a slice with a dollop of fresh whipped cream and a single, whole Oreo perched on top. A few fresh raspberries or a drizzle of raspberry coulis provides a sharp, acidic contrast to the rich chocolate.
The Beverage Pairing: A cold glass of whole milk is the traditional choice, but a hot cup of black coffee or an espresso brings out the bitterness of the cocoa and cuts through the sweetness of the frosting. For something different, try a glass of chilled almond milk with a pinch of cinnamon.
Recipe FAQs
Do I need to refrigerate this cake?
Yes, this cake must be refrigerated. The cream cheese in the frosting is perishable and requires cold storage to remain safe and stable.
Why did my cake sink in the middle?
This usually happens if the oven door was opened too early. The sudden drop in temperature causes air bubbles to collapse before the cake structure has fully set.
How to fix frosting that is too soft?
Chill the frosting or stir in more powdered sugar. If the frosting is sliding off the cake, additional sugar or more time in the fridge will firm up the consistency.
Can I add extra toppings to the cake?
Yes, a dollop of homemade whipped cream works beautifully. It adds a light, airy contrast to the rich cookies and cream frosting.
How to prevent the Oreo pieces in the batter from becoming soggy?
Gently fold the crushed cookies into the batter at the very end. Over mixing the batter breaks down the cookie structure and causes them to lose their texture.
Is it true that I should bake the cake for exactly 30 minutes regardless of the oven?
No, this is a common misconception. Check for doneness with a toothpick between 28 and 32 minutes, as actual baking times vary by oven.
Should the butter and cream cheese be cold when making the frosting?
No, use softened ingredients. Cold butter and cream cheese will create lumps, while softened ingredients beat into a pale, fluffy consistency.
Oreo Cookies And Cream Cake