Little Debbie Christmas Tree Cheesecake
- A Slice of Holiday Nostalgia
- Little Debbie Christmas Tree Cheesecake: A Culinary Journey
- Your New Favorite Little Debbie Christmas Tree Cheesecake
- Health and Nutrition Highlights
- Recipe at a Glance
- Essential Components Guide
- Kitchen Equipment Essentials
- Professional Cooking Guide
- Master Chef's Advice
- Perfect Presentation
- Storage and Make-Ahead
- Creative Variations
- Complete Nutrition Guide
- Expert FAQ Solutions
- 📝 Recipe Card
A Slice of Holiday Nostalgia
Have you ever bitten into a dessert that transported you straight back to the magic of childhood? that’s the kind of joy the little debbie christmas tree cheesecake brings.
This creative twist on the classic cheesecake not only brings smiles but also sparks memories of festive cheer and sugary treats every december.
Now, if you’re anything like me, you're already wondering how this delightful concoction can become part of your holiday traditions.
What makes this recipe special is how easily it blends a beloved snack with a timeless dessert. with a prep time of just 30 minutes and a moderate difficulty level, it’s perfect for both novice bakers and seasoned pros looking to impress.
You’re looking at about an hour in the oven, followed by a chill out period in the fridge 4 hours is ideal but hey, if you have the patience, overnight chilling makes for a creamier treat!
Little Debbie Christmas Tree Cheesecake: A Culinary Journey
Cheesecake has a long and storied history. it dates back to ancient greece when it was served to athletes during the first olympic games! fast forward a few centuries, and we find this creamy delight gracing tables across europe and eventually the united states, evolving based on local tastes.
Enter the little debbie christmas tree snack cake, a nostalgic favorite that many of us looked forward to during the holiday season.
The brilliance of combining this iconic treat with cheesecake draws on the rich culinary heritage we cherish sweet, creamy, and oh-so-festive.
But, why the christmas tree? well, it's a nod to the cheerful spirit of the season, recalling decorations, trees, and everything merry we associate with the holidays.
Nowadays, this cheesecake is not just popular at family gatherings; it’s become a beloved go-to for potlucks and holiday parties think about how you’ll wow your guests with this stunning centerpiece!
Your New Favorite Little Debbie Christmas Tree Cheesecake
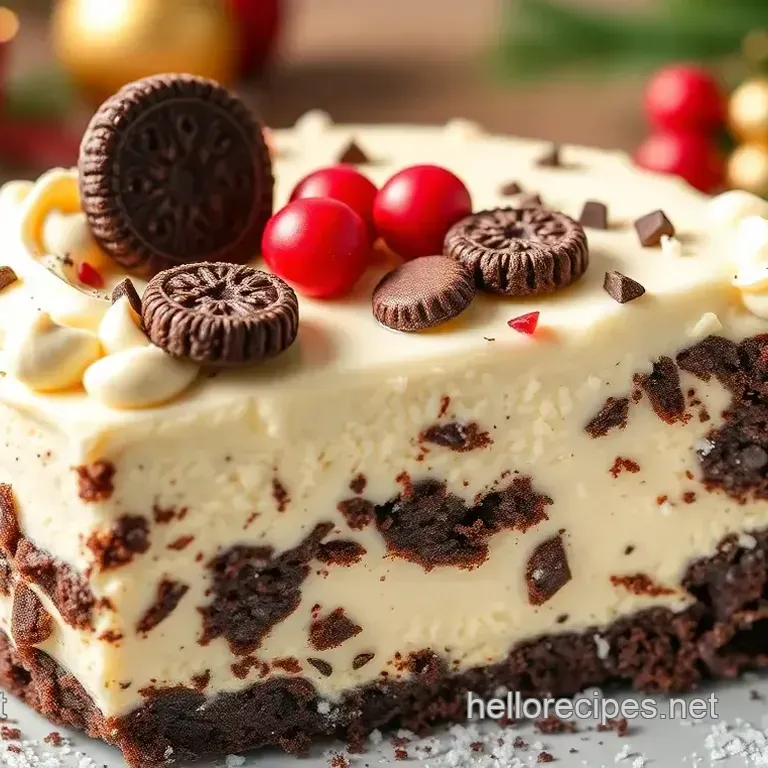
What sets this cheesecake apart are its unique flavor combinations the rich chocolate cookie crust balances perfectly with the creamy, tangy filling.
Not only is the technique manageable, but it’s also foolproof if you follow a few expert tested methods. i still giggle when i think back on my first attempt, which left my kitchen resembling a flour bomb went off!
Take it from me, prepping your ingredients and making sure they're at room temperature makes all the difference in avoiding that overly lumpy filling we all dread.
To save time, i’ve got some nifty tips! looking to impress without the stress? you can prepare the crust and filling a day ahead, chill it, and simply decorate right before serving.
This way, you can kick back with a cup of cocoa while your cheesecake takes the spotlight!
Health and Nutrition Highlights
Let’s not forget about nutrition in this sugar laden world of festive desserts. while indulging is part of the joy, this cheesecake still manages to include some key nutritional benefits.
You’ve got eggs and cream cheese, which bring protein to the plate. however, if you’re keeping an eye on calories, you might explore a few lower fat alternatives .
The beauty of cheesecake is its versatility! you can swap in low-fat cream cheese or use a gluten-free crust option without sacrificing taste.
As with all good things, moderation is key, so sharing this delightful dessert with family and friends is not just tasty but also keeps those serving sizes reasonable! Just imagine those Christmas dessert recipes you’ll be remembered for!
Recipe at a Glance
- Preparation Time: 30 minutes
- Cooking Time: 60 minutes (plus chilling time)
- Total Time: 90 minutes (plus 4 hours chilling)
- Serving Size: 12 servings
- Difficulty Level: Medium
And now, let’s dive right into what you’ve all been waiting for the ingredients! you'll have everything you need, whether it's chocolate covered fun or a creamy landscape to delight your taste buds.
Get ready to mix, bake, and chill your way to a little debbie christmas tree cheesecake that’ll become an instant holiday classic.
So, let’s gather those magical ingredients and embark on a flavorful journey that’ll fill your kitchen with joy.
Essential Components Guide
Premium Core Ingredients
When whipping up your Little Debbie Christmas Tree Cheesecake , you gotta start with the best ingredients. Trust me, it makes a world of difference. Here’s a rundown of what you need:
For the Crust:
- 1 ½ cups crushed chocolate wafer cookies : These are your base and set the tone. Look for deeply chocolaty cookies; a rich flavor is key.
- ½ cup unsalted butter, melted : Grab the unsalted stuff; it gives you control over the salt balance.
- 2 tablespoons granulated sugar : Just enough sweetness to kick things off nicely.
For the Cheesecake Filling:
- 2 (8-ounce) packages cream cheese, softened : Quality matters here. Aim for a cream cheese that has no funky additives. Softening it ensures a smooth mix.
- 1 cup granulated sugar : This is your sweetener. You want fine sugar for easy incorporation.
- 1 teaspoon vanilla extract : Use pure vanilla for that incredible aroma. It'll elevate the flavor to another level.
- 3 large eggs : Make sure they're at room temp; this helps everything blend more evenly.
- 1 cup sour cream : I love this for creaminess, plus it subtly cuts through the sweetness.
- 1 cup heavy cream : That’s the magic creamy touch right there.
For the Topping:
- 1 (8-ounce) container whipped topping (Cool Whip) : Optional but totally worth it for that fluffy finish.
- 2 tablespoons powdered sugar : Adds a touch of sweetness without the granule texture.
- ½ teaspoon green food coloring : Gets you that festive vibe, but it's totally optional.
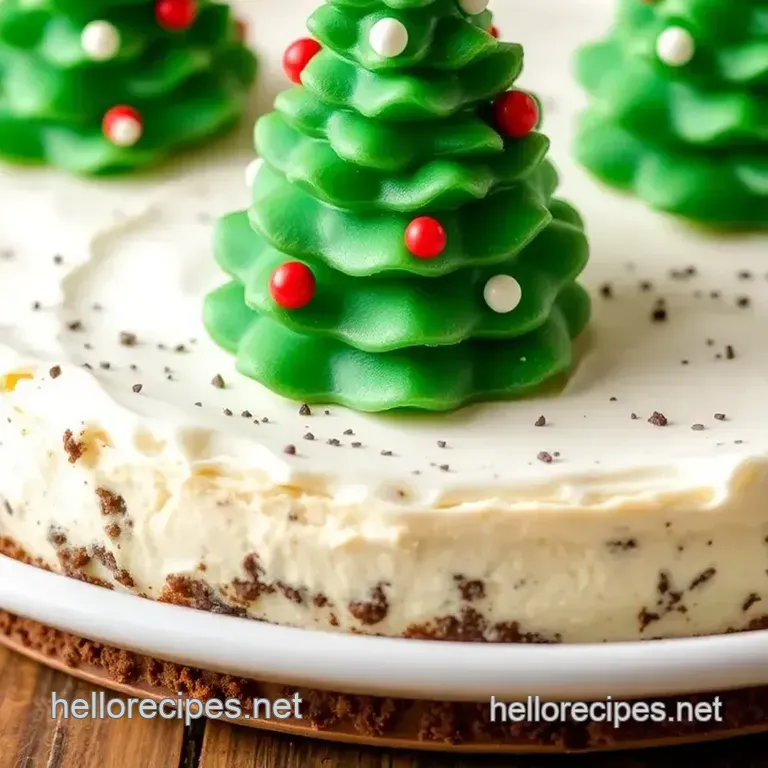
- 12 mini chocolate trees : These are the little stars of the show super cute!
- Festive sprinkles : Because who doesn’t love sprinkles, especially during the holidays?
Storing your ingredients is key. keep your creams in the fridge and those cookies sealed tight so they don’t turn stale.
I’d even consider slicing them while they’re still fresh and storing them in an airtight container.
Signature Seasoning Blend
Let’s not forget about the little flavor boosts. Not exactly a spice blend but some smart choices go a long way:
- Cinnamon is a classic in holiday desserts, lending warmth.
- Nutmeg, albeit sparingly —it can make cheesecakes sing if used right.
- A dash of salt always helps balance sweetness, so don’t skip it when combining your crust.
Smart Substitutions
So I’ve been there ran out of an essential ingredient or two. No panic, just improvisation!
- If you need a different crust (graham crackers work brilliantly) or even Oreos if you’re itching for a hint of mint chocolate!
- For the cream cheese, look for non-dairy alternatives if lactose is an issue.
- Need a lower fat version? Swapping full fat creamy ingredients for lighter versions can work but watch out, the texture may change a tad.
- Seasonal swaps like using pumpkin spice in the filling give a cool twist if you feel adventurous.
Kitchen Equipment Essentials
You don’t need a ton of gadgets to conquer this cheesecake, but a few key tools make it all smoother and fuss free:
- 9 inch springform pan : A must have. It makes it easy to remove without the usual cheesecake struggle.
- Electric mixer : Nothing beats it for whipping up a smooth filling, which means no lumps.
- Measuring cups and spoons : Get the right measurements for consistent results. No one wants to guess trust me.
- Rubber spatula : For scraping every bit of delicious filling out of the bowl. You don't want to waste a single ounce, right?
Pro Ingredient Tips
When it comes to selection secrets, it’s all about trusting your gut . Feel that cream cheese if it feels a bit gritty, put it back. You want that creamy goodness!
- Look for cream cheese in blocks rather than tubs; they’re often more stable for baking.
- Invest in good quality chocolate wares. This isn’t the time for cheap imitations.
- Consider stocking your pantry with butter, sugar, and flour you can whip up a last minute dessert anytime!
Now that you have all the ingredients lined up, let's dive into the step-by-step instructions . They’re simple, I promise! Just follow along, and soon you’ll be savoring that Little Debbie Christmas Tree Cheesecake that will have your family raving and dreaming of sugar plums!
Professional Cooking Guide
When it comes to whipping up something special, like my beloved little debbie christmas tree cheesecake , preparation is key.
Let’s dive into the essential steps, so we can knock this out of the park.
Essential Preparation Steps
Mise en place details: first things first, gather up all your ingredients. get everything out on the counter the chocolate wafer cookies, cream cheese, sugar, and so on.
It keeps chaos at bay and means you won’t have to run around the house searching for that last packet of vanilla.
Been there, done that, and it's not pretty.
Prep techniques:
for the crust, i like to crush the chocolate wafer cookies in a zip-top bag using a rolling pin.
It’s minimal clean-up and feels great! just keep a few large chunks, as they’ll add some texture.
Time management:
this recipe takes roughly 90 minutes, plus chill time. if you remember to prep the cheesecake first, you can pop it in the oven while you clean up the mess.
Trust me, it makes everything smoother.
Organization tips:
keeping your workspace tidy helps maintain focus. use bowls for smaller prep tasks, like mixing your topping ingredients.
Less clutter means fewer distractions, and we want all our attention on that luscious cheesecake.
Professional Cooking Method
Step-by-step Process
Preheat the Oven:
Set that oven to 325°F (160°C). This sets the stage for the baking magic to happen.Prepare the crust:
mix your crushed cookies, melted butter, and a smidge of sugar in a bowl. press this mixture firmly into a 9 inch springform pan.I find using the bottom of a measuring cup helps make it even.
Bake the Crust:
Throw that crust in the oven for about 10 minutes, then let it cool slightly. This really brings out the flavor.Make the cheesecake filling:
in a mixing bowl, beat the softened cream cheese with an electric mixer, and oh, make sure it’s nice and creamy.Then add sugar and vanilla, mix in the eggs one at a time, and fold in the sour cream and heavy cream.
Voila!
Pour Filling Into Crust:
Pour this creamy goodness over that cool crust. Just use a spatula to spread it smooth.Bake the cheesecake:
this is the nail biting part! bake for 50-60 minutes until the center is a little jiggle-y.Take it out and trust the process; it firms up as it cools.
Cool and chill:
let it cool at room temp for about 15 minutes, then cover with plastic wrap and refrigerate for at least 4 hours.Overnight is even better if you can wait.
Prepare the Topping:
Whip together the topping ingredients yeah, that lovely whipped topping and a dash of powdered sugar with green food coloring. It’ll be festive!Decorate the Cheesecake:
Spread your green heavenly topping over the cheesecake and add those cute mini chocolate trees and sprinkles if you're feeling extra.Serve:
Carefully remove the cheesecake from the springform pan, slice, and dig in. You might even hear the angels sing.
Expert Techniques
Professional Methods:
Don’t rush the chilling process! The flavors deepen, and the texture improves. It's hard to resist peeking, but patience pays off.
Critical Steps:
The key here is to keep an eye on the cheesecake while baking. Underbaked is better than overbaked!
Precision Points:
When beating eggs in, ensure no visible yolk remains for that dreamy filling.
Quality Checks:
Before removing from the pan, tap it gently. If it jiggles too much, give it a few more minutes in the oven.
Success Strategies
Troubleshooting Tips:
If cracks appear, don’t fret! Top it with more whipped topping and sprinkles; no one will know!
Quality Assurance:
Always use fresh ingredients, especially your cream cheese; it makes such a difference.
Perfect Results Guide:
A chilled cheesecake tastes best. So, trust your refrigerator and let it do its work.
With this ultimate guide, you're well on your way to creating a Little Debbie Christmas Tree Cheesecake that’ll make any holiday gathering sing.
Additional Information
Before we wrap things up, let’s talk about some fun variations and serving ideas that can really take your cheesecake up a notch.
Whether you want to swap some ingredients or try some creative presentations, i’ve got you covered!
Master Chef's Advice
Professional Insights
Okay, friends, let’s chat a bit about some pro tips that could really take your little debbie christmas tree cheesecake from ordinary to extraordinary.
One of my favorite chef tricks is to mix in a touch of sour cream not just for richness, but for that incredible tangy kick.
It’s like a secret weapon in the baking world!
Expert Techniques
When you're working with cream cheese, make sure it’s at room temperature. don’t go thinking you can skip this bit it’ll make your life so much easier when you’re mixing everything together.
I learned this the hard way back in the day when i used cold cream cheese and ended up with a lumpy filling, which, trust me, is not what you want.
Kitchen Wisdom
A lot of home cooks worry about their cheesecake cracking. here’s a little wisdom: keep an eye on it as it bakes! it should be set at the edges but still have a slight jiggle in the middle.
Once it's out, don’t rush the chilling part! let it cool in the oven with the door ajar for a bit before moving it to the fridge.
Success Guarantees
And honestly? the real guarantee for a cheesecake that’ll have your friends begging for seconds is patience. if you let everything chill properly and don’t skimp on quality ingredients, you’re golden.
Trust me , the taste will reflect all that love you put into it!
Perfect Presentation
Plating Techniques
Now let’s talk presentation, because we all eat with our eyes first, right? when serving your cheesecake, i like to slice it into clean pieces using a warm knife just dip it in hot water, wipe it off, and slice.
Voila! smooth cuts every time!
Garnish Ideas
As for garnishes, you can get super creative. festive sprinkles are always a hit, or you can use some crushed chocolate cookie crumbs to sprinkle on top as a nod to the crust.
And hey, if you find cute mini chocolate trees, throw those on top, and you’ll have an instagram worthy dessert.
Serving Suggestions
Serve it alongside a dollop of whipped cream or even some fresh berries. i’ve found that a vibrant pop of color makes everything look even more festive and inviting.
Your guests will be so impressed!
Visual Appeal Tips
Play around with textures when presenting your dish. the light fluffiness of the whipped topping complements the rich creaminess of the cheesecake.
Layering those different textures makes your dessert not just tasty, but a real showstopper.
Storage and make-ahead
Storage Guidelines
If you’ve got leftover slices (which is rare, but it happens), store them in an airtight container in the fridge.
They’ll be good for about a week, but i dare you to let them last that long; they’re that good!
Preservation Methods
You can also freeze the cheesecake for up to three months! just pop it into an airtight container and let it freeze solid.
When you're ready to indulge again, simply thaw it in the fridge for a day.
Reheating Instructions
Now, i wouldn’t recommend reheating cheesecake in the microwave, unless you want it to turn all weird and mushy. instead, let it come to room temperature for the best flavors to come through.
Freshness Tips
And here’s a little tip: always check the date on your ingredients, especially cream cheese! Nothing ruins a great recipe faster than bad dairy.
Creative Variations
Flavor Adaptations
Feeling adventurous? Swap out the vanilla for almond extract, or add a swirl of melted chocolate through the batter. Or if you're up for a flavor explosion, try mixing in some peppermint essence for that holiday vibe!
Dietary Modifications
If you’ve got guests with dietary restrictions, no worries! you can absolutely make a gluten-free crust using gluten-free cookies, and swap out the cream cheese and whipped topping for dairy-free versions.
It still tastes amazing .
Seasonal Twists
Come summer, consider adding fresh fruits on top think berries or even a mango compote as an alternative topping!
Regional Variations
For a nod to regional flavors, i once had a version that used honey and served it with a drizzle of local syrup it was honestly a revelation.
Play around and make it your own!
Complete Nutrition Guide
Detailed Breakdown
Before you dive into this cheesecake, you might be wondering how indulgent it really is. each slice weighs in at about 350 calories, which isn’t bad for a holiday dessert packed with flavor.
Health Benefits
You’ve got cream cheese, which offers calcium and some protein. It’s certainly more of a treat than a health food, but hey it’s about balance, right?
Dietary Information
This recipe also contains quite a bit of fat due to the cream and cookies. If you’re looking to lighten things up, consider low-fat alternatives next time.
Portion Guidance
Think about serving size 12 pieces means you can share the love (and calorie count). Don’t be shy about slicing those generous portions, though; it’s Christmas, after all!
Expert FAQ Solutions
Common Concerns
A common question I hear is, “Why did my cheesecake crack?” Remember, overbaking is a major culprit. Embrace that jiggle!
Expert Answers
And if your cheesecake sinks a bit in the middle after cooling, don’t fret this can happen, too. Just cover it up with whipped topping, and call it rustic!
Troubleshooting Guide
If you’re finding it hard to get the crust to hold together, add a smidge more melted butter. That should do the trick to help it stick.
Success Tips
Lastly, always taste your batter before pouring it in the crust! Adjusting sweetness right then can save you if you find it a bit off.
To wrap it all up, making your own little debbie christmas tree cheesecake is not just about the ingredients; it’s about the love you pour into every layer.
Take your time, enjoy the process, and celebrate the joy of creating something special. happy baking, everyone!
Little Debbie Christmas Tree Cheesecake

