The Heritage Apple Pie Perfectly Spiced Filling Beneath a Crumbly Allbutter Crust
- Unearthing the Secrets to Our Signature Heritage Apple Pie
- Why This Recipe Outshines the Everyday Bakery Offering
- Assembling the Perfect Components for Flaky Success
- Mastering the Dough: Achieving True Pastry Flakiness
- The Art of Filling Preparation: Cooking Down the Apples
- Assembling and Finishing Touches Before the Oven
- Troubleshooting Common Pitfalls in Your Baking Journey
- Elevating Your Final Presentation with Serving Suggestions
- Recipe FAQs
- 📝 Recipe Card
Unearthing the Secrets to Our Signature Heritage Apple Pie
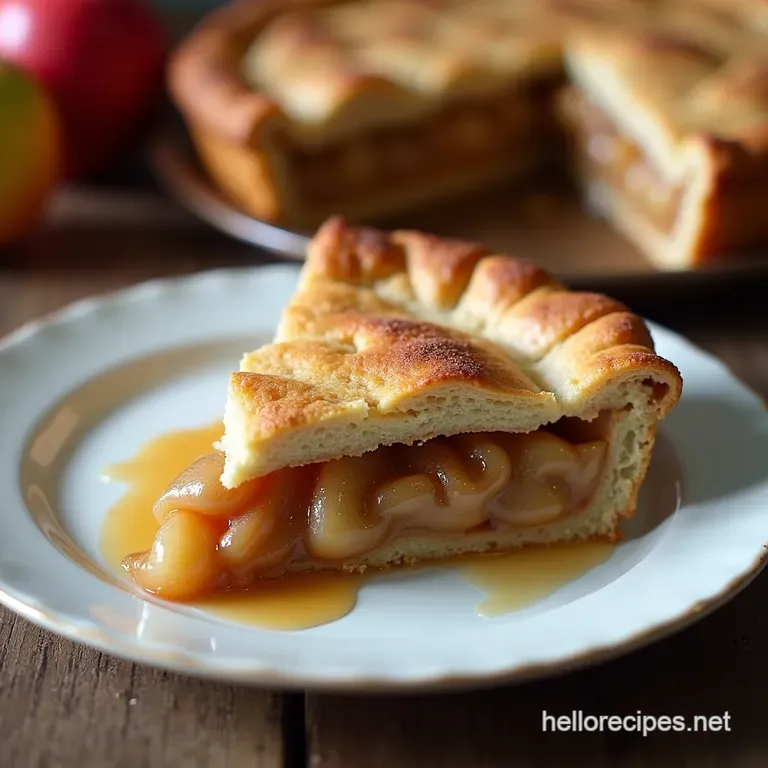
There is a certain magic woven into the fabric of a truly great Apple Pie . It’s more than just a dessert; it's a comforting tradition, a centrepiece for family gatherings, and the ultimate test of any baker's skill.
While you can certainly grab a serviceable slice from a high street bakery, nothing compares to achieving that perfect harmony of textures and tastes right in your own kitchen. This Homemade Apple Pie Recipe is designed to deliver precisely that a deep, fragrant filling cradled by a crust so shatteringly flaky it practically dissolves on the tongue.
We are aiming for that ideal slice where the spiced apple interior sings loudly against the rich, buttery backdrop of the pastry.
Why This Recipe Outshines the Everyday Bakery Offering
Many commercial pies rely on shortcuts, often substituting flavourful butter with less expensive fats or using pre-cooked fillings that lack vibrancy. Our approach, however, honours the craft, focusing on quality components and technique. The result is an unmistakably superior bake that commands attention.
The Quest for the Quintessential Comfort Bake
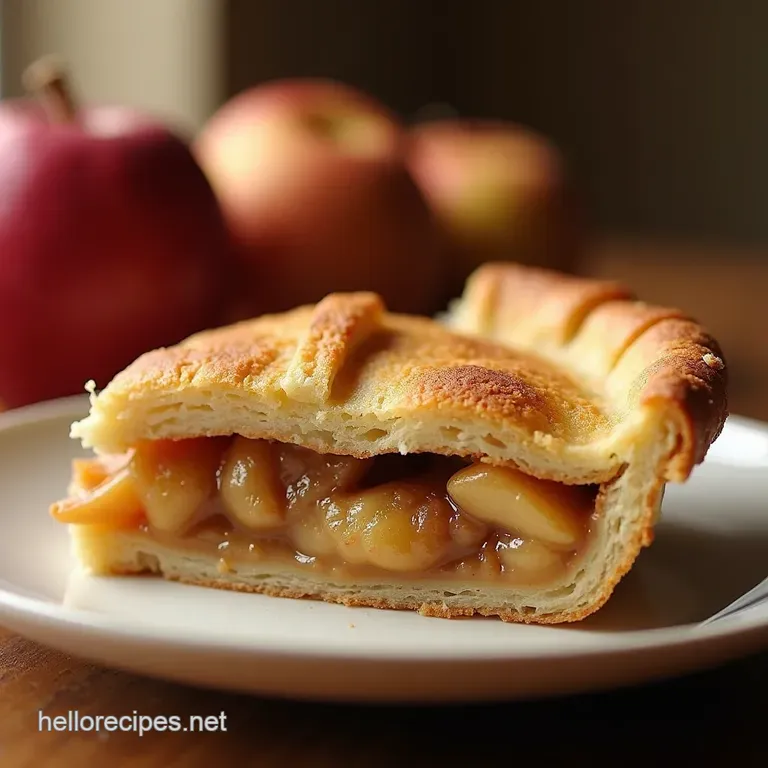
When chasing that quintessential comfort bake, the balance of the filling is paramount. We use a judicious blend of firm, slightly tart baking apples ensuring the final product holds its shape and doesn't turn to complete mush.
Peeling, coring, and slicing the fruit to a consistent ¼-inch thickness is the first crucial step toward success. This uniformity guarantees even cooking throughout the filling, preventing those frustrating pockets of crunchy apple amidst soft ones.
Defining the 'Pub-Style' Flavor Profile
What sets this particular recipe apart is its slight nod to a rich, robust "Pub-Style" flavour profile. This means leaning into warmth rather than just sweetness. We achieve this depth using a careful measure of aromatic spices: a generous hand with cinnamon, balanced by nutmeg, and lifted with a whisper of allspice.
This blend elevates the natural sweetness of the fruit, creating a complex, warming sensation that pairs beautifully with the richness of the pastry.
Beyond the Basic: Integrating Tang and Sweetness
To prevent the Apple Pie Filling Recipe from becoming cloyingly sweet, we incorporate both light brown and granulated sugars, but the secret weapon is a bright splash of fresh lemon juice. This acidity cuts through the richness of the crust and prevents the overall flavour from falling flat.
It ensures that every bite offers a delightful interplay between sweet, tart, and spice. The inclusion of flour or cornstarch acts as the silent guardian, ensuring the juices thicken beautifully into a luscious syrup rather than a watery mess at the bottom of the dish.
Assembling the Perfect Components for Flaky Success
A perfect pie is built from perfect parts. Before we even think about mixing, we must ensure our ingredients are poised for success. This Easiest Apple Pie Recipe is genuinely easy once you respect the temperature requirements of the pastry components.
Selecting the Right Apple Varieties: Beyond Granny Smith
While the classic Granny Smith is indispensable for its tartness and structure, relying on just one type can yield a one-note experience. For the very best results in Homemade Pie Recipes , select a mix.
We aim for 3 lbs of apples in total, ideally blending firm, tart varieties (like Granny Smith) with slightly sweeter, crisp ones (like Honeycrisp or Braeburn). This multi apple approach provides textural integrity and a broader flavour spectrum.
The All-Butter Foundation: Pastry Ingredient Breakdown
For this double crust, we commit fully to unsalted butter. Measure out 1 cup plus 2 tablespoons of butter, ensuring it is profoundly cold and cut into small ½-inch cubes. The cold temperature is non-negotiable; those tiny, solid butter pieces are what create the steam pockets that result in a truly Flaky Pie Crust Recipe .
Alongside the butter, three cups of all-purpose flour, a tablespoon of sugar for browning, and one teaspoon of fine sea salt form the dry foundation.
Spice Blend Ratios for Maximum Aromatic Impact
The spice mixture demands respect. For the 3 lbs of apples, measure 1 ½ teaspoons of ground cinnamon, ½ teaspoon of ground nutmeg, and ¼ teaspoon of ground allspice. This precise ratio ensures that the spices perfume the air without overpowering the inherent flavour of the fruit.
Combine these with the sugars and the chosen thickener (3 tablespoons of flour or 2 tablespoons of cornstarch) before tossing them with the freshly sliced apples.
Must Have Equipment: Pans, Rollers, and Bench Scrapers
While you don't need a professional kitchen, certain tools make the journey to making a fantastic Apple Pie much smoother. A sturdy 9 inch pie dish, preferably ceramic or glass, allows you to monitor the bottom crust’s browning.
A heavy rolling pin is essential for evenly flattening the dough, and having a bench scraper on hand is invaluable for lifting and maneuvering the delicate raw pastry sheets without stretching or tearing them.
Mastering the Dough: Achieving True Pastry Flakiness
The dough making process is where precision truly pays off. This is the core of achieving that perfect texture that defines great Homemade Apple Pie .
Cold Butter Technique: How to Mix Without Overworking
Whether you use a food processor or a pastry blender, the goal remains the same: cut the cold butter into the flour mixture until the pieces resemble coarse crumbs, with some larger, pea-sized chunks still visible. These larger chunks are your future flakes!
Once the dry ingredients and butter are combined, drizzle in the ice water one tablespoon at a time mixing only until the dough just starts to clump together. Stop immediately. Over mixing develops gluten, leading to a tough, less flaky crust.
Chilling Times and Resting: Patience for Perfect Texture
After forming the dough into two slightly unequal discs (the larger one for the bottom crust), wrap them tightly in plastic wrap. These discs must now rest in the refrigerator for a minimum of two hours, though an overnight chill is superior.
This resting period allows the gluten to relax, making the dough easier to roll, and critically re-hardens the butter, guaranteeing those structural pockets during baking.
Related Recipes Worth Trying
- The Best Apple Pie Recipe Flaky Crust From Scratch — Tired of soggy bottoms Master the art of the Homemade Apple Pie with this detailed flaky crust recipe Deeply spiced filling awaits
- The Best Flaky AllButter Pie Crust Recipe No Shortening — Forget the box This homemade pie crust recipe delivers gloriously flaky layers using only butter Perfect for any pie from savory to sweet Get the technique...
- Silky Dulce de Leche Cream Pie with PecanGraham Crumble — Make this showstopper Caramel Cream Pie featuring a crunchy Pecan Graham Crumble A decadent dessert recipe thats easier than you think
The Art of Filling Preparation: Cooking Down the Apples
While the dough is chilling, focus your attention on the filling. Some bakers insist on a pre-cook, but for a beautiful, Rustic Apple Pie Recipe that maintains some texture, we rely on the high heat of the oven, assisted by careful seasoning.
Pre-Cooking the Filling: Preventing the Soggy Bottom Dilemma
To actively combat the dreaded soggy bottom, we ensure our fruit mixture is seasoned and allowed to macerate slightly while we roll the dough. The combination of sugar drawing out moisture and the flour/cornstarch binding that moisture is usually sufficient.
However, if you notice an excessive amount of liquid pooling in the bottom of your mixing bowl after 20 minutes, carefully spoon off the excess liquid before transferring the apples to the crust.
Assembling and Finishing Touches Before the Oven
The moment of assembly brings the two major components crust and filling together. Precision here ensures a sealed, beautiful finish when your Apple Pie In Oven is complete.
Crimping Edges and Venting Steam for Golden Perfection
After carefully settling the apple mixture into the chilled bottom crust and dotting the top with small knobs of reserved butter, drape the top crust over the apples. Trim the overhang to about one inch, then tuck the top edge under the bottom edge and crimp them securely together. This seal is vital.
Finally, cut 4 to 5 distinct slits in the top crust. These vents allow the inevitable steam generated by the cooking apples to escape, preventing the crust from rupturing wildly or becoming saturated.
Finishing Touches: The Golden Sheen
For that professional, deep golden brown finish, brush the entire top surface lightly and evenly with an egg wash (one egg beaten with a splash of milk or water). Follow this immediately by sprinkling generously with coarse Turbinado sugar.
This adds both shine and a delightful, crunchy texture contrast to the finished bake.
Troubleshooting Common Pitfalls in Your Baking Journey
Even with the best intentions, baking can present challenges. If your pie begins to look less than perfect during baking, don't panic we have fixes.
If you notice the delicate edges of your crust achieving a deep mahogany colour long before the centre of the Apple Pie looks done (typically around the 30-minute mark), simply fashion a ring or shield from aluminum foil. Loosely drape this over the crimped edges.
This shields the vulnerable crust from direct heat, allowing the apples more time to soften and the internal temperature to rise adequately.
Elevating Your Final Presentation with Serving Suggestions
Once the pie emerges from the oven, the hardest part begins: waiting. The initial bake time (60– 75 minutes total) must be followed by a mandatory cooling period of at least three to four hours on a wire rack.
This resting time allows the pectin and starches in the filling to fully set, ensuring you get clean, firm slices rather than a slump of hot fruit.
The Ideal Accompaniments: From Custard to Whipped Cream
A slice of this exceptional Apple Pie begs for a perfect counterpoint. While a scoop of high-quality vanilla bean ice cream is timeless, consider elevating the experience with a rich, warm vanilla custard sauce poured generously alongside the slice.
For a purely British indulgence, a generous smear of thick, cold clotted cream melts beautifully over the spiced fruit.
Creative Variations: Exploring Cranberry and Savory Twists
Once you master this classic foundation, experimentation is encouraged. For a wintery twist, incorporate a cup of fresh or frozen cranberries into the fruit mix; the extra tartness pairs wonderfully with the spice blend.
Alternatively, for a truly unexpected treat, a slight reduction in the sugar and the addition of a hint of black pepper can push this into an intriguing, almost savoury dessert territory, proving the versatility of this foundational Apple Pie Recipe .

Recipe FAQs
My Apple Pie filling always seems runny after it cools down what am I doing wrong?
Ah, the dreaded runny bottom! This usually happens because the filling hasn't cooked long enough for the thickener (flour or cornstarch) to fully activate. Make sure you bake until the juices bubbling through the vents are visibly thick, not watery.
Also, remember the golden rule: you must let your Apple Pie cool completely at least 3 to 4 hours before slicing, otherwise, it won't set properly.
What’s the secret to getting that perfectly flaky, buttery crust?
The secret sauce is temperature, my friend! Ensure your butter and water are ice cold that’s non-negotiable for a proper flaky crust. When mixing, work quickly and stop mixing as soon as the dough just comes together; you want visible pea-sized chunks of butter remaining.
These little frozen butter pockets create steam in the oven, leading to that lovely, shattering texture.
Do I really need to chill the Apple Pie dough, and for how long?
Yes, absolutely, think of it as giving the gluten a proper sit-down! Chilling the dough for a minimum of two hours (or even overnight) lets the gluten relax, making the pastry much easier to roll out without shrinking back.
It also firms up the butter again, which is essential for that flaky rise when it hits the hot oven.
Can I make this Heritage Apple Pie ahead of time, and how should I store leftovers?
You certainly can prepare this ahead! You can keep the pastry dough wrapped in the fridge for up to three days, or even freeze it for a month. Once baked, leftover Apple Pie is best stored covered at room temperature for up to two days, or refrigerated for up to four.
Reheat slices gently in a moderate oven to crisp the crust back up never microwave it if you value your pastry!
I don't have Bramley apples; which other apples work well in this recipe?
If you can’t get your hands on traditional tart Bramleys, aim for a mix! A great combination is using firm, tart apples like Granny Smith alongside a sweeter variety like Honeycrisp or Jonagold.
Mixing apples provides complexity in flavour and ensures some apples hold their shape while others soften beautifully during the bake.
I’m worried about the edges burning before the centre is cooked; any tips?
That’s a classic baking conundrum, especially with rich, buttery crusts! After the initial 15-minute blast at high heat, if the edges start looking too dark, simply create a ring or "pie shield" out of aluminum foil.
Place this loosely over the rim of the pie dish and continue baking at the lower temperature until the centre is bubbling well.
Heritage Apple Pie Recipe

Ingredients:
Instructions:
Nutrition Facts:
| Calories | 1051 kcal |
|---|---|
| Protein | 6.4 g |
| Fat | 16.5 g |
| Carbs | 95.8 g |
| Fiber | 12.2 g |
| Sodium | 5033 mg |
