Classic Homemade Apple Pie Filling
- A Slice of Nostalgia: Making Apple Pie Filling
- Baking Up Some History
- Benefits That Make You Smile
- Let’s Get to the Good Stuff
- Essential Ingredients Guide: The Heart of Your Kitchen
- Perfecting Your Professional Cooking Method
- Delicious Secrets to the Perfect Apple Pie Filling
- Frequently Asked Questions
- 📝 Recipe Card
A Slice of Nostalgia: Making Apple Pie Filling
Oh my gosh, do you remember the smell of freshly baked apple pie wafting through the house during thanksgiving? i can still picture my grandmother pulling it out of the oven, the flaky crust golden and speckled with sugar.
It’s moments like these that make me think about the apple pie filling recipe i want to share with you today.
You know, the one that's warm, comforting, and just downright irresistible.
Let’s dive into this classic. whether you're channeling your inner baker or just trying to impress your family during the holidays, this apple pie filling recipe will do the trick.
It'll have you reminiscing about cozy autumn days and family gatherings in no time.
Baking Up Some History
Did you know that apple pie has roots going way back? we're talking hundreds of years, with origins in europe before it became a staple in american culture.
It's the ultimate comfort food, especially when you think of all those pioneer stories you read in school. today, it’s super popular for a reason.
It's not just a pie; it’s a slice of americana. you feel me?
Now, let’s talk about the nitty gritty. this recipe is as easy as pie (literally). you can whip it up in about 55 minutes , with just around 15 minutes of prep time and 10- 15 minutes of cooking .
Trust me when i say, anyone can tackle this there are no fancy skills required. and did i mention? it also makes about 4 cups of delicious filling.
Enough for a big ol’ 9 inch pie or two smaller ones!
As for costs, if you’ve got apples on hand, this recipe is super budget friendly. you can grab some sugar and spices for less than your average tuesday coffee run.
Plus, the yield is more than enough to fill your home with the sweet scent of cinnamon and nostalgia.
Benefits That Make You Smile
Now, let’s chat about why this apple pie filling is simply the best homemade apple pie filling you’ll find. first up, the health benefits apples are packed with vitamins and fiber.
While desserts aren’t typically health food, you can at least feel good about sneaking in some nutrition, right? mixing in all those spices gives it an aromatic kick, too, which is always a win.
What makes this recipe shine is its versatility. whether you’re baking for a family dinner, a potluck, or just because it’s tuesday, this apple pie filling fits right in.
It’s great for special occasions, but let’s be real you don’t need a reason to indulge in a slice of warm pie!
Compared to store-bought alternatives, this apple pie recipe homemade is a game changer. you control the sweetness and spices, and nothing beats that homemade love.
Plus, you won’t have to sweat about any weird preservatives just good ol’ ingredients you can pronounce!
Let’s Get to the Good Stuff
So, are you ready to get your hands dirty? before we dive into the ingredients, just know this: you’re going to want to try this homemade apple pie filling in all sorts of delicious ways.
On top of that perfect buttery crust, imagine warm vanilla ice cream melting into it... heaven!
Stay tuned, and let’s grab those apples and spices because our easy pie recipe is just about to begin!
Essential Ingredients Guide: The Heart of Your Kitchen
So, you're ready to whip up something delicious, huh? well, let's dive into the essentials that’ll help you create the best homemade apple pie without a hitch.
Whether you’re aiming for that old fashioned apple pie vibe or something more along the lines of a best apple pie that even grandma would approve of, the ingredients are your key players.
Premium Core Components
First up, let's talk measurements . You can’t just toss in a pinch here and a dash there. Here's a quick breakdown:
- Granulated Sugar: 3/4 cup (150g)
- Brown Sugar: 1/4 cup (50g)
- Ground Cinnamon: 1 teaspoon (5g)
- Ground Nutmeg: 1/4 teaspoon (1g)
Why not measure in both us & metric ? it’s just easier for everyone! also, when purchasing, look for vibrant colors.
Apples should be firm and free from blemishes. they should smell like they belong in a pie, ya know?
Storage guidelines: Keep your apples in a cool, dry place. They usually stay fresh for about a week. Just remember, if they start to feel soft? Time to bake or toss!
Signature Seasoning Blend
You can’t have a stellar Apple Pie Filling Recipe without the right spices. Trust me, the spices make all the difference between “meh” and “oh my gosh!” You want a blend that includes:
- Essential spices: Cinnamon, nutmeg, and a pinch of salt are a must.
- Herb selections: Fresh thyme can actually pair nicely, surprisingly!
- Flavor enhancers: Don’t skip the vanilla extract . It takes the flavor up a notch.
- Regional variations: Curious about that? Just swap out cinnamon for pumpkin spice to give a twist, and wow your friends! A little Southern charm , if you will.
Smart Substitutions
Now, we all know things don’t always go as planned in the kitchen, right? If you find yourself short on an ingredient, no sweat!
- Common alternatives: Have maple syrup instead of granulated sugar? Use it! Just reduce the liquid elsewhere.
- Dietary modifications: Vegetarian? Use plant based butter for richness.
- Emergency replacements: No apples? Canned apple pie filling will work in a pinch, though homemade is a whole new ball game!
- Seasonal options: Berry season? Try using mixed berries for a fun twist on apple pie.
Kitchen Equipment Essentials
Alright, let’s not forget about the tools of the trade. You need a few must haves to make your life easier:
- Mixing Bowl: A large one, alright? You’ll be tossing ingredients here like a pro!
- Cutting Board and Knife: Seriously, a sharp knife and a stable board work wonders.
- Measuring Cups and Spoons: Don’t even think of eye-balling it measure, measure, measure!
Also, if you’ve got a random pan lying around, use that for cooking everything down nicely. No need to run out and buy specific tools! Make it work!
Bringing It All Together
Now that we’ve gone through the must haves, you’re probably itching to get to that Easy Pie Recipe , right? So, here’s the deal: you’re not just pulling ingredients together; you’re creating a memory!
Imagine your family gathered around, the smell of homemade apple pie wafting through the air. it’s nostalgia in a crust.
But trust me, there’s still the magic part ahead. you know, the actual instructions . that’s where the real fun kicks in.
Ready to roll up those sleeves and get cookin’? let’s make that classic homemade apple pie filling come to life!
Perfecting Your Professional Cooking Method
Cooking is an art, but let’s face it sometimes it feels like a chaotic mess, right? so, whether you’re trying to whip up the best homemade apple pie , or just dinner, let’s chat about how to make the process smoother with some professional cooking methods that’ll set you up for success.
Spoiler alert: you’re gonna love the apple pie filling recipe that we'll dive into!
Essential Preparation Steps
First things first, you gotta get organized! this is where mise en place comes into play. it’s a fancy french term that simply means “everything in its place.
” chop up your ingredients, measure your spices, and have your pots and pans ready before you hit the stove.
It’ll save you from running around like a chicken with its head cut off trust me on that!
Next, let’s talk timing. if you want to make that old-fashioned apple pie , you need to manage your time wisely.
Set a timer for every step especially when baking. you don’t want to end up with an overcooked crust! and organization? keep your workspace clear.
It’s a game changer. just think of it like cleaning up your craft room before starting a school project; it makes everything a lot less overwhelming.
Oh, and don't forget safety! Always use oven mitts and be careful with hot surfaces. Nothing ruins a baking mood faster than a nasty burn on your hand.
Step-by-step Process
Now let’s jump into the nitty gritty! Here are clear, numbered instructions for your new apple pie filling:
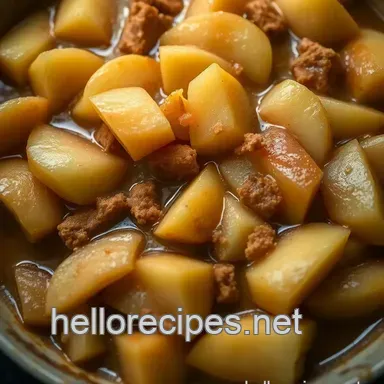
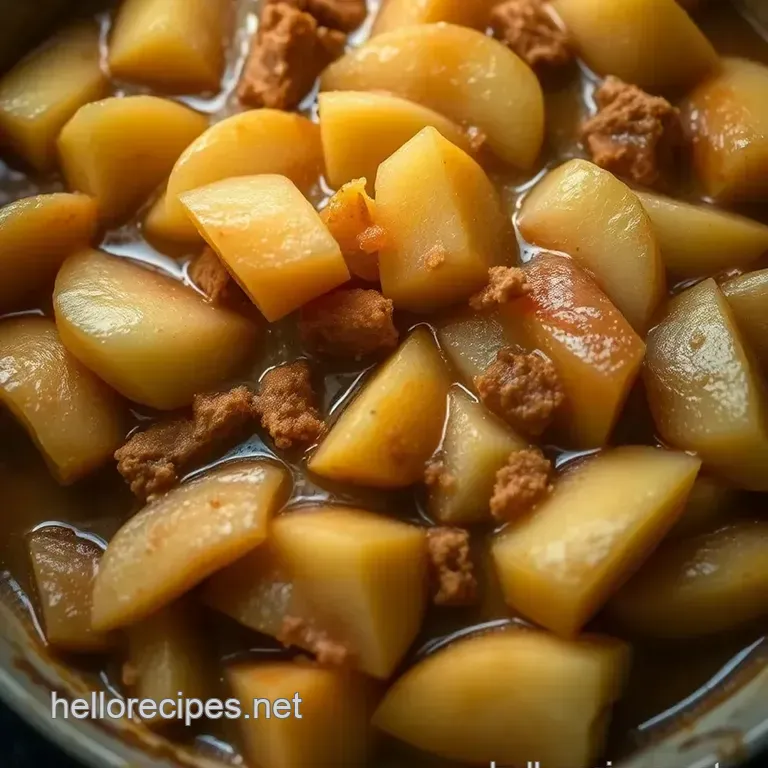
Prepare the Apples : Peel, core, and slice 6-8 medium apples (about 3 pounds). Toss them in a bowl.
Mix the Dry Ingredients : In another bowl, combine 3/4 cup sugar , 1/4 cup brown sugar , 1 teaspoon cinnamon , 1/4 teaspoon nutmeg , and a pinch of salt.
Add Lemon Juice : Drizzle 1 tablespoon of lemon juice over the apples and mix to coat. This keeps them from browning and adds flavor.
Combine : Sprinkle the dry mix over the apple slices and toss. Make sure they’re coated!
Cook the mixture : heat up a large skillet over medium heat . if you’re feeling indulgent, melt in 2 tablespoons of butter .
Add your apple mix and cook for 10- 15 minutes until they start to get tender.
Thicken the Filling : Stir constantly until it bubbles up and thickens to your liking. Remove it from the heat when ready.
Add Vanilla : Finally, stir in 1 teaspoon of vanilla extract and let that filling cool. This is the moment you realize you’re on your way to making the best apple pie ever!
Expert Techniques
Alright, now let’s mix in some expert techniques to elevate your pie game. one critical step is to use a mix of sweet and tart apples.
You’ll be pleasantly shocked at the depth of flavor! quality checkpoints? taste your filling before it cools. adjust sugar or spices if needed.
Oh, but if things go sideways like it’s too runny or too thick no worries! Just add more cornstarch to thicken or a bit more lemon juice if it’s too sweet.
Success Strategies
Don’t fall prey to common mistakes like not tasting as you go. you just can’t! your pie deserves that attention.
And remember, if you’re making ahead, chill that filling. it helps it hold its shape when you’re pouring it into a crust.
When baking, make sure your oven is at the right temperature around 425° f should do.
And for those who like a twist, think about spicing up your apple filling maybe toss in some ground ginger or even caramel! It can transform your homemade apple pies into something legendary.
So, there you have it! From preparation to success strategies, you’ve got the tools to create a stunning apple pie recipe homemade that will knock everyone's socks off.
Additional Information...
Keep exploring the beautiful world of baking, and never hesitate to experiment. the kitchen is your playground, after all! whether you're a newbie or a seasoned pro, every time you step in, it's a chance to create something delicious.
Happy baking, y’all!
Delicious Secrets to the Perfect Apple Pie Filling
Making an apple pie filling recipe that’s as good as grandma’s is no small feat. i mean, let's be real who doesn't want that perfect balance of tart and sweet apples, wrapped up in warm spices that'll make your cozy autumn dreams come true?
After testing this classic recipe a few times, i've unlocked some secrets that i can’t wait to share with you.
So grab your apron, and let’s dive into the juicy details!
Pro Tips & Secrets
Alright, first things first. my number one tip? always mix sweet and tart apples! granny smith combined with honeycrisp gives you that mouthwatering contrast.
Don’t skip the lemon juice either; it brightens everything up!
For those of you who are short on time (who isn’t these days?), peeling and slicing apples can feel like a chore.
Here’s a pro trick: use a handy apple peeler. it’s a game changer and will save you some precious minutes.
Oh, and about spices don’t skimp on the cinnamon . a healthy pinch of nutmeg can elevate the flavor profile, but if you want to kick it up another notch, sprinkle in a little ground ginger.
Trust me on this.
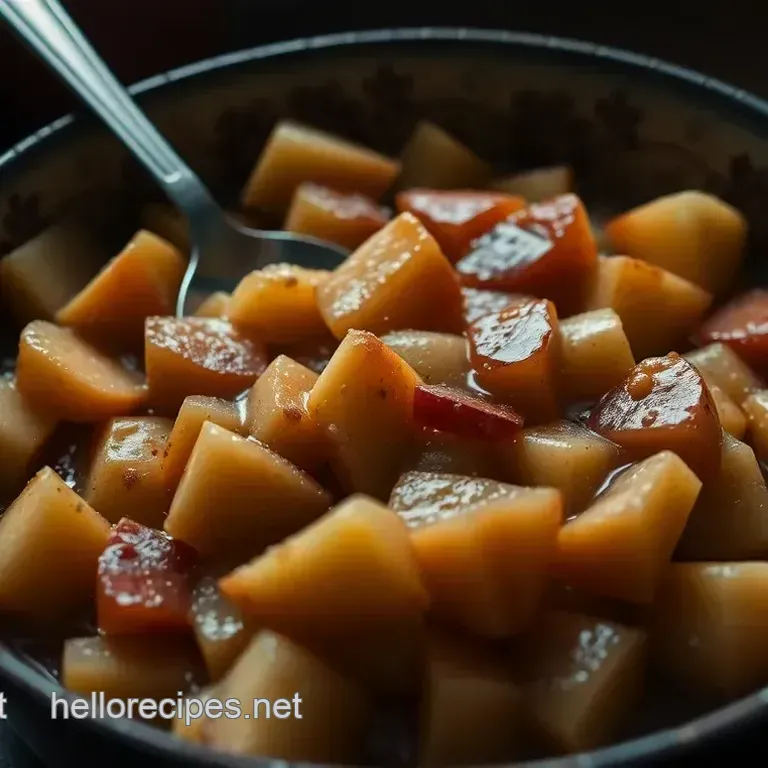
Perfect Presentation
Once your filling is all made and cooled down, it’s time to think about how to present it. After all, we eat with our eyes first. Plating is everything!
If you’re looking to impress, take that filling and be all chef like with some plating. use a large spoon to create a pretty pile in the center of your pie crust.
I like to add a bit of glaze on top to make it look glossy and inviting.
As for garnishes, a sprinkle of fresh mint or a dusting of powdered sugar goes a long way! It adds that pop of color and just looks stunning on the table.
Storage & make-ahead Magic
Alright, life happens we can’t always whip up homemade apple pies on the fly. here’s the scoop on storage: your apple pie filling can last in the fridge for about a week.
If you want to prep ahead, make it a few days in advance and pop it in a sealed container.
Want to keep it for longer? freeze it! just pour that filling into a freezer safe bag, squeeze out the air, and it’ll be good for up to three months .
Just remember to thaw it overnight in the fridge before using.
Creative Variations
Now, if you’re feeling a little adventurous while cooking, why not try adding some creative twists? Like, how about a Caramel Apple Filling ? Drizzle in some caramel sauce for extra sweetness!
Got dietary restrictions? you can swap out sugars for alternatives like maple syrup. and for seasonal variations, consider adding cranberries in the fall for a festive touch, or even some diced pears for a fun spin.
Complete Nutrition Guide
When it comes to food, knowledge is power. this homemade apple pie filling recipe contains about 180 calories per serving with a good dose of fiber from the apples.
It’s all about moderation, folks!
If you’re counting, remember that one serving is about 1/4 of a cup. Pair it with whole grain crust for a more health conscious option, and you can still enjoy dessert without the guilt!
Wrapping It Up
There you go! whether you’re baking for a potluck or just treating yourself to the best homemade apple pie , this apple pie filling recipe has got your back.
Each step can be modified to make it fit your style or taste.
So why wait? gather those apples and get to filling. you might even find that your filling becomes the star of the show, outshining the pie crust! trust me; your family will be begging for more of your homemade apple pies.
Happy baking!
Frequently Asked Questions
What types of apples are best for an apple pie filling recipe?
The best apples for apple pie fillings are tart varieties like Granny Smith or a sweet option such as Honeycrisp. A mix of sweet and tart apples creates a well rounded flavour that's just perfect for a hearty pie. British cooks often swear by Bramley apples for their tartness and ability to hold shape during baking!
How can I thicken my apple pie filling?
To thicken your apple pie filling, you can add cornstarch or all-purpose flour as noted in the recipe. If you prefer an even thicker consistency, consider increasing the amount to 3 tablespoons. Just remember to ensure the mixture is bubbling and gently simmering as this activates the thickening agents!
Can I use canned apples instead of fresh for this filling?
Yes, canned apples can be used in a pinch, but they won’t have the same fresh taste and texture as homemade. If you opt for canned, make sure to drain them well and reduce the sugar accordingly, since they often come packed in syrup. For a delightful adventuring spirit in the kitchen, fresh is always best!
What variations can I try with my apple pie filling recipe?
You can spice things up by adding ground ginger or cloves for a festive note, or even swirl in some caramel sauce for a rich twist. Incorporating raisins or nuts can also bring in a wonderful texture that complements the soft apples much like a rustic English crumble!
How long can I store my apple pie filling?
Your apple pie filling can be stored in the refrigerator for up to a week, so it's perfect for meal prep enthusiasts. For longer storage, consider freezing it in an airtight container for up to three months. Just remember to let it cool completely before sealing it up no one likes a soggy pie!
Is this apple pie filling recipe suitable for a gluten-free diet?
Absolutely! If you use cornstarch as the thickener instead of flour, you can create a gluten-free filling. Just be sure to also use a gluten-free pie crust to maintain the integrity of the dish. With a little care, everyone can enjoy a slice of this delightful British classic!
Classic Homemade Apple Pie Filling