Ultimate Crispy Baked Chicken Thighs
- Time: 5 min active + 40 min cook = Total 45 mins
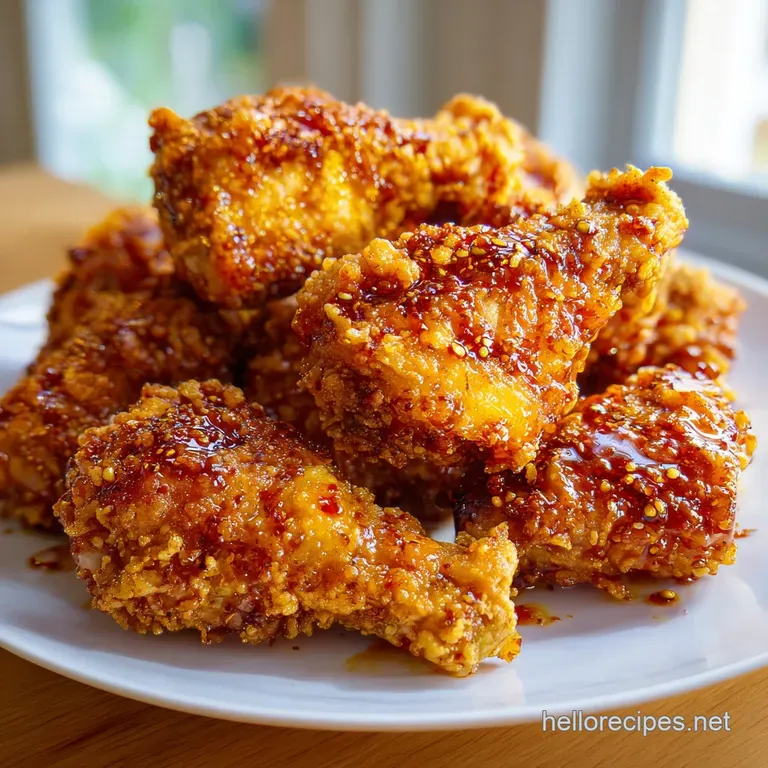
- Flavor/Texture Hook: Mahogany colored skin with a shatter crisp texture
- Perfect for: High protein weeknight dinners or budget-friendly meal prep
- Getting the Crunch Right with Crispy Baked Chicken Thighs
- The Secret to That Shatter Crisp Skin
- Component Analysis for Maximum Flavor
- The Essentials and Smart Swaps
- Essential Gear for the Best Results
- Step-by-Step Guide to the Perfect Roast
- Fixing Common Texture Issues
- Adapting the Recipe for Different Needs
- Busting Common Kitchen Myths
- Storage and Zero Waste Guidelines
- Final Touches for a Great Plate
- Recipe FAQs
- 📝 Recipe Card
Getting the Crunch Right with Crispy Baked Chicken Thighs
That sound the sharp, distinct crackle of skin hitting the plate is exactly why I'm obsessed with this method. I grew up in a house where Sunday meant a slow roasted bird, a tradition passed down through generations of aunts and grandmothers who believed the only way to get skin right was a slow, steady heat.
But let's be real, who has six hours to wait on a Tuesday? I spent years trying to replicate that nostalgic crunch in a fraction of the time, often ending up with rubbery skin that felt more like a wet blanket than a crust.
The breakthrough happened when I stopped treating the oven like a slow cooker and started treating it like a convection engine. By shifting the focus to surface moisture and pH levels, I found a way to get those heavy hitting, traditional results in under an hour.
These Crispy Baked Chicken Thighs aren't just a meal; they're a cheat code for anyone who wants the soul satisfying comfort of a traditional roast without the time consuming labor.
You can expect a result that's velvety on the inside and genuinely crisp on the outside. We're talking about that deep, mahogany hue that makes you want to eat the skin first. It's a budget friendly approach that relies on smart chemistry rather than expensive ingredients, making it a staple for anyone who loves a fast, high impact dinner.
The Secret to That Shatter Crisp Skin
I used to think the secret was just high heat, but it's actually about how we handle the surface of the meat. When we remove moisture and tweak the skin's chemistry, the oven does the hard work for us.
Surface Dehydration: Removing moisture prevents the chicken from steaming in its own juices. This allows the skin to fry in its own rendered fat rather than boiling.
PH Alteration: Baking powder increases the skin's pH level. This breaks down the protein bonds, creating tiny bubbles that increase the surface area for more crisping.
Thermal Airflow: Using a rack lifts the meat off the pan. This lets hot air circulate under the chicken, so you don't get a soggy bottom.
Fat Rendering: At 425°F, the subcutaneous fat melts quickly. This effectively deep fries the skin from the inside out, similar to the technique used in a Whole 30 Roasted Chicken.
| Thickness | Internal Temp | Rest Time | Visual Cue |
|---|---|---|---|
| 1 - 1.5 inches | 165°F | 5-10 mins | Deep mahogany, skin pulls away from bone |
Component Analysis for Maximum Flavor
Not every ingredient here is just for taste; some are doing heavy lifting behind the scenes to ensure the texture is spot on.
| Ingredient | Science Role | Pro Secret |
|---|---|---|
| Baking Powder | Texture Modifier | Use aluminum free to avoid a metallic aftertaste |
| Smoked Paprika | Color/Aroma | Provides a "grilled" look without the outdoor mess |
| Olive Oil | Heat Conductor | Helps the rub adhere and kicks off the frying process |
| Kosher Salt | Moisture Draw | Draws out surface water for a better sear |
The Essentials and Smart Swaps
For these Crispy Baked Chicken Thighs, you don't need a fancy pantry. Just a few staples and some bone in, skin on thighs. Trust me, don't bother with boneless here; the bone acts as an insulator, keeping the meat velvety while the skin gets hammered by the heat.
The Lineup:
- 2 lbs bone in, skin on chicken thighsWhy this? Bone in stays juicier during over high heat roasting
- 1 tsp baking powderWhy this? Creates the micro bubbles for the crunch
- 1 tsp kosher saltWhy this? Coarser grains penetrate the skin more evenly
- ½ tsp black pepperWhy this? Adds a sharp contrast to the rich fat
- 1 tsp garlic powderWhy this? Doesn't burn as easily as fresh garlic at 425°F
- 1 tsp smoked paprikaWhy this? Gives that deep, charred color
- 1 tbsp olive oilWhy this? High smoke point and neutral flavor
Ingredient Swaps:
| Original Ingredient | Substitute | Why It Works |
|---|---|---|
| Olive Oil | Avocado Oil | Higher smoke point. Note: Virtually tasteless, great for very high heat |
| Smoked Paprika | Sweet Paprika | Similar color. Note: Lacks the "fire roasted" depth, tastes milder |
| Kosher Salt | Table Salt | Same salinity. Note: Use only 1/2 tsp as it's more concentrated |
Right then, before we get to the oven, let's talk about the gear. You don't need a professional kitchen, but one specific tool makes a world of difference.
Essential Gear for the Best Results
Most people just throw chicken on a baking sheet. That's where they go wrong. When the chicken sits directly on the metal, the bottom side steams in the released juices, leaving you with a soggy mess.
The real MVP here is the wire cooling rack. By elevating the thighs, you're creating a 360 degree heat chamber. The air flows underneath, ensuring that the bottom of the thigh doesn't just "sit" in grease, but actually roasts.
If you don't have a rack, you can bunch up some aluminum foil into small balls and balance the chicken on top of them, though a rack is far more stable.
You'll also want a rimmed baking sheet. The rims catch the rendered fat so your oven doesn't turn into a grease fire hazard. I usually use a standard 13x18 inch sheet, which gives the chicken plenty of room to breathe.
Step-by-step Guide to the Perfect Roast

Let's crack on. This process is quick, but the "pat dry" step is non negotiable. If you skip it, you're just making boiled chicken.
- Pat the chicken thighs extremely dry using paper towels. Note: Any surface moisture will turn into steam and ruin the crunch
- In a small bowl, whisk together the baking powder, salt, pepper, garlic powder, and paprika.
- Rub olive oil over the thighs, then coat them generously with the seasoning mix. Note: Try to get some rub under the skin for extra flavor
- Preheat your oven to 425°F (218°C).
- Place a wire cooling rack atop a large rimmed baking sheet.
- Arrange the thighs skin side up, leaving at least one inch of space between each piece. Note: Overcrowding creates steam, which kills the crispiness
- Roast for 35–40 minutes until the internal temperature hits 165°F (74°C) and the skin is mahogany colored.
- Remove from the oven and let the chicken rest on the rack for 5–10 minutes before serving.
Chef's Tip: For an even deeper color, I sometimes add a pinch of brown sugar to the rub. It caramelizes quickly at 425°F, giving you a dark, lacquered finish that looks professional.
Fixing Common Texture Issues
Even with a plan, things happen. Maybe your oven runs cold, or your chicken was extra juicy. Here is how to handle the most common hiccups.
Why Your Skin Stays Rubbery
Usually, this is a moisture problem. If the chicken wasn't patted dry or the oven wasn't fully preheated, the fat doesn't render fast enough to fry the skin. You might also be overcrowding the pan, which traps steam around the meat.
Why the Meat is Dry but Skin is Pale
This happens when the oven temperature is too low. The meat overcooks before the skin has a chance to crisp. Ensure your oven is actually at 425°F using an oven thermometer.
Dealing with Burnt Rub
If the paprika is charring too quickly, your rack might be too close to the top heating element. Move the oven rack to the middle or lower middle position to balance the heat.
| Problem | Root Cause | Solution |
|---|---|---|
| Soggy Bottoms | No airflow under meat | Use a wire rack or foil balls |
| Rubbery Skin | Surface moisture | Pat dry with paper towels twice |
| Dry Meat | Overcooked/Too high heat | Use a meat thermometer; pull at 165°F |
Common Mistakes Checklist:
- ✓ Pat chicken completely dry (do this twice if they're very wet)
- ✓ Preheat oven for at least 15 minutes before adding chicken
- ✓ Leave 1 inch of space between thighs to allow airflow
- ✓ Use a meat thermometer rather than relying on time alone
- ✓ Let the meat rest on the rack to avoid steaming the bottom
Adapting the Recipe for Different Needs
This base recipe is versatile. Once you have the "baking powder trick" down, you can change the flavor profile entirely. If you're craving something with a bit more heat, check out my Buffalo Chicken recipe for a similar over high heat approach.
Adjusting the Scale: - Cooking for two (Half Batch): Use a smaller baking sheet. You can reduce the cook time by about 5-10% because the oven doesn't have to work as hard to maintain heat with less meat. - Cooking for a crowd (Double Batch): Do NOT crowd the pan.
Work in two separate batches or use two separate baking sheets. If you put 12 thighs on one tray, they will steam and you'll lose the crunch. Only increase the spices to 1.5x, not 2x, to avoid over salting.
Method Comparison:
| Method | Time | Texture | Best For |
|---|---|---|---|
| Fast (This Recipe) | 45 min | Shatter crisp | Weeknights / Budget |
| Classic Slow Roast | 2-3 hrs | Tender / Rendered | Sunday Dinner |
Flavor Variations:
- Zesty Lemon Herb: Swap the paprika for dried oregano and thyme. Squeeze fresh lemon juice over the chicken after it comes out of the oven.
- Spicy Kick: Add 1/2 tsp of cayenne pepper or chipotle powder to the rub.
- Boneless Option: You can use boneless skinless thighs, but the cook time drops to about 20-25 minutes. Since there's no skin, the baking powder is less effective; I recommend a light dusting of cornstarch instead.
Busting Common Kitchen Myths
There's a lot of bad advice out there about roasting poultry. Let's set the record straight.
The "Searing Seals in Juices" Myth: You'll often hear that you need to sear chicken in a pan first to "seal" the juices. This is false. Searing adds flavor through browning, but it doesn't stop moisture from leaving. In this recipe, the high oven heat and the rest period do all the work for you.
The "Room Temp" Myth: Some say you must let chicken reach room temperature before roasting. For thighs, this isn't necessary and can actually be a food safety risk.
The high heat of 425°F penetrates the meat quickly enough that starting from the fridge doesn't negatively impact the result.
Storage and Zero Waste Guidelines
Don't let the leftovers go to waste. These thighs actually keep quite well, though the skin will lose some of its "shatter" in the fridge.
Storage: - Fridge: Store in an airtight container for 3-4 days. - Freezer: You can freeze cooked thighs for up to 3 months. Wrap them tightly in foil and then a freezer bag to prevent freezer burn.
Restoring the Crunch: Never microwave your leftovers. The microwave turns crisp skin into rubber. Instead, pop them back in the oven or an air fryer at 375°F for 5-8 minutes. This re renders the fat and brings back the crunch.
Zero Waste Tip: Save the bones! If you're using bone in thighs, don't toss the leftovers. Throw the bones into a pot with a carrot, an onion, and some celery. Simmer for a few hours to make a rich, collagen packed bone broth that's far better than anything you can buy at the store.
Final Touches for a Great Plate
Presentation is everything. Since these Crispy Baked Chicken Thighs have such a bold, mahogany look, you want to pair them with something bright and fresh to cut through the richness.
I love serving these on a platter with a side of roasted root vegetables or a crisp arugula salad. The acidity of a lemon vinaigrette or a splash of apple cider vinegar on the greens balances the salty, savory rub.
For the final touch, garnish with a sprinkle of fresh parsley or sliced scallions. The pop of green against the dark skin makes the dish look like it came from a bistro. Serve them immediately while the skin is still crackling that's when the experience is at its peak.
Recipe FAQs
How do you get crispy chicken thighs when baking?
Pat the skin extremely dry with paper towels and apply a baking powder rub. This eliminates surface moisture and creates a textured surface that crisps up in the oven.
Is it better to bake chicken thighs at 400 or 425?
Bake at 425°F (218°C). This higher temperature is necessary to render the fat quickly and achieve a mahogany colored, shatter crisp skin.
Can a diabetic eat baked chicken?
Yes. This recipe focuses on protein and spices without adding sugars or refined carbohydrates, making it a blood sugar-friendly choice.
Can I eat chicken thighs with IBS?
Yes. Baked chicken is generally well tolerated, though those with specific sensitivities should be mindful of the garlic powder.
Do I need to sear the chicken in a pan first to ensure the skin is crispy?
No, this is a common misconception. Using a wire rack at 425°F allows hot air to circulate around the meat, crisping the skin perfectly without pre-searing.
Can I microwave leftover chicken thighs to reheat them?
No, avoid the microwave. Microwaving turns the skin rubbery; instead, reheat in an oven or air fryer at 375°F for 5 8 minutes to restore the crunch.
What should I serve with these crispy thighs?
Pair them with roasted root vegetables or a savory side. If you enjoyed the roasted flavor profile here, see how we use similar savory elements in our homemade sausage stuffing.
Crispy Baked Chicken Thighs

