Classic Vanilla Ice Cream Recipe
- Recipe Overview
- Key Benefits
- Premium Core Components
- Signature Seasoning Blend
- Smart Substitutions
- Kitchen Equipment Essentials
- Keeping it Real
- The Art of Professional Cooking: Mastering Vanilla Ice Cream
- Essential Preparation Steps
- Step-by-Step Process
- Expert Techniques
- Success Strategies
- Topping It Off
- Pro Tips & Secrets for Homemade Vanilla Ice Cream
- Storage & Make-Ahead Tips
- Creative Variations
- Complete Nutrition Guide
- Wrap-up Time!
- Frequently Asked Questions
- 📝 Recipe Card
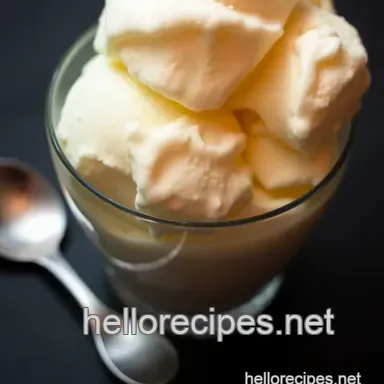
Oh my gosh, have you ever had a moment that just screamed summer? picture this: you’re at a backyard bbq, the sun is shining, and someone brings out a tub of homemade vanilla ice cream.
Just seeing that creamy treat brings back memories of childhood days, where i could hardly wait for the first scoop.
I remember how my grandma would gather all of us kids to help churn the ice cream, laughing and splattering as we went.
It’s funny how a simple dessert like vanilla ice cream can evoke such joy. today, i’m excited to share with you how to make vanilla ice cream that’ll have your friends and family begging for seconds, or thirds!
Recipe Overview
Did you know that vanilla ice cream has roots going all the way back to the 17th century? yup! european aristocrats first introduced this classic dessert, making it a staple on fancy dinner tables.
Fast forward to today, and this classic vanilla dessert still reigns supreme, whether you’re hosting a sunny picnic or enjoying a cozy night in.
And guess what? making this easy ice cream tutorial is a total breeze! you can whip it up in just about 15 minutes of active prep time, plus a little chilling, and it’s ready to serve in a few hours.
Even if you’re a novice in the kitchen, you can nail this creamy custard base recipe that’s so satisfying. don’t worry about breaking the bank either; this recipe is cost efficient and yields about 4 to 6 servings , making it perfect for the whole crew!
Key Benefits
Now, let’s talk benefits. first off, making your own ice cream comes with some serious health perks. you get complete control over your vanilla ice cream ingredients .
No weird additives, just rich, wholesome flavors that you can't resist. plus, because you’re using fresh ingredients, it’s a win for flavor and nutrition.
Who knew indulging your sweet tooth could also be relatively guilt free?
This chilled treat is perfect for all occasions, from birthday parties to cozy sunday dinners. it’s a family friendly dessert that never fails to satisfy those sweet cravings, especially on a hot summer day.
What’s even more fun? you can get creative with custom ice cream flavors ! feeling adventurous? toss in chunks of fresh fruit or even a swirl of peanut butter to jazz things up.
When comparing it to store-bought options, this homemade version typically beats them in flavor and texture hands down. you want that rich ice cream consistency ? it’s all in the homemade ice cream making process.
With just a little patience and effort, your creamy masterpiece will shine, making everyone wonder how you become such a pro in the kitchen!
As you can see, this recipe is an absolute game changer. so roll up those sleeves and get ready to dive into the joys of ice cream making! but first, let’s take a look at the ingredients you'll need to get started.
Sure thing! let’s dive right into the essential ingredients guide for how to make the best vanilla ice cream ever.
Trust me, once you whip this up in your own kitchen, those store-bought tubs will start to feel like, well, a little sad.
Premium Core Components
When making homemade vanilla ice cream, it all starts with knowing your vanilla ice cream ingredients . you only need a few core players, but man, do they need to be good quality.
First up, you’re gonna want 2 cups (480 ml) of heavy cream and 1 cup (240 ml) of whole milk .
Make sure it's not on the shelf for ages freshness is key. you can keep heavy cream in the fridge for about a month, but check that sell-by date! next, grab 3/4 cup (150 g) of granulated sugar .
Quality sugar delivers sweetness without that weird aftertaste.
Don’t skimp on 1 tablespoon of pure vanilla extract . seriously, no fake stuff here! real vanilla is what makes your ice cream sing.
Oh, and a bit of salt (about 1/2 teaspoon ) helps balance the sweetness. lastly, you’ll need 5 large egg yolks these create that rich custard base that everyone loves.
Store your ingredients in a cool, dry place; this will help maintain their quality and shelf life. if you’re unsure about freshness, always give things a sniff.
If it smells funky, toss it! you deserve the best ice cream.
Signature Seasoning Blend
Now we’re talking flavor! making your classic vanilla dessert isn’t just about the basics. you can always add a little twist.
Think about pairing your vanilla with sweet spices. for instance, a pinch of cinnamon or a dash of nutmeg can elevate your ice cream from a basic treat to something magical.
What about other herbs? try fresh mint leaves blended in, or even a hint of lavender if you’re feeling adventurous.
These little tweaks can result in custom ice cream flavors that will leave your guests raving!
Smart Substitutions
We all know life happens, right? maybe you ran out of heavy cream? no worries! you can swap it with half and-half ; just remember it won’t be quite as rich.
Want a low-fat ice cream recipe ? use whole milk and skip the heavy cream! for a dairy-free alternative, coconut milk is your best friend.
It'll give you that creamy texture without the cows!
And if you want to experiment, why not throw in some seasonal options? Fresh summer berries or nut-heavy brownies can become awesome mix-ins, providing delightful contrast!
Kitchen Equipment Essentials
Alright, you’ll need some kitchen tools to make your vanilla ice cream dreams come true. first, a heavy bottomed saucepan this is essential to ensure the heat distributes evenly, preventing burning.
You’ll want a sturdy whisk, too; we’re checking the consistency as we whisk those egg yolks to creamy perfection.
An ice cream maker is highly recommended, but hey, if you don’t have one, don’t sweat it! you can still make no-churn vanilla ice cream.
Just whip your cream, fold in the mixed base, and freeze it in a container. simple as that.
Lastly, a fine mesh sieve is key for that smooth custard texture; no one likes a chunky ice cream! For storage, get yourself an airtight container for freezing your masterpiece.
Keeping it Real
At the end of the day, making homemade ice cream can feel super rewarding. you’re creating something delicious and versatile that can be served during summer bbqs or cozy family gatherings.
Plus, it gives you a chance to explore with different toppings like chocolate sauce, sprinkles, or warm caramel. it’s a true sweet treat for family gatherings , no matter the occasion.
So, get ready to make the best vanilla ice cream of your life! in the next section, i’ll break down the step-by-step instructions for creating this rich, creamy custard base recipe that’ll have you dreaming of summer all year long.
Let's dive into those details!
The Art of Professional Cooking: Mastering Vanilla Ice Cream
Ah, vanilla ice cream the all-time classic that makes every bite feel like a warm hug. nothing says "i love dessert" quite like this delicious creamy custard base recipe! whether it’s a summer bbq or a cozy night on the couch, knowing how to make vanilla ice cream from scratch will elevate any occasion.
Let’s dive into the professional cooking method to make this sweet treat a little less intimidating and a whole lot more fun!
Essential Preparation Steps
Before you even think about churning that ice cream goodness, it’s crucial to get yourself organized this is where the pro chefs shine!
Mise en Place
First off, let’s talk mise en place french for “everything in its place.” gather your vanilla ice cream ingredients , like heavy cream, whole milk, sugar, egg yolks, and vanilla extract.
Trust me, nothing ruins the groove like rummaging through your pantry.
Time Management Tips
Timing is everything here. You’ll want to allocate about 15 minutes for active prep and about 30 minutes for chilling .
Organization Strategies
Keep everything tidy! Use a clear workspace and have your pots and utensils handy. This keeps your brain clear and your kitchen chaos free while you work that culinary magic!
Safety Considerations
Always read the labels on your ingredients. If you're using fresh vanilla beans, check for any unexpected allergies. Safety first, sweet treats later!
Step-by-step Process
Here's where the fun happens! Follow these clear, easy steps, and you’ll be well on your way to dessert fame.
Prepare the ice cream base : get a heavy bottomed saucepan; combine 2 cups heavy cream , 1 cup whole milk , 3/4 cup granulated sugar , and 1/2 teaspoon salt over medium heat.
Warm it up, but don’t let it boil!
Whisk the Egg Yolks : In a bowl, whisk 5 egg yolks until they’re pale and slightly thick.
Temper the Egg Yolks : Slowly add some of your warm milk mix to the yolks while whisking. This keeps the yolks from scrambling a total party foul!
Cook the custard : pour everything back into the pan and stir it until it coats the back of the spatula (around 170° f or 77° c ).
You want it to thicken nicely.
Strain and Cool : Pour through a fine mesh sieve into a bowl to remove any lumps. Stir in 1 tablespoon vanilla extract and cool it.
Churn the Ice Cream : Transfer the mixture to your ice cream maker (following those ice cream maker instructions ). Churn until you reach that creamy texture typically 10- 15 minutes .
Freeze : Put your churned ice cream into an airtight container. Let it freeze for at least 2 hours .
Expert Techniques
Here’s where it gets a bit fancier!
Professional Methods
Keep an eye on the temperature intervals. You don’t want to miss that 170° F goal , and freezing needs to be a solid task, not a last minute dash.
Quality Checkpoints
Always taste! Before you freeze, take a tiny spoonful of your mix to see if it’s sweet enough.
Troubleshooting Tips
If your ice cream isn’t setting, give it more time in the freezer. Sometimes it just needs some love and patience.
Success Strategies
Here are some tricks I’ve learned to avoid common pitfalls while making this easy ice cream tutorial .
Common Mistakes to Avoid
Don’t rush the chilling process, or you'll end up with a slushy mess instead of creamy perfection. Also, be careful with your egg yolks too hot and you’ll end up with scrambled eggs!
Quality Assurance Tips
Use real vanilla extract instead of that fake stuff. There’s a world of difference for vanilla ice cream lovers.
Make-ahead Options
If you’re hosting a gathering, feel free to make your ice cream a day ahead. Just ensure it’s well stored!
Topping It Off
Once you've mastered the art of traditional ice cream making , serve your homemade vanilla ice cream with a drizzle of warm chocolate syrup or fresh berries.
You can also experiment with custom ice cream flavors if you're feeling adventurous!
Additional Information
So, there you have it! that’s how to make a classic vanilla dessert that not only satisfies sweet cravings but also turns heads at family gatherings.
This stellar recipe has all the summer dessert ideas you could wish for, whether it’s whipped up for a birthday bash or just to indulge after a long day.
Look into into your kitchen with confidence, and enjoy every lick of this creamy masterpiece!
Pro Tips & Secrets for Homemade Vanilla Ice Cream
If you’re new to the world of ice cream making, worry not! here’s a little chef's wisdom to help you whip up the creamiest vanilla ice cream without breaking a sweat.
First off, use high-quality ingredients . seriously, don’t scrimp! the difference between a store-bought dessert and your homemade batch lies in the quality of the vanilla extract or even better, fresh vanilla beans .
It’s like the difference between folding in a fresh batch of love versus a cold shoulder!
Time Saving Techniques
Let's talk time, my friends! if you’re short on it but still want to nail that rich ice cream consistency , consider prepping the custard base a day ahead.
You can simply stick it in the fridge overnight, and trust me, it’ll save you a step when you’re ready to churn.
Plus, the flavors meld better. win-win!
Flavor Enhancement Tips
Now, for an extra flavor kick, try this add a pinch of sea salt . like, who knew a teeny bit of salt could elevate your sweet treats for family gatherings? just sprinkle it in the mix while warming your cream.
You’ll be shocked at how amazing it becomes!
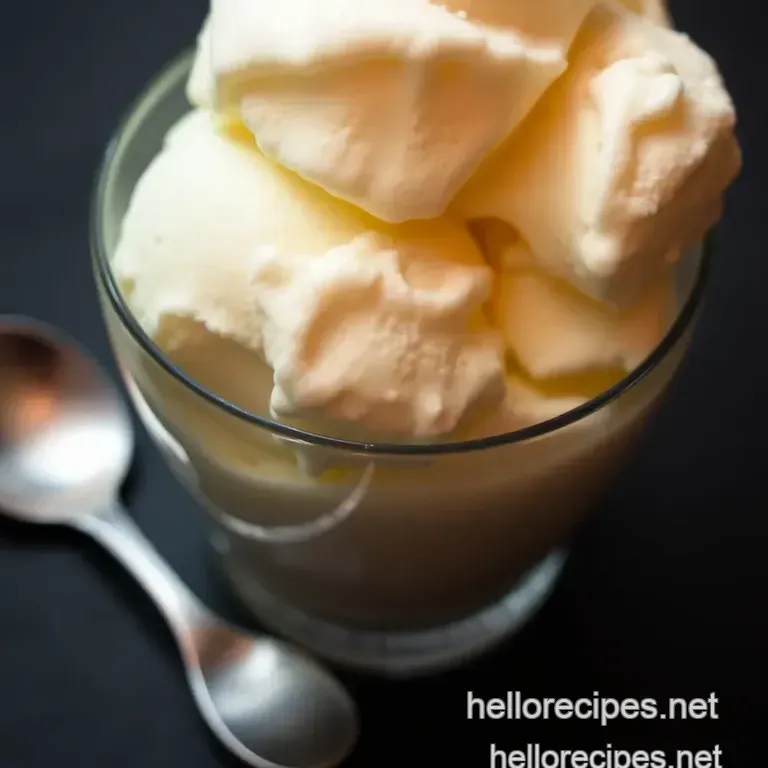
Perfect Presentation
So, who’s ready to plate like a pro? when it comes to serving your vanilla ice cream, presentation matters! use a large scoop for visual impact and bring out all the show stopping vibes .
For garnish, think fresh fruits or even a few chocolate shavings if you’re feeling fancy. layering with fruit also gives those vibrant color combinations that make your dessert look as good as it tastes trust me, it always makes for great instagram content!
Garnish Ideas
You can’t go wrong with vanilla ice cream toppings like toasted nuts, sprinkles, or a drizzle of honey. try pairing it with slices of ripe strawberries or some caramel sauce for that added flair.
Presentation is everything, especially if you're cooking for special occasions!
Storage & make-ahead Tips
Alright, so you made a stellar batch of ice cream now what? Storage guidelines are your friend here. Make sure to keep it in an airtight container to avoid freezer burn, and it’ll last about 2 weeks in the freezer if it lasts that long!
Reheating Tips
Reheating? yep, you heard right. if it’s a bit hard after freezing, just let it sit at room temperature for a solid 5 10 minutes before scooping.
You’ll get that perfect ice cream texture every time.
Creative Variations
Feeling adventurous? let’s explore custom ice cream flavors right in your kitchen. add in some crushed oreos for a cookies and-cream vibe, or swirl in some raspberry puree for a fruity twist.
Seasonal twists can also elevate your treat think pumpkin spice in the fall or fresh mint in the summer. go wild with it!
Complete Nutrition Guide
Now, i get it; you might be wondering about the nutritional side of this easy ice cream tutorial . for 1 serving, you're looking at around 320 calories .
While it’s not exactly a health food, indulging once in a while won’t hurt. just keep portion sizes in check! oh, and those egg yolks? they make that custard base recipe extra creamy while packing in some protein.
Wrap-up Time!
So there you have it your complete guide on how to make vanilla ice cream that will wow your friends and family.
Whether it's a summer bbq or cozy evenings at home, this homemade delight will become your go-to dessert. just remember to have fun with it ice cream making is all about creativity and enjoyment! now go ahead and start your journey into the creamy, dreamy world of homemade vanilla ice cream.
It's time to satisfy those sweet cravings!
Frequently Asked Questions
What is the best way to store homemade vanilla ice cream?
To store your homemade vanilla ice cream properly, transfer it to an airtight container to prevent freezer burn. For best results, press a layer of plastic wrap directly onto the surface of the ice cream before sealing the lid. It should stay fresh for up to 2-3 weeks, although it usually doesn’t last that long!
How to make vanilla ice cream without an ice cream maker?
If you don’t have an ice cream maker, no worries! After churning your mixture in a bowl for the first 20-30 minutes in your freezer (stirring every 30 minutes to break up ice crystals), pour it into an airtight container and freeze. This method can give you a delicious outcome with a bit of manual dedication!
Can I substitute the heavy cream with something else?
Absolutely! You can use full fat coconut milk for a dairy-free alternative, which still gives a lovely creamy texture. However, keep in mind that this might impart a slight coconut flavor. For a lighter version, half and-half can be used, but the ice cream may not be as rich and creamy.
Why is my homemade vanilla ice cream icy instead of creamy?
An icy texture often results from incorporating too much air while churning or not having the mixture cold enough before freezing. Make sure your ice cream base is well chilled and ensure that your ice cream maker bowl was frozen adequately before use to achieve that smooth, creamy texture.
How long does it take for homemade vanilla ice cream to freeze completely?
After churning, your ice cream will need at least 2-4 hours in the freezer to firm up completely. I recommend waiting overnight for the best texture, especially if you plan to scoop it out at a party or gathering. Patience is key good things come to those who wait!
What toppings can I add to my vanilla ice cream?
The world is your oyster when it comes to toppings! Classic options like chocolate sauce, fresh berries, or crushed nuts are always crowd pleasers. For a British touch, try crumbled biscuit or toffee for an indulgent finish. You could even create a delightful sundae bar for family gatherings!
Classic Vanilla Ice Cream Recipe