The Best Classic Strawberry Shortcake Recipe (Buttery Crumbly)
- Capturing the Taste of Summer: The Ultimate Buttery Strawberry Shortcake
- Sourcing and Preparing Your Essential Shortcake Components
- Baking Mastery: Step-by-Step Guide to Making Strawberry Shortcakes
- The Science of Perfect Texture: Why Our Shortcakes Don't Fail
- Troubleshooting the Shortcake: Expert Tips from Our Kitchen
- Make-Ahead Strategy and Proper Storage for Unassembled Shortcakes
- The Grand Finale: Assembling and Serving Your Classic Strawberry Shortcake
- Recipe FAQs
- 📝 Recipe Card
Capturing the Taste of Summer: The Ultimate Buttery Strawberry Shortcake
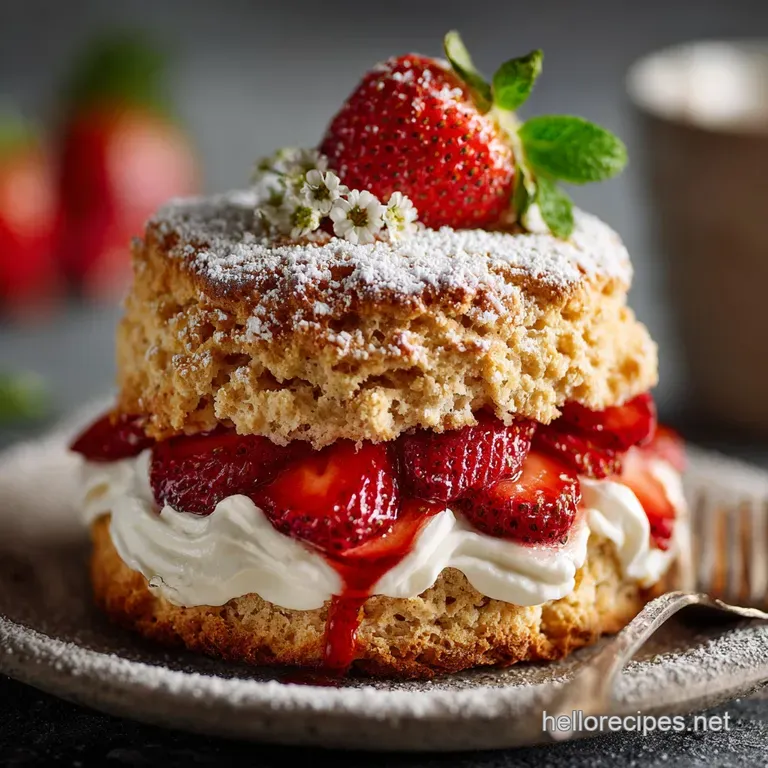
Have you ever opened the oven door and been hit with that smell? It’s pure magic: warm butter and browned sugar mingling with the intensely sweet, slightly tart aroma of crushed, ripe strawberries.
The promise of flaky, tall shortcakes topped with mounds of cold, fluffy cream is truly one of life’s great simple pleasures, isn’t it?
I adore fancy desserts, but honestly, this Quick Strawberry Shortcake Recipe is the one I lean on when I need maximum impact for minimal effort. It feels intensely decadent, yet the actual active prep time is shockingly short.
This Strawberry Shortcake is fast, cheap, and screams "summer party" without requiring you to stand over a hot stove for hours.
But let's be real: sometimes shortcakes turn out tough and flat, tasting more like a dense scone than a flaky biscuit. We’re fixing that today by focusing on temperature and technique.
This is the Shortcake Recipe that actually works every single time, giving you tall, buttery layers ready for those intensely glossy berries.
What Makes a Shortcake Truly "Short"?
The "short" in shortcake refers to the generous amount of fat, or shortening, used in the dough. Historically, that fat was lard or butter. That butter inhibits gluten development, resulting in a tender, crumbly, and non-stretchy texture.
If you skip the technique and overmix, the gluten develops too much, trapping all the ingredients into a dense little puck. The secret to that beautifully crumbly texture is ensuring the fat is fully distributed but never fully dissolved into the flour.
We want small, cold chunks of butter that steam the dough as they melt in the oven.
A Brief History of the Shortcake Biscuit
I’m a sucker for a history lesson, even if it’s about dessert. Early American versions were basically thick, hard biscuits served with fruit preserves, which sounds terribly dry. Thankfully, we evolved!
The modern version, complete with layers of sugar and cream, became super popular in the mid-1800s, turning the once simple biscuit into a celebrated Strawberry Dessert Recipe synonymous with late spring harvests.
Navigating the Difficulty: Why 'Cutting In' is Essential
Cutting in the butter is the single most important step for high rising, flaky shortcakes. You can use a pastry blender, two knives, or even your fingertips I prefer my fingertips, but I make sure they are ice cold first.
If the butter melts before it hits the oven, you lose the crucial steam pockets needed for that layered height. Keep everything cold!
Sourcing and Preparing Your Essential Shortcake Components
Selecting the Sweetest Strawberries for Maximum Flavor
Listen, a shortcake is only as good as its fruit. You must choose berries that smell fragrant and are deeply red all the way through; pale shoulders are a sign they were picked too early. If you can only find slightly bland fruit, adding that teaspoon of lemon juice is a necessary little trick.
It brightens and enhances the natural sweetness incredibly well.
Butter Choice: Salted vs. Unsalted for Optimal Crumb
I always use unsalted butter in baking because it gives me total control over the sodium content. This recipe calls for 1/2 teaspoon of salt, which perfectly balances the richness of the butter and the sweetness of the sugar.
If all you have is salted butter, use it, but reduce the added salt in the recipe to 1/4 teaspoon. The butter must be freezing cold when you use it.
Dairy Alternatives: Substituting Buttermilk and Cream
Don't panic if you realize you are out of buttermilk right when you're ready to bake. We have workarounds! The acid in buttermilk reacts beautifully with the baking powder, but you can fake it easily enough.
| Ingredient | Substitute | Notes |
|---|---|---|
| Buttermilk | Whole Milk + 2 tsp White Vinegar | Let it sit for 5 minutes until it curdles slightly. |
| Heavy Cream | High fat Coconut Cream (Chilled) | Scoop the thick cream from the top of the can; avoid the watery part. |
| All-Purpose Flour | 1:1 gluten-free Baking Blend | Look for a blend that contains xanthan gum. |
Baking Mastery: step-by-step Guide to Making Strawberry Shortcakes
Step 1: Macerating the Berries and Whipping the Cream
First things first: the strawberries need time to sweat out their juice and create that stunning, glossy syrup. Gently slice your berries and toss them in a bowl with the sugar and a splash of lemon juice. Let them sit at room temp for at least 30 minutes.
While the berries are relaxing, get your cream components chilling. You want your bowl and whisk attachment freezing cold to ensure the whipped cream holds its stiff peak structure it should look like dense, vanilla scented clouds! If you’re ever left with too much berry juice, you can always use the extra in my Fresh Strawberry Yogurt Popsicles UltraCreamy 10Minute Prep Recipe later.
Step 2: Mastering the Technique of Cutting the Cold Butter
Preheat your oven to a blazing 425°F (220°C). This high heat helps the shortcakes rise fast before the butter melts completely. Whisk together your dry ingredients (flour, sugar, salt, baking powder). Now, dump in the cubed, cold butter.
Use your tool of choice (pastry blender is easiest) to quickly cut the butter into the flour mixture. Stop when the largest pieces look like small peas, and the rest is coarse meal. Pour in the cold buttermilk all at once and mix just until combined.
It should look shaggy and barely mixed, not smooth like cake batter.
Step 3: Shaping and Baking Your Perfectly Risen Shortcakes
Turn the messy dough out onto a lightly floured surface. Fold it over itself 3 or 4 times that’s it! Pat it into a rectangle about 3/4 inch thick. Use your cutter and press straight down. Do NOT twist the cutter.
Twisting seals the edges of the dough, which prevents the magnificent layered rise we are aiming for.
Brush the tops with the egg wash (this ensures a beautiful golden brown color) and sprinkle with coarse sugar for texture. Bake them for 16- 18 minutes until they are perfectly golden. You'll know they are done when the kitchen smells utterly heavenly.
Step 4: Cooling and Preparing for Assembly
Transfer those beautiful golden biscuits onto a wire rack. They need about 10 minutes to cool down slightly. The shortcakes should be served warm or at room temperature, not straight-up piping hot, or the whipped cream will melt immediately a tragedy we must avoid.
The Science of Perfect Texture: Why Our Shortcakes Don't Fail
This specific Easy Springtime Strawberry Shortcake works because of the interplay between cold butter, high heat, and buttermilk. The buttermilk adds both flavor and necessary acidity. The acid reacts vigorously with the baking powder, creating bubbles.
Because the butter is locked in large cold pieces, it doesn't immediately mix into the dough; instead, it creates layers. When the shortcakes hit that extremely high oven heat, those butter layers release steam fast, forcing the dough layers apart. This process gives you the signature flaky height every time.
Troubleshooting the Shortcake: Expert Tips from Our Kitchen
It’s easy to mess up something simple, trust me, I've done it. I once tried to make a huge batch and ended up overworking the dough so badly I could have used the resulting bricks for construction. Learn from my mistakes!
Preventing Tough Shortcakes: The Overmixing Trap
The moment you add liquid (buttermilk) to the dry ingredients, the clock starts ticking for gluten development. Stir only until the dry ingredients disappear. If you keep mixing until the dough looks smooth, you’ve built too much gluten, and your shortcakes will be tough and chewy.
They should look shaggy and slightly messy.
Ensuring Uniform Rise: Why You Mustn't Twist the Cutter
We already covered this, but it’s worth reiterating: twisting the cutter seals the sides. When the butter tries to create steam inside, that steam can't push out, and the shortcake bakes into a dense dome. Press down firmly and pull up smoothly.
Fixing Runny Cream: Achieving Stiff Peaks Every Time
Runny cream is almost always a result of using warm cream or warm equipment. Put your metal bowl and whisk attachment in the freezer for 10 minutes before you start. Use heavy whipping cream, not half and half.
If your cream still won't stiffen, try adding 1 teaspoon of cornstarch mixed with the sugar. That usually does the trick!
Chef’s Note: If you want a fun variation on this Shortcake Recipe, try my slightly zesty version: Sunshine Zest Lemon Strawberry Shortcake Recipe . The lemon zest in the biscuit is fantastic.
make-ahead Strategy and Proper Storage for Unassembled Shortcakes
If you are prepping for a party, you can absolutely do the components ahead of time, but never assemble them until the last minute. The shortcake will turn soggy almost instantly.
Storage:
- Macerated Strawberries: Keep covered in the fridge for up to 3 days.
- Whipped Cream: Keep in an airtight container in the fridge for up to 2 days, though you might need to whisk it lightly again before serving.
- Baked Shortcakes: Store the cooled, baked shortcakes in an airtight container at room temperature for up to 2 days.
Freezing (Unbaked Dough): You can freeze the shaped, unbaked shortcake rounds. Place them on a parchment lined tray and freeze until solid (about 2 hours). Transfer the frozen rounds to a zip-top bag.
Bake directly from frozen, adding 5– 8 minutes to the baking time.
The Grand Finale: Assembling and Serving Your Classic Strawberry Shortcake
The Magic of Maceration: Achieving the Glossy Strawberry Sauce
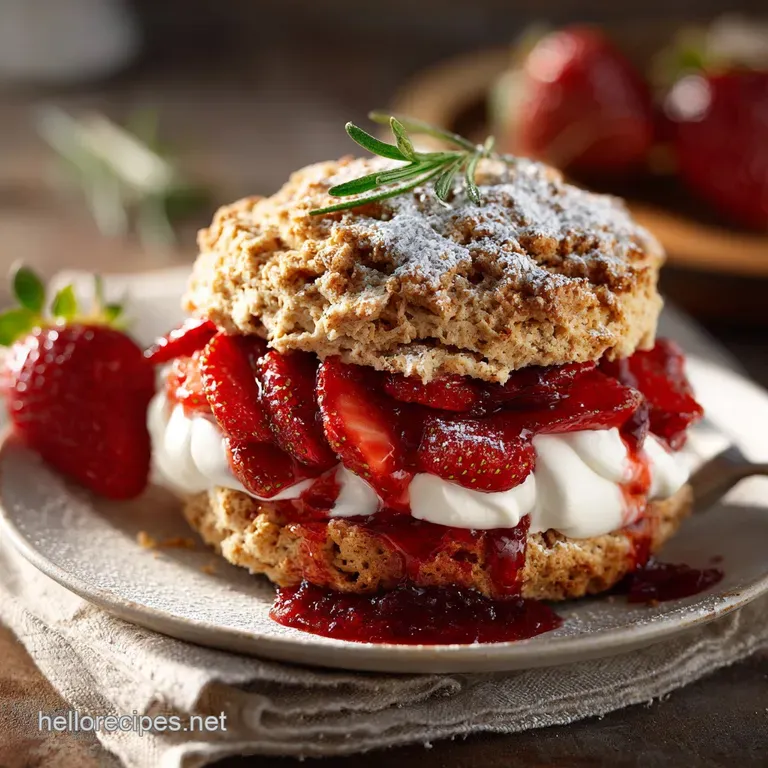
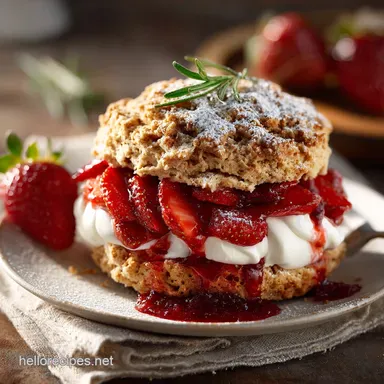
The maceration process should leave you with soft, intensely flavored berries swimming in a bright pink, slightly syrupy liquid. This natural syrup is liquid gold and is essential for soaking into the warm shortcake biscuit. Don't drain it!
Buttery Layers vs. Spongy Cake: Understanding the Biscuit Structure
Remember, we made a biscuit, not a sponge cake. Slice your shortcakes horizontally with a serrated knife. You should see obvious layers, created by the steam from the melting butter.
This textural difference is what makes a classic Strawberry Shortcake so much better than those sad, pre-packaged grocery store versions.
The Essential Role of Cold Ingredients (Temperature Control)
Just one last reminder: cold ingredients are your friends. If your kitchen is hot, pop the bowl of dry ingredients and butter back into the fridge for 10 minutes halfway through the process. Temperature control guarantees your success.
Serve your warm shortcake halves piled high with the glistening strawberries, then finish with a ridiculous, enormous cloud of vanilla whipped cream. Enjoy every beautiful, buttery, crumbly bite. It’s the definition of summer dessert perfection.

Recipe FAQs
Why did my shortcakes come out tough and dense instead of light and flaky?
The most common cause of dense shortcakes is overmixing the dough after adding the wet ingredients. Overworking the dough develops the gluten, resulting in a tough, bread like structure instead of the intended crumbly short texture.
Ensure you mix only until the flour is just incorporated and handle the dough minimally when shaping.
My macerated strawberries released a lot of water; is this normal?
A good maceration process should yield a vibrant, glossy syrup, not excessive water. If your mixture is too watery, it often means the berries were cut too thinly, or they weren't given enough time for the sugar to fully dissolve and integrate.
A splash of lemon juice helps balance the syrup and prevents the berries from becoming overly mushy.
What is the best way to store leftover components, and can I assemble the shortcakes ahead of time?
You should only assemble the shortcakes immediately before serving; otherwise, the moisture from the berries and cream will cause the shortcake base to become soggy quickly. Store the baked shortcakes at room temperature in an airtight container, the macerated berries in the refrigerator, and the whipped cream chilled separately for optimal texture.
Can I use buttermilk instead of heavy cream or regular milk in the dough?
Absolutely; buttermilk is an excellent choice for shortcakes as its slight acidity reacts with the baking powder, enhancing the rise and contributing a lovely subtle tang. If using buttermilk, you may need to adjust the liquid quantity slightly, ensuring the dough is moist but still slightly shaggy and easy to handle.
Why is the butter temperature so critical for this recipe?
The "short" in shortcake refers to the high fat content, which is achieved by incorporating cold, solid butter. When the shortcakes bake, the cold pockets of butter melt slowly and create steam, resulting in the essential flaky layers. If your butter is soft, the shortcake will spread, lack texture, and become dense.
Can I freeze the shortcakes, and how should I thaw them?
Yes, the baked shortcake biscuits freeze very well. Allow them to cool completely, then wrap them individually tightly in plastic wrap followed by aluminum foil, where they will keep for up to three months.
To thaw, unwrap the shortcakes and place them on a wire rack at room temperature for about one hour before serving.
Can I make this recipe vegan?
Yes, you can substitute the dairy components successfully. Use a quality cold, firm vegan butter stick for cutting into the flour, and swap the heavy cream for full fat coconut cream, which must be chilled overnight to allow the solids to separate for proper whipping.
Ensure your plant milk substitution has a decent fat content for the richest dough.
Classic Strawberry Shortcake Recipe
Ingredients:
Instructions:
Nutrition Facts:
| Calories | 1681 kcal |
|---|---|
| Protein | 19.0 g |
| Fat | 115.0 g |
| Carbs | 150.0 g |
