Peanut Butter Brownies: Dense and Fudgy

- Time:10 minutes prep + 30 minutes cook = Total 55 mins (includes resting)
- Flavor/Texture Hook: Deeply velvety chocolate with a crackly, meringue like top
- Perfect for: Potlucks, rainy afternoon cravings, or beginner friendly baking
- Baking The Ultimate Peanut Butter Brownies
- Essential Baking Numbers for Success
- Component Deep Dive Analysis
- The Best Pantry Staple Components
- Required Tools for Swirled Success
- The Method for Fudgy Batter
- Pro Secrets for Better Baking
- Scaling the Batch for Groups
- Customizing Your Salty Sweet Treats
- Omitting Leavening for Density
- Fat Ratios and Mouthfeel
- Storage and Warming Guidelines
- Plating for a Visual Feast
- Recipe FAQs
- 📝 Recipe Card
Baking The Ultimate Peanut Butter Brownies
Have you ever wondered why box mix brownies sometimes have a better crust than the "from scratch" versions we sweat over? It seems counterintuitive that a powder from a cardboard box could beat real butter and high-quality cocoa, but the secret isn't a preservative it's actually the way the sugar and eggs interact.
I used to think the "crackly top" was a myth until I realized I was being too gentle with my whisking; you really have to whip the life into the batter to get that aesthetic finish.
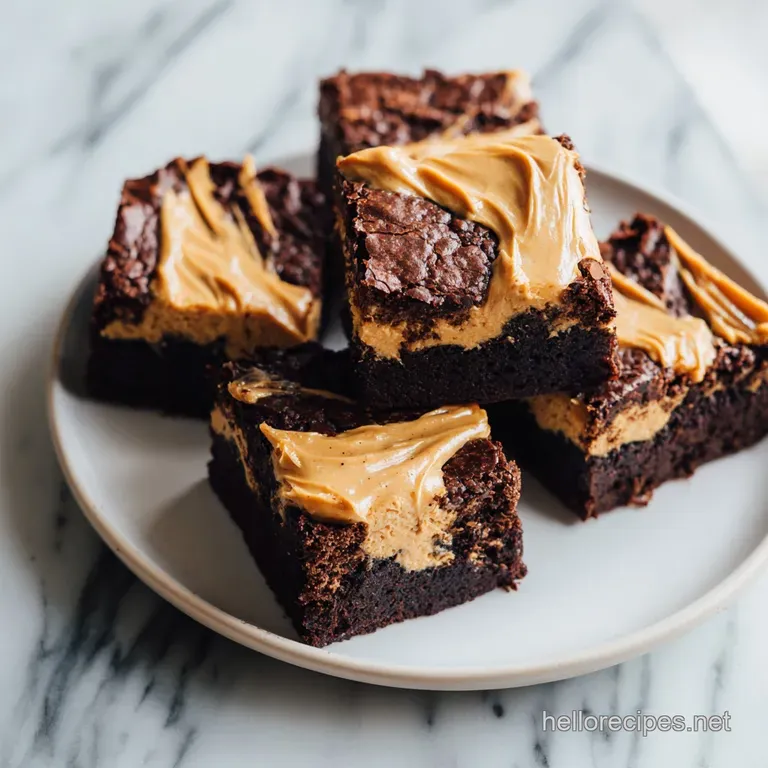
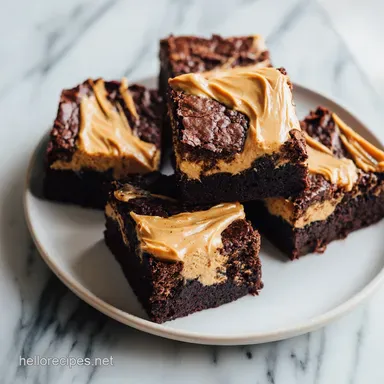
When the scent of melting butter hits the sharp, earthy notes of Dutch processed cocoa, the whole kitchen transforms into a vibrant chocolate sanctuary. This isn't just a snack; it's a study in contrasts where the velvety, dark chocolate base meets the salty, creamy intensity of a peanut butter marble.
We’re skipping the baking powder here because we want density, not cakeyness.
These Peanut Butter Brownies are designed for those who want a heavy, fudgy bite that isn't cloyingly sweet. By using two types of sugar, we balance moisture with structure, ensuring the edges get that slightly chewy, caramelized bite while the center stays almost like a truffle.
Trust me, once you see that peanut butter swirl emerge from the oven, there is no going back to the plain stuff.
Essential Baking Numbers for Success
The One Step Most People Skip: Whisking the eggs and sugar for a full two minutes creates a stable protein foam that rises to the top during baking. This creates the wafer thin, shiny crust that will shatter beautifully when sliced.
| Brownie Thickness | Internal Temp | Rest Time | Visual Cue |
|---|---|---|---|
| 1 inch (Standard) | 195°F | 15 minutes | Edges pull away slightly |
| 1.5 inch (Thick) | 198°F | 25 minutes | Center doesn't jiggle |
| 0.5 inch (Thin) | 190°F | 10 minutes | Top is fully matte |
Getting the timing right is the difference between a velvety center and a dry, crumbly mess. Because chocolate continues to cook after it leaves the oven a process known as carryover cooking you actually want to pull these out while the center still looks a tiny bit underdone.
Component Deep Dive Analysis
| Ingredient | Science Role | Pro Secret |
|---|---|---|
| Dutch Processed Cocoa | Low acidity/Rich color | Sift it to avoid lumps |
| Brown Sugar | Moisture/Chewiness | Pack it tight for accuracy |
| Large Eggs | Emulsifier/Structure | Use room temp for volume |
| Melted Butter | Fat/Flavor | Whisk while hot for gloss |
The interaction between the melted butter and the sugars is what starts the process of that "wet sand" texture. If your butter is too cold, the sugars won't partially dissolve, and you'll miss out on the fudge like consistency that makes these so addictive. For more baking tips, don’t hesitate to check out resources like King Arthur Baking . Enjoy your baking adventure!
The Best Pantry Staple Components
To make these Peanut Butter Brownies, you'll need a few basics that you likely already have. If you want to take the base to a multicultural fusion level, using a Brown Butter Sauce adds a nutty depth that complements the peanut butter perfectly.
- 1/2 cup (113g) unsalted butter, melted
- Sub: Salted butter (just omit the extra salt). Why this? Provides the fat base for a fudgy, non cakey texture.
- 3/4 cup (150g) granulated sugar
- Sub: Caster sugar. Why this? Dissolves quickly to help create the crackly top.
- 1/2 cup (100g) light brown sugar, packed
- Sub: Dark brown sugar for more molasses flavor. Why this? Adds moisture and a chewy bite.
- 2 large eggs, room temperature
- Sub: Flax eggs (result will be much denser). Why this? Acts as the primary binder and aeration source.
- 2 tsp vanilla extract
- Sub: Almond extract (use only 1/2 tsp). Why this? Rounds out the chocolate flavors.
- 1/2 cup (45g) unsweetened cocoa powder, Dutch processed
- Sub: Natural cocoa (will be more acidic). Why this? Gives that dark, vibrant chocolate intensity.
- 3/4 cup (95g) all purpose flour
- Sub: 1:1 gluten-free flour blend. Why this? Provides just enough structure without being tough.
- 1/2 tsp kosher salt
- Sub: Sea salt. Why this? Cuts through the sugar and enhances the cocoa.
- 1/2 cup (90g) semi sweet chocolate chips
- Sub: Chopped dark chocolate bar. Why this? Creates molten pockets of chocolate throughout.
- 1/2 cup (125g) creamy peanut butter
- Sub: Almond butter or sunflower butter. Why this? The star of the marble swirl.
- 2 tbsp (15g) powdered sugar
- Sub: Extra granulated sugar (blitzed). Why this? Stabilizes the peanut butter swirl.
- 1 tbsp (14g) melted butter
- Sub: Coconut oil. Why this? Keeps the swirl soft enough to marble.
Required Tools for Swirled Success
You don't need a high end stand mixer for this; in fact, a simple whisk and a silicone spatula are often better because they give you more control over the batter's aeration. I personally prefer a glass bowl for melting the butter because it holds heat well, helping the sugar dissolve faster. For more variations and ideas, check out Serious Eats for countless recipe inspirations!
8x8-inch Square Baking Pan
The size of the pan is non negotiable here. If you move to a 9x9, the brownies will be thin and prone to overbaking. A metal pan will give you sharper, crispier edges, while glass tends to bake more slowly but evenly.
Parchment Paper
Always leave an "overhang" or "sling" on the sides. This allows you to lift the entire block of brownies out of the pan once they've cooled, ensuring you can get those sharp, clean cuts without scratching your pan or mangling the first square.
Fine Mesh Sieve
Sifting the cocoa and flour might seem like a chore, but cocoa powder is notorious for holding onto little lumps that won't disappear in the batter. Sifting ensures the dry ingredients integrate into a silky, velvety mixture.
The Method for Fudgy Batter
- Preheat your oven to 350°F (175°C). Line your 8x8-inch pan with parchment paper. Note: This ensures the brownies don't stick to the corners.
- Melt 1/2 cup of butter in a large bowl. Whisk in granulated and light brown sugars until the mixture looks like wet sand.
- Crack the eggs into the bowl and add vanilla. Whisk vigorously for exactly 2 minutes until the batter is light and glossy.
- Sift the cocoa powder, flour, and salt directly into the bowl. Note: Sifting prevents dry pockets of flour in the finished bake.
- Fold the dry ingredients gently with a spatula until no white streaks remain.
- Toss in the chocolate chips and give it one final fold.
- In a small side bowl, whisk the peanut butter, powdered sugar, and 1 tablespoon of melted butter until completely smooth.
- Spread the chocolate batter into the pan. Dollop the peanut butter mixture on top.
- Use a butter knife to swirl the two together. Stop before they fully mix to keep the patterns distinct.
- Bake for 30 minutes until a toothpick comes out with moist crumbs. Let rest for 15 minutes before slicing.
Pro Secrets for Better Baking
Fixing Dry and Crumbly Texture
If your brownies are falling apart or feel like dry cake, the most likely culprit is overbaking or too much flour. When measuring flour, always spoon it into the cup rather than dipping the cup into the bag, which packs the flour down and adds too much weight.
| Original Ingredient | Substitute | Why It Works |
|---|---|---|
| Unsalted Butter | Coconut Oil | 1:1 ratio; makes the edges crispier but adds a slight coconut aroma |
| AP Flour | Oat Flour | Provides a nuttier flavor. Note: Result will be more fragile |
| Semi Sweet Chips | Cacao Nibs | Adds intense crunch and bitterness without extra sugar |
Always remember that the peanut butter swirl adds its own moisture. If you use a "natural" peanut butter that is very oily, the swirl might sink to the bottom. I recommend using a standard creamy brand (like Jif or Skippy) for the best structural results.
Identifying Potential Baking Errors
| Problem | Root Cause | Solution |
|---|---|---|
| Greasy surface | Butter was too hot | Whisk longer to emulsify the fat |
| Dull, matte top | Under whisked eggs | Whisk eggs/sugar for a full 2 mins |
| Swirl disappeared | Over marbling | Only 3-4 passes with the knife |
Common Mistakes Checklist
- ✓ Ensure eggs are at room temperature to help the sugar dissolve effectively.
- ✓ Don't over mix once the flour is added; this prevents gluten development that makes brownies tough.
- ✓ Use Dutch processed cocoa for that vibrant, dark color natural cocoa will result in a lighter, more acidic brownie.
- ✓ Let the brownies rest! Slicing while hot will lead to a messy, un set center.
- ✓ Check your oven temperature with a separate thermometer to ensure 350°F is accurate.
Scaling the Batch for Groups
If you're making these for a big party, you can easily double the recipe. Use a 9x13-inch pan and increase the baking time to roughly 35-40 minutes. Keep a close eye on the center; it should still have a slight wobble when you gently shake the pan.
Reducing for Two People
To make a small batch, cut all ingredients in half and use a standard loaf pan. You'll want to check for doneness around the 22 minute mark since the smaller surface area can cause the edges to cook faster than the middle.
Proportional Flavor Adjustments
When doubling the recipe, you don't actually need to double the salt or vanilla. Use 1.5x the amount of salt and spices to keep the flavors balanced without being overwhelming. This prevents the "chemical" aftertaste that sometimes happens with scaled up bakes.
| Serving Goal | Pan Size | Adjustments |
|---|---|---|
| 8 People | 9x5 Loaf Pan | Halve all ingredients |
| 16 People | 8x8 Square | Follow recipe exactly |
| 32 People | 9x13 Rectangle | Double ingredients; 1.5x salt |
Customizing Your Salty Sweet Treats
For those who love the nostalgic PB&J profile, you might enjoy my Peanut Butter & Jelly Cookies. You can actually dollop a few teaspoons of raspberry jam alongside the peanut butter in this brownie recipe for a "PB&J Brownie" fusion that is absolutely vibrant.
The Salty Sweet Crunch
Try adding a handful of crushed pretzels or salted peanuts on top of the batter before it goes into the oven. The added texture provides a great contrast to the velvety chocolate base and keeps the brownies from feeling one dimensional.
The dairy-free Alternative
You can swap the butter for a high-quality vegan butter. If you're feeling adventurous, How to Make Vegan Butter can guide you through a version that actually browns, giving you that same nutty aroma you'd get from dairy.
Omitting Leavening for Density
One common misconception is that brownies need baking soda to rise. In reality, adding leavening creates air pockets that turn a brownie into a piece of chocolate cake. By relying solely on the air whipped into the eggs, we achieve a dense, fudge like consistency that feels much more indulgent.
Fat Ratios and Mouthfeel
Another myth is that using more oil makes a brownie "moister." While oil adds fat, it doesn't provide the same structural creaminess as butter. Butter contains milk solids that brown and caramelize, adding a layer of flavor complexity that oil simply cannot match. For even more brownie inspiration, check out Serious Eats for expert tips!
Storage and Warming Guidelines
These brownies stay fudgy for up to 4 days if kept in an airtight container at room temperature. If you prefer them cold (which makes them even chewier!), they'll last about a week in the fridge. To get that "just out of the oven" feel, microwave a square for 15 seconds until the chocolate chips sizzle slightly.
Freezing for Later
Brownies freeze remarkably well. Wrap individual squares tightly in plastic wrap and then place them in a freezer bag. They’ll stay fresh for up to 3 months. To thaw, just leave them on the counter for an hour or pop them in a low oven (300°F) for 5 minutes.
Zero Waste Tips
If you end up with edges that are a bit too crispy, don't throw them away! Crumble them up and use them as a topping for vanilla bean ice cream or fold them into a chocolate mousse. The caramelized edges are basically "brownie brittle" and hold their crunch even when mixed with dairy.
Plating for a Visual Feast
To get those perfectly clean edges you see in professional photos, you need patience. Let the brownies cool completely, then put the whole pan in the fridge for 30 minutes. Use a large chef’s knife and wipe it clean with a warm, damp cloth between every single cut.
Serving Suggestions
A sprinkle of flaky sea salt (like Maldon) on top of the peanut butter swirls makes the colors pop and balances the richness. If you're serving these as a plated dessert, a dollop of unsweetened whipped cream or a scoop of tart raspberry sorbet creates a beautiful multicultural flavor balance.
Styling the Swirl
For a more professional look, use a toothpick to draw "figure eights" through the peanut butter dollops. Don't go too deep; you want the vibrant tan color of the peanut butter to stay on the surface of the dark chocolate batter for maximum visual impact. For more delicious dessert ideas, check out Food Network’s dessert section for inspiration.

Recipe FAQs
What is the secret to chewy brownies?
Whisk your eggs and sugar vigorously for two minutes. This technique creates a glossy, stable base that produces that coveted chewy texture and crackly top.
What happens if you add peanut butter to brownie mix?
Adding peanut butter creates a rich, salty sweet contrast while keeping the crumb moist. Using our method of dolloping and marbling ensures the flavors stay distinct throughout the bake.
Can a diabetic eat brownies?
Consult your medical professional regarding blood sugar management. These brownies contain high amounts of granulated sugar, light brown sugar, and powdered sugar, which significantly impact glucose levels.
What makes brownies chewy vs fudgy?
The ratio of flour to fat and the agitation of the batter determine the final bite. Less flour and proper aeration via vigorous whisking favor a chewier result, whereas higher fat content keeps them dense and fudgy. If you enjoy learning about how these ratios impact texture, see how the same principles of balancing density and texture function in other treats.
How to ensure the center is perfectly set?
Bake for 30 minutes at 350°F and test with a toothpick. You are looking for a few moist crumbs to remain on the pick, which confirms the center has set without becoming dry.
Is it true that I should slice them immediately while hot?
No, this is a common misconception. You must let the brownies rest in the pan for 15 minutes, as slicing too early prevents the structure from setting and results in a messy, crumbly center.
How to get the most intense chocolate flavor?
Use Dutch processed cocoa powder instead of natural cocoa. Dutch processed cocoa provides a deeper, darker, and less acidic chocolate flavor that balances perfectly with the creamy peanut butter.
Chewy Peanut Butter Brownies
Ingredients:
Instructions:
Nutrition Facts:
| Calories | 231 kcal |
|---|---|
| Protein | 4.3 g |
| Fat | 12.9 g |
| Carbs | 27.7 g |
| Fiber | 1.6 g |
| Sugar | 21.4 g |
| Sodium | 112 mg |
