Failure-Proof Cheap Cuts Grilled Steak
- Time: 15 min active + 2 hrs 30 mins prepping/resting
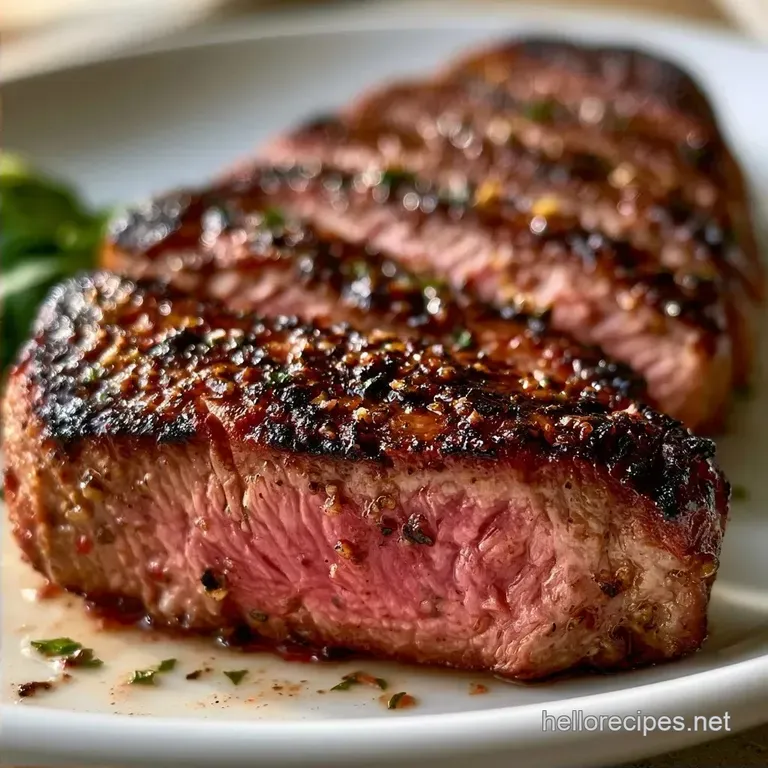
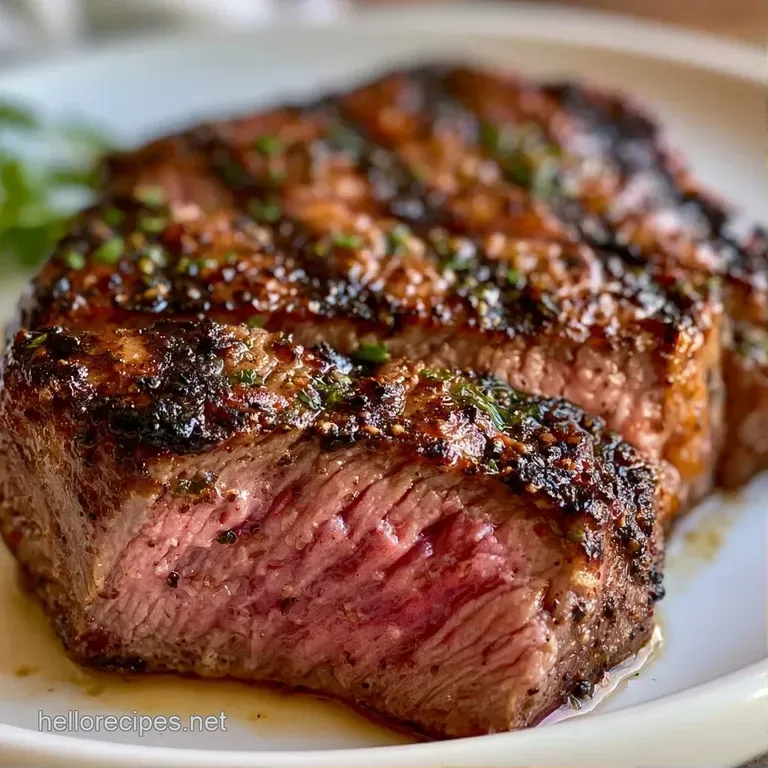
- Flavor/Texture Hook: Deep mahogany crust with a rich, buttery finish
- Perfect for: Weeknight dinners on a budget or casual summer hosting
Ever wonder why some of the most expensive cuts at the steakhouse feel a bit... empty? I had a moment a few years back where I dropped 40 Euro on a prime cut that tasted like nothing because it lacked the fat distribution of a harder working muscle. It was a wake up call.
I started looking at the "underrated" section of the butcher's case and found the chuck eye.
It is essentially a ribeye's cousin, but it costs a fraction of the price. The trick is that you can't just throw it on the heat and hope for the best. You have to treat it with a bit of respect, which means timing and salt.
I'm going to show you how to handle a Cheap Cuts Grilled Steak so it doesn't end up like a rubber tire. We're focusing on a specific color balance here: a deep brown sear, golden melted butter, and a pop of bright green parsley to make the plate look distinctive and modern.
Cheap Cuts Grilled Steak
The real difference between a chewy steak and a tender one comes down to how you manage the surface moisture. Most people make the mistake of seasoning right before they grill, which leads to steaming rather than searing.
By using a dry brine, we pull moisture out and then push the salt back in, which breaks down those tougher proteins.
When making Cheap Cuts Grilled Steak, you'll notice the meat looks darker and slightly tacky after its time in the fridge. That is exactly what you want. It means the surface is dehydrated, allowing the heat to create a crust almost instantly.
But the salt is only half the battle. We also need to temper the meat. If you put a freezing cold steak onto a 500°F grate, the outside overcooks before the middle even wakes up. Letting it sit on the counter for 30 minutes keeps the cook even.
The Logic of Texture
If you're wondering why this approach works for budget meats, it's all about the muscle structure.
The Salt Pull: Salt draws water out of the cells, dissolves into a brine, and then re absorbs into the meat. This process tenderizes the fibers from the inside out, according to Serious Eats.
Two Zone Heat: Using a hot side and a cool side prevents the fat from causing massive flare ups that char the meat without cooking it.
| Approach | Prep Method | Resulting Texture | Visual Cue |
|---|---|---|---|
| Fresh/Patient | Dry Brine + Temper | Tender, juicy center | Mahogany crust |
| Shortcut | Salt & Grill | Chewier, "grey band" | Pale brown/charred |
Ingredient Role Breakdown
I've picked these specific seasonings to complement the beefy flavor without masking it. The smoked paprika doesn't make it taste like BBQ; it just adds a hint of color and depth.
| Ingredient | What It Does | Best Swap |
|---|---|---|
| Chuck Eye Steak (900g) | Provides ribeye like flavor at a lower cost | Denver cut or Flat Iron |
| Kosher Salt (10g) | Tenderizes and seasons deeply | Sea salt (reduce amount) |
| Unsalted Butter (56g) | Adds richness and carries garlic flavor | Ghee for higher smoke point |
| Smoked Paprika (2g) | Adds a distinctive reddish brown hue | Cumin for an earthy twist |
Necessary Grilling Gear
You don't need a professional rig, but a few things make a huge difference. A digital meat thermometer is non negotiable because guessing the doneness of budget cuts is a gamble you'll usually lose.
I prefer a heavy duty grill with a lid. The lid allows you to create an oven like environment in the indirect zone. If you're using a cast iron skillet on a grill, that's grand too, as long as you can move the meat away from the direct flame.
A wire cooling rack is also essential for the brining phase. It lets air circulate around the whole steak, so the bottom doesn't stay soggy while the top dries out.
The Grilling Process
Let's crack on. This is where we bring that color balance together.
- Pat the 900g of steaks completely dry with paper towels. Note: Excess moisture is the enemy of a good sear.
- Apply the 10g salt, 5g pepper, 5g garlic powder, and 2g paprika generously to all sides.
- Place steaks on a wire rack in the fridge for at least 2 hours.
- Remove the meat from the fridge 30 minutes before grilling.
- Setup a two zone heat on the grill, targeting 230°C to 260°C (450°F to 500°F).
- Brush steaks lightly with 30ml neutral oil and sear over high heat for 3–4 minutes per side until a mahogany crust forms.
- Move steaks to the cool zone, close the lid, and cook until the internal temperature hits 54°C (130°F) for medium rare.
- Baste the steaks for the last 2 minutes with 56g softened butter mixed with 6g minced garlic and 3g chopped parsley.
Chef's Note: When basting, use a spoon to continuously pour the bubbling butter over the meat. This adds that golden shine and a fresh garlic aroma right as the meat comes off the fire.
Fixing Grilling Issues
Even with a plan, budget meats can be temperamental. The most common issue with Cheap Cuts Grilled Steak is the "rubber band" effect, where the meat feels springy or tough.
Why Your Steak Toughens
This usually happens when the meat is cooked too quickly over too much heat, causing the muscle fibers to contract violently. If the steak feels like a sponge, you likely skipped the tempering step or cooked it past 60°C.
Preventing Flare Ups
Budget cuts often have larger pockets of fat that melt and drip, causing flames to jump up. Moving the meat to the indirect zone the second the crust is formed solves this.
Fixing Grey Meat
A grey band around the edge means the heat was too low during the sear or the meat was too cold. Ensure your grill is screaming hot before the meat hits the grate.
| Problem | Root Cause | Solution |
|---|---|---|
| Tough Texture | Overcooked/Cold center | Use a thermometer; target 54°C |
| Bitter Char | Fat flare ups | Use two zone grilling method |
| No Crust | Meat was too damp | Dry brine on a wire rack |
Customizing Your Steak
Once you're comfortable with the basic method, you can tweak the flavor profile. I love adding a splash of espresso powder to the rub for a deeper, almost charred coffee undertone that pairs well with beef.
If you want something more vibrant, you can skip the garlic butter and top your Cheap Cuts Grilled Steak with my Chimichurri sauce. The acidity of the vinegar cuts through the richness of the chuck eye perfectly.
For those avoiding dairy, you can swap the butter for a high-quality olive oil infused with garlic. You'll lose some of that golden color, but you'll keep the flavor. If you're looking for a different style of steak preparation entirely, Bistec Ranchero is another great way to handle affordable cuts.
Adjusting Portion Sizes
If you're cooking for a crowd or just yourself, don't just multiply everything blindly.
Scaling Down: For a single steak, keep the seasoning ratios the same. Use a smaller pan or a specific corner of the grill to maintain the heat zone.
Scaling Up: When doubling the meat to 1.8kg, don't double the salt. Increase salt and spices to about 1.5x. Too much salt on a large batch can make the meat taste metallic. Work in batches so you don't crowd the grill, which would drop the temperature and ruin the sear.
Steak Myths Debunked
There are a few old wives' tales in the kitchen that just don't hold up.
Searing meat does not "seal in juices." This is a total myth. Moisture loss happens throughout the entire cooking process regardless of how hard you sear. The crust is for flavor and texture, not for creating a waterproof barrier.
Many believe that "room temperature" meat is the only way to get a good cook. While tempering helps, the dry brine is far more important for the actual tenderness of the meat.
Storage and Scraps
If you have leftover Cheap Cuts Grilled Steak, don't microwave it until it's grey. Slice it thin and flash sear it in a pan for 30 seconds per side. It stays in the fridge for 3-4 days or the freezer for 2 months.
Don't throw away the fat trimmings from the steak. Render them down in a small pot to make beef tallow. This tallow is a distinctive addition to roasted potatoes or can be used to sear your next batch of steaks for an even deeper flavor.
Ideal Side Dishes
To keep the meal balanced, you need something that cuts through the richness of the butter and beef. A sharp, vinegary slaw or some grilled asparagus provides a great color contrast.
For a heartier meal, I recommend a Traditional Potato Salad to add a creamy element that balances the smoky notes of the paprika.
The joy of Cheap Cuts Grilled Steak is proving that you don't need a massive budget to have a high end dinner. It's all about the prep, the patience, and the fire. Trust the process, watch your internal temps, and enjoy that mahogany crust.
Recipe FAQs
What is the best cheap cut of steak for grilling?
Chuck eye steak. It offers a flavor and tenderness very similar to a ribeye but at a significantly lower price point.
What is the poor man's filet cut?
Top sirloin or sirloin tip. These cuts are lean and affordable, though the chuck eye is often preferred for those seeking more marbling.
What is the poor man's ribeye cut?
Chuck eye steak. Located in the shoulder just before the ribeye starts, it shares a nearly identical fat profile and taste.
How to grill cheap steak for maximum tenderness?
Prepare a two-zone heat setup between 450°F and 500°F. Sear the meat for 3 4 minutes per side, then move it to the cool zone until the internal temperature hits 130°F.
Is it true that budget steaks cannot achieve a professional sear?
No, this is a common misconception. By dry brining the meat for 2 to 24 hours and searing over high heat, budget cuts develop a deep mahogany crust.
How to reheat leftover grilled steak without overcooking it?
Slice the meat thin and flash sear in a pan for 30 seconds per side. This prevents the steak from becoming grey and rubbery, which often happens in the microwave.
What are the best side dishes for grilled chuck eye steak?
Savory sides like roasted potatoes or smoked beans. The rich beef pairs perfectly with BBQ baked beans for a classic, hearty meal.
Cheap Cuts Grilled Steak

