Light & Pillowy Gluten-Free Dinner Rolls
- Essential Ingredients Guide for Baking Gluten-Free Rolls
- Unveiling the Secrets to Bake Gluten-Free Rolls: Light & Pillowy
- Pro Tips & Secrets for Baking Gluten-Free Rolls
- Perfect Presentation: Making Your Rolls Shine
- Storage & Make-Ahead: Keep Those Rolls Fresh
- Creative Variations for Your Rolls
- Complete Nutrition Guide
- Expert FAQ Solutions: Your Cooking Questions Answered
- 📝 Recipe Card
Oh, you guys! i have a confession. one of my biggest kitchen disasters happened when i first tried to make homemade bread.
Picture this: i was super ambitious, thinking i could whip up some soft gluten-free rolls for dinner. i thought i followed the recipe perfectly, but what came out of the oven looked like something that could double as a hockey puck! seriously, it was a bread fail of epic proportions.
But that’s when i stumbled upon the secret to making bake gluten-free rolls: light & pillowy and wow, what an adventure it has been since then!
Have you ever found yourself in a similar situation? you’re all excited about trying a new recipe, and then it just flops? that’s why i totally understand how challenging gluten-free baking can be.
But trust me, these light dinner rolls will change your perspective on gluten-free goodies. anyone can whip these up, and they come out fluffy and fabulous every time!
Recipe Overview
The origins of rolls date back centuries, tied to the hearty breads that people made at home. but as more folks are seeking healthy bread alternatives , traditional recipes have evolved.
We now have these almond flour rolls that fit perfectly into today’s gluten-free kitchen essentials .
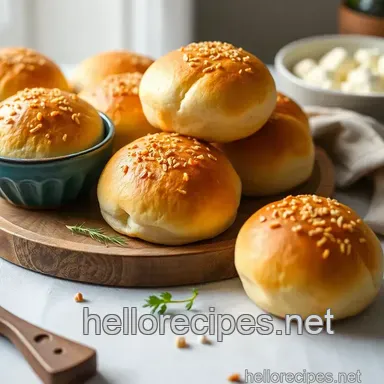
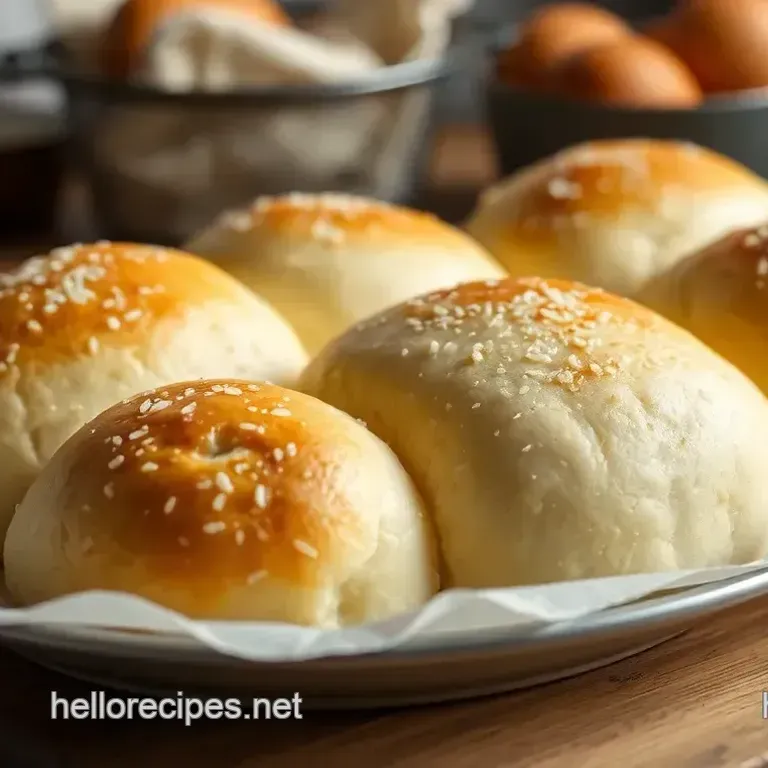
These rolls are not just any bread they're light and pillowy , perfect for family dinners or gatherings. imagine breaking bread with friends, and these warm rolls steal the show!
Even if you’re in a crunch, you can slap these together in about 80 minutes , making it an easy bread recipe for any day of the week.
Worried about costs? no biggie! you’ll spend less on ingredients than grabbing a bag of premade rolls from the store.
Plus, this recipe yields 12 rolls , so it’s perfect for serving with soup or whatever comforting meal you've got rattling around.
Key Benefits
Let’s talk about the real perks of these gluten-free yeast rolls . first off, they are not just gluten-free; they are also a healthier option compared to traditional bread.
Packed with proteins from almond flour , these rolls are nutrient rich and will keep you feeling full longer. seriously, you won’t miss the gluten one bit!
These wholesome flour blends create rolls that make for great holiday gatherings or any special occasion. whether you’re looking for classic dinner rolls or flavor infused dinner rolls , this recipe satisfies.
It’s even easy to make kid-friendly versions or sweet dinner roll recipes by just tossing in a cinnamon swirl!
And here's a little insider tip: if you’re hosting a party, serve these warm dinner rolls alongside your favorite dishes! they’ll make any meal feel special trust me! get ready to impress your guests with your gourmet gluten-free baking skills.
Plus, these rolls are the ultimate comfort food perfect for cozy nights when all you need is a few freshly baked rolls and a warm bowl of soup.
Alright, now that you're all pumped and hungry, let's dive into the ingredients you'll need to make these magical rolls happen!
Essential Ingredients Guide for Baking gluten-free Rolls
Baking can feel like a wild adventure, especially when it comes to gluten-free cooking. if you're ready to shake up your kitchen game, i’ve got you covered with an essential ingredients guide .
Whether you want to bake gluten-free rolls: light & pillowy or dive into other delicious gluten-free recipes , knowing your ingredients is key.
Let’s break it down!
Premium Core Components
When you're whipping up those soft gluten-free rolls , it's all about the quality of your ingredients. Here’s a quick guide:
Detailed measurements : always follow precise measurements for your ingredients. for example, you'll want 2 cups (240g) gluten-free all-purpose flour blend the right proportions really make a difference.
That's about 120g in metric for almond flour.
Quality indicators : look for flour labeled as “gluten-free” that includes xanthan gum; it gives your rolls that much needed elasticity.
You’ll spot good almond flour by its fine texture and absence of lumps.
Storage Guidelines : Keep your gluten-free flours in airtight containers in a cool, dark place to prolong shelf life. For the best results, use them within 3-6 months.
Freshness Tips : Always check for weird smells or off colors before you bake. Fresh flour means better fluffy dinner rolls and great results.
Signature Seasoning Blend
Now, let’s talk about how to turn those plain rolls into the flavor bombs they should be!
Essential Spice Combinations : A pinch of salt is essential. You can also experiment with herbs like rosemary or thyme for an extra punch.
Herb Selections : Dried herbs or lots of fresh ones can infuse your gluten-free dinner rolls with flavor. They really elevate the whole experience!
Flavor Enhancers : Don't skip the honey or agave syrup. A tablespoon does wonders for a sweet dinner roll recipe .
Regional Variations : Depending on your mood, toss in spices from different cuisines like Italian herbs for Mediterranean vibes or chili powder for a Southwest kick.
Smart Substitutions
We all know sometimes you don’t have exactly what a recipe calls for. Here are some common alternatives to keep your baking stress free:
Common Alternatives : If you’re out of almond flour, go ahead and use more gluten-free flour blend it works just fine!
Dietary Modifications : Need it vegan? Use applesauce or a flax egg instead of real eggs. Your rolls will still turn out tasty.
Emergency Replacements : No honey on hand? Maple syrup is a great fall back option, especially if you’re leaning towards that sweet dinner roll vibe .
Seasonal Options : During holidays, why not add pumpkin spice to your dough? It adds a festive twist!
Kitchen Equipment Essentials
Don't underestimate the tools of the trade. Here’s what you’ll need:
Must Have Tools : A good mixing bowl, whisk, and baking sheet lined with parchment paper are essential for making gluten-free meal ideas .
Alternative Equipment Options : Don’t have a pastry brush? Use a clean cloth for your egg wash!
Preparation Tips : Always room temperature means your ingredients mix better. This makes your gluten-free baking techniques ten times smoother!
Storage Solutions : Invest in storage bins for flour to keep things organized and fresh. Nobody wants stale flour messing up their rolls!
As you gather your ingredients and tools, think about this: baking is more than just mixing stuff together; it's a journey.
Your kitchen transforms into a haven of delicious smells and exciting flavors. so before you dive right in to bake gluten-free rolls: light & pillowy , make sure you’ve got these essentials down!
Next up, we’ll dive into the step-by-step instructions to make those delicious rolls that everyone is going to adore!
Unveiling the Secrets to Bake gluten-free Rolls: Light & Pillowy
Have you ever found yourself standing in your kitchen, dreaming of those fluffy dinner rolls that your grandma used to make, but you had to rethink it because, well, gluten? fear not, my friend! today, i’m gonna share my tips and tricks on how to bake gluten-free rolls: light & pillowy .
You’re going to want to grab your apron and roll up your sleeves, because these lil’ rolls pack a punch of flavor and comfort!
Essential Preparation Steps
You know what they say, “success is where preparation and opportunity meet.” first up is the mise en place kind of fancy talk for getting everything ready before diving in!
Gather your ingredients so you don’t find yourself halfway through the recipe, frantically searching for almond flour or a warm cup of water.
Now, let’s talk time management. when you’re cooking, keep your timing precise . for our rolls, you’ll need about 1 hour and 20 minutes total from prep to baking.
I promise it’ll fly by. try to keep track of how long your dough is rising especially with gluten-free baking because it can be a bit tricky!
And let’s not forget to stay organized! Keep a clean workspace (seriously, it makes a difference) and set your measuring tools in one spot. Your future self will thank you!
Safety first, though, right? make sure you’re cautious with your oven. when you’re preheating to 375° f ( 190° c) , always use hot pads and watch out for spills.
Keep your kids away while the oven is in action safety’s always a priority!
Step-by-step Process
Alright, are you ready for some simple instructions? Grab your mixing bowls and let’s roll!
Prepare the dough: start by combining 2 cups of gluten-free flour blend with 1 cup of almond flour , 1 tablespoon of sugar , 1 teaspoon of salt , and 1 packet of instant yeast in a large bowl.
Get it mixed!
Combine wet and dry: in another bowl, mix ¾ cup of warm water (around 110° f / 43° c warm, not hot, folks!), 2 eggs , 2 tablespoons of olive oil , and 1 tablespoon of honey .
Pour that magic mix into the dry ingredients. stir until you get a sticky dough that smells heavenly!
Let it rise: cover that bad boy with a kitchen towel and place it in a warm spot for about 30- 45 minutes .
You want it to puff up a bit patience, my friend!
Shape those rolls: Time to divide the dough into 12 equal portions and roll them into balls.
Second rise: Place them on a lined baking sheet. Give them room because they’ll spread like they own the kitchen! Let them rise again for another 20- 30 minutes .
Preheat your oven: While waiting, let’s get that oven at 375° F ( 190° C) .
Egg wash: Mix 1 egg and 1 tablespoon of water and brush it onto those rolls for that gorgeous golden color.
Bake: Into the oven they go! Bake for 18- 20 minutes until they’re golden brown and your kitchen smells like heaven.
Cool and serve: Let them cool for at least 10 minutes and then dig in!
Expert Techniques and Success Strategies
Let’s talk expert tips. to really nail those soft gluten-free rolls , remember to use room temperature ingredients. this helps the yeast come alive.
Also, don’t over flour the dough; it should stay sticky. stick to it, literally!
Give these rolls plenty of space to breathe as they bake. It’s literally the roominess that makes them light and pillowy .
Now let’s chat about some common mistakes. don’t skip the proofing stages; that’s where magic happens. and be sure to test your yeast first.
If it doesn’t bubble up in warm water with sugar, toss it and start fresh because old yeast is a no-go.
And if you find yourself a bit short on time, these can be prepped ahead! Just make the dough, cover it up and pop it into the fridge for later.
So, if you’re ever feeling the need for easy gluten-free recipes that can be transformed for any occasion? i mean, who wouldn’t want to bake a sweet dinner roll recipe ? from family dinners to gatherings, these rolls will be your new go-to.
Additional Information
If you’re interested in learning more about gluten-free baking techniques or how to ensure your rolls are perfect every time, there’s a wealth of information out there just waiting for you to dive into!
Happy baking, and remember that every roll is a step in the right direction to enjoy that warm, comforting homemade gluten-free bread you’ve been craving!
Pro Tips & Secrets for Baking gluten-free Rolls
Let’s dive into the secret sauce behind these light & pillowy gluten-free dinner rolls . trust me, it’s all about the little details.
Chef’s personal insights? well, when i first started this gluten-free journey, i thought i’d be stuck with dry, crumbly bread forever.
Oh boy, was i wrong! the secret is using a good quality gluten-free all-purpose flour blend with xanthan gum to mimic that glorious stretch of traditional bread.
It makes all the difference!
Now, here’s a time saving technique that'll change your baking game. if you’re short on time, make the dough the night before.
Pop it in the fridge after kneading for the first rise. when you’re ready to bake, just shape those rolls and let them rise again.
This way, you have soft gluten-free rolls fresh out of the oven in no time!
Want to enhance the flavor ? try adding a dash of garlic powder or a sprinkle of fresh herbs. your rolls can go from basic to gourmet with just a little tweaking! and for a presentation tip , brush those rolls with melted butter right when they come out of the oven.
It makes them shiny and super appetizing. seriously, they'll steal the show at any dinner table.
Perfect Presentation: Making Your Rolls Shine
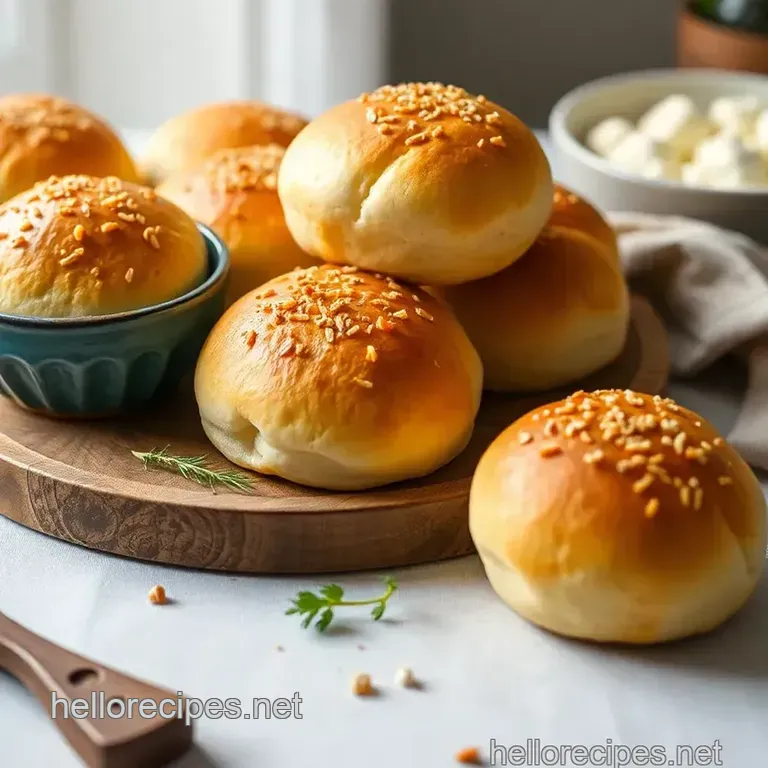
Speaking of presentations, let’s talk about plating. presentation can totally elevate your meal. arrange those fluffy dinner rolls in a pretty bread basket lined with a rustic cloth.
Add some cute labels for any flavored variations you made herbed, cheesy, you name it!
For garnish ideas , consider a sprinkle of sesame seeds or even some fresh herbs on top before serving. they add that perfect pop of color and elegance.
A mix of colors can be tempting too. think about pairing these rolls with brightly colored soups or salads. it not only looks great but is also inviting.
And never forget the visual appeal tips ! a few rolls stacked on top of each other with a drizzle of honey can create quite a little masterpiece.
Your friends will be snapping photos before they even dig in!
Storage & make-ahead: Keep Those Rolls Fresh
Now, let’s get practical. if you end up with leftover rolls though i doubt you will because they’re so delicious here’s how to store them.
Keep the homemade gluten-free bread in an airtight container with a couple of slices of bread to help retain moisture.
They'll stay soft for about 2 days at room temperature or you can freeze them for later (up to 3 months).
When you’re ready for some warm dinner rolls again, simply pop them in a preheated oven at 350° f for about 10- 15 minutes.
They'll taste like they just came out of the oven. freshness is key for these comfort food rolls to keep that soft, pillowy texture.
Creative Variations for Your Rolls
Feeling adventurous? here come the creative variations ! spice things up during your next baking adventure by trying different flavors.
Add caramelized onions or diced jalapeños for a kick. you could also use different flours. if you’ve never tried almond flour rolls , now's your chance! they give a nutty flavor that complements the sweetness nicely.
If you’re preparing for a gathering, consider adapting the recipe to be kid-friendly . swapping honey for a little cinnamon can transform these rolls into an irresistible sweet treat for kiddos.
And yes, those gluten-free dessert rolls aren’t just a fantasy anymore!
Complete Nutrition Guide
Now, i get it. you might want to know what you’re biting into. these rolls aren’t just healthy bread alternatives ; they’re also packed with flavor! a single roll has around 180 calories with 5g of protein .
You can also tweak the recipe to suit dietary needs. if you're looking for vegan gluten-free rolls , swapping out the eggs for applesauce is a genius way to keep them delicious and cruelty free.
When considering dietary restrictions , listen up: these rolls fit right in! They’re not just a side but a great gluten-free party food that everyone can enjoy.
Expert FAQ Solutions: Your Cooking Questions Answered
Okay, time to bust some myths. if you ever think your dough isn’t rising enough, it may be due to old yeast.
Test it make sure it bubbles before you mix it in! bake with confidence using these baking tips for yeast breads .
And if your rolls don’t look perfect? who cares! they’ll still taste phenomenal, and that’s what matters!
If any questions pop into your head, don’t hesitate! I’ve been there, done that, and I’m here to help you along the way.
In closing, don’t let gluten restrictions stress you out! baking gluten-free is like an art form, and these easy gluten-free recipes are just the beginning.
Enjoy experimenting and making those light dinner rolls with love. everyone deserves a warm, buttery roll on their plate, right? so bring on the baking, and let those rolls rise!
Bake gluten free Rolls Light Pillowy