Adorable Hello Kitty Cakes: Sweet Treats for Any Occasion
Adorable Hello Kitty Cakes: Sweet Treats for Any Occasion
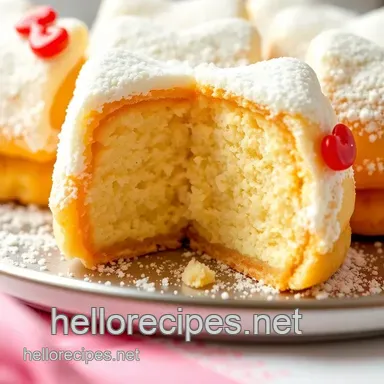
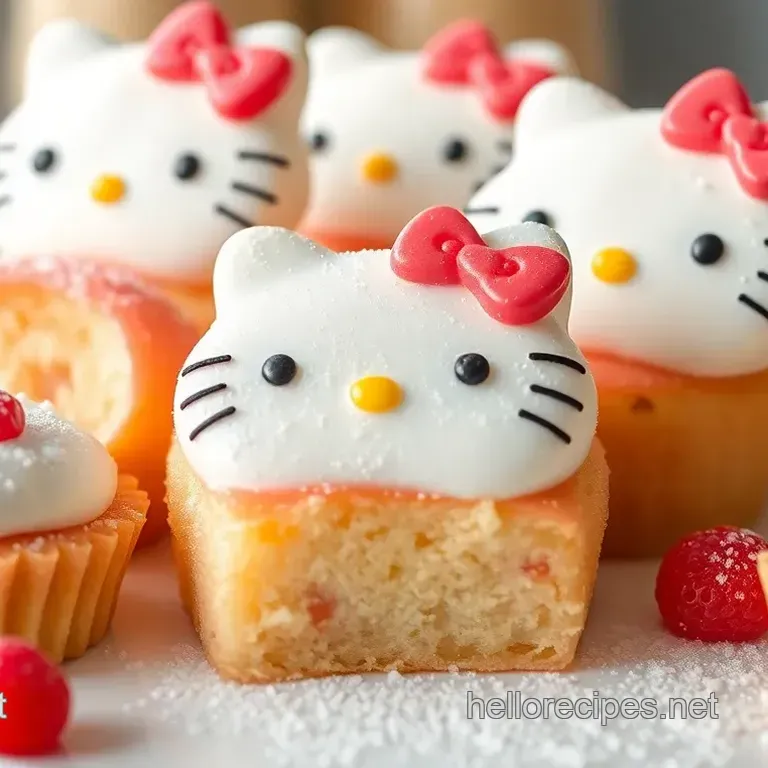
Oh my gosh! have you ever had a dessert that’s just too cute to eat? i can recall a time when i was at my friend’s kid’s birthday party, and someone brought in these adorable pasteles de hello kitty .
Seriously, i was like, “these belong in a gallery!” they weren’t just cakes; they were little edible art pieces, perfect for every party or even just to brighten your day.
If you ask me, there’s nothing quite like the whimsical charm of hello kitty desserts to kick up the fun quotient in any celebration.
These delightful mini cakes are rooted back in the whimsical world of japanese inspired baking . they are incredibly popular these days, turning up at birthday parties, themed tea parties, and even casual get-togethers.
Honestly, they make for unique birthday treats that appeal to both kids and adults! and while they may look like they require a degree in cake decorating, don’t sweat it! making pasteles de hello kitty is medium level fun, and with a little practice (and maybe some patience!), you’ll be whipping them up in no time.
Getting Started: Yummy and Cost Effective Treats
When you think about how long it takes to create these little masterpieces, don’t worry! prep time is about 30 minutes , with a chill time of about an hour after that, plus 20 minutes for baking.
All in all, you can have these beauties ready in about two hours . and let’s talk about cost! most of these ingredients are likely sitting in your pantry already, so you won’t have to break the bank.
This recipe makes 12 miniature cakes , which is plenty for sharing, or for indulging yourself!
Why Whip Up These Adorable Cakes?
What’s so fantastic about these pasteles de hello kitty? for one, they’re kid-friendly dessert recipes that your little ones can help you make.
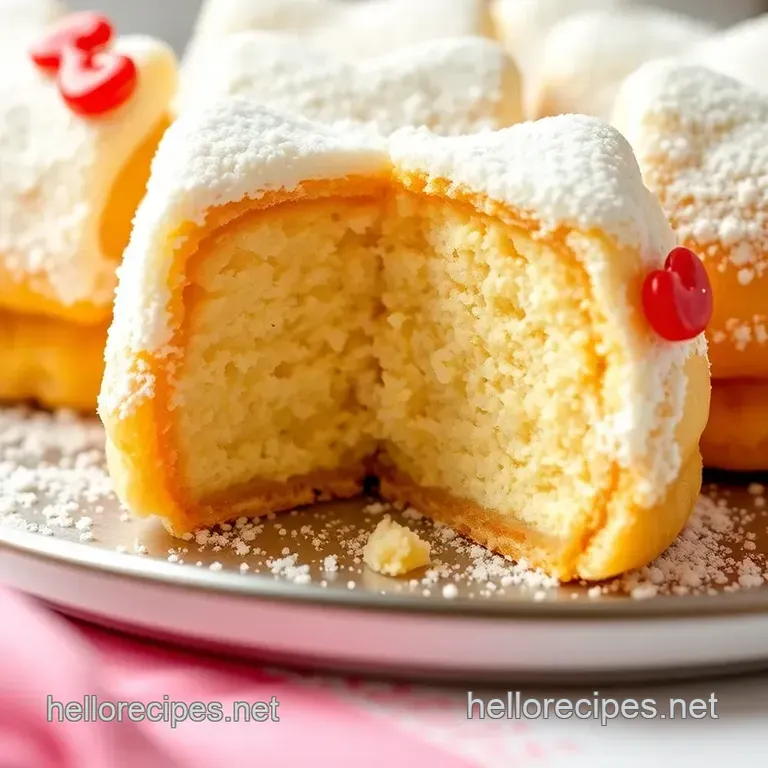
Talk about a fun baking project! they’re also a nutritional delight, packed with wholesome ingredients. the sponge cake base is light and airy, while the whipped cream filling delivers that dreamy creaminess we all crave.
If it’s a party you’re planning, these cakes are perfect for any celebration! imagine serving these cuties at a hello kitty themed birthday bash.
You'll be the life of the party, which, let’s be real, is half the fun of baking! plus, unlike other character themed treats that can go overboard with sweetness, these have that perfect balance of flavors without making your sweet tooth scream for mercy.
Time to Gather Your Ingredients!
Now that you're stoked about making these cute cake recipes, let’s ease into gathering our supplies. start thinking about how to make hello kitty cakes with a fun mix of basic baking goods and some colorful decorations that will pop!
If you’re into cake decorating tips , you’re going to want to keep it simple just grab some fondant, edible markers, and perhaps a hello kitty cake mold to help shape them.
Indulge your creativity! feel free to toss in your flair with personalized cake designs. add sprinkles, or maybe even a touch of edible glitter.
It’s all about making these festive dessert ideas as adorable as the character itself! you can really tackle this as a diy project that not only fills your kitchen with delicious smells but also makes for unforgettable cute dessert ideas .
Ready to jump in and start crafting these mini masterpieces? nothing beats the satisfaction of biting into a colorful cake designed with love and creativity.
Seriously, these pasteles de hello kitty are not just desserts; they are experiences, filled with excitement, memories, and a heck of a lot of fun! let’s get those ingredients together and dive into baking!
Essential Ingredients Guide for Making Adorable Hello Kitty Cakes
Baking the perfect pasteles de hello kitty isn't just about following the recipe; it’s about using the right ingredients! let’s break down everything you’ll need to create those cute hello kitty desserts your friends and family will swoon over.
Grab a snack; this is gonna be fun!
Premium Core Components
First things first. Knowing your ingredients is key! Here's the lowdown on the essentials:
- All-Purpose Flour : You need 1 ½ cups (190 g) . Make sure it’s fresh; old flour can give your cake a dense texture.
- Unsalted Butter : Grab ½ cup (115 g) , softened. It should be a beautiful, creamy yellow if it's overly soft or greasy, it's past its prime. Store it in the fridge and it’ll last about 1 month .
- Granulated Sugar : We’re talking 1 cup (200 g) . Did you know sugar keeps your cake moist? Store it in a cool, dry place. It'll last indefinitely .
- Eggs : Definitely go with 2 large eggs . Fresh eggs bounce back when you press them (literally!). Check for freshness; if they float in water, toss ‘em!
- Heavy Cream : For that luscious whipped filling, you want 1 cup (240 ml) . Look for cream with a fat content of at least 36% . Keep it cold, and it’ll last in the fridge for about 1 week .
Tip : Always check the expiration dates! Fresh ingredients make the biggest difference in your baking.
Signature Seasoning Blend
Now, let’s jazz things up a bit with flavor enhancers!
- Vanilla Extract : You want 1 tsp for the sponge cake and ½ tsp for the filling. Quality matters here, so go for pure vanilla. Trust me, it's a game changer!
- Salt : Just ½ tsp . It balances the sweetness perfectly, making flavors pop!
Feel free to explore other flavors, too maybe add some almond extract or even a zest of lemon for fun!
Smart Substitutions
You know what’s cool? If you’re out of something, there’s usually a fix!
- Flour : gluten-free flour works just fine if that’s your jam.
- Butter : Swap in coconut oil if you’re dairy-free; the cakes will still be fab!
- Heavy Cream : Try coconut cream for a non-dairy filling that tastes awesome!
Kitchen Equipment Essentials
You gotta have the right tools. Don’t worry; you don’t need fancy gadgets!
- Two 6 inch cake pans : Perfect for stacking those mini cakes.
- Mixing bowls and an electric mixer : Gotta get that batter whipped up right!
- Piping bags : Super helpful for filling and decorating.
- Rolling pin : If you’re using fondant, this one’s a must!
And if you can’t invest in a Hello Kitty cake mold? No sweat! You can cut the shapes by hand. Just channel your inner artist!
Wrapping It Up
So, now that we’ve covered the essentials for creating those cute hello kitty cakes , let’s transition into the fun part: making them! it's time to roll up your sleeves and dive into the recipe.
Gather your ingredients and pull out those baking tools. trust me; you'll be grinning like a kid in a candy store when you see these adorable character themed treats come to life.
In the next section, we’ll walk through step-by-step instructions to bring your Japanese inspired baking to the next level. You’re going to create miniature cakes that are not just desserts; they're a whole experience! Let's get baking!
Mastering the Art of Adorable Hello Kitty Cakes
Baking can feel like a fine art, but don’t let the term “professional cooking method” freak you out. honestly, it’s all about breaking it down step-by-step, especially when you’re whipping up something as cute as pasteles de hello kitty .
With a bit of preparation and patience, you’ll be on your way to creating adorable treats that will thrill everyone at your next birthday bash or tea party.
Let’s jump right in!
Essential Preparation Steps
Before you start, take a moment to prepare enter mise en place . this fancy french term just means having everything in its place before you start mixing and measuring.
Gather your ingredients, tools, and any edible decorations you might want to use. remember, the less you run around searching for missing stuff, the smoother your experience will be.
Time management is key, too! for an easy workflow, segment your baking into parts. you should aim for 30 minutes of prep time, followed by the cooking, which takes about 20 minutes .
Trust me, it’ll keep you organized and stress free.
Okay, safety first! Always keep those fingers away from the mixer blades or hot surfaces. A kitchen injuries are about as fun as a soggy cake.
Step-by-step Process
Ready for the fun part? Grab your mixing bowls and let’s get started!
- Preheat your oven to 350° F ( 175° C) . That way, it’s all set to go when your batter is ready.
- Whisk together the dry ingredients in one bowl and cream the butter with sugar in another. It’s the classic sponge cake recipe bases, easy peasy!
- Pour and bake : Your cakes need to bake for about 20 minutes . Test their doneness with a toothpick if it comes out clean, you’re golden.
You’ll want to keep an eye on the temperature control points . once they’re out of the oven, let them cool for about 10 minutes in the pan before transferring them to a wire rack.
Expert Techniques
Getting your cakes to look like hello kitty requires a bit of finesse. when it comes to decorating with fondant, roll it thinly.
I can’t stress this enough! plus, using high-quality edible decorations will really elevate your cake game.
Make sure to check for quality checkpoints; you're aiming for a moist sponge and a smooth basic cake filling. if things don’t go as planned (maybe your cream won't whip-up? don’t panic!), just take a breath and try again.
Sometimes, a little extra effort makes all the difference.
Success Strategies
Now, let’s talk about the biggest cake no-nos. one common mistake is over mixing the batter; this can lead to dense cakes, and nobody wants that.
Quality assurance tips include tasting your whipped cream filling before piping it into the cakes. that way, you can adjust the sweetness if needed.
If you find yourself overwhelmed, you can always make your hello kitty cakes a day ahead. they’ll chill out nicely in the fridge.
Just drizzle with chocolate sauce right before serving for that extra flair.
Cute Decoration Tips
When it comes to the look of your hello kitty cakes, this is where you can really have fun. don’t stress about being perfect! use edible decorations to customize your designs, whether it’s colorful fondant or adorable bow accents.
Really, the cuter they look, the better they taste!
After all, baking is also about making memories (and messes) with your little ones. so, why not get the kids in the kitchen too? baking with children can turn into a delightful fun baking project that they’ll remember forever.
Additional Information
So, what are you waiting for? grab those mixing bowls and start your journey to delightful, mini hello kitty cakes.
You’ll impress your friends with not just the presentation , but the flavor too! and if you're feeling adventurous, feel free to experiment with different fillings or decorations who says you can’t whip up a collection of cute dessert ideas for every holiday?
I’ve absolutely loved sharing my experiences, and I hope you dive into this fun baking project. Trust me, everyone will want a slice of your character themed treats ! Enjoy the baking and don’t forget to channel your inner Hello Kitty while you do it!
Sweet Secrets for Pasteles de Hello Kitty
Oh my gosh, making pasteles de hello kitty is such a fun adventure! honestly, they are the cutest little desserts ever, and i'm here to spill all the delectable secrets and tips you need to nail these adorable cake creations.
So, grab your mixing bowls and let’s dive into the magical world of hello kitty desserts !
Pro Tips & Secrets
First things first, let’s talk about some seriously game changing time saving techniques . if you're anything like me, multitasking while baking is a lifesaver.
Whip up your cream filling while the cake is in the oven. it'll save you time and keep you from worrying about if the cake is cooling down too much.
When it comes to flavor enhancement , consider adding a splash of almond extract to the sponge cake. it adds a delightful depth! oh, and don't forget about the magic of presentation .
If you sprinkle some edible glitter on top, it turns these mini cakes into sparkly wonders that will wow your guests!
Perfect Presentation
Presentation can make or break your cute cake recipes. after all, we eat with our eyes first! for plating, use colorful plates that contrast with the cakes; it makes those pastel colors pop! garnish ideas like fresh berries or mint leaves can add that wow factor too.
You’ll definitely want to pay attention to those color combinations . pink fondant on a white cake is a classic, but i love adding some vibrant sprinkles for extra fun!
Storage & make-ahead
Life is busy, and knowing how to store these cuties is important. after you’ve made your hello kitty cake masterpieces, store them in an airtight container in the fridge.
They'll stay fresh for about three days if they last that long, that is! if you want to make them ahead, you can prepare the sponge cakes a day in advance.
Just assemble and decorate the day you plan to serve them. don't forget to chill them after decorating; it helps set the fondant and makes the cakes even more delightful.
Get Creative: Variations
Now, let’s spice things up a bit with creative variations ! how about playing around with different flavors? you can easily turn these into lemon or chocolate pasteles de hello kitty by adding some zest or cocoa powder.
If you're watching your diet, swap in gluten-free flour or a dairy-free cream for filling. these kid-friendly dessert recipes can be modified to meet any dietary need, and trust me, no one will be the wiser.
Complete Nutrition Guide
Let’s not forget about the nitty gritty of health! each of these mini cakes is roughly 250 calories . got kids? these delightful treats are a great way to show them that homemade doesn’t have to be heavy or unhealthy.
They can relish a sweet tooth indulgence without overdoing it. ensure you keep portion sizes in check these little guys pack a flavorful punch!
Expert FAQ Solutions
Finally, here’s where i answer some of your common questions . a frequent one is, “can i freeze pasteles de hello kitty?” the answer is yes! just wrap them individually and pop them in the freezer.
If you ever run into issues with the fondant, i recommend warming it a bit in your hands first. it’ll become more pliable and easier to work with, which is essential if you want flawless cake decorating tips .
And if decorating isn’t your strong suit, don’t stress! sometimes, keeping it simple is the best option.
Encouragement
So there you have it! armed with these tips, you're ready to make the most adorable character themed treats . remember, baking is all about having fun, so don’t be afraid to experiment with designs and flavors.
Share your creations with friends, family, and, of course, anyone who has a sweet tooth. you’ll find joy not just in baking, but in the smiles you receive when everyone samples your creations! enjoy the magic of baking, and most of all have fun!
Adorable Hello Kitty Cakes Sweet Treats For Any