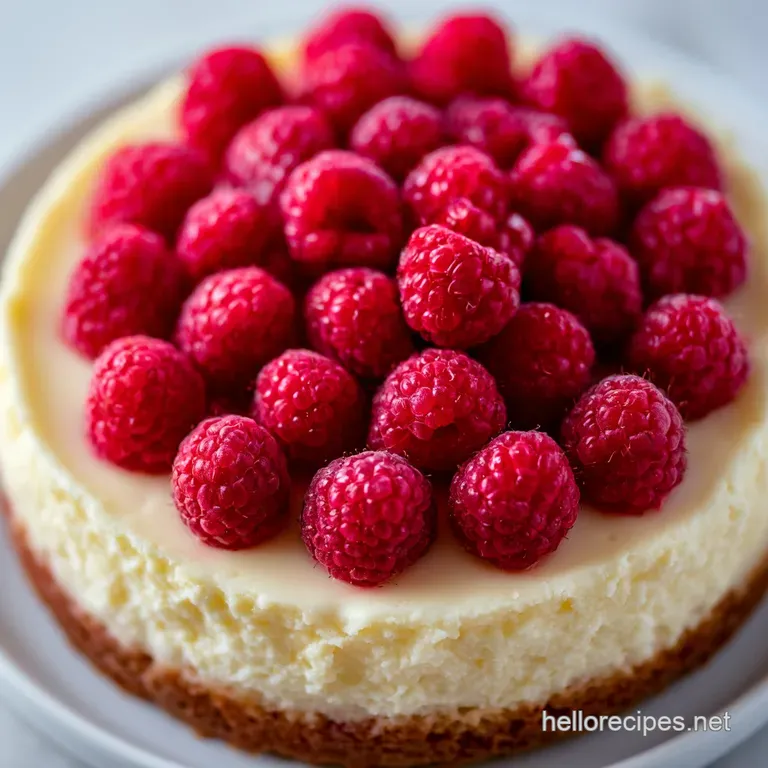
White Chocolate Raspberry Dream Cake: Velvety Crumb
- Time:20 minutes active + 2 hours 30 mins chilling/setting = Total 2 hours 50 mins
- Flavor/Texture Hook: Velvety white chocolate crumb with a sharp, tangy raspberry core
- Perfect for: Birthday celebrations, dinner party finales, or a fancy Sunday treat
The scent of melted white chocolate and tart raspberries filling the kitchen is honestly one of the best smells on earth. It’s that mix of creamy sweetness and sharp fruit that just hits different. I remember the first time I tried a version of this, and it was a total disaster.
The berries acted like little lead weights, dragging themselves to the bottom of the pan and creating a soggy, burnt layer of fruit while the top of the cake was practically tasteless.
It was frustrating because the flavor profile was spot on, but the texture was a mess. I spent way too long wondering why my cake looked like a raspberry landslide. But once I figured out the flour tossing trick and the importance of a cooked down reduction instead of raw jam, everything clicked.
Now, this white chocolate raspberry dream cake is my go to whenever I want something that looks high end but feels like a cozy home bake. It’s a bit of a project, but the result is a slice that’s cloud like and vibrant. Trust me on this, the effort is worth every minute.
Making the white chocolate raspberry dream cake
The reason this cake works where others fail is all about managing moisture and weight. When you just throw fresh berries into a batter, they release water as they bake, which creates those dreaded soggy pockets. By tossing them in flour first, you create a tiny friction barrier that keeps them suspended in the crumb.
Fat Stabilization: The melted white chocolate adds a layer of cocoa butter that stabilizes the sponge, giving it a denser, more velvety feel than a standard vanilla cake.
Acidity Balance: The lemon juice in the raspberry reduction cuts through the heavy sweetness of the white chocolate, preventing the cake from feeling cloying.
Starch Gelatinization: Using a cornstarch slurry in the filling ensures the raspberry center stays put and doesn't leak into your frosting.
Air Incorporation: Creaming the butter and sugar for a full 3 minutes creates the necessary lift, which is essential since the white chocolate can make the batter quite heavy. If you're after something a bit lighter and simpler, my vanilla cupcakes recipe is a great alternative for a quicker treat.
| Method | Time | Texture | Best For |
|---|---|---|---|
| Fresh Berries | 20 min prep | Burst of tartness | Fresh, summer cakes |
| Frozen Berries | 15 min prep | More moist/dense | Winter baking |
| Raspberry Jam | 5 min prep | Very sweet/thick | Quick assembly |
This difference in method really changes the vibe of the cake. Fresh berries give you those beautiful, distinct pockets of fruit, while a jam based filling is more about a consistent, sweet layer. I always go for the fresh reduction because it tastes more professional and looks stunning when you cut into it.
The Secret to Success
When we look at what's happening inside the bowl, it's all about the interaction of fats and acids. The white chocolate isn't just for flavor; it acts as a structural element. Because it's mostly cocoa butter and sugar, it changes how the flour hydrates.
Component Analysis: Understanding these roles helps you tweak the recipe if you're missing something.
| Ingredient | Science Role | Pro Secret |
|---|---|---|
| White Chocolate | Fat/Structure | Use high cocoa butter brands for a better snap |
| Raspberries | Acid/Moisture | Toss in flour to stop them from sinking |
| Cream Cheese | Stability | Keep it cold until the last second for a firmer frost |
| Cornstarch | Thickener | Dissolve in cold water first to avoid lumps |
I've noticed that using a contemporary Irish grass fed butter, like Kerrygold, adds a distinct richness that pairs perfectly with the white chocolate. It gives the sponge a slight golden hue and a flavor that feels a bit more modern and polished.
The Must Have Ingredients
You'll want to get everything to room temperature before you start, especially the eggs and milk. If you add cold milk to melted chocolate, you risk the batter seizing, which leads to a lumpy sponge.
For the Sponge
- 280g all purpose flourWhy this? Standard protein level for a sturdy but tender crumb
- 300g granulated sugar
- 12g baking powder
- 3g salt
- 170g unsalted butter, softenedWhy this? High fat content for a velvety texture
- 3 large eggs, room temperature
- 240ml whole milk
- 10ml vanilla extract
- 115g high-quality white chocolate, melted and cooledWhy this? Adds richness and a distinct sweetness
- 125g fresh raspberries, lightly tossed in 12g flour
For the Raspberry Reduction
- 340g fresh raspberries
- 50g granulated sugar
- 15ml lemon juice
- 5g cornstarch dissolved in 5ml water
For the Frosting
- 225g cold cream cheese, slightly softenedWhy this? Provides the tangy base to offset the sugar
- 115g unsalted butter for frosting, softened
- 360g powdered sugar
- 170g white chocolate, melted and cooled
- 5ml vanilla extract
- 30-45ml heavy cream (use only if needed)
| Original Ingredient | Substitute | Why It Works |
|---|---|---|
| Whole Milk (240ml) | Buttermilk (240ml) | Same liquid volume. Note: Adds a slight tang and more tenderness |
| White Chocolate | Blonde Chocolate | Similar fat profile. Note: Adds a caramelized, toasted flavor |
| Fresh Raspberries | Frozen Raspberries | Same flavor. Note: Thaw and drain excess liquid first to avoid sogginess |
Honestly, don't even bother with low-fat cream cheese. It has too much water and your frosting will end up as a puddle. Stick to the full fat stuff; it's the only way to get that professional, photographic finish.
Essential Kitchen Tools
You don't need a professional kitchen, but a few specific tools make this white chocolate raspberry dream cake much easier. A stand mixer such as a KitchenAid is great for the creaming process, but a hand mixer works just fine if you've got a bit of patience.
Make sure you have parchment paper for the pans. I've had too many cakes stick to the sides because I thought "greasing is enough." It's not. Parchment is your insurance policy. You'll also need a fine mesh sieve for the powdered sugar, because lumps in the frosting are a nightmare to beat out once the butter is in.
Finally, get a digital scale. Measuring flour by the cup is a gamble. If you're unsure about weights, you can check a weight chart to make sure your conversions are spot on.
Step by step Process
Right then, let's crack on with the actual baking. Take your time with the mixing, and don't rush the cooling process.
Phase 1: Preparing the Sponge 1. Preheat your oven to 350°F (175°C). Grease and line your pans with parchment paper to ensure a clean release. 2. Beat the softened butter and sugar until pale and fluffy (about 3 minutes).
Note: This incorporates air for a lighter lift 3. Add eggs one at a time, followed by vanilla. Mix until smooth and creamy. 4. Slowly stream in the melted white chocolate while continuing to mix until well combined. 5. Whisk together flour, baking powder, and salt in a separate bowl. 6.
Gradually add the dry ingredients to the wet, alternating with the milk. Stop mixing as soon as you see no more flour streaks. 7. Gently fold in the floured raspberries using a spatula. Note: Overmixing here will turn the batter pink 8.
Divide batter between pans and bake 30 mins until a toothpick comes out clean and the edges slightly pull away from the pan.
Phase 2: Creating the Raspberry Reduction 9. Combine raspberries, sugar, and lemon juice in a saucepan over medium heat. 10. Simmer for 10-15 mins until the berries break down and the mixture thickens. 11.
Stir in the cornstarch slurry and cook for another 2 mins until glossy and thick. 12. Remove from heat and let it cool completely before using.
Phase 3: Whipping the Dream Frosting 13. Beat the cream cheese and butter together until silky. 14. Gradually add powdered sugar and vanilla. 15. Pour in the cooled melted white chocolate and beat until velvety. 16.
Add heavy cream 1 tablespoon at a time until you reach a spreadable, firm consistency.
Phase 4: Assembly & Finishing 17. Level the cooled cakes with a serrated knife. 18. Pipe a ring of frosting around the edge of the first layer to create a "dam." 19. Fill the center of the ring with the cooled raspberry reduction. 20.
Top with the second layer and frost the entire white chocolate raspberry dream cake.
Fixing Common Cake Fails
Even for experienced bakers, this recipe can throw a few curveballs. Most of the time, it comes down to temperature or over mixing.
Berry Sinking Issues
If your berries end up at the bottom, it's usually because they weren't coated enough in flour or the batter was too thin. Ensure your flour is well distributed and that you don't over beat the batter after adding the milk.
Frosting Curdling
Curdled frosting happens when the butter and cream cheese are at different temperatures. If it looks grainy, it's just an emulsion problem. Gently warm the bowl with a hairdryer for 10 seconds while mixing, and it should smooth out.
Runny Filling
A filling that leaks is usually a result of not cooking the reduction long enough or skipping the cornstarch. The reduction should be thick enough to hold its shape on a spoon before it goes into the cake.
| Problem | Root Cause | Solution |
|---|---|---|
| Cake Sinks in Middle | Oven opened too early | Keep door shut until 25 mins |
| Frosting Too Soft | Butter was too warm | Chill cake and frosting for 30 mins |
| Dry Sponge | Overbaked by a few mins | Check doneness at 28 mins |
Mistakes Checklist
- ✓ Did you toss the berries in flour?
- ✓ Is the melted chocolate cooled before adding to batter?
- ✓ Did you use a "dam" of frosting for the filling?
- ✓ Are the eggs at room temperature?
- ✓ Did you avoid over mixing the flour?
Fun Flavor Variations
Once you've mastered the white chocolate raspberry dream cake, you can start playing with the flavors. If you want a more citrusy vibe, add the zest of one lemon to the batter. It brightens the whole thing up and makes it feel like a spring dessert.
For those who want a more intense chocolate experience, you can swap the white chocolate in the sponge for a blonde chocolate (caramelized white chocolate). This gives the cake a deep, butterscotch note that is incredible with the tart raspberries.
If you're looking for a different style of topping, you could try my silky smooth buttercream frosting for a more traditional, sugary finish. You could also add a layer of white chocolate ganache between the sponge and the raspberry filling for extra decadence.
Decision Shortcut
- If you want more tartness, increase the lemon juice in the reduction.
- If you want a sturdier cake for stacking, reduce the milk by 20ml.
- If you want a "wedding style" look, use a piping bag for the exterior.
Freshness and Storage
Because of the cream cheese and fresh fruit, this cake needs to be handled carefully. It’s not a "leave it on the counter" kind of dessert.
Storage Guidelines Keep the cake in an airtight container in the fridge for up to 5 days. I actually think this white chocolate raspberry dream cake tastes better on day two, as the flavors have more time to meld and the sponge softens slightly from the filling.
For the freezer, you can freeze the unfrosted layers for up to 3 months. Wrap them tightly in plastic wrap and then foil. When you're ready, let them thaw in the fridge overnight before frosting.
Zero Waste Tips Don't throw away the raspberry seeds and pulp left over from straining your reduction. You can stir them into a batch of morning porridge or mix them into a homemade yogurt.
If you have leftover frosting, freeze it in small dollops on a tray and then move them to a bag; they make great toppers for pancakes.
Plating and Serving
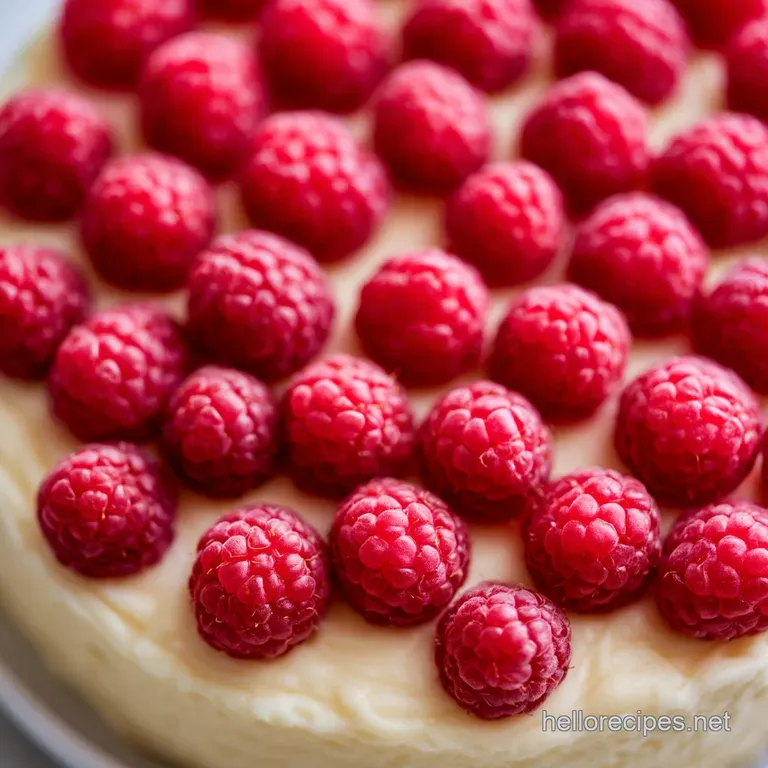
The visual contrast of the deep red raspberry against the stark white chocolate frosting is what makes this dish so photographic. Depending on who you're serving, you can change the presentation completely.
Simple Level Cut a generous slice and serve it on a plain white plate. Top with one fresh raspberry and a light dusting of powdered sugar. This is perfect for a casual family dinner where the taste is the main event.
Polished Level Frost the cake with a smooth "naked cake" style finish, letting some of the sponge peek through. Pipe small stars of frosting around the top edge and nestle a raspberry on each star. Finish with a few mint leaves for a pop of green.
Restaurant Level Place a single, neat slice slightly off center on a large plate. Use a spoon to create a dramatic "swipe" of extra raspberry reduction across the plate. Add three small dots of frosting, a few white chocolate curls that shatter when touched, and a tiny sprig of mint.
| Plating Level | Key Element | Vibe |
|---|---|---|
| Simple | Powdered Sugar | Homey |
| Polished | Piped Stars | Boutique Café |
| Restaurant | Coulis Swipe | Fine Dining |
When you finally dive into this white chocolate raspberry dream cake, you'll notice that the texture is the real star. The sponge is tender, the filling is tangy, and the frosting is velvety.
It’s a complete sensory experience that proves you don't need a professional pastry degree to make something that looks and tastes world class. Just remember the flour on the berries, and you're golden!
Recipe FAQs
Can I use frozen raspberries instead of fresh?
No, stick with fresh. Frozen berries release excess moisture and bleed color, which can ruin the batter consistency.
How to prevent the raspberries from sinking to the bottom?
Toss the berries in flour before folding them in. This creates a textured surface that helps the batter grip the fruit.
Is it true I must use a double boiler for the white chocolate?
No, this is a common misconception. A microwave at 50% power in short intervals works perfectly and is much faster.
How to store this cake to keep it fresh?
Keep the cake in an airtight container in the refrigerator. The cream cheese frosting requires cold storage to maintain its structure and safety.
How to fix frosting that is too stiff to spread?
Whisk in heavy cream one teaspoon at a time. Continue adding small amounts until the frosting reaches a smooth, spreadable consistency.
Why must the butter and sugar be beaten for 3 minutes?
To incorporate air for a lighter lift. This aeration process ensures the sponge is fluffy rather than dense.
Can I add a chocolate drizzle for extra decadence?
Yes, it complements the tart raspberries. If you enjoyed balancing these flavors, see how we create a similar richness in our decadent chocolate sauce.
White Chocolate Raspberry Dream Cake

