The Ultimate Dill Pickle Brine: Bold, Zesty, and Irresistibly Crunchy
- Tasting the Tang: A Personal Journey into the Best Dill Pickle Brine Recipe
- Essential Ingredients Guide to Kickstart Your Pickle Journey
- Unlocking the Secrets of the Best Dill Pickle Brine Recipe
- The Ultimate Guide to Making Pickles With the Best Dill Pickle Brine Recipe
- Frequently Asked Questions
- 📝 Recipe Card
Tasting the Tang: A Personal Journey into the Best Dill Pickle Brine Recipe
Oh my gosh, i remember the first time i craved pickles! i was at a summer picnic, and those zesty, crunchy bites were the highlight of the day.
The sound of someone crunching into a pickle was like music to my ears. that’s when i knew i had to find the best dill pickle brine recipe and try making my own.
Let me tell you, there’s something magical about pickles homemade easy enough that even your grandma would be impressed.
You know, making your own pickles really connects you to something classic. this dill pickle brine recipe draws inspiration from the generations before us.
Pickling dates back to ancient times, basically when cucumbers were just sitting around and someone decided, “hey, let’s make these bad boys tasty!” today, homemade pickles are hot on the scene once again seriously, you’ll find them everywhere from fancy charcuterie boards to backyard
Bbqs.
The beauty of this dill pickle recipe is how easy it is. seriously, it’s like a walk in the park on a sunny day! you’re looking at roughly 50 minutes total, with about 15 minutes of active prep.
And trust me, if you can measure and boil water, you can totally master this brine. plus, it yields enough for about 4 pints of crispy pickles! yes, please!
Dishing Out the Benefits: Why You Need These Pickles in Your Life
So why go through the trouble of making pickle recipes homemade ? let’s chat about the good stuff! for starters, there are tons of health benefits.
Did you know that pickles can be great for digestion? they pack a punch when it comes to probiotics your gut will thank you later! with fresh ingredients, this recipe is even a solid way to sneak some veggies into your diet.
Now let’s talk moments. these pickles are perfect for special occasions , like summer bbqs or family gatherings. picture this: you’ve got burgers sizzling on the grill, friends gathered ‘round, and there you are, serving up crunchy, tangy pickles that steal the show.
No one will even remember the chips!
And the best part? this dill pickle recipe is a fantastic advantage over store-bought pickles. you get to control the flavors! want them extra garlicky? go for it! want a kick of heat? toss in some spice! you're not just a consumer; you're the artist of your culinary masterpiece.
Months of Happiness in a Jar
You might be thinking, "what's the catch?" there isn't one! in fact, once you make this pickle recipe , you’ll want to keep those jars in your fridge all summer long.
I swear, every time i pop open a jar, it’s like a mini celebration. just imagine crackin' one open and watching your friends' eyes light up.
Cucumbers, dill, garlic, and a bit of spice make for the ultimate flavor bomb! and guess what? you won’t break the bank either! the ingredients are super affordable, making this not only the best refrigerator pickles dill recipe but also one that doesn’t stretch your wallet too much.
But wait, how do we dive into this pickle journey? All right, hold on tight because I’m about to spill the beans on how to snag the most epic crunch.
With that being said, let’s jump into the ingredients section where you can gather everything you need to start your own homemade pickles adventure! Trust me, you'll be the pickle whisperer in no time!
Essential Ingredients Guide to Kickstart Your Pickle Journey
So, you’re thinking about diving into the world of homemade pickles? Let me tell you, it’s a game changer. The top secret? It all starts with the best dill pickle brine recipe !
Premium Core Components
Before you even touch those cucumbers, let’s talk about core ingredients . Yes, I mean the stuff that makes your brine pop. You'll need:
- 2 cups white vinegar (that’s about 480 mL if you’re a metric fan).
- 2 cups water (again— 480 mL ).
- ¼ cup kosher salt for that essential brine taste (that’s 75 g ).
- ¼ cup granulated sugar (or about 50 g ).
When you gather these ingredients, look for the real deal . the vinegar should smell sharp, and the salt should feel crystal clear.
Store your spices in a cool, dry place to keep them fresh longer. trust me, an old salt won’t do your pickles any favors, and your pickles will thank you for being a flavor snob.
Signature Seasoning Blend
You’ve got your brine base; now let’s spice things up! Think of a signature seasoning blend:
- 3 tablespoons of dill seeds ( 30 g ) make everything taste like summer.
- Toss in 8-10 cloves of smashed garlic because honestly, who doesn’t love garlic?
- A sprinkle of black peppercorns and maybe a pinch of red pepper flakes if you're feeling spicy.
Different regions have their vibe. my cousin in the south throws a bit of mustard seed in, and it’s a whole new game! if you’re looking to keep it classic or jazz it up a bit, it’s all on your flavor playlist.
Smart Substitutions
But what if you’re missing something? no worries, we’ve all been there. if you’re out of dill seeds, fresh dill works just as well! honestly, use what you have.
If you need a sugar fix and you're counting carbs, opt for a sweetener like erythritol. life’s too short for stale pickles, so don’t be afraid to get creative!
And don’t forget about seasonal options! If cucumbers are out of season, pick those crunchy zucchinis instead. They’ll give you that same satisfying crunch in your refrigerator pickles.
Kitchen Equipment Essentials
Alright, let’s get down to business. To whip up this homemade goodness, you’ll need:
- A large saucepan to bring that brine to life.
- Measuring cups and spoons for the precision fans out there.
- Glass jars for keeping your pickles sealed and sassy.
Don’t stress if you don’t have all the fancy tools. a wooden spoon will work just as well for stirring up some deliciousness.
Honestly, cooking isn’t about the tools; it’s about the love you pour into it.
Let’s Wrap It Up
Now that we've covered the basics and prepped you to become the ultimate pickle pro, you’re ready to embrace the joy of homemade pickling.
Your friends will be begging you for your quick and easy dill pickles , and you'll be the star of every barbecue.
Feel free to experiment and become the pickle guru in your circle. remember, the best dill pickle brine recipe is the one that feels right to you .
Up next, i’ll guide you through the easy steps to turn those ingredients into something crunchy and tangy. grab that apron and let's get to it! happy pickling, folks!
Unlocking the Secrets of the Best Dill Pickle Brine Recipe
Oh my gosh, if you’re like me, you’ve probably found yourself in a pickle when it comes to making the perfect homemade pickles.
Yes, i went there! but seriously, crafting your own pickles can be super easy and fun, especially with the best dill pickle brine recipe in your back pocket.
Let’s dive into the magic of pickling, starting with essential preparation steps!
Essential Preparation Steps
Before you even think about chopping those cucumbers, you need to get your ducks in a row. the term mise en place is fancy chef speak for "everything in its place.
" so, gather all your ingredients first. for the brine, that’s 2 cups of white vinegar, 2 cups of water, ¼ cup of kosher salt , and a ¼ cup of granulated sugar , among other goodies.
Time management is just as vital! if you want tasty fridge pickles, you should plan on about 50 minutes total 15 minutes of active prep and a crucial 30 minutes cooling time.
Safety is key, too. be sure that your jars are sterilized, or it can be a real pickle disaster! remember, cleanliness is next to crunchiness when it comes to keeping those bacterial beasts at bay.
Step-by-step Process
Let’s break this down nice and tidy with numbered steps:
Prepare the Brine: Combine 2 cups of vinegar and 2 cups of water in a saucepan. Stir in ¼ cup of kosher salt and ¼ cup of sugar until dissolved.
Add Flavorings: Toss in the dill seeds , smashed garlic, peppercorns, and if you’re feeling adventurous, some crushed red pepper flake.
Bring to a Boil: Heat that mix until it’s boiling gently, then remove it from the heat.
Cool It Down: Let the brine cool for 30 minutes at room temperature. We don’t want to scald our cucumbers!
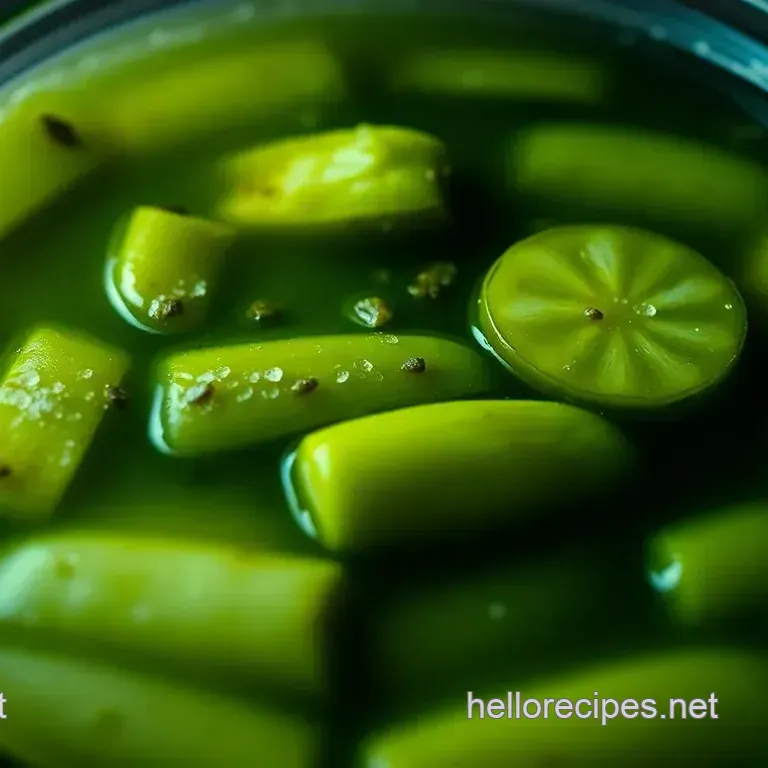
Prepare the Cucumbers: Wash and slice 4 cups of your freshest cucumbers.
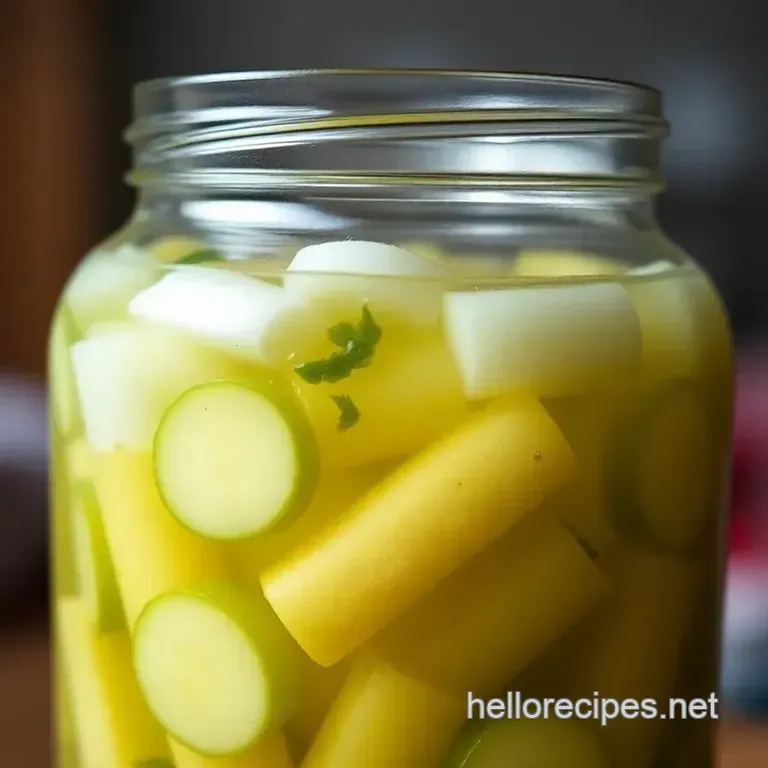
Fill the Jars: Using a funnel (if you have one), pour the cooled brine into sterilized jars over the cucumbers. Make sure they’re all submerged no floaters allowed!
Seal ‘Em Up: Put on the lids and pop them in the fridge.
Wait for the Goodness: Allow at least 24 hours for those flavors to really sink in before diving in!
Expert Techniques
Now onto the expert techniques that can take your pickles to the next level. first off, quality checkpoints are a must.
Make sure your cucumbers are as fresh as you can get; a good rule of thumb is to go for pickling cucumbers and avoid those soft ones.
If you run into any trouble, remember, it’s just about adjusting. Did your brine end up too salty? Add more water. Too sweet? A splash of vinegar can balance it out.
Success Strategies
We’ve all made rookie mistakes, so don’t fret! avoid overpacking your jars. it can be tempting, but leaving a little headspace is crucial for the pickling process.
Also, give your jars a good shake after filling them to remove any air bubbles.
For the perfect crunch, consider adding grape leaves or a pinch of that fancy alum. They keep those pickles crisp and ready for action.
And hey, if you’re planning for a party? You can make these a day ahead. Pickles homemade easy! Trust me, they taste even better after sitting for a day or two.
Wrap-Up for Pickle Lovers
Once you've nailed down this dill pickle recipe , you’ll never want to go back to store-bought. these refrigerator pickles are a snack staple that elevates sandwiches, burgers, or any charcuterie board to a whole new level.
Plus, they're great for impressing friends at a picnic.
So, grab those cucumbers and get pickling! i can't wait for you to enjoy these crunchy delights. and if you’re looking for even more inspiration, stay tuned for the additional information section.
Happy pickling, friends!
The Ultimate Guide to Making Pickles With the Best Dill Pickle Brine Recipe
Oh my gosh, if you’re ready to dive headfirst into the delicious world of pickles , you’ve landed in the right spot! i mean, who doesn't love a crunchy, tangy bite of homemade pickles?
Honestly, it's more than just a recipe; it’s a fun little project that can sprout some really tasty results right in your own kitchen! let's dig into the additional recipe information for the best dill pickle brine recipe that’ll keep your taste buds dancing.
Pro Tips & Secrets
Alright, first things first: time saving techniques ! i know you’re busy, so here’s what i do. prep your cucumbers the night before.
Rinse them, and maybe slice them up or leave them whole. just toss them in a bowl and cover them with water easy peasy!
Also, don’t underestimate the power of cold brine . letting your brine cool completely before pouring it over the cucumbers makes for crisper pickles.
No one wants soggy pickles, right? and if you’re thinking of elevating the flavor, toss in a couple of slices of fresh ginger next time! it adds this zing that's unexpected but delightful.
Perfect Presentation
Let’s get a little fancy here! plating isn’t just for restaurants; it’s for at-home enjoyment too. once your pickles are ready, think color.
Serve those beauties on a white plate nothing pops like green pickles against a clean backdrop!
For garnishes , a sprig of dill or maybe a few chili flakes on top can really bring your dish together.
You want people to be intrigued, like, "wow, how did you make these?"
Storage & make-ahead
If you’re like me and love to plan ahead, this is for you. storage is crucial. keep your pickles in the fridge and they’ll last about 2-3 months if you make them correctly.
Just make sure they are fully submerged in the brine to keep them fresh and zesty!
When it's time to reheat (if you’re going that route in dishes), just give them a quick dip in hot water. Trust me, no need to nuke them.
Creative Variations
Now, this part is where you can really get the creative juices flowing. what’s your fave flavor? want to make a spicy version? just toss some sliced jalapeños into your brine! or if you’re looking for something a bit more seasonal , try adding some spices like cinnamon sticks during the fall.
If you need to adapt but don’t want to compromise on taste, go for sugar substitutes! Erythritol works wonders in the brine without losing that lovely sweetness.
Complete Nutrition Guide
Okay, I know the word "nutrition" sounds a little boring, but hear me out! Did you know that cucumbers are super hydrating? They’re packed with fiber, which can help keep your digestion on point score!
These pickles are roughly 30 calories per serving . and the sodium level can be high if you don’t watch out; feel free to adjust the salt for your needs.
Just remember, balance is key!
Wrapping It Up
So there you have it! with the best dill pickle brine recipe , you’re not just making pickles; you’re creating a delicious moment.
Whether you’re munching them straight from the jar or adding them to your favorite burger, you’re adding a bit of homemade love to your meals.
Now, take that brine, and let’s get pickling! remember, the joy of cooking isn't just in the eating it's in the experience.
So kick back, enjoy the process, and celebrate those crunchy bites you’ve just created! happy pickling, friend! 🍳🥒
Frequently Asked Questions
What is the best dill pickle brine recipe for beginners?
The best dill pickle brine recipe for beginners is our Ultimate Dill Pickle Brine. With simple steps and easily accessible ingredients, you can whip it up in under an hour! Just remember to let the pickles sit for at least 24 hours to soak up all that delicious flavour.
How long do I need to let the pickles sit in the brine?
For the best results, let your pickles sit in the brine for at least 24 hours. However, if you can wait 48 hours or even longer, they’ll develop an even richer flavor. Think of it like a good cup of tea better when steeped a bit longer!
Can I reuse dill pickle brine for another batch of pickles?
You can reuse dill pickle brine for a second batch, but keep in mind that it may lose some flavour and crunch in the process. It’s best to use a fresh batch for maximum zesty punch. Just like with a good British cuppa, fresh is often best!
What are some variations I can try with this best dill pickle brine recipe?
There are tons of delightful variations! You can add spices like mustard seeds, or slice up jalapeños for a spicy kick. Experimenting is key just like spice blends in a curry, a little tweak can lead to something special!
How should I store my homemade pickles?
Store your homemade pickles in the refrigerator, sealed tightly in jars. They should last for about 2-3 months, but you’ll likely gobble them up much sooner! Just make sure to label your jars with the date so you know when they were pickled.
What are the nutritional facts for this dill pickle brine recipe?
Per serving (1/2 cup of pickles), they roughly contain 30 calories, 1g protein, and 700mg sodium. While the brine is flavorful, you might want to enjoy those pickles in moderation, just like with a lovely slice of cake!
The Ultimate Dill Pickle Brine Bold Zesty And Ir

