Gluten Free Bread: the Bakers Secret to a Soft, Springy Loaf
- Ditching the Crumble: Introducing the Ultimate Gluten Free Bread Loaf
- Precision Engineering: The Science Behind a Soft gluten-free Crumb
- Essential Components: Ingredients for Your Everyday Sandwich Loaf
- Baking Success: Step-by-Step Guide to Your gluten-free Loaf
- Troubleshooting the Bake: Expert Tips for Flawless Gluten Free Bread
- Extending Freshness: Storing Your Homemade Loaf
- Beyond Toast: Creative Ways to Enjoy This Springy Sandwich Loaf
- Recipe FAQs
- 📝 Recipe Card
Ditching the Crumble: Introducing the Ultimate gluten-free Bread Loaf
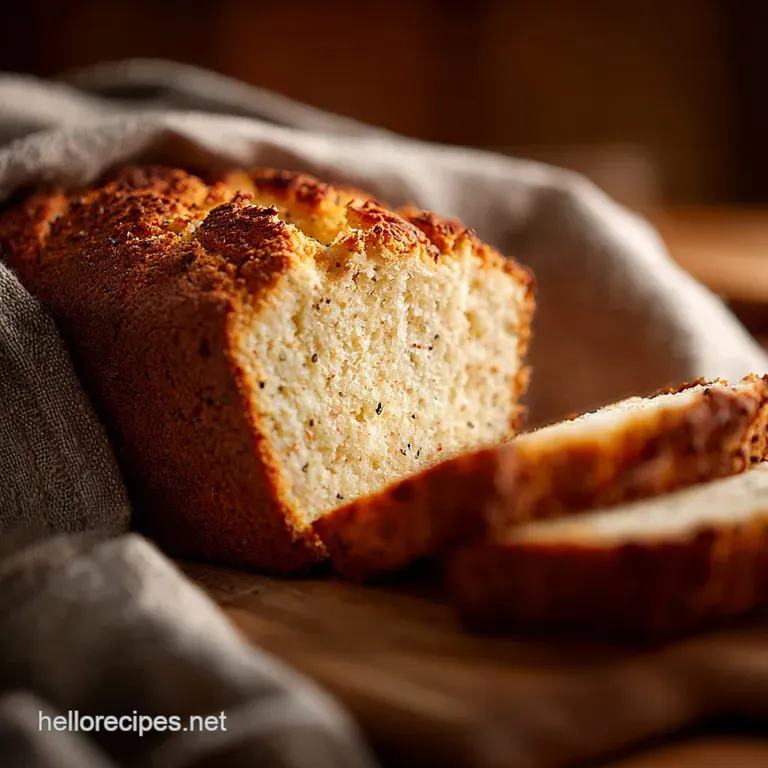
When this loaf comes out of the oven, the smell is just phenomenal. You actually get that deep, rich, yeasty, proper bread aroma that you thought you had lost forever when you went gluten-free. It has a crust that cracks lightly, and the crumb inside is soft, springy, and totally reliable.
Listen, I know what you’re thinking: every GF recipe promises soft bread, and you usually end up with a brick or something that falls apart if you look at it sideways. I’ve been there; I wasted so much expensive flour on dense hockey pucks.
This recipe is a genuine lifesaver because it’s fast (no complicated kneading!) and, frankly, it’s cheaper than buying those tiny, pre-sliced, rock hard loaves from the fancy health food stores.
We aren't doing any complex alchemy here; we’re just being super precise with a few magical ingredients that mimic gluten’s function. We need to talk about structure, moisture, and how to harness the power of psyllium husk powder.
Let’s crack on and finally bake a sandwich loaf worthy of a serious BLT.
Precision Engineering: The Science Behind a Soft gluten-free Crumb
I often joke that GF baking is less like cooking and more like chemistry you have to get the ratios exactly right, especially when building structure without wheat. The reason most GF bread fails is that it lacks elasticity; it rises beautifully, then immediately collapses under its own weight.
We fix that here.
The Baker's Secret: Structure Without Gluten
The key to a light, airy loaf is creating tiny air pockets that stay put when heated. Since we can't use the gluten protein network to trap those gases, we rely on specialized hydrocolloids. These ingredients bind water and create that necessary viscosity, effectively acting as our substitute scaffolding.
What Makes This Loaf Springy and Elastic?
Our structure relies on the powerful synergy between psyllium husk powder and xanthan gum. Xanthan gum helps keep the structure stable throughout the rise and bake, ensuring a tight crumb.
The real game changer, though, is the psyllium; it absorbs tremendous amounts of water and, when mixed, forms a gel that gives the dough that slight stretchiness that we all crave in real bread.
Quick Overview of the No-Knead Method
Traditional bread develops gluten through extensive kneading, but we don't need that here. Since we are using gums and starches, we only need a high speed mix. This high speed paddle mixing incorporates air and ensures the gums are evenly distributed and fully hydrated, which is crucial for preventing a gummy interior.
The Synergy of Psyllium and Xanthan Gum
Don't skip either of these ingredients! Xanthan stabilizes the starches, while psyllium gives the bread its texture and mouthfeel. Using both ensures you get both lift and chewiness.
If you use a pre-mixed GF blend, always check if it already contains xanthan gum; you might need to reduce the amount listed in my recipe.
Achieving the Perfect Crust Density
The biggest secret to a great GF crust is steam, or rather, trapping moisture early in the baking process. We cover the loaf with foil for the first 20 minutes; this prevents the outside from hardening too quickly while the interior is still trying to expand.
This little trick also helps the loaf achieve a better height.
Why Accurate Weighing is Non-Negotiable
This is my biggest piece of advice, and honestly, the one mistake that cost me months of failures. Flours, especially GF flours, compress differently. Scooping a cup of rice flour can give you 130g one day and 160g the next!
You absolutely must use a digital kitchen scale to weigh the dry ingredients listed in grams; precision guarantees success in this recipe.
Essential Components: Ingredients for Your Everyday Sandwich Loaf
Please follow the weights listed in the recipe card above, as those are the figures I trust completely. If you have to make a substitution, pay close attention to the ratios.
Choosing the Right gluten-free Flour Blend
I prefer mixing my own blend of white rice flour, tapioca, and potato starch because it gives me total control over the flavour and texture. Rice flour provides the bulk, tapioca starch adds chewiness, and potato starch ensures it stays light and moist.
Using a pre-mixed All-Purpose GF flour blend that already contains gums can work, but remember that the results will vary widely based on the brand.
Measuring and Substituting Psyllium Husk Powder
We are using powdered psyllium husk here, which is finer than the whole husks and absorbs water faster. If you only have whole psyllium husks, you can use 3 tablespoons, but you must let them sit in the warm water mixture for five minutes before mixing to ensure they fully hydrate.
Active Dry Yeast vs. Instant Yeast Notes
I call for instant dry yeast because you can just mix it right in with the dry ingredients super easy! If you only have active dry yeast, proof it first with the warm water and a pinch of sugar for about ten minutes until frothy, and then proceed with the recipe.
Can I Skip the Added Sugar or Honey?
The 1 tablespoon of sugar isn't for sweetness (you won't taste it); it's there purely as food for the yeast. Yeast needs something to snack on to produce the gas that makes your bread rise. You can substitute this with honey or maple syrup if you prefer, adding it to the warm water mixture.
| Ingredient | Substitution Tip | Ratios |
|---|---|---|
| Psyllium Husk Powder | Whole Psyllium Husks | Use 3 Tbsp instead of 2 Tbsp Powder |
| Warm Water/Milk | Unsweetened Plant Milk (Soy or Oat) | 1:1 ratio for richer flavour |
| Olive Oil | Melted Coconut Oil or Avocado Oil | 1:1 ratio, any neutral oil works |
| Apple Cider Vinegar | White Vinegar or Lemon Juice | 1:1 ratio; provides necessary acidity |
| Egg | Flax Egg (1 Tbsp flaxmeal + 3 Tbsp water, rested 5 min) | The bread will be denser but still structurally sound |
Baking Success: step-by-step Guide to Your gluten-free Loaf
This isn't a hands-on dough, so your stand mixer is your best friend. Don't worry if the final "dough" looks more like a thick cake batter that's exactly what we're aiming for!
Activating the Yeast (The Proofing Stage)
If you are using Instant Yeast (my preference), simply mix it with all your dry ingredients. If using Active Dry, mix it with the warm liquid first; you want it foamy and smelling yeasty before you combine it with the flour.
Remember, the water must be warm, but not scorching hot , or you'll kill the yeast and end up with a very sad, dense brick.
Mixing and Developing the Viscous Dough Structure
Get all those dry ingredients uniform in your mixer bowl before adding the wet components. Use the paddle attachment on medium high speed for the full 5– 7 minutes.
The dough will look lumpy at first, but keep scraping and mixing until it smooths out and becomes visibly thick and slightly sticky.
Chef's Note: Stop the mixer immediately if the dough starts riding up the paddle attachment too much, and scrape it down. The finished texture should be like really thick oatmeal or paste, not a traditional wheat dough that you can handle easily.
The Optimal Rise: First and Second Fermentation
GF dough only proofs once, right in the pan. Place the loaf in a warm, draft free spot. I use my oven with just the light on; it’s perfect. Watch for a rise of about 50 75%; it won't double.
If you let it go too long, the structure weakens , and it will collapse dramatically in the oven, trust me, I learned that the hard way!
Baking Temperatures and Internal Doneness Checks
We start hot at 375°F (190°C) with the foil on, then drop the temp slightly after uncovering. This controlled temperature ensures the crust doesn't burn while the centre is setting. The internal temperature is the only reliable way to know if your loaf is done.
It must hit 208 210°F (98 99°C) dead centre before you take it out.
Troubleshooting the Bake: Expert Tips for Flawless gluten-free Bread
Baking without gluten can be unforgiving, but most common failures are totally preventable. If you had trouble, review these fixes!
Preventing the Gummy Interior (The Hydration Fix)
A gummy interior usually means one of two things: you sliced it before it was fully cooled, or it wasn't baked thoroughly enough. If the internal temperature hit 210°F and it’s still gummy, then your initial mix was likely too hydrated. Next time, slightly reduce the water by 1 2 tablespoons.
Slicing must wait until it's completely cold this is non-negotiable.
Why Your Loaf Collapsed (The Oven Temperature Solution)
Collapse is almost always due to over proofing. The structure couldn't hold the gas generated by the yeast. Make sure your rising environment isn't too hot (no direct sun!), and get it into the oven as soon as it looks visibly puffy (around the 60 90 minute mark).
Also, ensure your oven thermometer is accurate, as wide temperature swings can cause deflation.
The Essential Steam Trick for a Chewy Crust
While the foil helps, if you want a truly chewy, rustic crust, try this: place a small, oven safe tray on the bottom rack of your oven while preheating. Just before you put the bread in, pour about half a cup of hot water into that tray.
The resulting burst of steam keeps the crust soft initially , allowing the loaf maximum height before it sets.
Extending Freshness: Storing Your Homemade Loaf
So, you’ve baked a perfect loaf great! Now don't ruin it with bad storage. This bread is free of the heavy preservatives found in store-bought options, so it requires care.
Short Term Countertop Storage Solutions
Once completely cool, wrap the loaf tightly in plastic wrap, then place it inside a sealed zip-top bag or container. It stays perfectly fresh at room temperature for about 3 days. After that, it starts to dry out, though it’s still fantastic for toast!
Best Practices for Freezing Sliced Bread
Does it freeze well? You bet it does. If you aren't going to finish the loaf within three days, slice it first! Freeze individual slices, separated by small squares of parchment paper, inside a large, heavy duty freezer bag. This allows you to pull out just one slice at a time.
It will keep well for 2 3 months.
How to Gently Thaw and Refresh Your Loaf
To thaw, you can simply pull the slice out and let it sit on the counter for 15 minutes, or toast it immediately from frozen. If you have a full, thawed loaf that needs refreshing, lightly spritz the crust with water and bake it at 350°F (175°C) for about 5 minutes.
This brings back the soft texture and that incredible fresh baked aroma.
Beyond Toast: Creative Ways to Enjoy This Springy Sandwich Loaf
This loaf is hearty enough to handle anything you throw at it. It’s ideal for thick, loaded sandwiches because it doesn't disintegrate halfway through eating.
- Proper Grill Cheese: Use a thick slice, smear with butter, and load it up with your favourite melting cheese. It toasts beautifully without becoming brittle.
- Stuffing Base: This bread, when dried out slightly, makes a wonderfully sturdy base for stuffing recipes. While it doesn't have the same flavour profile as the cornbread in my Southern Thanksgiving Menu: Classic Cornbread Dressing Recipe , it provides excellent structure if you need a non-corn GF stuffing.
- The Ultimate Dessert Pairing: This bread is neutral enough to enjoy with sweet spreads. After a fantastic dinner, sometimes I love serving a slice with butter alongside something bright and tart, like my gluten-free Lemon Summer Recipes: No-Bake Mascarpone Bars .
- Croutons: Cube up slightly stale slices, toss with olive oil and herbs, and bake until crisp. Best salad croutons ever!

Recipe FAQs
Why is my gluten-free loaf dense, gummy, or raw in the middle?
This is usually a sign of underbaking or slicing the bread too soon while it is still hot, which traps moisture and causes condensation. Ensure the internal temperature of the finished loaf reaches 200 210°F (93 99°C) using a thermometer.
Can I omit the psyllium husk or xanthan gum from the recipe?
No, psyllium husk and xanthan gum are absolutely crucial binders in this specific gluten-free recipe; they replace the structure and elasticity provided by gluten. Omitting either ingredient will result in a heavy, crumbly loaf that fails to rise or hold its shape properly.
How should I store this gluten-free bread, and can I freeze it?
Since gluten-free bread stales quickly, it is best stored in an airtight container at room temperature for up to three days. For longer storage, slice the cooled loaf completely, wrap the slices tightly in plastic wrap, and then place them in a freezer bag for up to three months.
My bread did not rise properly; what went wrong?
Check the temperature of the water used to activate the yeast; if it was too hot (above 115°F/46°C), it may have killed the yeast, preventing the rise. Also, ensure your flours are fresh and that your loaf pan is the correct size to support the rising structure.
Can I make this recipe completely vegan or dairy-free?
Yes, this recipe can easily be made vegan and dairy-free by substituting the regular milk with an unsweetened plant based milk, such as almond, soy, or oat milk. Since this recipe relies on psyllium for structure, no egg substitutes are generally required.
Why is the crust of my loaf too hard or thick?
A very thick crust often indicates that the loaf dried out too much during the initial baking phase. To remedy this, try placing a shallow, oven safe pan of water on the lowest rack during the first 15 minutes of baking to introduce steam into the oven environment.
Can I substitute a single type of gluten-free flour (like oat or rice) for the recommended blend?
While possible, it is not recommended, as commercial gluten-free bread blends are carefully balanced with starches and proteins to mimic wheat flour structure. Using a single flour will likely result in a loaf that is too dense, crumbly, or has an off-flavor.
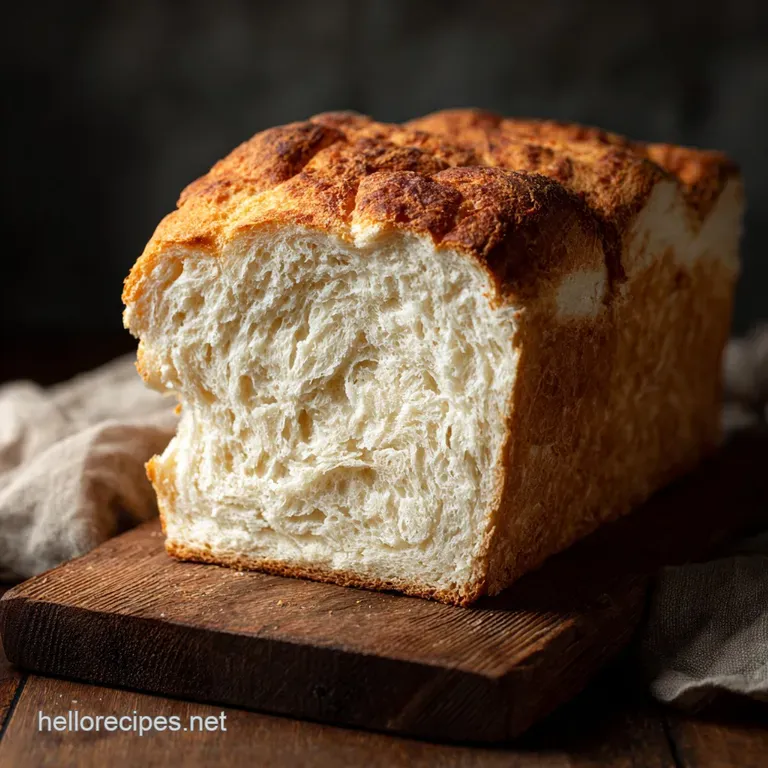
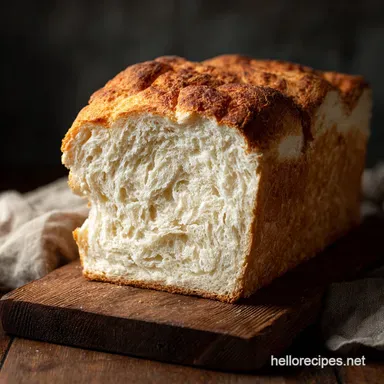
Soft Springy gluten-free Bread Loaf
Ingredients:
Instructions:
Nutrition Facts:
| Calories | 443 kcal |
|---|---|
| Protein | 6.5 g |
| Fat | 15.6 g |
| Carbs | 64.8 g |
