The Proper Sunday Roast Gravy Rich Silky and Made from Scratch
- Ditching the Dust: Why Homemade Gravy Reigns Supreme Over Packets
- Unlocking Deep Umami: The Pan Drippings Secret to Superior Flavour
- Assembling Your Foundation: Essential Components for Classic Gravy
- Beyond the Basics: Optional Add-Ins for Elevated Flavor Depth
- The Art of the Roux: Building the Flavor Base with Drippings
- Achieving Silken Texture: Step-by-Step Simmering and Smoothing
- Troubleshooting: Correcting Common Gravy Mishaps Mid-Cook
- Variations on the Classic: Adapting Your Homemade Gravy for Any Meal
- Storage Secrets: Keeping Your Gravy Fresh for Later Use
- Recipe FAQs
- 📝 Recipe Card
Ditching the Dust: Why Homemade Gravy Reigns Supreme Over Packets
There are few kitchen aromas more evocative of comfort and genuine home cooking than rich, savory gravy bubbling gently on the stovetop. Yet, for too long, many home cooks have relied on dusty packets promising 'instant flavour.' I’m here to tell you that those granules are pale imitations of the real thing.
Learning to make Homemade Gravy is not just a culinary skill; it’s a fundamental step toward elevating any meal from good to truly unforgettable. When you craft Gravy From Scratch , you control the richness, the seasoning, and most importantly, the depth of flavour derived directly from your roast something no manufactured product can ever replicate.
This process transforms simple meat juices into liquid gold.
Unlocking Deep Umami: The Pan Drippings Secret to Superior Flavour
The magic of truly excellent Homemade Gravy lies entirely in what remains in your roasting tin after the meat has been removed: the fond . These are the caramelized, sticky brown bits stuck to the bottom, saturated with rendered fat and meat essence. This residue is pure umami.
While you can certainly manage a decent gravy using only store-bought stock, harnessing these pan drippings is what separates a pleasant sauce from the Brown Gravy Recipe Easy staple that becomes the talk of the dinner table.
The Comfort Factor: Defining Truly 'Proper' Gravy
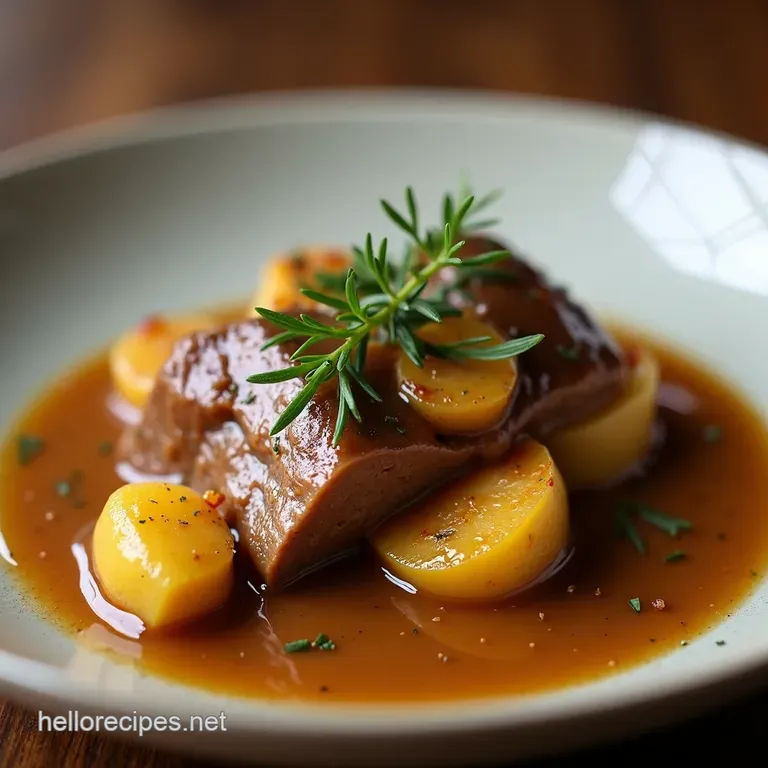
What constitutes 'proper' gravy? For me, it means a sauce that is opaque, deeply coloured, richly savoury without being salty, and possesses a silky mouthfeel never gluey. It should cling lovingly to a fluffy mound of mash or soak perfectly into a crisp Yorkshire pudding.
The goal for this Homemade Gravy Recipe is achieving that luxurious texture and that signature savoury punch.
Why This Pan-Scrape Method Guarantees Richness
We are utilizing the time honoured technique of building a roux directly in the roasting tin, assuming it is stovetop safe, or transferred immediately to a saucepan. This method ensures that every last molecule of flavour trapped in the fond is incorporated into the final product.
The fat from the drippings combines with flour to form the foundation, simultaneously cooking out any potential raw flour taste while locking in the essence of your roast.
Setting Expectations: What You Need for Flawless Homemade Gravy
To begin crafting this benchmark sauce, we start with the fundamentals. You’ll need about 3 to 4 tablespoons of the combined fat and juices left after roasting your meat. This rich base is essential.
For thickening, we rely on an equal amount of all-purpose flour three tablespoons should suffice for a standard batch yielding about three cups of finished sauce. Beyond that, high-quality stock, a teaspoon of Worcestershire sauce for depth, a touch of fresh herb like thyme, and salt and pepper complete the core components for this Simple Homemade Gravy .
Assembling Your Foundation: Essential Components for Classic Gravy
Assembling the base of our Homemade Gravy Easy sauce begins immediately after removing your perfectly rested meat. If you have excess fat in the pan, skim some off, ensuring you leave at least those crucial 3 to 4 tablespoons of fat mixed with the browned bits.
If your roast didn’t yield enough fat perhaps you roasted a lean bird like a chicken you may supplement with a tablespoon or two of butter or oil, but using the rendered fat is preferred for authentic flavour.
Beyond the Basics: Optional Add-Ins for Elevated Flavor Depth
While the drippings provide the backbone, a few carefully chosen additions can push your Homemade Gravy with Beef Broth (or chicken stock) into the stratosphere.
A finely minced shallot or small onion, sautéed gently in the drippings before adding the flour, introduces aromatic complexity. On top of that,, a splash of Worcestershire sauce is non-negotiable for boosting that deep, meaty umami, cutting through the richness provided by the fat.
The Meat Magic: Maximizing Your Meat Juices and Fat Ratio
The ratio between the fat and the flour in your initial roux is critical for texture. Aim for a nearly 1:1 ratio by volume for the initial thickening stage (e.g., 3 tablespoons of fat to 3 tablespoons of flour).
If your drippings are exceptionally fatty, drain off the excess before adding the flour, as too much pure fat will result in a greasy, thin sauce.
Flour vs. Cornstarch: Choosing Your Perfect Thickening Agent
For that classic, hearty coating synonymous with Homemade Gravy for Biscuits and Gravy or Sunday roasts, flour is the superior choice. Flour creates a slightly opaque, flavour carrying sauce base called a roux.
Cornstarch, conversely, yields a clear, glossy, almost gelatinous finish, which is lovely for stir fries but often lacks the traditional richness we seek here. We will stick to the flour roux for this definitive guide.
Stock Selection Showdown: Broth Quality Matters
Since the stock forms the majority of the liquid volume, its quality directly impacts your final flavour. If you are making Chicken Gravy , use a rich, homemade chicken stock rather than a weak bouillon cube solution. For beef roasts, a deeply roasted, homemade beef stock is ideal.
If purchasing, choose a low-sodium variety so you can control the final seasoning salt level yourself.
Related Recipes Worth Trying
- The Best Fluffy Homemade Omelet Recipe in Under 10 Minutes — Master how to make a homemade omelette thats perfectly pale and creamy inside This two egg omelette recipe is foolproof for breakfast perfection
- The Ultimate Crunchy Taco Salad with Homemade Ranch — Ditch the soggy lettuce This easy Taco Salad recipe delivers crunch zesty flavour and a cooling homemade CilantroLime Ranch dressing A guaranteed...
- The Best Homemade Bone Broth Rich Gelatinous Clear — Forget the watery stuff Learn how to make authentic gelatinous Beef Bone Broth from scratch with this foolproof slowsimmer recipe Perfect for sipping or...
The Art of the Roux: Building the Flavor Base with Drippings
Now we enter the crucial stage: the roux. With your chosen drippings (and sautéed aromatics, if using) warmed over medium heat, sprinkle the measured flour evenly over the top. Whisk constantly for 60 to 90 seconds. The mixture will become a thick paste.
It is imperative to cook this paste until it takes on a light, nutty aroma, moving from pale white to a sandy blonde colour. This process eliminates the raw, pasty taste flour leaves behind.
Achieving Silken Texture: step-by-step Simmering and Smoothing
Once the roux is perfectly cooked, it’s time for the liquid. Begin by adding only about half a cup of your stock, pouring it in slowly while whisking vigorously. You must break down every lump immediately this process is called deglazing and it lifts all those browned bits from the bottom of the pan.
Once that initial portion is completely smooth, you can gradually pour in the remaining stock, still whisking. Bring the entire mixture to a gentle simmer. Reduce the heat to low and let it bubble softly for 5 to 10 minutes.
This simmering time allows the starch in the flour to fully hydrate and thicken the sauce to the consistency where it coats the back of a spoon beautifully.
Troubleshooting: Correcting Common Gravy Mishaps Mid-Cook
Even experts encounter turbulence, but gravy is incredibly forgiving if you know the fixes.
Deglazing Mastery: Scraping Up Every Last Brown Bit
The key to maximum flavour is scraping the fond . Use a wooden spoon or spatula to scrape the bottom of the pan as you introduce the first splash of liquid. Those brown particles dissolve, infusing the liquid instantly. If you skip this, you are leaving flavour behind.
Whisking Technique: Integrating the Thickener Without Lumps
Lumps occur when dry flour hits hot liquid all at once, creating little gelatinous clumps. Always whisk the flour into the fat first (the roux), and then introduce the liquid slowly, whisking constantly and firmly, especially in the beginning.
The Final Flavor Tune-Up: Seasoning for Perfection
Taste, taste, taste. Gravy needs aggressive seasoning. After simmering, stir in your Worcestershire sauce and thyme. Only then should you season with salt and pepper. Remember that the flavour will concentrate slightly as it cools, so season it when it’s hot and thin it should taste perfectly seasoned at this stage.
Variations on the Classic: Adapting Your Homemade Gravy for Any Meal
This base recipe is incredibly adaptable. If you’ve roasted lamb, infuse your stock with rosemary instead of thyme. For an intensely dark and rich sauce, use Homemade Gravy with Beef Broth and deglaze the pan with a half cup of dry red wine before adding the flour; let the wine reduce by half to concentrate its flavour, and then proceed with the roux.
Storage Secrets: Keeping Your Gravy Fresh for Later Use
Leftover gravy is treasure! Cool it rapidly before sealing it in an airtight container. It will keep well in the refrigerator for three to four days.
Turning Poultry Drippings into Vegetarian Gold: A Quick Hack
Don't have meat drippings but craving that deep roast flavour for your mashed potatoes? You can create a phenomenal vegetarian gravy. Use 3 4 tablespoons of olive oil or vegan butter for the roux. For flavour, whisk in a teaspoon of Marmite or a few drops of soy sauce along with your vegetable stock.
This imparts a savory depth that mimics roasted meat juices, resulting in a surprisingly flavourful alternative.
The Garlic Infusion Method for Roast Flavor Boosts
If you are struggling to get enough fond but still want that rich roast character, try gently simmering a few crushed garlic cloves in the cold stock for 15 minutes before heating the stock to add to your roux.
Strain the garlic out before using the infused stock for a subtle savory enhancement.
Freezing Friendly: How to Maintain Texture After Thawing
Gravy freezes beautifully. Once cooled, portion it into freezer safe bags or containers. When reheating from frozen, place the solid gravy into a saucepan with a splash of water or stock and heat slowly over low heat, whisking frequently until fully melted and smooth.
If it seems slightly separated, a vigorous whisking usually brings it right back together.

Recipe FAQs
Why is my Homemade Gravy lumpy, and how do I get it silky smooth like they serve at the pub?
Lumps usually happen when you dump all the cold liquid into the hot roux at once! The secret is the slow addition: pour in just a splash of stock initially, whisking like mad until that first bit is perfectly smooth before gradually adding the rest.
For that professional silkiness, don't skip straining it through a fine mesh sieve right at the end it catches any rogue bits.
My roast didn't leave many drippings; can I still make a proper Homemade Gravy?
Absolutely, don't panic if your roasting tin looks bare! You can still make a cracking gravy using a substitute fat like butter or olive oil to create your roux. The most critical element then becomes using a really good quality, concentrated stock, as that will carry the flavour instead of the meat drippings.
How long can I store leftover gravy, and can I freeze it for another day?
Homemade gravy is fantastic for making ahead! Store cooled leftovers in an airtight container in the fridge for up to 3 4 days; it will set quite firm, which is normal. Yes, you can freeze it too it keeps beautifully for up to three months.
Just thaw it slowly in the fridge, then reheat gently on the hob, adding a splash of water or stock if it thickens too much.
My gravy thickened up too much while waiting for the roast to rest help!
That's a classic kitchen conundrum! Gravy firms up like concrete as it cools down. The fix is simple: whisk in a small amount of hot liquid be it water, stock, or even a glug of wine a little bit at a time over low heat until it returns to your desired consistency.
Keep it simmering very gently until you're ready to serve.
What’s the best way to add depth of flavour if I'm not using beef drippings?
To mimic that deep, savoury flavour, you need umami. A teaspoon of Worcestershire sauce, as included in the recipe, is essential for that rich background note. You could also try adding a splash of dry sherry or even a small amount of Marmite/Vegemite dissolved in the stock before thickening.
Proper Homemade Gravy
Ingredients:
Instructions:
Nutrition Facts:
| Calories | 135kcal |
|---|---|
| Fat | 9g |
| Fiber | 1g |
