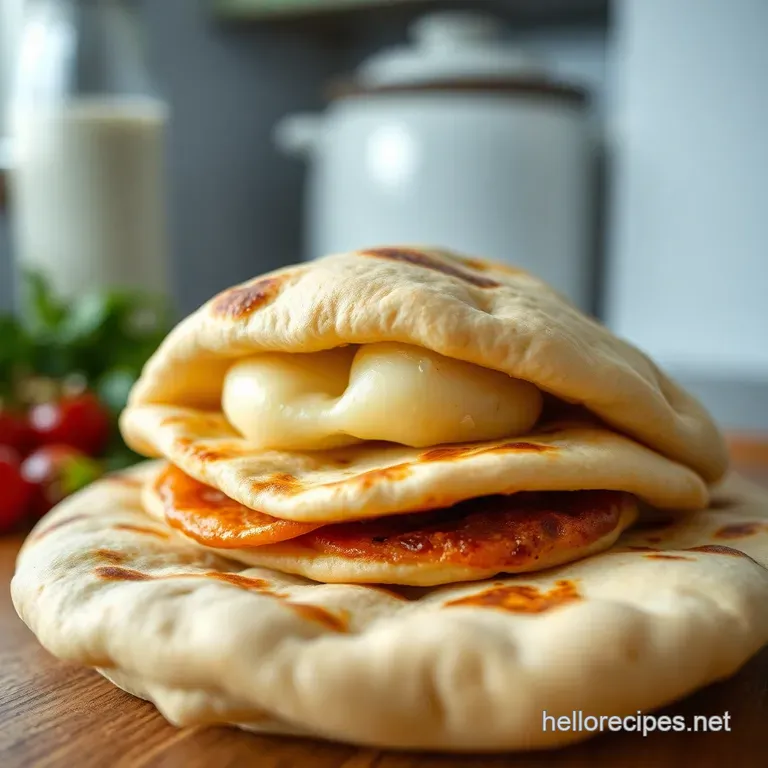
Perfectly Pillowy Homemade Pita Bread
Alright, let's dive into the wonderful world of pita recipe creation! have you ever craved that perfect, fluffy middle eastern bread recipe ? honestly, nothing beats homemade, right? so, grab your apron, and let's get baking.
This pita recipe is gonna be a game changer.
Quick Hook: Craving Gyros? Start Here!
This pita recipe isn't just about bread. It’s about amazing Gyros Tzatziki , flavorful Homemade Greek Food , and so much more! These pitas are soft, fluffy, and begging to be filled.
The Humble Pita: A Quick Overview
Pita bread has been a staple in middle eastern and mediterranean cuisine for centuries. it's a bread with history and tradition! it's a blank canvas for so many yummy fillings.
This recipe? it's pretty straightforward. a medium difficulty, around 2 hours total (most of it waiting!), and yields about 8 glorious pitas.
Perfect for a family meal, or batch cooking.
Why Make Your Own Pita?
Forget those cardboard-y store-bought pitas. This easy pita bread is all about flavor. One of the main benefits is that you control what goes into them. No weird preservatives!
Imagine warm oven baked pita bread with your favourite pita and chicken recipes . these pitas are perfect for a casual weekend lunch or a fun homemade greek food night.
What makes it really special? that delightful puff and that soft texture. it's like a little cloud.
Let's move on to those essential ingredients for our pita bread dough .
Alright, let's talk ingredients and equipment for the perfect pita recipe ! honestly, it’s all pretty straightforward. you probably have most of this stuff already.
The beauty of homemade greek food , right?
Ingredients & Equipment
Main Ingredients
Okay, so here's the deal. We need:
- 1 ½ cups (355 ml) warm water. About 105- 115° F (40- 46° C) is perfect .
- 1 teaspoon (5 ml) granulated sugar.
- 2 ¼ teaspoons (7g) active dry yeast. One standard packet usually does the trick.
- 3 ½ cups (420g) all-purpose flour. Plus extra for dusting, obviously.
- 1 teaspoon (6g) salt.
- 2 tablespoons (30 ml) olive oil.
For the flour, just grab your regular all-purpose. But, quality counts for the olive oil! Find yourself some good quality olive oil to give it a great boost.
Seasoning Notes
This is where you can have some fun. We’re going for that classic Middle Eastern bread recipe vibe.
- Essential spice combinations? Keep it simple. A touch of garlic powder (½ teaspoon) in the dough can be lovely.
- Flavor enhancers? Olive oil is your friend here. Maybe a tiny pinch of smoked paprika for a bit of depth.
- Quick substitution options? If you don’t have salt, sea salt works great too!
Equipment Needed
Right, let's get this sorted! You’ll definitely need:
- A big mixing bowl. I use my trusty stainless steel one.
- Measuring cups and spoons. Obvs.
- A clean tea towel. For proofing!
- A baking sheet.
- An oven. Super important, lol .
Got no pizza stone? No worries! The baking sheet will do.
So there you have it all you need for this easy pita bread adventure. Next up, we get our hands dirty with the pita bread dough !
Alright, let's talk pita bread . honestly, making your own pita recipe is easier than you think! forget the store-bought stuff, we're going full-on homemade greek food here.
Get ready for that awesome pocket, perfect for stuffing with all the good stuff, like a gyro recipe easy peasy!
Prep: Get Your Act Together!
First up, mise en place , my friends! this means having everything ready before you start. it’s the chefy way to say "get organised".
Measure your ingredients. get your bowls ready. it will save you so much time!
Got warm water (around 105- 115° F )? Good. That's super important for waking up the yeast. Safety wise, the oven is HOT. Watch your hands.
Let's Bake: Pita, step-by-step
- Bloom the yeast: Water, sugar, yeast. Wait 5- 10 minutes until foamy.
- Dough time: Flour, salt, yeast mix, then olive oil.
- Knead it real good: 8- 10 minutes by hand or 5- 7 minutes in a mixer.
- First rise: Put it in a bowl. Wait around 1-1. 5 hours , until it’s bigger.
- Divide & conquer: Punch it down. Split it in 8 equal pieces.
- Second Rise: Give it 15- 20 minutes rest, covered.
- Roll 'em out: 6-7 inch circles. 1/4 inch thick.
- Bake!: 475° F ( 246° C) for 3- 5 minutes . Watch 'em puff!
Pita And Chicken Recipes Pro Tips & Tricks
Here is the secret. make sure the oven is really hot. that's how you get the pocket. want that awesome pocket? i would use a pizza stone for sure! wrapping them in a towel as they come out of the oven will keep them so soft.
A common mistake? over kneading the dough can cause it to be tough. make your own pita bread dough , it's so satisfying! for a quick easy pita bread , make the dough the night before.
If you like homemade flatbread , give this middle eastern bread recipe a go! there you have it: how to make pita pockets you'll never buy storebought again!.
Also, an oven baked pita bread is a great addition to gyros tzatziki , just saying!
Alright, let's dive into some extra nuggets of wisdom. These are the things that'll take your pita recipe from good to amazing . Trust me, I've been there, done that!
Recipe Notes: Level Up Your Pita Game
Right, so you've nailed the recipe. Fab! Now for some extra tips.
Serving Suggestions: Get Your Plating On!
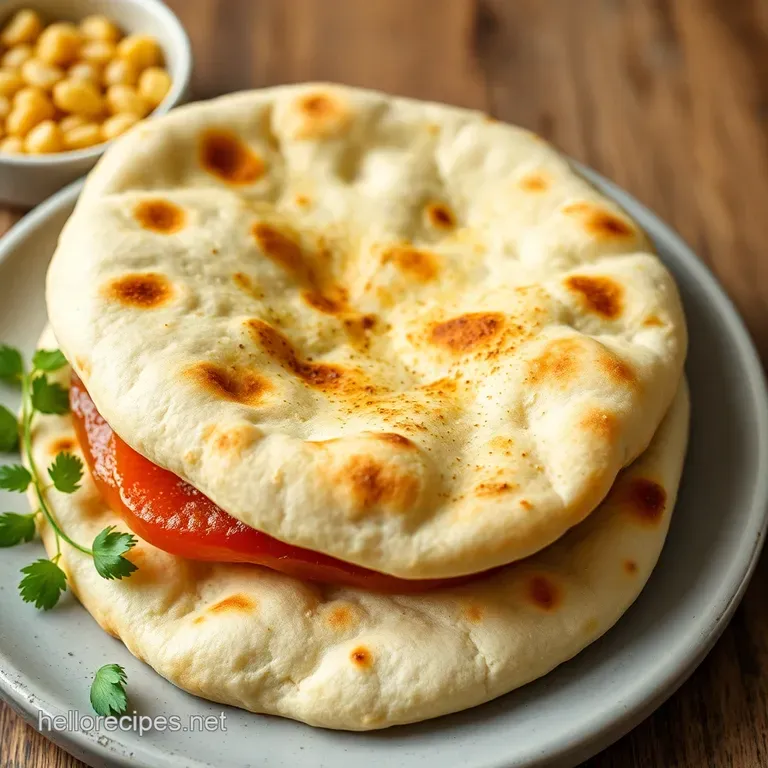
Okay, first things first, let's talk presentation. honestly, the way you serve homemade flatbread can make all the difference. warm pitas, slightly puffed, are just begging to be torn into.
For a casual vibe, pile them high on a platter. for something a bit fancier, arrange them neatly in a basket.
As for what to serve with them, oh my gosh, the possibilities are endless! obviously, gyros tzatziki is a classic pairing.
Think about serving these with a vibrant greek salad, the acidity cuts through the richness beautifully. or, get creative! pita and chicken recipes are really popular and you can try my personal favorite - grilled chicken marinated in lemon, garlic, and herbs.
A light, crisp white wine would also be the perfect addition.
Storage Tips: Keep It Fresh, Keep It Real!
Right, so you've made a batch of this easy pita bread . what now? storing is actually pretty simple. let them cool completely before popping them into an airtight container.
They'll keep at room temp for about 2-3 days. honestly, they're best eaten fresh, so try and avoid leaving them out for too long.
Want to freeze them? go for it! separate each pita with a piece of parchment paper to prevent sticking. they'll keep in the freezer for up to 2 months.
To reheat, just pop them in a toaster or warm oven for a minute or two. bam! fresh oven baked pita bread goodness!
Variations: Spice Things Up!
Want to make things interesting? Let's tweak the base. Looking for a gluten-free option? I find that you will need to use a proper blend for gluten-free baking.
Got some herbs going spare? Mix these into your Pita Bread Dough along with a little garlic. This is brilliant.
Seasonal ingredient swaps are fun too, and make Homemade Greek Food even more special.
Nutrition Basics: Fuel Your Body!
Let's keep it short and sweet. one pita recipe bread packs some great energy. this is a fab way to get going.
They have protein. plus, they have fiber, which is great for keeping you full. but of course, don't go wild; anything in moderation, right?
Alright, so there you have it. your middle eastern bread recipe is now complete! it feels easy, and your friends and family will love it.
Get into your own kitchen, and see how to make pita pockets and the gyro recipe easy !
Don't be scared to experiment and have fun. Honestly, that's what cooking is all about! Get baking!
Frequently Asked Questions
My pita bread didn't puff up! What went wrong?
Several factors can prevent the pita from puffing up like a good souffle on Bake Off. Make sure your oven is hot enough (475°F/246°C is ideal). Also, ensure your yeast is active if it doesn't foam when mixed with warm water and sugar, it's likely dead, Jim!
Finally, rolling the pita too thin can also hinder the puff, aim for around ¼ inch thickness.
Can I make this pita recipe with whole wheat flour?
Absolutely! For a healthier, nuttier pita, you can substitute up to 50% of the all-purpose flour with whole wheat flour. Just keep in mind that whole wheat flour can make the pita slightly denser, so you might need a touch more water to achieve the right dough consistency.
Think of it like swapping out your plain digestive biscuit for a wholewheat one similar, but with a bit more oomph!
How do I store homemade pita bread to keep it soft?
The secret to maintaining that lovely, soft texture is to wrap the freshly baked pitas in a clean kitchen towel immediately after they come out of the oven. Once cooled, store them in an airtight container or a resealable plastic bag at room temperature for up to 3 days.
If you want to keep them longer, you can freeze them for up to 2 months. Just be sure to defrost them thoroughly before using, and a quick warm-up in a dry pan will revive them nicely.
Can I freeze this pita recipe dough before baking?
Yes, you can! After the first proof, punch down the dough, divide it into individual portions, and shape them into balls. Wrap each ball tightly in plastic wrap and then place them in a freezer bag. They can be frozen for up to 2 months.
When ready to bake, thaw the dough balls in the refrigerator overnight, then let them rest at room temperature for about 30 minutes before rolling and baking. It’s a great make-ahead tip!
What's the best way to reheat pita bread?
A dry skillet or griddle over medium heat works wonders for reheating pita bread. Simply warm each side for about 30 seconds to a minute, until pliable and heated through. You can also pop them in a toaster or under a broiler for a few seconds, but watch them carefully to prevent burning!
Avoid the microwave if possible, as it can make them rubbery nobody wants a rubbery pita, right?
Is there a way to make this pita recipe without a stand mixer?
Absolutely! While a stand mixer makes things easier, you can definitely knead the dough by hand. After mixing the ingredients, turn the dough out onto a lightly floured surface and knead for about 8-10 minutes, until it becomes smooth and elastic. It's a bit of an arm workout, but totally achievable!
Just picture yourself as Mary Berry kneading away in her kitchen inspiring stuff.
Perfectly Pillowy Homemade Pita Bread

