The Only Pizza Dough Recipe Youll Ever Need Chewy Blistered and Perfect Every Time
- Mastering the Foundation: Why This Neapolitan Style Pizza Dough Reigns Supreme
- The Secret to That Perfect Char: Understanding Hydration and Flour Choice
- Curating Your Components: Selecting The Best Ingredients for Superior Dough
- Weighing for Perfection: Precise Measurements for Optimal Texture
- The Slow Build: Step-by-Step Mixing and Kneading Technique
- Patience is Paramount: Fermentation Stages for Maximum Flavor Development
- Troubleshooting Common Pizza Dough Dilemmas
- Beyond the Bake: Storage and Revitalization Tips
- Recipe FAQs
- 📝 Recipe Card
Mastering the Foundation: Why This Neapolitan Style Pizza Dough Reigns Supreme
A truly transcendent pizza experience begins long before the sauce hits the base; it starts with the dough. Too often, home cooks treat pizza dough as a mere vehicle for toppings, resulting in something dense, brittle, or sadly flavorless. We are going to change that perception today.
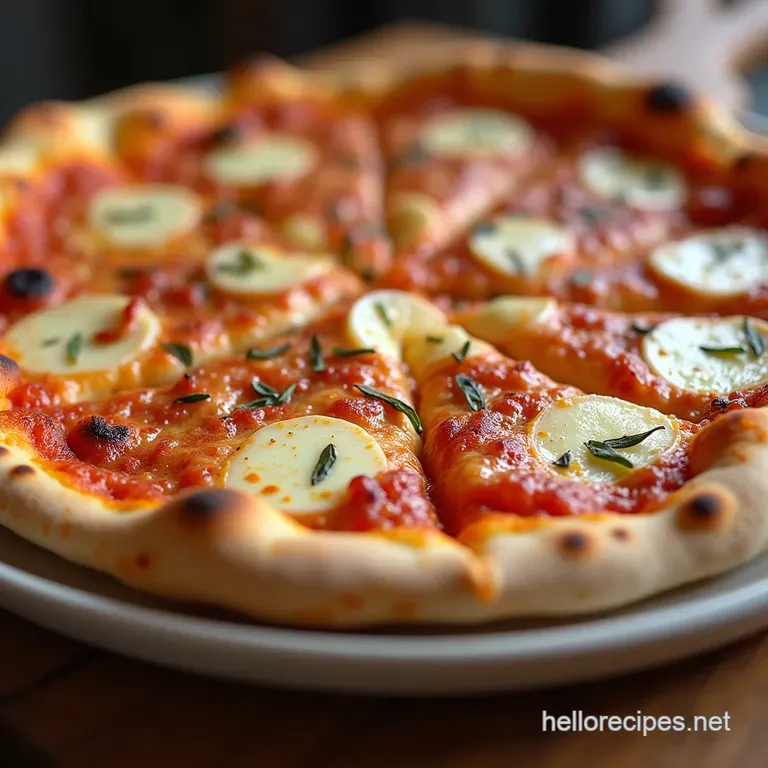
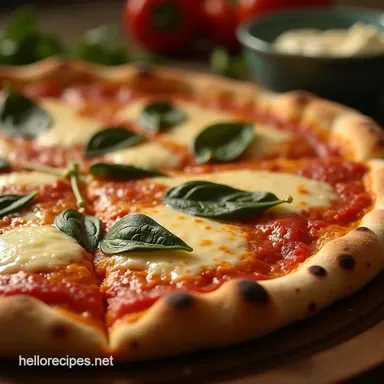
This Pizza Dough Recipe From Scratch is engineered to deliver that coveted Neapolitan chew a light, airy crust structure known as the cornicione , spotted with beautiful char bubbles.
Forget those lackluster supermarket bases; this recipe guides you toward creating the foundation for truly spectacular Homemade Pizza Recipes . While this recipe requires a touch of patience, especially during the resting phase, the result is a profoundly flavorful, versatile dough, perfect for everything from a classic Margherita to your most adventurous culinary creations.
The Secret to That Perfect Char: Understanding Hydration and Flour Choice
The magic of an artisan crust isn't achieved through complex kneading; it's about balancing water content (hydration) against the structure provided by the flour. This is the cornerstone of any Best Basic Pizza Dough Recipe .
High hydration allows for more steam during baking, leading to a lighter interior, while the right flour provides the gluten framework necessary to trap that steam.
Why Settle for store-bought When Homemade Pizza Dough Delivers Bliss?
store-bought dough often contains dough conditioners and preservatives that inhibit true flavor development. Commercial yeast is typically forced to act quickly. Our method, detailed in this Pizza Dough Recipe Easy guide, relies on a slower, cooler fermentation.
This lengthy resting period allows natural acids and subtle, complex flavors to develop, giving your finished pizza the depth you usually only find at specialty pizzerias.
Achieving the 'Cornicione': The Goal of Our Chewy Crust
The cornicione —that puffy, slightly charred outer rim is the hallmark of superior pizza. To achieve this, we aim for moderate hydration (around 65%) using high-quality flour and a minimal amount of yeast.
When this dough hits a blistering hot surface, the internal moisture flashes to steam, puffing the edges aggressively before the exterior sets. If you are looking for a Quick Pizza Dough Recipe , know that sacrificing the long proofing time will affect this signature rise, but even a few hours will yield better results than pre-made options.
Essential Starter Kit: Gear Needed for Artisan Results
While you can certainly manage with just a sturdy bowl and your hands, certain tools elevate the process. The single most important piece of equipment for this Neapolitan style base is a digital kitchen scale. Unlike measuring cups, a scale ensures you hit our target hydration precisely every time.
Beyond that, a large mixing bowl for the bulk fermentation, a bench knife for portioning, and airtight containers for the cold proof are highly recommended for successful Pizza Recipes Homemade .
Curating Your Components: Selecting The Best Ingredients for Superior Dough
The quality of your input dictates the quality of your output. Since this Pizza Dough Recipe has so few components, each ingredient must pull its weight. We are aiming for a classic, balanced profile that supports robust toppings without tasting overly yeasty or bland.
Weighing for Perfection: Precise Measurements for Optimal Texture

Accuracy is not optional here; it’s crucial. We are targeting a specific ratio of flour to water to achieve a manageable yet highly extensible dough.
The Flour Factor: Why '00' or High Protein Bread Flour is Non-Negotiable
For genuine elasticity and chew, we rely on flour with a high protein content (12.5% or higher). Traditionally, Italian Neapolitan Pizza Dough Recipe calls for '00' flour, which is finely milled and absorbs water evenly.
If '00' isn't available, a high-quality, unbleached bread flour serves as an excellent substitute, providing the necessary gluten strength to manage the required stretching.
Water Temperature Tactics: Keeping Yeast Happy
The temperature of your water directly controls the initial activity of the yeast. Since we are utilizing a very small amount of yeast intended for a long, slow rise, we use cool water aiming for about 60° F ( 15° C).
This temperature prevents the yeast from over activating prematurely, preserving its power for the long fermentation ahead.
Salt, Sugar, and Yeast: The Flavor Trinity Explained
We use instant dried yeast it’s reliable and doesn't require pre-activation. Salt (fine sea salt preferred) is not just for flavour; it regulates yeast activity and strengthens the gluten network, preventing the dough from becoming too slack.
While a tiny pinch of sugar can help kick start the yeast, it’s optional, as flavor development relies more heavily on time than added sweetness in this style of Pizza Dough .
Related Recipes Worth Trying
- The Cupboard Staple Simple Cookie Dough Recipe Guaranteed Success — Master the essential Simple Cookie Dough From Scratch This foolproof recipe creates buttery tender cookies perfect for cutting or scooping Easy recipe Get...
- The Ultimate Basic Cookie Dough Recipe for Any MixIn — Forget fussy recipes this bedrock Basic Cookie Dough Ingredients list delivers perfect buttery texture every time Chill it well for the best chip cookie...
- Cheesy PullApart Pizza Muffins Easy Homemade Pocket Pizzas — Bake up these utterly brilliant Pizza Muffins Theyre portable pockets of Italian sunshineperfect for a party snack or quick lunch See our foolproof recipe
The Slow Build: step-by-step Mixing and Kneading Technique
The creation of this dough is a two-stage process: initial mixing until shaggy, followed by thorough kneading to develop strength.
- Begin by whisking together 400g of high protein flour and 8g of fine sea salt in a large bowl.
- In a separate measuring cup, combine 260g of cool water with 1.5g of instant dried yeast and 15ml of extra virgin olive oil.
- Pour the wet mixture into the dry ingredients. Use a wooden spoon or your hand to mix until there are no dry patches of flour remaining. This will look messy a "shaggy mass" and that is precisely correct. Resist the urge to add more water!
The Autolyse Advantage: Resting Before the Knead
Once the shaggy mass is formed, cover the bowl and allow it to rest undisturbed for 20 minutes. This is the autolyse phase. During this crucial time, the flour fully hydrates without mechanical stress, allowing gluten development to begin naturally.
This rest makes the subsequent kneading far more efficient and is often the missing step in those attempting an Easy No-Knead Pizza Dough style without fully committing to a long proof.
Kneading for Elasticity
After the rest, turn the dough onto a lightly floured surface. Knead vigorously for about 8 to 10 minutes. You are looking for a transformation: the dough will shift from sticky and rough to smooth, supple, and elastic.
Test for readiness using the "windowpane test" if you can gently stretch a small piece thin enough to see light through it without tearing, the gluten is sufficiently developed for our purposes.
Patience is Paramount: Fermentation Stages for Maximum Flavor Development
This is where the true flavor is unlocked. While a Quick Pizza Dough Recipe skips this, the multi day cold fermentation turns simple ingredients into something extraordinary.
Bulk Fermentation Versus Cold Proofing: Which Path to Take?
After kneading, place the dough in a lightly oiled bowl, cover it, and let it sit at room temperature for 1 to 2 hours. This initial bulk fermentation allows the yeast to wake up and begin producing gases. Following this, we transition to the crucial cold proof.
Transfer the sealed container to the refrigerator for a minimum of 18 hours, and ideally up to 48 hours. This low temperature significantly slows yeast activity while allowing organic acids to mature, resulting in complex, tangy flavor notes.
Shaping Your Dough Balls: Gentle Handling for Gas Retention
Once the cold proof is complete, gently turn the dough onto a clean, minimal flour surface. Use a bench scraper to divide the mass into four equal pieces, roughly 200g each. Gently cup your hand around each piece and tuck the edges underneath to create a smooth, tight surface tension this is balling.
Overworking them now will crush the airy structure you patiently built. Place these dough balls into individual, lightly oiled, airtight containers.
Troubleshooting Common Pizza Dough Dilemmas
Even with the best Pizza Dough Recipe , hiccups occur. If your dough feels overly sticky or fails to develop structure, it usually comes down to hydration or handling.
Fixing Dough That Won't Rise: Quick Hydration Adjustments
If, after the first hour of room temperature proofing, your dough seems dense and flat, the yeast might be sluggish, or your water was too cold. For immediate relief, you can gently perform a "stretch and fold" every 30 minutes for the next hour, which introduces oxygen and gently redistributes the yeast.
If it refuses to proof even after bringing it to room temperature, the yeast may have died, requiring you to start over with warmer water (around 105° F/ 40° C) next time.
Stretching Secrets: From Ball to Canvas Without Tearing
Never, ever use a rolling pin on this dough! A rolling pin destroys the precious internal air pockets. Place a dough ball on a lightly floured surface. Start by gently pressing down the center with your fingertips, leaving a half inch border untouched this will become your cornicione .
Pick up the disc and gently stretch it over the backs of your knuckles, allowing gravity to pull the center thin, rotating as you go until you reach a 12 inch circle.
Can I Flavor My Pizza Dough with Herbs or Pumpkin Puree?
Absolutely! While our base recipe sticks to classic simplicity, you can introduce flavor during the initial dry mixing phase. For an herbal note, mix 1 teaspoon of dried oregano and a pinch of dried rosemary into the flour.
For a richer color and slight sweetness, try substituting up to 50g of the water with pumpkin puree for a seasonal twist in your Homemade Pizza Recipes . Just be mindful that thicker additions, like puree, slightly reduce the dough's extensibility.
Beyond the Bake: Storage and Revitalization Tips
Having fantastic dough ready to go is the mark of a prepared home chef. Knowing how to store and revive it ensures pizza night is always on the menu.
Long Term Storage: Freezing Your Perfect Pizza Dough Batches
This dough freezes exceptionally well, provided it is properly prepared for the deep chill. After shaping the individual balls (Step 10), place them in lightly oiled, sealed containers and freeze for up to three months.
To revive, move the frozen dough ball directly from the freezer into the refrigerator overnight (12– 18 hours). Then, allow it to temper (sit at room temperature) for 1.5 to 2 hours before stretching.
This slow thaw maintains the internal structure better than trying to rush it at room temperature.

Recipe FAQs
My Pizza Dough is too sticky; what have I done wrong?
Don't fret, it happens to the best of us! Generally, stickiness comes from using too much water relative to your flour, or not kneading long enough to develop the gluten structure properly.
Try adding a tiny dusting of flour during the kneading stage, but resist the urge to add too much, or you'll end up with a tough base.
How long can I actually keep this pizza dough in the fridge, and does it improve the taste?
We recommend a cold fermentation of 24 to 48 hours; this slow, cold rest is where the real flavour magic happens, developing complexity that short proofs just can't match. You can potentially push it to 72 hours if you use slightly less yeast, but after three days, the yeast activity might start to break down the structure too much, resulting in a dough that’s floppy when you try to stretch it.
I don’t have a pizza stone or steel; can I still make great pizza with this dough?
Yes, you absolutely can, though it requires a bit of cunning! Preheat a heavy duty baking tray upside down in the oven while it reaches its maximum temperature this acts as a surrogate stone. Just be sure to dust it lightly with cornmeal or semolina before stretching your pizza onto it for easy sliding.
Why does the recipe insist on using strong bread flour instead of plain flour?
It’s all down to the protein content, which builds the gluten network necessary for that lovely, chewy crust we’re after. Plain flour simply doesn't have enough oomph to trap the gases effectively during the long proof, meaning your final base might end up dense rather than light and bubbly like a good sponge.
Can I freeze leftover pizza dough balls, and how should I defrost them?
Freezing is a brilliant way to bank a batch for a future takeaway night! Wrap each individual dough ball tightly in plastic wrap, then place them in an airtight freezer bag, aiming to use them within three months.
To defrost, move them to the fridge overnight, and then let them sit at room temperature for a good 2 3 hours before stretching.
My dough has proofed well but seems to shrink back when I try to stretch it; help!
Ah, you’ve encountered the classic 'tight gluten' issue! This means the dough hasn't rested long enough after shaping or degassing. Just cover those resistant balls loosely and leave them on the counter for another 20 30 minutes; letting the gluten relax is essential before attempting to stretch it out thinly without tearing a hole in the middle nobody wants a pizza with a sauce leak!
Perfect Pizza Dough Recipe
Ingredients:
Instructions:
Nutrition Facts:
| Calories | 822 kcal |
|---|---|
| Protein | 11.5 g |
| Fat | 8.3 g |
| Carbs | 37.1 g |
| Fiber | 3.1 g |
| Sodium | 10935 mg |
