Peanut Butter Blossoms
- Time: Active 20 minutes, Passive 10 minutes, Total 30 minutes
- Flavor/Texture Hook: Shatter crisp sugar crust with a fudgy, melt in-the mouth center
- Perfect for: Nostalgic cookie swaps or a rainy afternoon baking session
- Baking The Best Peanut Butter Blossoms
- Flavor Layering and Texture Secrets
- Essential Metrics for Success
- Selecting High Quality Components
- Tools For Precise Baking
- Step By Step Process
- Fixing Common Cookie Issues
- Creative Flavor Adaptations
- Scaling Your Cookie Batch
- Keeping Cookies Fresh Longer
- Perfect Pairing Ideas
- Recipe FAQs
- 📝 Recipe Card
Baking The Best Peanut Butter Blossoms
There is a specific, heady aroma that fills a kitchen when peanut butter hits a hot oven it is toasty, nostalgic, and deeply comforting. I remember the first time I tried making these; I rushed the process and ended up with "chocolate puddles" instead of those iconic peaks.
It was a mess, but it taught me everything about the importance of temperature contrast. Now, I’m sharing the tweaks that transformed my flat, sad discs into the vibrant, puffy Peanut Butter Blossoms everyone begs for at the holidays.
We have all been there: you pull a tray out, press the chocolate in, and it immediately liquefies into a brown smear. Or worse, the cookie base is so dry it shatters before you can even take a bite.
This recipe isn't just about mixing ingredients; it’s about the architecture of a cookie that can support a giant chocolate kiss without collapsing. We are going to build layers of flavor using brown sugar for chew and a pinch of sea salt to make that peanut butter truly sing.
This isn't just another peanut butter blossoms recipe; it is a masterclass in texture. We are aiming for that specific "shatter" when your teeth hit the granulated sugar coating, followed by the soft, velvety give of the cookie.
Trust me, once you see the science behind why we chill the chocolate and how the fats interact, you will never go back to a basic box mix again. Let’s get into the details of what makes these classic peanut butter blossoms so irresistible.
Flavor Layering and Texture Secrets
The secret to a successful batch of peanut butter blossom cookies lies in the physics of the fats. We are using a combination of dairy butter and peanut butter, which have different melting points. This creates a staged expansion in the oven.
While the dairy butter provides that classic richness, the peanut butter adds structural protein that keeps the cookie from spreading into a thin pancake.
The Science of Why it WorksProtein Stabilization: The proteins in peanut butter act as a secondary structure, preventing the cookie from over spreading during the Maillard reaction.
Hygroscopic Balance: Brown sugar attracts moisture from the air, ensuring the crumb stays fudgy rather than turning into a dry cracker.
Chef's Tip: Freeze your chocolate kisses for at least 30 minutes before baking. When you press a frozen kiss into a hot cookie, the temperature differential creates a "sear" on the bottom of the chocolate that locks it in place without melting the entire tip.
The way we handle the sugars also changes the game. By rolling the dough in granulated sugar before baking, we create a moisture barrier. This causes the exterior to set quickly in the heat, creating tiny micro cracks that look beautiful and provide a satisfying crunch. This technique is similar to how I approach the crust in my Brown Butter Sauce recipe to maximize depth and texture through controlled browning.
| Dough Ball Size | Bake Time | Visual Cue | Best For |
|---|---|---|---|
| 1 inch (Small) | 8 minutes | Pale gold edges | Large parties |
| 1.5 inch (Standard) | 10 minutes | Visible cracks | Classic look |
| 2 inch (Jumbo) | 13 minutes | Deep golden bottom | Extra fudgy center |
By choosing your size, you control the final texture. Smaller cookies tend to be crunchier, while the larger 1.5 inch balls (which this recipe yields) provide that perfect ratio of crispy edge to soft, peanut heavy interior.
1. Sugar Moisture Lock
Sugar isn't just for sweetness; it is a humectant. In this recipe, the light brown sugar holds onto water molecules during the bake. This prevents the flour from drying out completely, which is why these cookies stay soft for days.
Without that brown sugar, you’d essentially have a peanut flavored shortbread tasty, but not a "blossom."
2. Temperature Contrast Technique
The "Blossom" effect relies on the interaction between a hot cookie and a cold chocolate. If the cookie is too hot, the chocolate collapses. If it’s too cold, the chocolate won’t stick. I’ve found that a 2 minute "rest" on the tray after baking is the sweet spot.
It allows the cookie structure to firm up enough to hold the weight of the Hershey’s kiss.
3. Low Protein Balance
Using all purpose flour provides just enough gluten to hold the "thump" of the chocolate. If you used bread flour, the cookies would be too tough and bread like. We want a delicate crumb that yields easily.
The 220g of flour specified is the exact threshold needed to support the 190g of creamy peanut butter without making the dough feel like clay.
Essential Metrics for Success
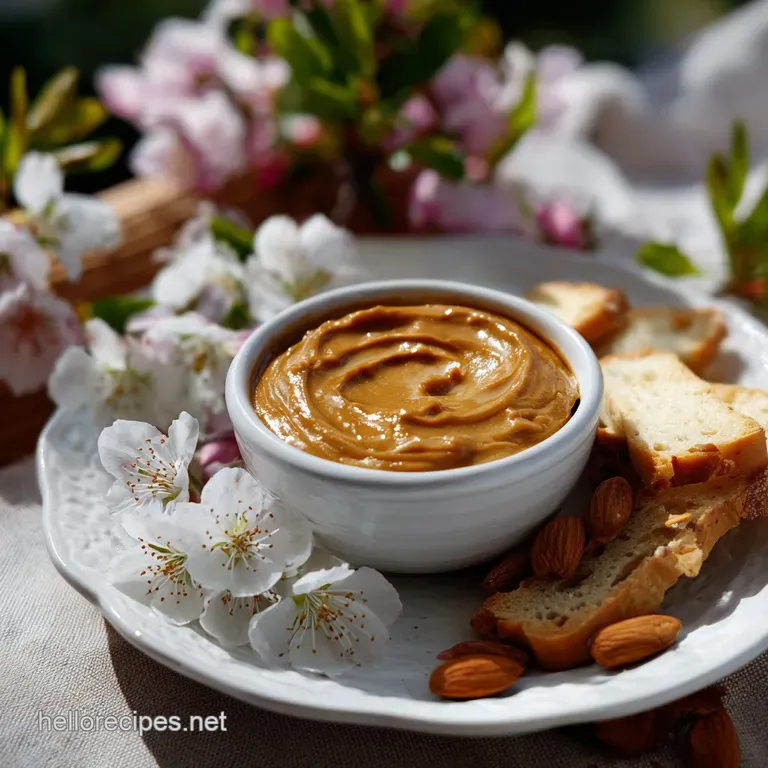
To get that vibrant, professional finish, you need to understand the role each component plays. Many people think any peanut butter will do, but for homemade peanut butter blossoms, the "no stir" creamy variety is king.
Natural peanut butters that separate at room temperature will cause the cookies to become oily and crumbly because the fat isn't emulsified properly with the solids.
| Component | Science Role | Pro Secret |
|---|---|---|
| Creamy Peanut Butter | Emulsified fat & protein | Use "no stir" for structural integrity |
| Baking Soda | Alkaline leavening | Reacts with brown sugar for browning |
| Large Egg | Protein binder | Must be room temp to prevent curdling |
Having your egg at room temperature is a non negotiable step. A cold egg will seize the softened butter, creating tiny clumps in your dough. These clumps melt unevenly in the oven, leading to "pockmarks" on your cookie surface. If you're looking for another way to use these pantry staples, you might find the fat ratios in this Safe Brown Butter recipe interesting for a no bake alternative.
Selecting high-quality Components
Gathering your ingredients is the first step toward that perfect chocolate peanut butter blossoms flavor. Make sure your butter is "softened" but not greasy it should give slightly when pressed with a finger but still hold its shape.
For The Cookie Base
- 220g All purpose flour: Provides the essential scaffolding.
- 1 tsp Baking soda: Responsible for the lift and the classic cracked surface.
- 0.5 tsp Fine sea salt: Cuts through the sugar to highlight the nuttiness. Why this? Salt is a flavor magnifier; it makes the peanut notes pop.
- 115g Unsalted butter: Softened to room temperature for easy aeration.
- 190g Creamy peanut butter: The heart of the recipe. Avoid natural oily versions.
- 100g Granulated sugar: For sweetness and structure.
- 110g Light brown sugar: Packed. This provides the essential chewiness.
- 1 Large egg: Room temperature to ensure a silky emulsion.
- 1 tsp Pure vanilla extract: Adds a floral backnote to the heavy salt/nut flavors.
- 2 tbsp Whole milk: Adds just enough hydration to keep the dough pliable.
The Coating And Topping
- 50g Granulated sugar: For rolling. This creates the "shatter" crust.
- 36 Hershey’s Kisses: Unwrapped and chilled. Why this? Chilling prevents the tips from melting off immediately.
| Original Ingredient | Substitute | Why It Works |
|---|---|---|
| Unsalted Butter | Vegan Butter Sticks | Similar fat to water ratio. Note: Ensure it is the stick variety, not tub margarine. |
| Whole Milk | Oat Milk | Provides the same hydration. Note: Adds a slight toasted grain flavor. |
| Hershey's Kisses | Dark Chocolate Chunks | Higher cocoa content. Note: Won't have the "peak" shape but tastes richer. |
Tools For Precise Baking
You don't need a professional kitchen, but a few specific tools make this easy peanut butter blossoms process much smoother. A stand mixer (like a KitchenAid) is great for the aeration stage, but a hand mixer works just as well if you have some patience.
- Digital Scale: Measuring by weight (grams) is the only way to ensure consistency in baking.
- Cookie Scoop: A 1 tablespoon scoop ensures all 36 cookies are identical in size.
- Parchment Paper: Prevents sticking and ensures the bottoms don't brown too quickly.
- Wire Cooling Rack: Essential for airflow so the bottoms don't get soggy from steam.
Chef's Tip: Use a "double pan" method if your oven runs hot. Stack two baking sheets on top of each other. This creates an air pocket that insulates the bottom of the cookies, preventing the edges from burning before the center is set.
step-by-step Process

This process is all about building the dough in stages. We start with aeration, move to hydration, and finish with the "Kiss" integration. Follow these steps for the most vibrant results.
Phase 1: Aeration Stage
- Cream the fats. Combine the 115g softened butter, 190g peanut butter, 100g granulated sugar, and 110g brown sugar in a large bowl.
- Beat on medium high. Continue for 3 minutes until the mixture looks pale and fluffy. Note: This incorporates air which helps the cookies rise.
Phase 2: Incorporating Dry
- Add the liquids. Mix in the room temperature egg, 1 tsp vanilla, and 2 tbsp milk until fully incorporated and silky.
- Whisk dry ingredients. In a separate bowl, stir together the 220g flour, 1 tsp baking soda, and 0.5 tsp salt.
- Combine. Gradually add the flour mixture to the wet ingredients until no white streaks remain. Note: Do not overmix or the cookies will be tough.
Phase 3: Rolling Coating
- Chill the dough. Place the bowl in the fridge for 20 minutes. Note: This makes the dough less sticky and easier to handle.
- Shape the balls. Scoop 1 tablespoon portions and roll into smooth balls.
- The sugar roll. Toss each ball in the 50g of granulated sugar until completely encrusted and sparkling.
Phase 4: Precision Bake
- Arrange. Place balls 2 inches apart on a parchment lined sheet.
- Bake. Heat at 375°F (190°C) for 8-10 minutes until the edges are just set and tops show small cracks.
Phase 5: Kiss Integration
- Rest. Let the cookies sit on the hot pan for 2 minutes exactly.
- The "Thump". Press a chilled Hershey’s Kiss firmly into the center of each cookie until the cookie cracks slightly around the edges.
- Final cool. Transfer to a wire rack until the chocolate is firm and the cookie is cool.
Fixing Common Cookie Issues
Even with the best intentions, things can go sideways. The most common heartbreak with this classic peanut butter blossoms recipe is the "spreading" issue or the "shattering" issue.
Crumbly Cookie Syndrome
If your cookies are falling apart as soon as you touch them, the dough was likely too dry. This often happens if the flour was measured by volume (cups) rather than weight (grams). If the dough feels like sand while you're rolling it, add an extra teaspoon of milk to bring it back to a pliable, play dough consistency.
Chocolate Melting Mess
If your Hershey’s Kisses are losing their shape and turning into puddles, the cookies were too hot when you added them. It’s tempting to do it the second they come out, but that 2 minute rest is vital. Also, double check that you chilled your chocolate.
The frozen core of the chocolate Kiss acts as a heat sink, protecting the delicate tip from the residual warmth of the cookie.
Natural Peanut Butter Pitfall
If you used "natural" peanut butter (the kind you have to stir), your cookies might be greasy or flat. The oil separation in natural PB disrupts the emulsion we worked so hard to build. If you must use it, make sure it is very well stirred and add an extra 10g of flour to help absorb the excess oil.
| Problem | Root Cause | Solution |
|---|---|---|
| Flat Cookies | Butter was too soft/melted | Chill dough for 30 mins before baking |
| No Cracks | Oven temperature too low | Verify temp with an oven thermometer |
| Tough Texture | Overmixing after adding flour | Mix until flour just disappears |
Common Mistakes Checklist
- ✓ Always use room temperature eggs to maintain a stable emulsion.
- ✓ Chill your chocolate Kisses for at least 30 minutes to prevent melting.
- ✓ Weigh your flour cups are notoriously inaccurate for baking.
- ✓ Don't overbake; the cookies should look slightly "underdone" when they come out.
- ✓ Space the cookies at least 2 inches apart to allow for proper heat circulation.
Creative Flavor Adaptations
Once you've mastered the classic version, you can start playing with the "flavor layers." The beauty of this dough is its versatility. It is a sturdy base that can handle quite a few modifications without losing its structural integrity.
gluten-free Peanut Butter Blossoms
To make these gluten-free, simply swap the 220g of all purpose flour for a high-quality 1:1 gluten-free flour blend (like King Arthur or Cup4Cup). Because gluten-free flours absorb moisture differently, let the dough rest for 30 minutes instead of 20 to allow the starches to fully hydrate.
The result is just as vibrant and nutty, with a slightly softer crumb.
Dark Chocolate Twist
For a more sophisticated, "grown up" version, use dark chocolate kisses or even high-quality dark chocolate discs. You can also add a tiny pinch of flaky sea salt (like Maldon) on top of the chocolate right after pressing it in.
The contrast between the dark cocoa and the salt creates a vibrant flavor profile that cuts through the richness of the peanut butter.
Scaling Your Cookie Batch
Whether you are baking for a small family or a giant office party, these cookies scale beautifully.
- To Half (18 cookies): Use half of all ingredients. For the egg, whisk it in a small bowl and use exactly 25g (about half a large egg). Use a smaller mixing bowl to ensure the beaters can still aerate the butter effectively.
- To Double (72 cookies): Double all ingredients, but keep the baking soda to 1.75 tsp instead of a full 2 tsp to prevent a metallic aftertaste. Work in batches; do not try to bake more than two sheets at a time, as it drops the oven temperature too significantly.
- Baking Large Batches: If doubling, rotate your pans halfway through the bake (front to back and top to bottom) to ensure even heat distribution.
Keeping Cookies Fresh Longer
Storage Store your cooled Peanut Butter Blossoms in an airtight container at room temperature for up to 5 days. To keep them extra soft, place a small piece of white bread in the container; the cookies will absorb the moisture from the bread.
Freezing You can freeze the baked cookies for up to 3 months. Lay them in a single layer on a baking sheet to freeze solid first, then transfer to a freezer bag. This prevents the chocolate kisses from breaking off. You can also freeze the raw dough balls (after rolling in sugar).
Just add 2 minutes to the bake time when cooking from frozen.
Zero Waste Tip If you have leftover Hershey’s Kisses, don't just snack on them! Chop them up and use them as a replacement for chocolate chips in your next batch of muffins or pancakes.
If you have extra sugar rolling mixture that got peanut butter crumbs in it, save it in a small jar in the fridge it's a great "sprinkle" for oatmeal or yogurt the next morning.
Perfect Pairing Ideas
These cookies are quite rich, so they pair best with beverages that provide a bit of contrast. A cold glass of dairy or oat milk is the classic choice because the fats in the milk help cleanse the palate from the sticky peanut butter.
If you are serving these at a party, try pairing them alongside a tart fruit platter. The acidity of berries or green apples cuts through the heavy sweetness of the chocolate. For a cozy night in, a cup of dark roast coffee or a spicy chai tea works wonders.
The bitterness of the coffee highlights the toasted notes of the peanuts, making the whole experience feel much more vibrant. Don't be afraid to experiment these cookies are a blank canvas for your favorite comforting flavors!

Recipe FAQs
Can peanut butter blossoms be frozen?
Yes, baked cookies freeze well for up to 3 months. For best results, freeze them in a single layer on a baking sheet until solid before transferring to a freezer bag to prevent the chocolate kisses from breaking off.
You can also freeze the raw, sugar rolled dough balls and add about 2 minutes to the bake time when cooking from frozen.
What is a peanut butter blossom?
A peanut butter blossom is a classic chocolate chip cookie variation. It features a chewy peanut butter cookie rolled in granulated sugar, baked until slightly cracked, and then topped with a chocolate kiss pressed into the center while still warm.
The contrast between the salty peanut butter and the sweet chocolate is its signature.
Why are my peanut butter blossoms dry?
Your cookies are likely dry due to overbaking or an incorrect flour measurement. Ensure you are measuring your flour by weight (grams) for accuracy, as cup measurements can vary.
Bake only until the edges are set and the tops show small cracks, as they will continue to cook slightly on the hot pan after removal.
What makes peanut butter blossom cookies unique?
The unique combination of a slightly salty, chewy peanut butter cookie base topped with a firm chocolate kiss sets them apart. The signature "blossom" appearance comes from pressing the chocolate into the warm cookie, and the sugar coating provides a delightful crisp exterior. If you enjoyed controlling cookie spread here, the same fat ratio logic applies to our Ultimate Edible Cookie Dough Recipe Safe Buttery and Ready in Minutes.
What kind of peanut butter should I use?
Use creamy, "no-stir" peanut butter for the best structural integrity. Natural peanut butters that separate will cause the cookies to be oily and crumbly due to inconsistent fat distribution.
Why do my chocolate kisses melt off?
The chocolate kisses are likely melting because the cookies are too hot when you add them. Let the cookies rest on the hot baking sheet for exactly 2 minutes after removing them from the oven.
Also, ensure your Hershey’s Kisses are chilled in the freezer for at least 30 minutes beforehand; this temperature difference helps them set.
Can I substitute the butter?
Yes, you can substitute vegan butter sticks for a similar texture. Ensure you use stick style vegan butter rather than tub margarine, as they have a comparable fat-to-water ratio. If you enjoyed mastering fat ratios here, explore our How to Make Vegan Butter That Browns for more insights.
Peanut Butter Blossoms
Ingredients:
Instructions:
Nutrition Facts:
| Calories | 129 kcal |
|---|---|
| Protein | 2.4 g |
| Fat | 6.8 g |
| Carbs | 15.6 g |
| Fiber | 0.6 g |
| Sugar | 10.9 g |
| Sodium | 88 mg |
