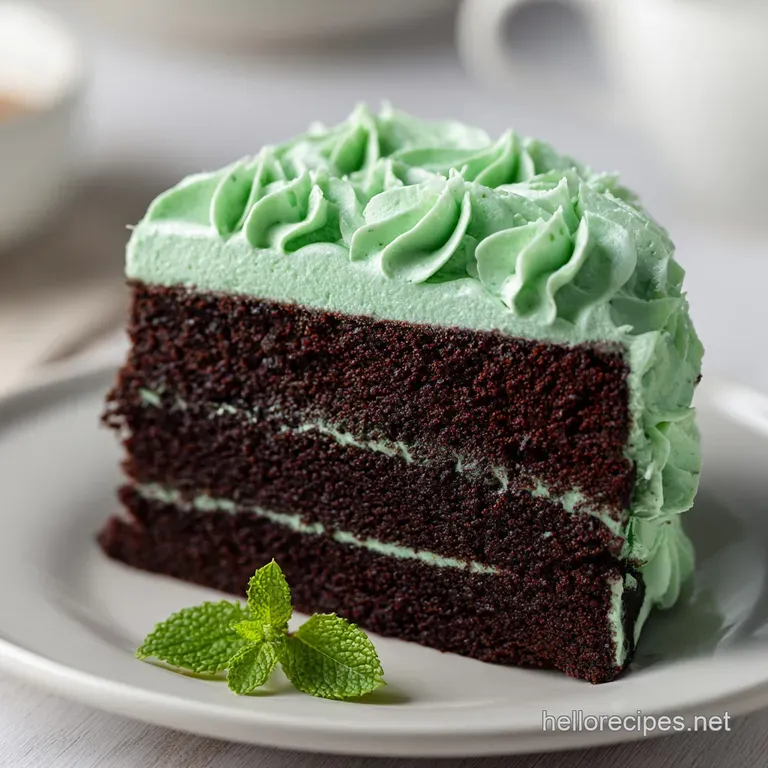
Mint Chocolate Cake: Fudgy and Velvety
- Time: 30 min active + 2 hours chilling = Total 3 hours 5 mins
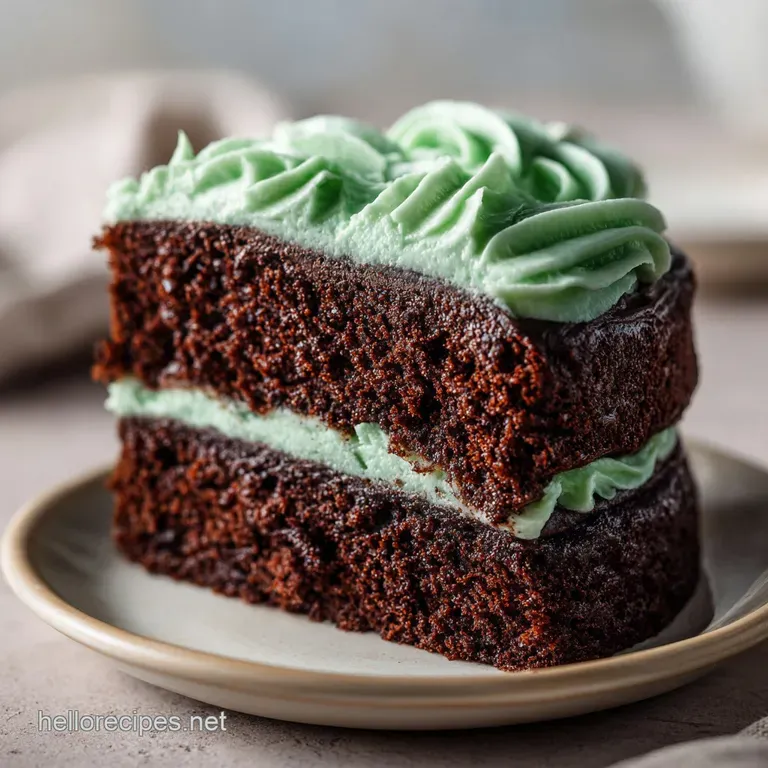
- Flavor/Texture Hook: Fudgy, moist sponge with a velvety, chip studded frosting
- Perfect for: Birthday parties, holiday celebrations, or a fancy weekend treat
The first thing that hits you when you make this is the smell. When that boiling water hits the cocoa powder, there is this sudden, intense burst of dark chocolate aroma that fills the entire kitchen. It is a total shift from the dry, dusty scent of the powder to something that smells like a high end chocolate shop.
I remember the first time I tried to make a homemade version of this. I went way too heavy on the peppermint extract, and the result was a cake that tasted exactly like a tube of minty toothpaste. It was a disaster, and I almost gave up on the whole flavor profile.
But I kept tweaking. I realized that the secret isn't just the amount of mint, but where you put it. By keeping the cake layers purely chocolate and loading the peppermint into a buttery, velvety frosting, you get that classic contrast.
The cake stays rich and fudgy, and the mint provides a sharp, cooling hit that cuts through the sugar. This Mint Chocolate Cake is the result of those mistakes, and trust me, it actually works.
You can expect a cake that is incredibly moist, almost like a brownie but with a lighter crumb. The Andes mint chips add these little bursts of texture that shatter when you bite into them, contrasting with the smooth frosting.
It is a vibrant, bold dessert that looks as good as it tastes, without requiring professional gear.
How to Nail Mint Chocolate Cake
The key to this recipe is the "bloom." Most people just whisk their dry ingredients and call it a day, but adding boiling water at the end changes everything. It dissolves the cocoa lumps and releases the flavor trapped in the bean, which is why this version tastes so much more intense than a standard chocolate cake.
It creates a thin batter that might look wrong at first, but that is exactly what gives you that velvety, moist interior.
Another big point is the temperature of your ingredients. If your buttermilk or eggs are ice cold, they will seize the fats in the oil and butter, leading to a clumpy batter. I always leave mine on the counter for about an hour.
It sounds like a small detail, but it is the difference between a cake that rises evenly and one that has weird pockets of air or sinks in the middle.
Finally, don't rush the chill. The frosting is loaded with butter and chopped chocolate, and if you slice into it while it is still room temperature, it will just slide right off the layers.
Giving it those two hours in the fridge lets the fats stabilize, creating a firm, sliceable layer that holds its shape on the plate.
The Secret to the Fudgy Texture
- Cocoa Blooming: Boiling water wakes up the cocoa powder, making the chocolate flavor more vibrant and deep.
- Buttermilk Acid: The acid reacts with baking soda to create a lift, ensuring a velvety, open crumb.
- Oil Base: Using oil instead of butter in the sponge keeps it moist even after it has been chilled.
- Cold Setting: Chilling the cake locks the frosting in place so it doesn't slide during slicing.
Right then, let's look at how different methods change the result. If you are in a rush, a sheet cake is the way to go, but for a celebration, the layers are unbeatable.
| Method | Time | Texture | Best For |
|---|---|---|---|
| Layer Cake | 3 hours 5 mins | Tall and velvety | Birthdays / Parties |
| Sheet Cake | 2 hours | Denser and fudgy | Casual get togethers |
| Cupcakes | 1 hour 30 mins | Light and airy | Easy serving / Kids |
Component Analysis
Understanding why we use specific ingredients helps you avoid the common traps. For example, using the wrong type of cocoa can make the cake taste bitter or too sweet.
| Ingredient | Science Role | Pro Secret |
|---|---|---|
| Buttermilk | Tenderizer | According to King Arthur Baking, the acidity breaks down gluten for a softer bite. |
| Boiling Water | Flavor Activator | Use a kettle for precision; it ensures the cocoa is fully bloomed. |
| Andes Chips | Texture Contrast | Chop them finely so they distribute evenly without sinking. |
| Vegetable Oil | Moisture Lock | Prevents the cake from drying out in the fridge. |
Gathering Your Essentials
You will need a few specific items to get the texture right. Don't swap the buttermilk for regular milk unless you add a splash of lemon juice, or the cake won't rise properly.
For the Chocolate Cake
- 2 cups (250g) all purpose flourWhy this? Provides the necessary structure for layers
- 2 cups (400g) granulated sugarWhy this? Standard sweetness and moisture
- ¾ cup (75g) unsweetened cocoa powderWhy this? Deep, bitter contrast to the mint
- 2 tsp (10g) baking sodaWhy this? Reacts with buttermilk for lift
- 1 tsp (5g) baking powderWhy this? Added stability for the rise
- 1 tsp (5g) saltWhy this? Balances the sugar
- 1 cup (240ml) buttermilk, room temperatureWhy this? Creates a tender crumb
- ½ cup (120ml) vegetable oilWhy this? Ensures long term moisture
- 2 large eggs, room temperatureWhy this? Binds the batter together
- 2 tsp (10ml) vanilla extractWhy this? Rounds out the chocolate notes
- 1 cup (240ml) boiling waterWhy this? Blooms the cocoa powder
For the Mint Chocolate Chip Frosting
- 1 ½ cups (340g) unsalted butter, softenedWhy this? Base for a velvety texture
- 5 cups (600g) powdered sugarWhy this? Provides sweetness and structure
- 2 tbsp (30ml) heavy creamWhy this? Adjusts the consistency
- 1 tsp (5ml) peppermint extractWhy this? The signature cooling flavor
- 1 cup (170g) Andes mint chocolate chips, finely choppedWhy this? Adds a shatter like crunch
- 1 drop green food coloringWhy this? Purely for the visual effect
| Original Ingredient | Substitute | Why It Works |
|---|---|---|
| Buttermilk (1 cup) | Plain Yogurt + 1 tbsp Lemon | Similar acidity. Note: Slightly thicker consistency |
| Vegetable Oil (½ cup) | Melted Coconut Oil | Same fat content. Note: Adds a subtle coconut hint |
| Andes Mint Chips | Dark Chocolate Chips + Extra Mint | Similar flavor. Note: Lacks the specific mint center snap |
Necessary Baking Tools
You don't need a professional kitchen for this, but a few basics will make your life easier. A stand mixer such as KitchenAid is great for the frosting, but a hand mixer works just fine too.
- Two 9 inch round cake pans (essential for the layer look)
- Large mixing bowl and a whisk
- Silicone spatula for folding in chips
- Wire cooling rack
- Offset spatula for smoothing the frosting
- Measuring cups and a digital scale for precision
The step-by-step Process
Let's crack on. Pay attention to the smell and the look of the batter - it's your best guide.
Phase 1: Prepping the Batter
- Preheat your oven to 175°C (350°F) and grease two 9 inch round cake pans. Note: Grease the sides well so the cake doesn't stick
- Whisk together the flour, sugar, cocoa, baking soda, baking powder, and salt in a large bowl until no lumps remain.
- Stir in the buttermilk, oil, eggs, and vanilla. Mix until smooth.
- Carefully pour in the boiling water and stir until incorporated. Note: The batter will be very thin, which is exactly what we want
Phase 2: Baking to Perfection
- Divide the batter evenly between the two pans and bake for 30–35 minutes until a toothpick inserted into the center comes out with just a few moist crumbs.
- Cool cakes in the pans for 10 minutes before transferring to a wire rack to cool completely. Note: Moving them too early can cause the cake to break
Phase 3: Whipping the Frosting & Assembly
- Beat the softened butter until creamy (about 3 minutes).
- Gradually add powdered sugar and heavy cream, beating on low then high until the frosting is fluffy and pale.
- Fold in the peppermint extract, chopped Andes mint chips, and optional green food coloring. Note: Use a spatula here to avoid over beating the butter
- Frost the cooled cake layers and chill for 2 hours until the frosting feels set and firm.
Chef's Note: If you find the frosting is too stiff to spread, add one extra teaspoon of heavy cream at a time. Just be careful not to overdo it, or the frosting will slide off your Mint Chocolate Cake.
Pro Tips and Pitfalls
One mistake I see people make is over mixing the batter after adding the flour. If you beat it too hard, you develop too much gluten, and your cake becomes tough instead of velvety. Use a whisk or a low speed on your mixer.
Another tip: when chopping the Andes mint chips, put them in the freezer for 10 minutes first. This stops them from smearing and gives you clean, sharp pieces that provide that great shatter texture in the frosting.
Why Your Cake Sank
If the middle of your cake dipped, it's usually because the oven door was opened too early or the baking soda was expired. Make sure your oven is fully preheated before the pans go in.
Frosting Too Runny
This happens when the butter is too soft or the kitchen is too hot. If your frosting looks like soup, pop the bowl in the fridge for 15 minutes, then beat it again.
Chips Sinking Down
If the chips settle at the bottom of the frosting, you likely over mixed the butter and sugar. Fold the chips in by hand at the very end.
| Problem | Root Cause | Solution |
|---|---|---|
| Dry Crumb | Overbaked | Reduce bake time by 2-3 minutes |
| Toothpaste Taste | Too much extract | Balance with more butter/sugar |
| Cake Sticking | Poor greasing | Use parchment paper rounds |
Common Mistakes Checklist
- ✓ Eggs and buttermilk are at room temperature
- ✓ Cocoa powder is sifted to remove lumps
- ✓ Oven is preheated to exactly 175°C
- ✓ Cake is completely cool before frosting
- ✓ Cake has chilled for 2 hours before slicing
Ingredient Swaps and Ideas
If you want to change the vibe of this Mint Chocolate Cake, you have a few options. For a deeper, almost coffee like chocolate taste, you can replace the boiling water with hot brewed coffee. It doesn't make the cake taste like mocha, but it makes the chocolate pop.
If you are looking for other rich options, you might like my Coca Cola Cake, which has a similarly deep flavor profile but a different kind of sweetness.
For a Vegan Version
You can use an egg replacer (like flax eggs) and swap the buttermilk for a mix of soy milk and apple cider vinegar. Use a plant based butter for the frosting, though keep in mind the stability will be slightly different, so you may need to chill it longer.
For a gluten-free Version
Substitute the all purpose flour with a high-quality 1:1 gluten-free blend. Since there is no gluten to over develop, you can be a bit more aggressive with the mixing, but keep the boiling water step exactly the same.
If you're in the mood for something lighter and fruitier, my Strawberry Layer Cake is a great contrast to this heavy chocolate treat.
| If you want... | Do this... | Result |
|---|---|---|
| More Intensity | Use Dutch process cocoa | Darker color, smoother taste |
| Less Sweetness | Reduce powdered sugar by 1/2 cup | More minty, less sugary |
| Extra Crunch | Add toasted hazelnuts to layers | Nutty, textural contrast |
Scaling the Recipe
Adjusting the size of this Mint Chocolate Cake is pretty straightforward, but you have to be careful with the leavening agents.
Scaling Down (Half Batch) Use one 8 inch pan or make cupcakes. For the egg, crack one into a bowl, beat it, and use half of it (about 25g). Reduce the baking time by about 20% and start checking for doneness at 25 minutes.
Scaling Up (Double Batch) If you are making a massive cake for a party, don't just double the salt and baking soda. Increase them to 1.5x the original amount to avoid a metallic taste. Work in batches if your mixer can't handle the volume of frosting, otherwise, you'll end up with air pockets.
For baking double layers, lower the oven temp by about 15°C and extend the time. This ensures the center cooks through before the edges burn.
Truths and Myths
There are a few things people say about mint desserts that just aren't true. Let's set them straight.
Myth: Fresh mint leaves make the best frosting. Truth: Fresh mint leaves don't blend into buttercreams. They leave green flecks and often taste like grass rather than that crisp, cool peppermint. Stick to the extract for that classic flavor.
Myth: Butter in the cake sponge is better than oil. Truth: While butter tastes great, oil is what gives this cake its specific velvety texture and keeps it from drying out when you put it in the fridge.
Storage and Waste Tips
This cake keeps surprisingly well because of the oil base. Store it in an airtight container in the fridge for up to 5 days. When you're ready to eat it, let it sit at room temperature for 30 minutes so the frosting softens back up to that velvety state.
If you need it to last longer, you can freeze the cake. I recommend freezing the layers individually, wrapped in plastic and foil, for up to 3 months. Thaw them in the fridge overnight before frosting.
Zero Waste Tips
- Leftover Frosting: Don't throw it away! Use it as a dip for fresh strawberries or spread it on a slice of toasted brioche.
- Cake Scraps: If you trim the tops of your layers to make them flat, crumble the scraps into a bowl, add a dollop of the mint frosting, and roll them into cake pops.
- Buttermilk: If you have a bit left over, use it in your next batch of pancakes or as a marinade for fried chicken.
Plating and Presentation
Since this Mint Chocolate Cake is so visually striking with the green frosting, you want to keep the decorations simple. A few shavings of dark chocolate on top provide a beautiful contrast. You can use a vegetable peeler on a room temperature chocolate bar to get those long, curly ribbons.
Add a single, fresh mint leaf to the center of each slice for a pop of natural color. If you're serving this for a birthday, a drizzle of melted chocolate over the edges of the frosting looks professional without much effort.
For a more rustic look, leave the frosting slightly swooped and messy, then press some of the chopped Andes chips into the sides of the cake. It signals exactly what's inside and adds a great textural element to the outside of the dessert.
Recipe FAQs
Why is the batter so thin after adding boiling water?
This is normal and intentional. The boiling water blooms the cocoa powder to intensify the chocolate flavor and creates a very moist, tender crumb.
How to tell when the cake is fully baked?
Insert a toothpick into the center. It should come out with just a few moist crumbs after baking for 30 35 minutes at 350°F.
Is it true that using boiling water ruins the cake's structure?
No, this is a common misconception. The hot water helps dissolve the sugar and cocoa, resulting in a smoother batter and a more velvet like texture.
How to keep the frosting from becoming too runny?
Chill the finished cake for 2 hours. This allows the butter and heavy cream to set properly, ensuring the frosting remains stable before serving.
Can I use a dairy-free alternative for the butter in the frosting?
Yes, a high-quality vegan butter works well. If you enjoyed the flavor profile of browned butter, you can apply a similar rich fat approach here for a dairy-free version.
How long can I store this cake in the refrigerator?
Store it for up to 5 days. Keep it in an airtight container and let it sit at room temperature for 30 minutes before eating so the frosting softens.
How to prevent the frosting from feeling grainy?
Beat the softened butter for 3 minutes until creamy. Gradually add the powdered sugar and heavy cream on low speed before whipping on high until fluffy.
Mint Chocolate Cake

