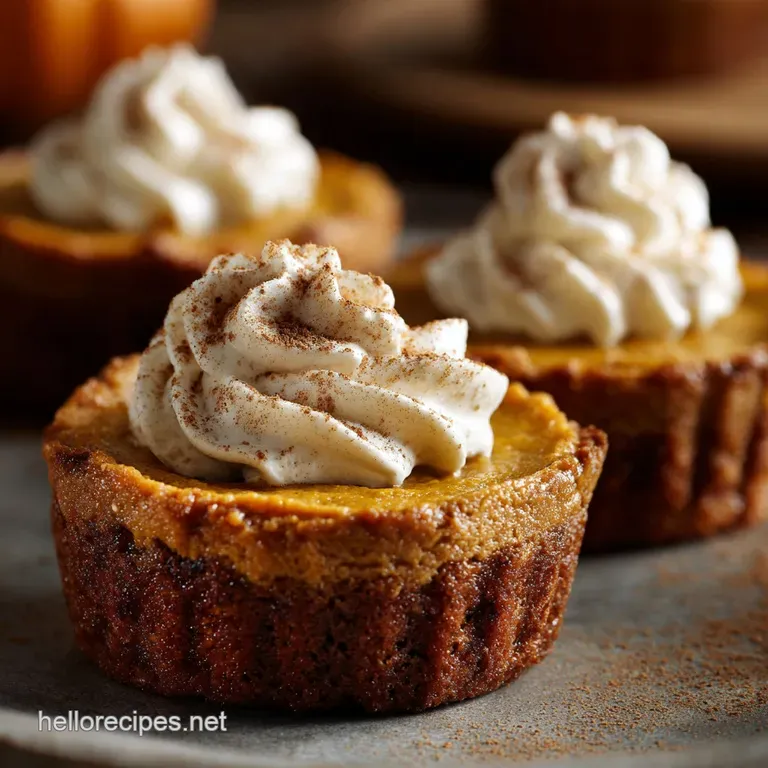
Mini Pumpkin Pies: the Ultimate Creamy, Perfectly Portioned Fall Dessert
- Ditch the Dinner Knife: Why We Love Individual Dessert Servings
- Gathering Your Autumnal Baking Arsenal
- Stocking the Pantry: Essential Spices and Sweeteners
- Crafting the Crust and Custard: A Step and by-Step Guide
- Expert Techniques for Flawless Mini Pumpkin Pies
- Maintaining Freshness and Flavour Longevity
- Flavour Swaps and Serving Suggestions
- Recipe FAQs
- 📝 Recipe Card
Ditch the Dinner Knife: Why We Love Individual Dessert Servings
Oh my gosh, you are going to absolutely love this recipe. If you're anything like me, you adore pumpkin pie (especially when the weather gets chilly) but you dread the actual serving of it. Trying to carve a perfect slice of a traditional, nine and inch pie after a massive holiday meal? Impossible.
That wobbly slice ends up spilling its custard guts everywhere, the crust crumbles, and suddenly your beautiful, rustic dessert looks like a scene from a baking horror movie. I hate the faff, honestly.
Escaping the Thanksgiving Slicing Stress
I’ve been there. I distinctly remember one year, standing over a gorgeous pie for Thanksgiving, armed with a knife that was definitely not sharp enough, trying to coax the first piece out. It was chaos. The whole slice collapsed into the void, taking half the filling with it.
My mother and in-law was politely looking away, but I knew the truth. That night, I vowed to find a better way to handle individual pumpkin servings. That’s how I landed on the magnificent mini pumpkin pies recipe. They are the ultimate solution to holiday dessert anxiety.
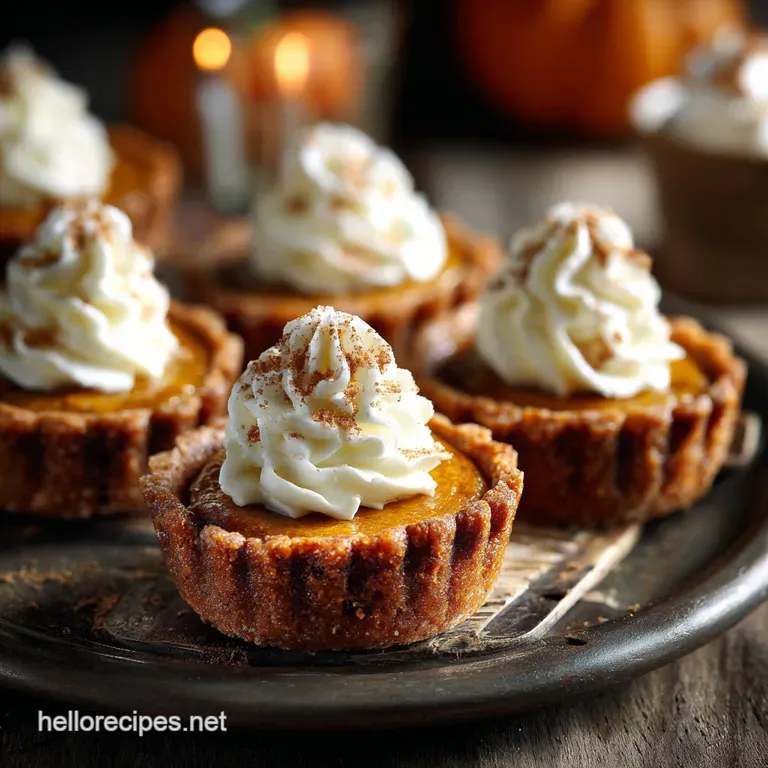
The Perfect Party Bite: Mini Pumpkin Pies
These are pure genius, seriously. Baking your dessert in a standard muffin tin solves so many problems instantly. First, they’re perfectly portioned. No guesswork, no fighting over who gets the biggest slice. Second, they are portable .
If you are looking for easy mini pumpkin pies for Thanksgiving or any fall party where people are mingling, these are your answer. Just grab a small napkin and go. It’s brilliant for when you’re serving mini pumpkin pies for a crowd. I mean, who needs that drama of hunting down a dessert fork?
What Makes These Maple and Kissed Pies So Special?
We aren't just shrinking a big pie here; we are refining it. This version uses evaporated milk, which creates an unbelievably creamy, almost velvety custard that sets beautifully inside the small pastry shell. But the real game and changer is the flavour profile.
We use a combination of brown sugar and pure maple syrup. The maple syrup gives the mini pumpkin pies a warm, woodsy depth that traditional recipes miss out on. Paired with a flaky shortcrust (that stays crisp because we pre and bake it!), these are spot on.
Gathering Your Autumnal Baking Arsenal
Right then, let’s crack on. The great thing about autumn baking is that most of the ingredients are probably already in your cupboard. The key to making these individual desserts sing is focusing on the quality of your spices and the chill factor for the pastry.
Remember, we are aiming for flaky crust perfection here.
Stocking the Pantry: Essential Spices and Sweeteners
You simply cannot rely on that old, half and empty jar of pumpkin spice mix you bought three years ago. You just can’t. The spices need to be potent and fresh. Specifically, ginger, cinnamon, and nutmeg should practically jump out of the jar when you open them.
I am extremely opinionated about nutmeg: please, use freshly grated nutmeg if you can. It smells intoxicating and makes a massive difference in the final taste. Instead of relying solely on granulated sugar, the brown sugar adds moisture and the maple syrup introduces that lovely, complex sweetness that screams "fall."
Selecting the Ideal Pumpkin Puree (Not Pie Filling)
This is my official public service announcement. Listen up: read the label. I once grabbed a can in a rush thinking I was saving time, only to realize I’d grabbed ‘Pumpkin Pie Filling,’ which is essentially pumpkin puree that’s already been dosed with spices and heaps of corn syrup.
My final product was sickeningly sweet and strangely textured.
CRITICAL WARNING: Always purchase 100% pure pumpkin puree (like Libby’s in the U.S.). It should have only one ingredient: pumpkin. This gives you total control over the spice blend.
Must and Have Equipment: Preparing Your Muffin Tin Base
You don't need fancy mini pie pans to make perfect mini pumpkin pies in muffin tin format. A standard 12 cup tin is perfect. However, you absolutely must grease those cups aggressively, even if it's non and stick. I prefer to use a quick spritz of non and stick baking spray (the one with flour mixed in).
The secret tool for forming those tiny crusts is a 4 inch round cutter (or any glass/jar lid that measures about 4 inches across). This size ensures the dough comes high enough up the sides without too much trim.
Temperature Tips for Optimal Ingredient Combining
For the crust, temperature is everything. Keep the butter and water ice cold. If the butter melts before the dough hits the oven, you lose all your flakiness. The little pockets of cold butter create steam in the oven, which pushes the pastry layers apart.
For the filling, it's the opposite: the eggs and milk should be closer to room temperature so they integrate smoothly and evenly into the pumpkin puree without curdling.
Related Recipes Worth Trying
- Apple Crisp Mini Cheesecakes: Easy Fall Dessert Recipe — Apple Crisp Mini Cheesecakes are the ultimate sophisticated fall dessert. Combining creamy richness and spiced crumble, this easy recipe is perfect for...
- Mini Beef Wellington Bites Classic Puff Pastry Party Food — Mini Beef Wellington Bites offer true elegance as luxurious appetizers Follow our chefapproved recipe for flaky puff pastry rich duxelles and perfectly rare...
- NoBake Pumpkin Marshmallow Pie Easy Autumn Dessert Recipe — This NoBake Pumpkin Marshmallow Pie is the ultimate effortless autumn dessert Achieve a light velvety Cool Whip Pumpkin Pie texture without turning on the...
Crafting the Crust and Custard: A Step and by-Step Guide
It feels like a lot of steps, but trust me, they’re mostly quick cooling phases. Getting the crust right takes the most attention. Once you’ve successfully chilled the dough and rolled out your 12 small rounds, carefully seating them into the muffin tin cups is a job for gentle fingers.
Don't stretch the dough, just press it gently into place.
Expert Techniques for Flawless Mini Pumpkin Pies
We are aiming for a beautiful contrast: buttery, crisp crust against a smooth, spicy, creamy filling. That contrast is what makes the mini pie so satisfying.
Blind and Baking the Tiny Pastry Shells
You cannot skip the blind bake. Period. I’ve tried to cut corners before, and what happens? The raw pastry base soaks up the wet pumpkin filling like a sponge. Gross. The blind bake (par and baking) creates a shield.
- Parchment is Easier: Cut small squares of parchment paper (or cupcake liners work) and gently press them into the unbaked cups.
- Fill with Weights: Fill those cups with dried beans or ceramic pie weights.
- Initial Bake: Bake until the edges look dry, about 10 minutes.
- Remove Weights: Take out the weights and parchment, then bake for another 5 minutes to fully dry out the bottom.
Whisking Together the Silky Smooth Filling
The biggest mistake here is over and mixing. We aren't making a meringue. You want to whisk the filling just until it's uniform and smooth. If you incorporate too much air, the filling will puff up wildly in the oven and then collapse dramatically, potentially cracking the surface.
I highly recommend sifting your brown sugar and all those potent spices together before adding them to the pumpkin and wet ingredients. No one wants a mouthful of cinnamon clumps.
Achieving the Perfect Bake and Creamy Set
Reduce your oven temperature to 350°F (175°C) before you put the filling in. The mini pies will bake quickly, usually 20 to 25 minutes. How do you know they are done? The edges should look firm, slightly puffed, and set.
When you gently nudge the muffin tin, the very center of the pies (maybe a tiny dot the size of a pea) should still have a slight jiggle. This is the sweet spot. They will finish setting as they cool down.
Troubleshooting Common Muffin Tin Issues
If your pies don't want to come out, they are either still warm or you didn't grease the tin enough. Don't panic. Wait until they are completely cool (this takes about an hour on the counter).
Then, run a thin, flexible offset spatula or even a thin plastic knife gently around the edge of the crust, tilting it slightly to break the seal. Once you’ve done that for all 12, they should lift out easily.
Maintaining Freshness and Flavour Longevity
Pumpkin pie actually tastes better the day after you bake it. This is why these are perfect candidates for making ahead. The spices have time to settle down and truly permeate the custard.
Flavour Swaps and Serving Suggestions
Need to adjust for guests? Want to get a little wild? Here are my favourite quick modifications for these delicious little pies.
Optimal Storage Methods for Baked Pies
Because they contain egg and dairy, these individual desserts must be refrigerated once they have completely cooled down. Store them loosely covered (or in an airtight container if you need to stack them) in the fridge for up to four days. If you serve them slightly chilled, the custard consistency is simply divine.
Can I Make the Filling Ahead of Time?
Yes, absolutely. The filling can be made up to two days in advance and kept covered in the fridge. Just give it a good whisk before you pour it into the pre and baked shells. Since we're doing the crucial blind and bake step, you can even bake and cool the shells completely the day before, keeping them covered on the counter, and just fill and bake them the next morning.
Dairy and Free and Gluten and Free Crust Alternatives
If you need a dairy and free crust, swap the butter for a good quality vegetable shortening (like Crisco) or a hard block of non and dairy butter alternative, keeping it just as cold. For a gluten and free crust, the simplest move is often a press and in base.
Try a graham cracker or almond flour crumb crust mixed with melted butter; press it into the muffin tin cups, bake for 5 minutes, and then fill and bake as directed. It makes the mini pumpkin pies recipe easy and accessible for everyone.
Pairing Ideas: Whipped Topping and Seasonal Garnishes
Please don't skip the topping. It finishes the dish visually and texturally.
- Sweetened whipped cream is classic, but a dollop of slightly tart crème fraîche mixed with vanilla bean paste is incredible.
- For a garnish, try a sprinkle of extra cinnamon or a few toasted pepitas (pumpkin seeds) pressed lightly into the whipped cream.
- If you’re feeling extra festive, I love a tiny dusting of powdered sugar over the whole plate, making them look snowy and ready for fall.

Recipe FAQs
Can I make these Mini Pumpkin Pies ahead of time for a party, and how do I store them?
Yes, absolutely! These are brilliant for making ahead; they keep beautifully covered in the fridge for 3 4 days, or you can freeze fully baked pies for up to 3 months just ensure they are completely thawed before serving.
Help! How do I stop the crust from getting a dreaded soggy bottom once I add the creamy filling?
The secret weapon here is the blind baking step; the initial 15 minutes in the oven hardens the crust before the wet custard goes in, creating a vital moisture barrier against the filling.
I haven’t got time for the homemade pastry faff; can I use shop bought crust instead?
You’re spot on, you certainly can; use store-bought refrigerated pie crusts, cut them into 4 inch rounds, and proceed directly to the blind bake as outlined in Phase 2 of the instructions.
How do I know when the custard filling is properly set without overbaking them into a brick?
Look for the ‘sixpence coin jiggle’ when gently nudged, the edges should be firm, but the very centre (a tiny spot) should still wobble slightly, as the residual heat will finish setting the custard perfectly upon cooling.
Are there any tips for making these Mini Pumpkin Pies a bit lighter, or perhaps adding an extra kick of flavour?
For a lighter option, swap the evaporated milk for half and-half or whole milk, and for a warming boost, stir in a tablespoon of quality spiced rum or bourbon into the pumpkin filling mixture.
Mini Pumpkin Pies In Muffin Tin
Ingredients:
Instructions:
Nutrition Facts:
| Calories | 629 kcal |
|---|---|
| Protein | 3.5 g |
| Fat | 31.2 g |
| Carbs | 83.8 g |
