Gluten Free Oreo Cakestersstyle Pies: the Ultimate Soft Chocolate Sandwich Cookie
- Biting into Nostalgia: Why We Needed a Gluten Free Oreo CakestersStyle Pies Recipe
- The Science of Softness: Achieving the Perfect Pillowy Chocolate Sponge
- Essential Pantry Checklist: Ingredients for Gluten Free Oreo CakestersStyle Pies
- Step-by-Step Guide: Baking and Assembling Your Cakester Pies
- Troubleshooting GF Baking: Chef’s Tips for Cakester Perfection
- Preservation Strategy: Storing and Freezing Gluten-Free Cakesters
- Elevated Enjoyment: Serving Suggestions for Your Cakester Pies
- Recipe FAQs
- 📝 Recipe Card
Biting into Nostalgia: Why We Needed a gluten-free Oreo CakestersStyle Pies Recipe
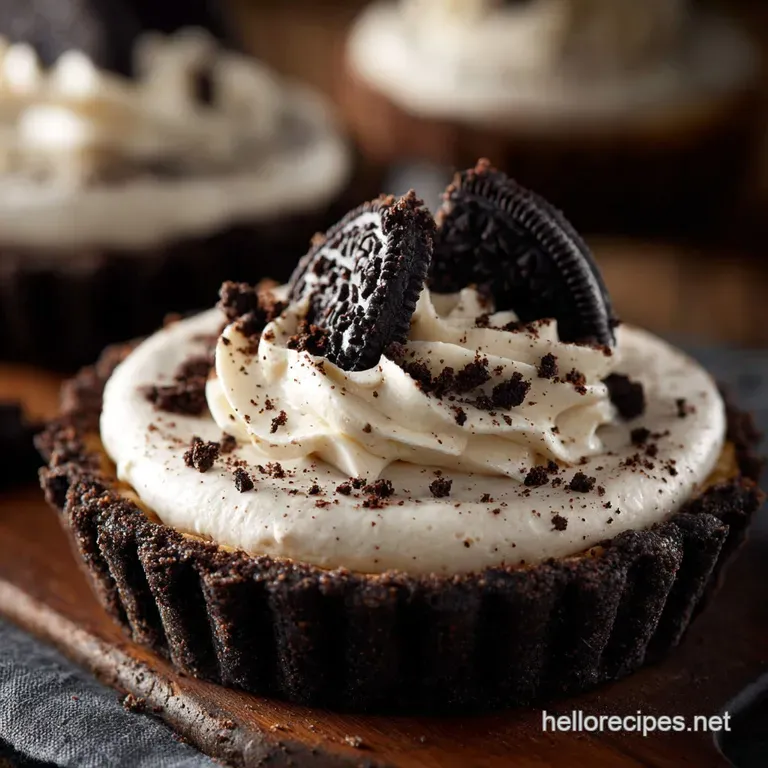
Just the smell of them, still warm on the cooling rack, takes me right back to the school lunch box era. These gluten-free Oreo CakestersStyle Pies are an absolute masterclass in soft, deeply chocolatey nostalgia.
The moment you bite through the pillowy cake and hit that tangy, super creamy center, you’ll understand why we had to nail this recipe.
We’ve all had those intense cravings for soft baked cookies or cakey sandwich treats, right? This recipe is a lifesaver because it’s surprisingly fast, delivering maximum comfort food satisfaction without the usual gluten-free complexity.
It’s also much cheaper than buying specialty GF packaged sweets, and honestly, the homemade version tastes about a thousand times better.
Ready to forget about dry, crumbly GF bakes forever? I’ve done all the testing, the ruined batches, and the butter-to-flour ratio disasters so you don't have to. Let's make some seriously amazing Oreo Cakesters Recipe tribute pies that will make you the dessert hero of the decade.
The Science of Softness: Achieving the Perfect Pillowy Chocolate Sponge
The History of the Cakey Sandwich Treat
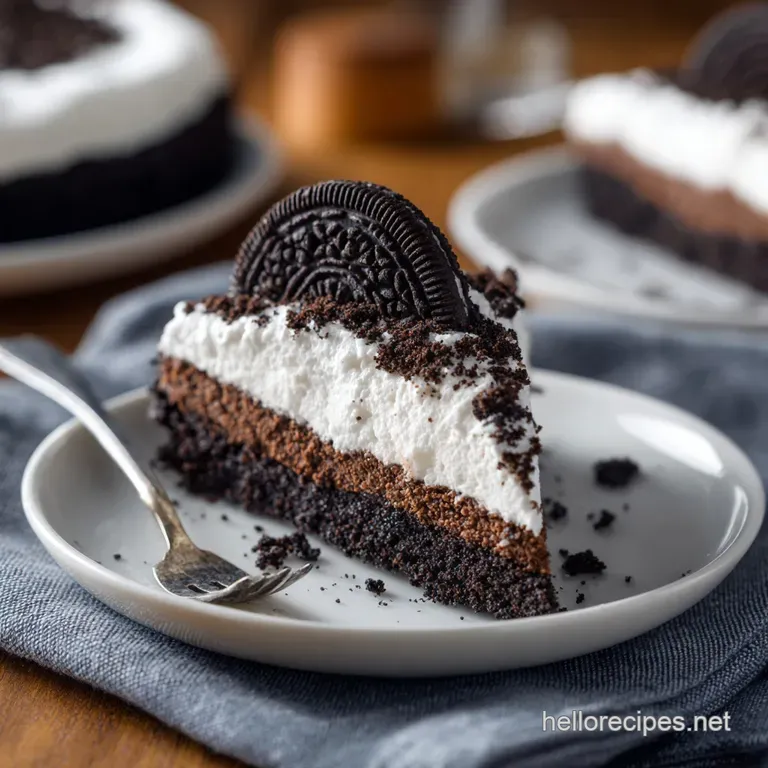
Before they became a gluten-free dream, those original Cakesters were famous for being perfectly plush. They weren't a crunchy wafer; they were a soft, almost whoopie pie-like cake sandwich that disappeared far too quickly.
We needed to capture that exact texture while keeping the structure sturdy enough to handle the filling.
Defining a "Cakester Style" Pie Texture
Achieving that signature soft, pillowy texture in GF baking requires balancing hydration and leavening agents perfectly. We aren't aiming for a brownie or a dry sugar cookie. We need a tender crumb that gently springs back when touched, which is why we rely heavily on buttermilk and proper creaming technique.
Why Traditional Oreo Cakesters Aren't Suitable for GF Diets
Obviously, the traditional version contains wheat flour, making it off-limits for celiacs and those avoiding gluten. My journey to create the perfect gluten-free Oreo Cakesters was driven by the sadness of having to pass up such a stellar snack.
This recipe provides that exact flavor profile and texture without any compromises.
Balancing the GF Flour Blend for Structure and Rise
The key to preventing dry, sandy GF desserts is the flour blend itself. I always stress using a high-quality blend that already contains xanthan gum, or adding half a teaspoon if it doesn't.
This binding agent replaces the protein structure that gluten normally provides, holding your delicate cake rounds together beautifully.
The Role of Buttermilk and Cocoa Acidity in Flavor Depth
Buttermilk is non-negotiable here, trust me. Its acidity reacts with the baking soda, giving our pies a lift and ensuring that wonderful, soft texture. Plus, when combined with Dutch process cocoa, it deepens the flavor, making the chocolate richer and darker essential for that classic "Oreo" look and taste.
Crafting the Tangy, Stable Vanilla Crème Filling
This isn’t just powdered sugar and butter mixed lazily. We beat the butter until it's super pale and fluffy before adding the sugar slowly. This incorporates maximum air, creating a filling that is lighter than traditional dense buttercream, with a slight tangy complexity thanks to a pinch of salt and sometimes a dash of cream cheese (though we stick to heavy cream here for stability).
Chef's Note: When mixing GF batter, it is crucial to stop mixing the second the dry ingredients disappear. Overmixing develops any starches present and results in tough, dense cakes the opposite of what we want.
Essential Pantry Checklist: Ingredients for gluten-free Oreo CakestersStyle Pies
Selecting the Right gluten-free All-Purpose Blend
I highly recommend using a cup-for-cup blend designed specifically for baking. It ensures consistent results every single time, which is so important when dealing with delicate batters. Look for brands that clearly state they include xanthan gum.
Choosing Between Natural and Dutch Process Cocoa Powder
To get that characteristic deep, dark, almost black color of the real thing, you absolutely need Dutch Process Cocoa Powder . Natural cocoa is more acidic and yields a lighter brown product.
The Dutch process cocoa is what gives these gluten-free Sweets their authentic appearance and robust flavor.
Swapping Dairy: Non-Negotiables and Flexible Alternatives
If you need to make these pies dairy-free, use high-quality vegan butter sticks and replace the buttermilk with equal parts non-dairy milk plus 1 teaspoon of vinegar. The slight acidity is vital for the cake's rise.
Building the Classic Crème Filling Base
The filling is simple: butter, powdered sugar, vanilla, and heavy cream. Don’t skimp on the vanilla use vanilla bean paste if you want those lovely little black specks, elevating these from good to incredible. A small pinch of salt prevents the filling from tasting sickly sweet.
| Ingredient | Role | Viable Substitution |
|---|---|---|
| GF All-Purpose Flour | Structure | Swap with GF oat flour (add 1/2 tsp xanthan gum). |
| Dutch Process Cocoa | Color/Flavor | Natural cocoa, but the color will be lighter. |
| Buttermilk | Tenderness/Acidity | Milk + 1 tsp white vinegar or lemon juice (rest for 5 mins). |
| Unsalted Butter | Fat/Flavor | Vegan butter sticks (ensure they are the firm baking type). |
| Heavy Cream | Filling stability | Whole milk, added slowly, or a splash of non-dairy creamer. |
step-by-step Guide: Baking and Assembling Your Cakester Pies
Phase 1: Preparing the Rich Chocolate Batter
First, preheat your oven to 350°F (175°C) and line two large baking sheets with parchment. In a medium bowl, whisk together all the dry ingredients flour, cocoa, baking soda, baking powder, and salt. Make sure that cocoa powder is well integrated; nobody wants a dusty cake!
Next, cream the softened butter and sugar in your stand mixer until they are beautifully pale and fluffy, about four minutes. Then, beat in the room temperature eggs one at a time, followed by the vanilla.
Now, alternate adding the dry mix and the room temperature buttermilk, starting and ending with the dry ingredients. Remember: mix just until combined.
Phase 2: Perfect Portioning and Baking the Sponges
Transfer your perfectly mixed batter into a large piping bag fitted with a wide round tip (or just use a spoon if you prefer less fuss). Pipe uniform, 2 inch rounds onto the prepared sheets, leaving plenty of space between each one. Uniformity is key here for making the perfect sandwich!
Bake the rounds for 8 to 12 minutes, rotating the pan halfway through. They are done when the tops spring back lightly when touched. Immediately transfer those delicate little sponges to a wire rack to cool completely. If you move them too quickly, they might crumble.
Phase 3: Mixing the Silky Vanilla Crème Filling
Using your electric mixer, beat the softened butter until it is dramatically pale and light. This step is essential for airy filling. Then, reduce the speed and gradually incorporate the sifted powdered sugar and the pinch of salt. Sifting prevents those awful lumps.
Add the vanilla extract or paste, followed by the heavy cream, one tablespoon at a time. Crank the speed back up to high and beat the filling for a full three to five minutes until it’s light, fluffy, and looks almost white. It should hold stiff peaks beautifully.
Phase 4: Matching, Filling, and Finishing the Pies
Now for the fun part! Match your cooled cake rounds into pairs that are similar in size this keeps the finished pies looking professional. Pipe a generous dollop of that glorious vanilla crème onto the flat side of one cake round.
Top it with its partner, pressing gently just until the filling pushes out to the edges. Don’t press too hard, or you’ll squish your fluffy cakes! These are now ready to eat, or you can chill them for a firmer filling.
They make such a satisfying snack, almost as fun as making homemade gluten-free Pop Tarts: Artisan Raspberry Tarts with Flaky Pastry .
Troubleshooting GF Baking: Chef’s Tips for Cakester Perfection
Preventing Flat or Dry Sponges (The Scoop Trick)
If your sponges come out flat, you likely overmixed the batter or used cold ingredients. Room temperature dairy and eggs are critical for proper emulsion and volume. The "Scoop Trick" ensures uniform size and helps with even baking; use a standard 2 tablespoon cookie scoop if you don't have a piping bag.
Why Your Filling Might Be Too Runny (or Too Stiff)
If your filling is runny, you probably added too much liquid, or your butter was too soft (almost melted). Fix a runny filling by beating in another quarter cup of sifted powdered sugar.
If it’s too stiff and dry, gradually add a few extra drops of heavy cream until it reaches that perfect, spreadable consistency.
The Critical Importance of Cooling Completely Before Filling
I made the rookie mistake once of trying to fill my cakes while they were still slightly warm it was a disaster. The heat instantly melted the butter in the crème, turning my beautiful filling into a sugary puddle that oozed everywhere. Wait. Until. They. Are. Cold. Period.
Preservation Strategy: Storing and Freezing gluten-free Cakesters
Optimal Shelf Life for Filled Pies
Once assembled, these Chocolate Sandwich Cookies gluten-free style pies stay gorgeously soft in an airtight container at room temperature for 1 2 days. However, because of the buttercream filling, they really benefit from refrigeration.
Kept in the fridge, they will last wonderfully for up to 5 days.
Freezing Unfilled Cake Rounds for Later Use
If you want to get ahead of the game, bake the cake rounds completely, let them cool, and freeze them flat in a freezer bag separated by parchment paper. They will keep perfectly for up to 3 months! Thaw them completely at room temperature before you whip up the fresh filling.
The Best Way to Thaw Baked Goods Safely
Never thaw delicate baked goods in the microwave. Simply move the container from the freezer to the refrigerator overnight. For best results, let the cakes sit at room temperature for about 30 minutes once thawed before filling them. This ensures they retain their lovely soft texture, just like my favorite Coconut Flour Muffins: The Ultimate Fluffy, Low-Carb gluten-free Recipe .
Elevated Enjoyment: Serving Suggestions for Your Cakester Pies
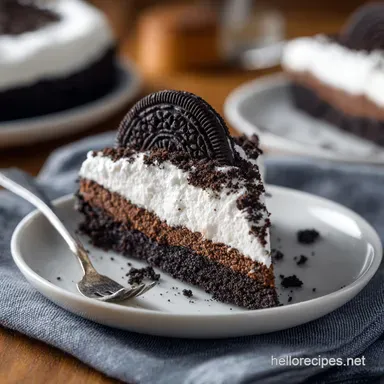
These pies are phenomenal eaten straight out of the fridge the slight chill firms up the buttercream beautifully. They make a perfect pairing for a mid-afternoon coffee break or packed into a lunch box.
For a decadent dessert experience, serve them alongside a scoop of vanilla bean ice cream or a drizzle of homemade chocolate ganache. They’re sweet enough to be a standalone dessert, but they also look beautiful arranged on a plate with fresh berries, much like serving my light and zesty gluten-free Summer Dessert Bars: Easy Raspberry Lemon Crumble . You absolutely cannot go wrong.

Recipe FAQs
Why did my gluten-free cakes turn out dry or crumbly?
GF flours absorb moisture quickly, so accurate measurement by weight is essential for this recipe's success. The most common culprit is overbaking; monitor closely and remove the cakes immediately when a toothpick comes out with moist crumbs, usually around the 12-14 minute mark.
Can I make the crème filling dairy-free or vegan?
Absolutely. Substitute the traditional dairy butter with a high-quality vegan butter stick, ensuring it is chilled and firm before whipping. You may need to add a touch more non-dairy creamer (like oat milk) or powdered sugar to achieve the perfect pipeable consistency.
My cakes spread too much and are flat. What went wrong?
Flat cakes often result from expired leavening agents (baking powder/soda) or the batter being too warm, causing the fat to melt prematurely. Ensure your ingredients are fresh, and if your kitchen is hot, chill the portioned cake circles briefly before baking.
How should I store the finished sandwich pies, and how long do they last?
Store the completed pies in an airtight container at cool room temperature for up to 3 days, or in the refrigerator for up to 5 days. For the best soft texture reminiscent of the original Cakesters, allow refrigerated pies to warm up slightly before serving.
Can I substitute the cup-for-cup GF blend for Almond or Coconut flour?
No, this cake requires a standard GF blend containing xanthan gum to achieve the light, structural elasticity needed for a soft cake sponge. Almond or coconut flours have drastically different liquid absorption rates and will result in a much denser, flatter finished product.
My vanilla crème filling is too runny. How do I fix the consistency?
The filling needs a very stiff consistency to prevent squeezing out when sandwiched. Gradually beat in 1 to 2 extra tablespoons of sifted powdered sugar until the filling holds firm peaks. If the kitchen is warm, chilling the bowl for 15 minutes before piping will also help firm up the butter mixture.
Can I freeze these Cakesters for later use?
Yes, both the baked cakes and the assembled pies freeze well. Wrap each pie tightly in plastic wrap, then place them in an airtight freezer bag or container. They can be stored for up to two months; thaw overnight in the refrigerator before enjoying.
Gf Oreo Cakesters Style Pies Recipe
Ingredients:
Instructions:
Nutrition Facts:
| Calories | 327 kcal |
|---|---|
| Protein | 3.0 g |
| Fat | 13.0 g |
| Carbs | 53.0 g |
