Roast Turkey: the Flawless Herb-Butter Recipe for a Moist Centrepiece
- Achieving the Ultimate Moist Roast Turkey
- The Science of Succulence: Why This Recipe Guarantees Moisture
- Essential Ingredients for Your Herb-Butter Roast Turkey
- Step-by-Step Guide to Roasting Your Centerpiece Turkey
- Expert Troubleshooting and Avoiding Dry Turkey Disasters
- Post-Roast Turkey: Safe Storage and Reheating
- Perfect Pairings: What to Serve with Roast Turkey
- Recipe FAQs
- 📝 Recipe Card
Achieving the Ultimate Moist Roast Turkey
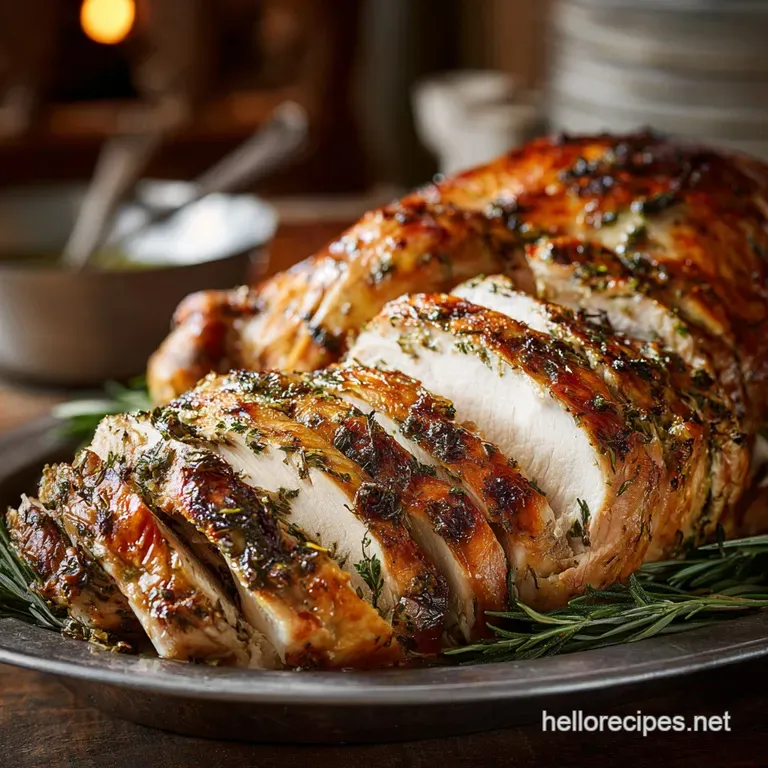
That aroma is just heaven, isn't it? The air gets thick with sage, roasted garlic, and that deep, warming scent of golden brown skin beginning to shatter. Pulling this centerpiece from the oven, truly golden and glistening, is the moment every home cook lives for.
Look, roasting a big turkey feels like a high stakes cooking challenge, but I promise you, it doesn't have to be complicated or stressful. My method focuses entirely on protection and penetration we use strategic fat application to keep the delicate breast meat moist while ensuring the darker leg meat cooks thoroughly.
This process delivers flavor deep into the muscle fibers, making every slice absolutely succulent.
I’ve made every mistake in the book, from forgetting to thaw it fully to carving it immediately (seriously, I did that once). Let’s ditch the guessing game and adopt a few non-negotiable, foolproof steps that guarantee your holiday feast will be remembered for all the right reasons.
The Science of Succulence: Why This Recipe Guarantees Moisture
The secret to a juicy turkey isn't magic; it’s thermal control and fat application. We are essentially giving the breast meat a luxurious shield while forcing the aromatics to work directly on the meat, not just sit on the skin. Trust me, the difference is night and day compared to simply rubbing some oil on top.
Why Turkey Fails (And How We Fix It)
Turkey fails because it is designed to fail. The breast meat is lean and cooks fast, needing to hit 165°F (74°C) to be safe. The dense, collagen rich dark meat in the thighs and legs needs to reach 180°F (82°C) to become tender and palatable.
If you wait for the legs to finish, the breast turns into dry sawdust. Our fix is simple: we protect the breast with compound butter and aluminum foil. We also utilize a two-temperature roast process to maximize flavor and crispness without burning.
The Essential Herb Butter Technique Explained
We don't just rub butter on the skin; we gently push about two-thirds of that fragrant herb mixture directly under the skin and onto the breast muscle. As the turkey roasts, the butter melts slowly, bathing the breast meat in fat, moisture, and intense herb flavor.
This technique acts as an internal baste, keeping the fibers hydrated right where they need it most.
Tools of the Trade: Essential Equipment Checklist
You don't need fancy gadgets, but a few basics are non-negotiable for success.
- V-Rack or Flat Roasting Rack: Crucial for allowing air to circulate completely underneath the bird. If the turkey touches the pan bottom, the skin won't crisp up there.
- Accurate Instant Read Meat Thermometer: This is your life preserver. Don't eyeball or rely on those little pop-up timers; they are notorious liars.
- Heavy Duty Roasting Pan: Make sure it can handle the weight and has high sides to catch the precious drippings for your gravy.
Thermal Management: Mastering Oven Temperature Zones
We start the turkey at a blistering 220°C (425°F) for about 30 minutes. This high initial heat quickly crisps the skin, giving us that beautiful, deep mahogany color we all want. Then we dramatically reduce the heat to a gentler 180°C (350°F).
This lower temperature allows the interior to cook evenly and slowly without over browning or desiccating the breast meat.
The Power of Compound Butter for Skin Crispness
While most of the butter goes under the skin for moisture, that last third rubbed generously on the outside is key for texture. This external layer of fat, combined with the pre-roast dry salting, helps render the skin perfectly thin and crisp. It gives you maximum flavour punch in every glorious bite.
Flavor Infusion: Maximizing Herb Absorption
The skin is a natural barrier, which is why simply tossing rosemary sprigs on top doesn't work well. When we mix fresh herbs, garlic, and zest into the softened butter, then push it under the skin, that flavor is driven right into the meat fibers. Use fresh herbs here.
The volatile oils in fresh thyme and sage are what carry that iconic holiday flavor profile.
Essential Ingredients for Your Herb Butter Roast Turkey
Choosing Your Bird: Sourcing and Sizing Guide
Plan on about 1.5 pounds of turkey per person, maybe slightly more if you want great leftovers. Always buy your bird completely thawed, or give yourself ample time a massive turkey can take five full days to thaw in the fridge!
When choosing, a heritage or free range bird often offers superior flavor, but any quality turkey will shine with this method.
The Perfect Herb Blend: Thyme, Rosemary, and Sage Ratios
These three herbs are the holy trinity of holiday roasts. I love a balanced approach, heavy on the earthy sage and thyme, with a little punch of aromatic rosemary.
Chef's Note: If you prefer a brighter profile, swap out some sage for finely chopped parsley and increase the amount of lemon zest in the compound butter.
Dairy Details: Choosing the Right Butter and Oil
We use unsalted butter so we control the salinity. The olive oil helps the butter spread better when cold and prevents scorching at high heat.
| Ingredient | Substitute Option | Why it Works |
|---|---|---|
| Unsalted Butter | Duck Fat or Goose Fat | Provides intense richness and a high smoke point for crispy skin. |
| Kosher Salt | Fine Sea Salt (Use 3/4 the quantity) | Essential for the dry-brine effect; enhances flavor dramatically. |
| Chicken Stock | Vegetable Broth or Water | Keeps the pan drippings from scorching; crucial for gravy base. |
Salt Strategy: Brining vs. Dry Salting (Pre-Roast Prep)
I swear by dry salting, also known as dry brining. Instead of wrestling a huge bird in a cooler of salty liquid, you simply season it well 12– 24 hours ahead of time and leave it uncovered in the fridge.
The salt draws moisture out, then the turkey reabsorbs the salty liquid, seasoning the meat deep down. This also thoroughly dries out the skin, which is the ultimate key to crunch.
step-by-step Guide to Roasting Your Centerpiece Turkey
This is where preparation pays off. Don’t rush the initial steps they are the foundation of moisture!
- Prep Day One (Drying): Make sure the turkey is fully thawed; remove the giblets and neck from both cavities. Pat the entire bird aggressively with paper towels until it feels bone dry. Season heavily with coarse salt and pepper, place on a rack in a pan, and let it hang out, uncovered, in the fridge for a day.
- Make the Herb Butter: In a bowl, combine softened butter with minced garlic, chopped herbs, zest, oil, and extra seasoning. Mix until everything is perfectly homogenous and smells amazing.
- Lube Up (The Secret Step): Gently slide your fingers between the skin and the breast meat to loosen the skin. It’s a bit weird, but necessary. Shove about two-thirds of the compound butter deep under the breast skin and spread it evenly across the meat. Rub the remaining butter all over the exterior skin.
- Aromatics and Stock: Place your chopped onion, carrots, celery, lemon halves, and herb sprigs into the large cavity. Pour chicken stock into the bottom of the roasting pan, ensuring the rack keeps the bird out of the liquid.
- Initial Blast: Pop the turkey into a screaming hot 220°C (425°F) oven for the first 30 minutes. This gives you that incredible golden color.
- Low and Slow Finish: Reduce the oven heat to 180°C (350°F). If the breast is already perfectly browned, loosely tent it with foil. Continue roasting and baste every 45 minutes, using the pan juices, for a total cooking time of around 3.5 to 4. 5 hours.
Expert Troubleshooting and Avoiding Dry Turkey Disasters
Prepping the Bird: Patting Dry and Seasoning Deeply
Seriously, I can't stress this enough: Pat it dry! If the skin has any surface moisture, it will steam instead of crisping up, resulting in rubbery skin. I made this mistake one year, rushing the process, and the results were depressingly leathery.
Take the extra five minutes to ensure it’s thoroughly dry before you even think about the butter.
The Under Skin Butter Application Protocol
Don't be shy about getting your fingers in there; the skin is tougher than you think. You need a thin, even layer of compound butter covering every bit of breast meat. If you glob it all in one spot, that area will cook unevenly. Think massage therapist, not painter.
Calculating Cook Time and Internal Temperature Targets
Use a timeline calculator to estimate your total cook time, but always, always rely on the thermometer for doneness. Check the temperature in the thickest part of the thigh (target 82°C / 180°F) and the thickest part of the breast (target 71°C / 160°F).
Pull it immediately when it hits those numbers.
The Crucial Resting Period for Maximum Juiciness
This 45 to 60 minute rest is non-negotiable, okay? When the meat is hot, the juices are frantic and mobilized. If you slice into the bird immediately, those juices will flood your cutting board. Resting allows the muscle fibers to relax and reabsorb all that liquid, ensuring every slice is unbelievably moist.
Tent it tightly with foil and leave it alone.
Saving Dry Breast Meat: The Aluminum Foil Shield Method
If you notice the breast is darkening too fast, simply cut a piece of aluminum foil large enough to cover the entire breast area. Fold it loosely like a tent. This shields the breast from the direct oven heat, allowing the darker, tougher leg meat to finish cooking without overcooking the white meat.
My Turkey Skin Isn't Crisping: Quick Fixes
If your turkey hits its target internal temperature but the skin still looks pale or soft, don't panic. Remove the foil tent and increase the oven temperature back up to 260°C (500°F). Blast the turkey for 5 to 10 minutes, watching it like a hawk.
The extra high heat will quickly render the remaining fat and crisp up the skin beautifully.
Post Roast Turkey: Safe Storage and Reheating
Optimal Refrigeration: Shelf Life and Safety
Once cooled, carve any remaining meat off the bone as quickly as possible. Store the turkey slices in shallow, airtight containers in the fridge. Cooked turkey is safe for 3 to 4 days. Keep the bone for making glorious stock later!
Freezing Cooked Turkey: Best Practices for Longevity
Cooked turkey freezes incredibly well. Place carved slices (or large chunks) in freezer bags or airtight containers, minimizing air exposure. If you plan to use the meat for stews or casseroles, consider adding a tablespoon of pan gravy or stock to the bag before sealing; this helps prevent freezer burn and retains moisture.
It should keep for 2 to 3 months.
Reheating Slices Without Drying Them Out
Never reheat carved turkey in a microwave! The best way is to place the turkey slices in an oven safe dish, pour a splash of turkey or chicken stock over the top, and cover the dish tightly with foil. Bake in a 150°C (300°F) oven for about 15– 20 minutes until heated through.
The steam from the stock ensures the meat stays moist.
Perfect Pairings: What to Serve with Roast Turkey
Must Have Gravy: Using the Pan Drippings
The delicious, browned bits stuck to the bottom of your roasting pan the fond —are pure flavor gold. After the turkey is resting, strain the pan juices and separate the fat.
Use the remaining liquid and a simple roux (butter and flour) or cornstarch slurry to create the richest, most savory gravy you’ve ever had.
Complementary Sides: Starchy and Green Recommendations
Roast turkey demands sides that contrast its richness. For starchy, deeply savory options, you might love my recipe for Savory Roasted Sweet Potatoes: The Ultimate Crispy Side Dish . If you want something a bit sweeter and autumnal, try the stunning MapleRoasted Acorn Squash Sticky Thyme Glaze Ready in Under an Hour . Classic roasted carrots and green bean casserole are always winners too!
Wine and Beverage Pairing Suggestions
Since the turkey is rich and buttery, you need something crisp to cut through the fat. A light, dry Pinot Noir is fantastic for red wine lovers because it won't overpower the herbs. For white, look for a full bodied Chardonnay or a dry Riesling.
If you’re opting for non-alcoholic, a sparkling cider or a spiced cranberry spritzer works wonders.

Recipe FAQs
How do I prevent the turkey breast meat from drying out?
The key to moisture is using the herb butter directly under the skin to baste the breast meat internally as it cooks. Additionally, if the breast begins to brown too quickly, loosely tent the top of the turkey with foil for the final hour of roasting.
This shields the quicker cooking breast while allowing the thighs to finish cooking.
What internal temperature must the turkey reach before it is safe to eat?
The turkey is safely cooked when a reliable meat thermometer registers 165°F (74°C) in the thickest part of the thigh, the wing joint, and the deepest part of the breast. Remember that the temperature will rise a few degrees during the mandatory resting period, so removing it around 160 162°F is acceptable.
How long should I rest the turkey after roasting, and why is this step so crucial?
You must rest the turkey for a minimum of 30 to 45 minutes, tented loosely with foil, after it comes out of the oven. This resting period allows the contracted muscle fibers to relax and redistribute the juices throughout the meat, guaranteeing a moist, flavorful slice.
Skipping this step results in all the moisture immediately draining onto the cutting board.
Can I stuff the turkey cavity before roasting?
For food safety and guaranteed even cooking, it is generally recommended to cook stuffing separately outside the bird. If you choose to stuff the cavity, ensure the stuffing is packed loosely and that its center reaches a minimum temperature of 165°F (74°C) before serving.
Cooking the stuffing inside adds significant time to the overall roast.
My turkey skin isn't crispy; what went wrong?
Crispy skin relies on a completely dry surface before applying the fat, so ensure you pat the turkey dry with paper towels initially. Avoid using liquid basting techniques, especially during the final hour of cooking, as moisture released near the end will steam the skin rather than crisping it up.
What is the safest way to thaw a large frozen turkey?
The safest and most reliable method is slow thawing in the refrigerator, budgeting approximately 24 hours for every 4-5 pounds of turkey weight. Ensure the turkey is placed on a rimmed tray to catch any drips and prevent cross contamination in your fridge. Once thawed, cook within two days.
How should I store leftover cooked turkey?
Leftover cooked turkey should be carved off the bone and refrigerated in airtight containers within two hours of cooking. It is safe to consume these leftovers for 3 to 4 days, or you can freeze tightly sealed portions for up to three months. Avoid cooling large chunks; slice the meat thinly for quicker chilling.
Flawless Herb Butter Roast Turkey Recipe

Ingredients:
Instructions:
Nutrition Facts:
| Calories | 500 calories |
|---|---|
| Fat | 25 g |
| Fiber | 0 g |
