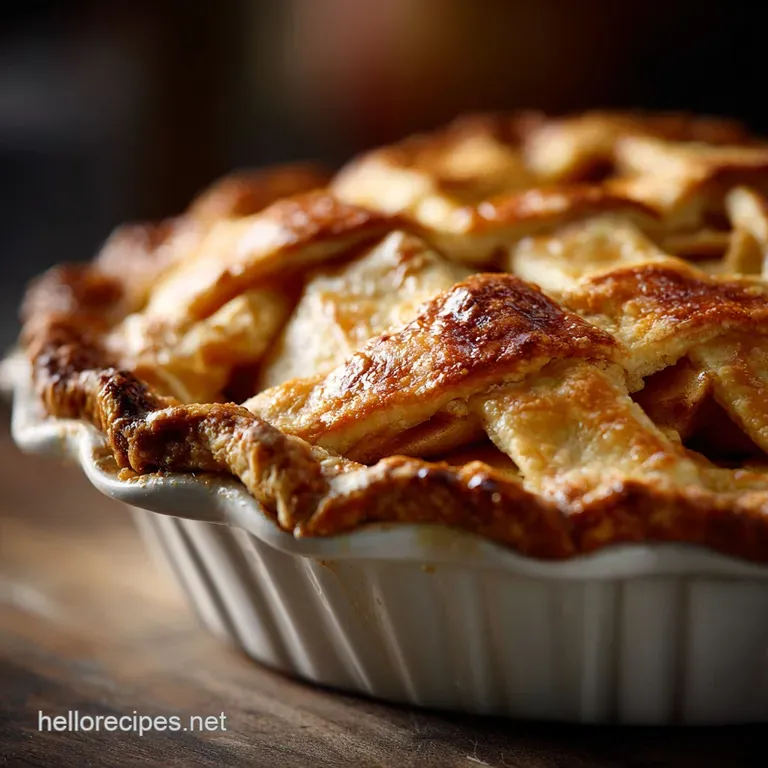
Homemade Apple Pie: the Flakiest All-Butter Classic Pie You Will Ever Bake
- Unlocking the Secret to the Flakiest All and Butter Pastry
- Essential Provisions for Your Showstopping Apple Pie
- Step and by-Step Guide to Baking the Ultimate Homemade Apple Pie
- Expert Strategies for Perfecting Your Apple Pie Bake
- Enjoying and Preserving Your Homemade Apple Pie
- Recipe FAQs
- 📝 Recipe Card
Unlocking the Secret to the Flakiest All and Butter Pastry
You know that slightly sad, dry pastry that snaps instead of melting in your mouth? We are not doing that. We are aiming for the golden, flaky, tender kind that absolutely shatters when you slice into it.
It’s all and butter, which gives you that incredible richness and flavor that shortening just can’t touch. Look, I’ve tried the half and half mixes, thinking I was being clever, but honestly? Commit to the butter. It’s non and negotiable for a truly great homemade apple pie crust.
The big secret here and I mean the one I wish I’d learned a decade ago when I was making hockey pucks instead of pies is temperature. The butter has to be brutally cold.
Not just "out of the fridge," but ideally chilled and chopped, then maybe tossed back in the freezer for ten minutes before you start. This ensures the butter melts slowly in the oven, releasing steam that pushes apart the flour layers. That is how you get layers. That is the magic.
Why This Recipe Delivers True Comfort and Nostalgia
There’s something deeply primal about the smell of cinnamon and baked apples wafting through the house. This isn't just a recipe for a dessert; it’s an instruction manual for creating a memory.
This is the classic apple pie recipe that tastes exactly like you hoped it would the one your parents or grandparents talk about, right down to the tiny, glistening pockets of melted butter in the crust.
We focus heavily on structural integrity here. Why? Because comfort food doesn't mean messy. We want the pastry to be substantial enough to hold the copious, deeply spiced filling without turning into a damp mess.
This balance (flaky top, sturdy bottom, rich filling) is what transforms a simple bake into an act of true comfort. It makes you want to curl up with a steaming mug and forget about the outside world, you know?
The Defining Features of a Proper British Bake
When I talk about a "proper bake," I mean one that’s robust. It's not overly sweet or timid with the spice. A true, classic apple pie needs a deep, golden and brown crust. If your crust is pale, the bottom is probably undercooked, and the flavors haven't had time to caramelize.
We need that rich, toffee note from the brown sugar in the filling to shine, and that only happens when it bubbles violently and sets completely.
Crucial Pie Philosophy: Never, ever be afraid to bake your pie longer than you think you should. If the filling isn't audibly bubbling and if the crust isn't bordering on mahogany brown, it’s not done. A pale pie is a sad pie.
Another defining feature is the height. We want a slight dome. Stack those apples high! They collapse significantly during baking, so if you think you have too many, you probably have just enough.
Essential Provisions for Your Showstopping Apple Pie
Okay, let's get serious about the shopping list. You can’t make a masterpiece with limp ingredients. This isn’t a place for substitutions unless absolutely necessary.
Selecting the Perfect Blend of Apples for Texture
This is probably the most critical tip I can give you about homemade apple pie filling: use a mixture. If you only use sweet apples (like Fuji or Gala), they turn into mush. If you only use tart, crisp apples (like Granny Smith), you miss out on that lovely natural sweetness.
Here’s my winning combination:
- Granny Smith: Sharp, tart, and most importantly, they hold their shape incredibly well, providing structure to the whole shebang. (Use slightly more of these.)
- Honeycrisp or Fuji: These break down a bit more, adding necessary sweetness and helping to create that luscious, thick sauce around the pieces that are still intact.
Slice them thinly (about an eighth of an inch) and uniformly. Thick chunks take forever to soften and create weird air pockets.
Pantry Staples and Spices for the Warming Filling
Forget pre and mixed apple pie spice. We’re doing this properly. We are using cornstarch, not flour, to thicken the filling. Flour can make the filling taste slightly cloudy, whereas cornstarch sets clear and glossy.
- Cinnamon is obvious, but don't stop there. Freshly grated nutmeg, please! It makes a massive difference compared to the stuff that's been sitting in the jar since Christmas 2018.
- The touch of brown sugar alongside the white sugar adds depth and that lovely caramel undertone. This combination gives you warmth without overwhelming the apple flavor.
Mandatory Tools to Master the Cold Pastry Dough
You don't need fancy equipment, but a couple of things are non and negotiable for that flaky crust texture:
| Tool | Necessity Level | Why You Need It |
|---|---|---|
| Pastry Blender/Cutter | High | Minimizes heat transfer from your hands to the dough. |
| Food Processor | Optional but Recommended | The fastest way to "cut" the butter into the flour quickly and evenly. |
| Heavy Rolling Pin | Medium | Provides even pressure to prevent tearing when rolling the chilled dough. |
| Lined Baking Sheet | Essential | Protects your oven from drips and, crucially, conducts heat straight to the bottom crust. |
Related Recipes Worth Trying
- Mini Pumpkin Pies: Creamy, Spiced Muffin Tin Dessert Recipe — Learn how to make the best Mini Pumpkin Pies using a muffin tin for perfect individual servings. This easy recipe features a flaky, blind baked crust and...
- Apple Crisp Mini Cheesecakes: Easy Fall Dessert Recipe — Apple Crisp Mini Cheesecakes are the ultimate sophisticated fall dessert. Combining creamy richness and spiced crumble, this easy recipe is perfect for...
- Garlic Butter Bread Rolls: Properly Fluffy Homemade Dinner Buns — Garlic Butter Bread Rolls are the softest dinner rolls youll ever bake. Master this enriched dough recipe for fluffy garlic butter buns that are the...
- Pecan Pie Bars Recipe Easy Ultimate Sticky Shortbread Dessert — Pecan Pie Bars are the perfect solution for holiday baking Skip the fussy crust with our Ultimate Buttery Shortbread Pecan Pie Bars Get all the traditional...
- Homemade Ranch The Chefs Guide to Fresh UltraCreamy Dressing — This Homemade Ranch Dressing Recipe elevates the classic condiment using fresh herbs and buttermilk Learn how to make ranch dressing that is rich tangy and...
- Homemade Taco Shells The Ultimate Recipe for Restaurant Crunch — Homemade Taco Shells are surprisingly easy to master Follow this proper Taco Shells Recipe for homemade hard taco shells from scratch achieving a golden...
Step and by-Step Guide to Baking the Ultimate Homemade Apple Pie

Preparing and Resting the All and Butter Crust
When you are adding the liquid to the dough, remember that little shot of vodka or apple cider vinegar? That stuff is genius. The alcohol evaporates in the oven, but while mixing, it prevents the water from interacting too much with the flour, which means less gluten and a far more tender crust. It’s brilliant.
Mix the cold water in slowly. Stop before the dough is completely smooth. You want it shaggy, almost crumbly, but when you squeeze a handful, it should just hold together. Then, press it into discs. Don't knead it! Wrap it up, and go do something else for two hours.
Seriously, that rest period is essential for hydration and relaxation (of the gluten, not necessarily you).
Constructing the Filling: Balancing Sweetness and Spice
As soon as those apples are peeled and sliced, they need to meet the lemon juice to prevent browning. Mix in all your sugars and spices. Now, here's a little cheat: let the filling sit for about 15 minutes while you roll out the bottom crust.
The sugar will start drawing liquid out of the apples. If you notice a huge pool of liquid at the bottom of your bowl, drain off a tablespoon or two before filling the pie. This helps prevent a watery result.
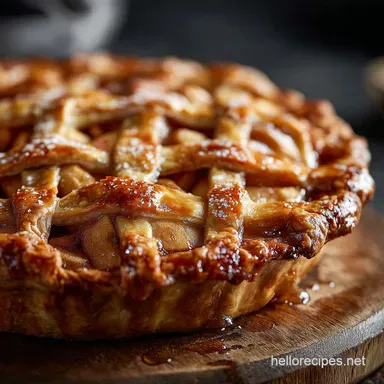
The Lattice Debate: Sealing and Venting the Pie
Lattice tops are gorgeous, I get it. But they take time, and if you’re pressed, just do a full crust. The key is proper sealing and venting. Seal the edges by tucking the top crust underneath the bottom overhang, then crimp aggressively (fork tines work perfectly, or a finger and to-thumb technique if you’re fancy).
For vents, I like cutting four V-shapes near the center. Make them big enough maybe a little over an inch long. And for the love of all that is holy, don't forget the egg wash! It gives you that beautiful, deep mahogany color and helps the coarse sugar stick.
Optimal Baking Temperatures for a Golden Finish
The two and temperature technique is the pro move here. Why the initial blast of heat at 425°F (220°C)? To rapidly set the pastry and begin the activation of that wonderful flaky butter. After 15 minutes, we drop the temperature down to 375°F (190°C).
This allows the heat to penetrate slowly and cook those apple slices completely without torching the gorgeous golden crust you just spent all that time perfecting. If the edges are getting too dark during the slow bake, grab your aluminum foil strips or a pie shield and cover just the rim.
Expert Strategies for Perfecting Your Apple Pie Bake
- Blind Taste Your Apples: Seriously, eat a slice of each apple variety before mixing. It confirms they are fresh and gives you a last and minute chance to adjust the sugar level if they’re surprisingly tart or sweet.
- The Freezer Quick Fix: If your dough feels sticky while rolling, fold it onto a parchment sheet and slide it into the freezer for five minutes. No joke, it fixes everything.
- Don't Over and Flour: When rolling the dough, use the absolute minimum amount of flour necessary to prevent sticking. Too much flour means a tough crust. Wipe your surface clean and re and dust sparingly.
- Rotate the Pie: Halfway through the 375°F bake, spin the pie 180 degrees. This ensures even browning across the whole surface, especially if your oven has hotspots.
Enjoying and Preserving Your Homemade Apple Pie
Troubleshooting Common Pastry Mistakes (The Soggy Bottom Fix)
Ah, the dreaded soggy bottom. We've all been there. It’s usually caused by one of two things: not enough heat reaching the bottom quickly, or too much moisture weeping out of the filling.
The ultimate safeguard against the soggy bottom is simple: Brush a thin, even layer of plain egg white onto the raw bottom crust before adding the filling. The egg white coagulates almost immediately in the oven and creates a protective, moisture and proof barrier.
Paired with baking on a hot sheet pan, you'll be golden.
Achieving a Perfectly Uniform Slice Every Time
This is pure agony, but it’s required. You must, must, must allow the pie to cool down for at least three to four hours before slicing. I know it smells incredible. I know you want to eat it now. But if you cut it hot, the gelatinized cornstarch hasn't fully set, and the filling will collapse into a runny mess.
Let it cool on a wire rack until it’s barely warm to the touch. Then, slice it cleanly.
Customizing the Flavor: Adding Citrus or Dried Fruit
If you want to play around with the flavor profile of this classic apple pie recipe, a little bit of zest goes a long way. I often grate in the zest of one small orange right into the filling mixture it really brightens the spices beautifully.
Or, if you want a little chewiness, fold in half a cup of dried cranberries or golden raisins with the filling ingredients. They soak up the apple juices and become wonderfully plump.
Safe Storage and Reheating Methods
The best homemade apple pie keeps well at room temperature (covered loosely) for up to two days, provided your kitchen isn't super warm. After that, it needs to be stored in the fridge. It will last about 4 5 days refrigerated.
To reheat, avoid the microwave if possible; it softens the crust. Instead, place individual slices on a foil and lined baking sheet and warm in a preheated oven (300°F/150°C) for about 10– 15 minutes until the filling is warm and the crust is crisp again.
Nutritional Overview and Serving Suggestions
Yes, we know this isn't kale salad. It's butter, sugar, and apples, and it's fantastic. Enjoy it for what it is: an absolute indulgence.
My favorite way to serve this is still slightly warm, preferably with a dollop of proper clotted cream or a huge scoop of really good vanilla bean ice cream. Or, if you're keeping it pure and British, pour a little homemade custard over the top. It's the perfect ending to any meal, truly.

Recipe FAQs
Crikey, how do I stop my pastry getting a soggy bottom?
Use a preheated baking sheet placed immediately under the pie to crisp the base. Also, brush the bottom crust with a thin layer of egg white before filling for a moisture barrier.
Can I bake this delicious Homemade Apple Pie a day ahead?
Yes, fully baked pie keeps beautifully at room temperature for up to two days. Cover it lightly with cling film once completely cool to maintain freshness.
Which apples are the best blend for a proper pie filling?
Always use a blend! Combining tart apples (like Granny Smith) with sweeter, firm varieties (such as Honeycrisp or Fuji) gives the best flavour and texture.
How can I tell if the apple filling is actually cooked through?
The filling is ready when you see thick, rolling bubbles through the vents. Crucially, allow the pie to cool for 3-4 hours afterwards to fully set the thickener.
What's the best thing to serve with a warm slice?
While vanilla ice cream is smashing, for a traditional British treat, serve it warm with a generous pour of proper English custard (crème anglaise).
Flaky All Butter Homemade Apple Pie
Ingredients:
Instructions:
Nutrition Facts:
| Calories | 420 kcal |
|---|---|
| Protein | 4.0 g |
| Fat | 18.0 g |
| Carbs | 63.0 g |
