Easter Deviled Eggs: Ultra Smooth and Creamy
- Time: Active 20 minutes, Passive 12 minutes, Total 32 minutes
- Flavor/Texture Hook: Zesty, velvety mousse with a smoky finish
- Perfect for: Easter brunch, healthy meal prep, or spring potlucks
- Make the Best Easter Deviled Eggs
- Why This Tangy Filling Works
- Components for Ultra Smooth Centers
- Tools for a Professional Finish
- Hard Boiling and Filling Steps
- Solving Common Yolk Issues
- Scaling for Large Gatherings
- Myths About Boiling Eggs
- Storage and Making Ahead
- Creative Ways to Swap Ingredients
- Perfect Pairings for Your Platter
- Recipe FAQs
- 📝 Recipe Card
Make the Best Easter Deviled Eggs
There is a specific sound, a dull "thwack," that happens when you tap a perfectly boiled egg against a marble countertop. It’s the sound of success. For years, I dreaded making appetizers for family gatherings because the shells would stick, leaving the egg whites looking like they’d been through a rock tumbler.
It was frustrating, messy, and honestly, a bit embarrassing when you’re trying to set out a beautiful platter. But once I realized that the secret wasn't in the age of the egg, but in the pH of the water, everything changed.
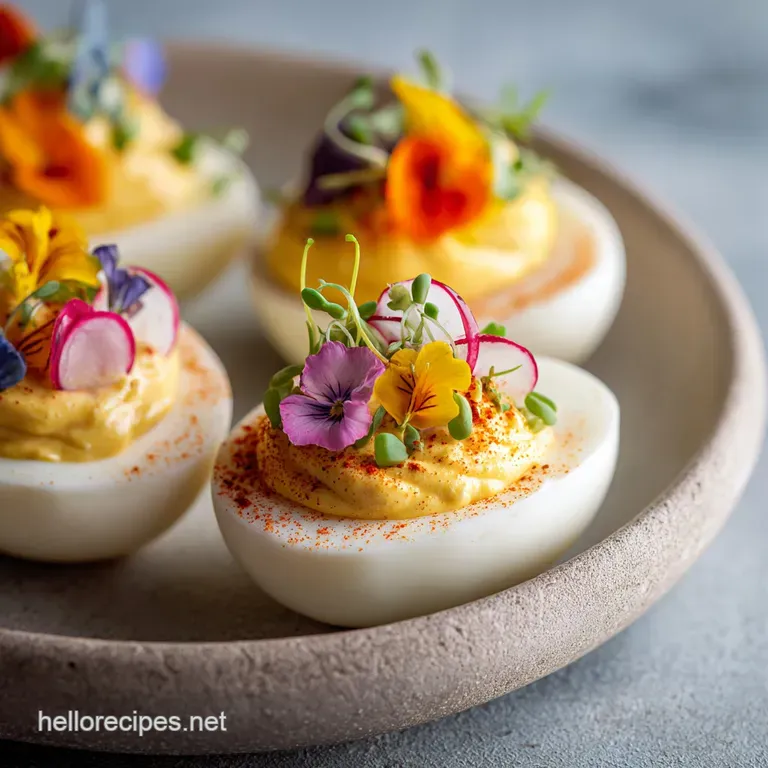
We are aiming for that specific moment when the shell slips off in two clean domes, revealing a porcelain smooth surface. These Easter Deviled Eggs aren't just about looking good on a pastel plate, though. They’re about that first bite where the filling doesn't just sit there it melts.
We've all had those chalky, dry yolks that make you reach for a glass of water. We’re moving past that. By using a fine mesh sieve and a specific ratio of fats, we’re creating a filling that has the structural integrity of a mousse but the tang of a classic deli spread.
You'll find that this version is lighter than the heavy, mayo laden ones from our childhood. We’re using Greek yogurt to provide a bright acidity that cuts through the richness of the yolk. It makes the whole dish feel fresh and modern, which is exactly what a spring celebration needs.
Plus, if you're like me and usually hovering over the appetizer table, you'll appreciate that these feel a bit more balanced. Let's get into why this specific method produces such a consistent result.
Why This Tangy Filling Works
Understanding what happens inside that shell during the boil is the difference between a rubbery egg and a tender one. It’s not magic, it’s just a bit of temperature control and some basic structural logic that I’ve picked up after many holiday rushes.
- Alkaline Membrane Release: Adding baking soda to the water raises the pH level of the egg whites. This causes the thin membrane to relax its grip on the shell, ensuring it slides off without tearing the delicate white.
- Thermal Shock Strategy: Moving eggs from boiling water directly into an ice bath stops the cooking instantly. This prevents the "sulfur ring" that unappetizing grey green circle from forming around the yolk.
- Yolk Micronization: Pressing the yolks through a sieve breaks the proteins into tiny particles. This allows the fats from the mayo and yogurt to coat every single grain, creating a texture that feels like silk on the tongue.
- Structural Emulsification: The combination of Dijon mustard and avocado oil mayo acts as a stabilizer. The lecithin in the yolks binds with these fats to create a filling that won't weep or lose its shape even after an hour on the table.
| Egg Size | Boil Time | Resulting Texture | Best For |
|---|---|---|---|
| Medium | 10 minutes | Jammy, soft center | Toast toppings |
| Large | 12 minutes | Fully set but creamy | Deviled eggs |
| Extra Large | 14 minutes | Firm, structured | Sliced salads |
When you are deciding which method to use, the 12 minute sit time in hot water is the sweet spot. It ensures the yolk is cooked enough to be powdered through a sieve, but not so long that it becomes crumbly and dry.
It’s about finding that balance where the egg is firm enough to hold the filling but tender enough to bite through easily.
Components for Ultra Smooth Centers
Choosing the right ingredients is about more than just what's in the pantry. Each item plays a role in the final architecture of the bite. I used to think any mustard would do, but the sharp kick of a good Dijon is what truly brings the egg yolk to life.
| Ingredient | Science Role | Pro Secret |
|---|---|---|
| Large Eggs | Protein Base | Use Grade A for centered yolks |
| Greek Yogurt | Acidic Binder | Adds "lift" and keeps it light |
| Dijon Mustard | Emulsifier | Prevents the filling from separating |
| Baking Soda | pH Regulator | The key to effortless peeling |
The Greek yogurt is a bit of a swap from the heavy mayo only recipes you might see. It adds a tang that mimics lemon juice but with a creamy body. If you’re looking for more inspiration on how to vary these, you might enjoy this classic deviled eggs recipe which stays a bit more traditional with the fats.
- 12 Large Grade A Eggs
- Why this? They provide the perfect cavity to filling ratio for a single bite.
- 2 Quarts Water
- Enough to submerge the eggs completely for even heating.
- 1 tsp Baking soda
- Why this? Vital for ensuring the shell membrane releases from the white.
- 1/4 cup Plain Greek Yogurt
- Provides the base creaminess with a lower fat content.
- 2 tbsp Light Avocado Oil Mayonnaise
- Adds the necessary richness and a smooth mouthfeel.
- 1.5 tbsp Dijon Mustard
- The primary flavor driver that adds depth and zest.
- 1 tsp Apple Cider Vinegar
- A tiny punch of acid to brighten the savory notes.
- 1/2 tsp Kosher salt
- Enhances all the other flavors without being overwhelming.
- 1/4 tsp White pepper
- Why this? Keeps the filling looking clean without black specks.
- 1 tsp Smoked Spanish Paprika
- For that iconic, earthy finish.
- 1 tbsp Freshly snipped Chives
- Adds a mild onion crunch and vibrant green color.
Tools for a Professional Finish
You don't need a high end kitchen, but a few specific tools make this process significantly faster. I’ve tried mashing yolks with a fork, and while it works, you’ll never get that "cloud like" texture that makes people ask for the recipe.
- Wide Saucepan: You want the eggs in a single layer. If they’re stacked, they’ll cook unevenly and potentially crack.
- Fine Mesh Sieve: This is the most important tool for the "micronization" step. It’s the difference between "okay" and "catering quality."
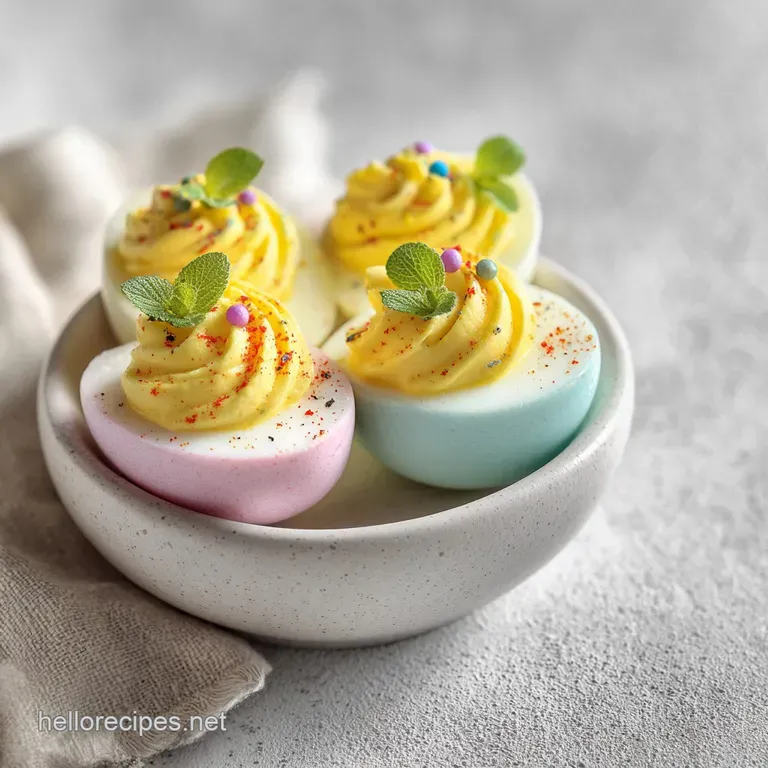
- Piping Bag and Star Tip: A large star tip (like a 1M or 2D) gives the filling those professional ridges that hold the paprika beautifully.
- Slotted Spoon: Essential for moving the eggs quickly and safely into the ice bath without splashing boiling water everywhere.
Hard Boiling and Filling Steps
Right then, let's get to the actual cooking. Follow the timing closely because even two extra minutes can change the texture of the yolks. We want them bright yellow, not dull and grey.
- Prep the boil. Place your 12 eggs in a single layer in the saucepan and cover with 1 inch of cold water. Stir in the 1 tsp of baking soda. Note: Starting with cold water ensures the eggs heat up gradually, preventing the shells from cracking.
- Heat it up. Bring the water to a rolling boil over high heat. As soon as it reaches a frantic bubble, remove the pan from the heat immediately and cover it with a tight fitting lid.
- The 12 minute timer. Let the eggs sit in the hot water for exactly 12 minutes. Don't peek! The residual heat cooks the eggs gently.
- The ice shock. Using your slotted spoon, move the eggs into a large bowl of ice and water. Let them chill for at least 10 minutes until they feel cold to the touch.
- Peel and prep. Gently crack the shells and peel under cold running water. Slice each egg in half lengthwise with a sharp, non serrated knife.
- The sieve technique. Pop the yolks out into your fine mesh sieve. Use the back of a spoon to press the yolks through the mesh into a bowl. They should look like fine, yellow snow.
- Incorporate the binders. Add the 1/4 cup Greek yogurt, 2 tbsp avocado oil mayo, 1.5 tbsp Dijon, ACV, salt, and white pepper.
- Whisk to emulsify. Stir vigorously until the mixture is a completely smooth, architectural mousse. It should hold a peak when you lift the spoon.
- Pipe the centers. Fit your piping bag with the star tip and fill it with the yolk mixture. Pipe a generous swirl into each egg white half.
- The final touch. Dust lightly with the 1 tsp smoked paprika and sprinkle with the 1 tbsp freshly snipped chives until vibrant and festive.
Solving Common Yolk Issues
Even with a plan, eggs can be temperamental. I once made a batch where the filling was so runny it looked like soup it was a nightmare to serve. Here is how to avoid that and other common pitfalls.
Why Your Filling Is Runny
Usually, this happens if you add too much liquid (like vinegar or mustard) before the fats have had a chance to thicken the yolks. It can also happen if the eggs weren't fully cooled before mixing.
If it's already runny, try whisking in an extra hard boiled yolk or a teaspoon of very cold Greek yogurt to tighten the emulsion.
Fixing Stubborn Egg Shells
If you find the shell is tearing the white, stop immediately. Submerge the egg back in the water and try peeling from the wider end where the air pocket usually sits. The water helps lubricate the space between the membrane and the white, making it easier to slip off.
| Problem | Root Cause | Solution |
|---|---|---|
| Green ring on yolk | Overcooked or slow cooling | Stick strictly to 12 mins + Ice Bath |
| Lumpy filling | Yolks mashed with a fork | Use a fine mesh sieve for micronization |
| Rubbery whites | Boiling too long | Remove from heat once water boils |
Common Mistakes Checklist
- ✓ Always use a single layer of eggs to ensure even heat distribution.
- ✓ Don't skip the baking soda; it's the most effective way to loosen the membrane.
- ✓ Pat the egg whites dry with a paper towel before piping to prevent the filling from sliding.
- ✓ Use white pepper instead of black to maintain a clean, professional aesthetic.
- ✓ Let the eggs sit in the ice bath until they are truly cold, not just lukewarm.
Scaling for Large Gatherings
If you are hosting the whole extended family, you'll likely need to double or triple this recipe. Eggs are cheap, but they take up space, so plan your equipment accordingly.
When scaling up to 24 eggs (48 servings), you must work in batches for the boiling process unless you have a very large stockpot. Overcrowding the pan leads to uneven cooking. For the filling, you can scale the yogurt and mayo linearly, but be careful with the salt and spices.
I usually recommend scaling the salt to 1.5x first, tasting, and then adding more if needed.
If you are scaling down for a quiet weekend snack (say, 6 eggs), the timing remains exactly the same. However, you might find it harder to get the sieve to work with such a small amount of yolk. In that case, a small food processor can help achieve that same silky texture without the manual labor.
Myths About Boiling Eggs
There are so many "old wives' tales" about eggs that it’s hard to know what’s real. Let's clear up a few things that I’ve tested in my own kitchen over the years.
One big myth is that eggs must be "old" to peel well. While it's true that older eggs have a higher pH, the baking soda trick effectively "ages" the egg instantly by changing the acidity of the water. You can use farm fresh eggs and still get a clean peel if you use the alkaline method.
Another common misconception is that you need to add vinegar to the boiling water to keep the eggs from cracking. Vinegar actually softens the shell, which can make it harder to peel later. Stick to the cold start method and baking soda for the best results.
Finally, "searing" or "shocking" the eggs isn't just for show it is a biological necessity to stop the carryover heat from toughening the proteins.
Storage and Making Ahead
These are fantastic for meal prepping because they hold up surprisingly well if you store them correctly. If you're looking for something with a bit more kick to store for the week, check out these spicy deviled eggs for a different flavor profile.
Storage Guidelines:Fridge: Store the whites and the filling separately if possible. The whites can go in an airtight container for up to 2 days. The filling should be kept in a sealed piping bag or container for the same duration.
Once assembled, they are best eaten within 12 hours. Freezer: Do not freeze hard boiled eggs. The whites become rubbery and tough, and the filling will separate and become watery upon thawing.
Zero Waste Tips: If you have leftover yolk filling, don't toss it! It makes an incredible spread for toast or a sandwich. If you have extra egg white "trimmings" from eggs that didn't peel perfectly, chop them up and toss them into a green salad for an extra hit of protein.
You can even use the crushed eggshells in your garden as a calcium rich fertilizer for your plants.
Creative Ways to Swap Ingredients
If you're out of something or just want to try a different vibe, there are plenty of ways to adjust this without losing that velvety texture.
- Greek Yogurt Substitution: If you don't have yogurt, sour cream works perfectly. It has a similar fat content and tang. Note: It will be slightly richer and less "light" than the yogurt version.
- Avocado Oil Mayo: Standard mayonnaise works just as well. I prefer avocado oil mayo for the neutral flavor and heart healthy fats, but it won't ruin the recipe to use whatever is in your fridge.
- Dijon Alternatives: If you find Dijon too spicy, use a mild yellow mustard. You'll lose some depth, but the structural emulsion will still work.
- Chive Swaps: Fresh dill or flat leaf parsley can replace chives. Dill is particularly lovely for Easter as it pairs beautifully with the egg.
Perfect Pairings for Your Platter
Deviled eggs are the quintessential "opener" for a meal, but they shouldn't stand alone. They thrive when paired with textures and flavors that contrast their creaminess.
Think about serving these alongside a salty, crunchy element like a charcuterie board. The richness of the yolk filling acts as a foil to salty prosciutto or sharp cheddar. For a full Easter spread, they are the natural partner to a honey glazed ham.
The acidity in the Greek yogurt and apple cider vinegar cuts through the sweetness of the ham perfectly.
If you're doing a brunch theme, serve them on a platter with smoked salmon and fresh radishes. The peppery bite of the radish against the soft egg is a match made in heaven. I also love to put them out with a bowl of lightly pickled vegetables the vinegar tie in makes the whole spread feel cohesive and intentional.
Whatever you do, make sure you have plenty; these tend to disappear faster than you can put them out!

Recipe FAQs
How to ensure the egg shells peel off easily?
Add one teaspoon of baking soda to the water before boiling. This helps loosen the shell membrane from the egg white, making it much easier to peel once chilled.
Is it true I must boil the eggs for 20 minutes to cook them through?
No, this is a common misconception. You only need to let the eggs sit in the hot water for exactly 12 minutes after bringing them to a boil to achieve a perfect, creamy yolk.
How to get the smoothest filling texture?
Press the cooked yolks through a fine mesh sieve into a bowl. This micronization process removes any lumps and creates the base for a smooth, architectural emulsion, a technique you can also master in our classic hollandaise style sauce.
How to stop green rings from forming around the yolk?
Transfer the eggs immediately into a bowl of ice and water after the 12-minute sit. This rapid cooling stops the cooking process instantly and prevents the chemical reaction that creates those unsightly sulfur rings.
Can I store these in the refrigerator?
Yes, store them for up to two days. For the best quality, keep the cooked egg white halves and the yolk filling in separate airtight containers and pipe them just before serving.
How to achieve a professional look for serving?
Pipe the mixture using a large star tip and finish with a garnish. A light dusting of smoked Spanish paprika and freshly snipped chives provides the necessary contrast to make the presentation look restaurant quality.
How to fix an emulsion that seems too thin?
Check your measurements of the Greek yogurt and avocado oil mayonnaise. Ensure you are using exactly the listed amounts, as these ingredients are specifically balanced to create a stable, thick emulsion that holds its shape when piped.
Easter Deviled Eggs

Ingredients:
Instructions:
Nutrition Facts:
| Calories | 42 kcal |
|---|---|
| Protein | 3.3 g |
| Fat | 2.9 g |
| Carbs | 0.4 g |
| Fiber | 0 g |
| Sugar | 0.2 g |
| Sodium | 107 mg |
