Baked Chicken Wings Recipe: Ultra Crisp Oven Finish
- Time: Active 15 minutes, Passive 45 minutes, Total 1 hours
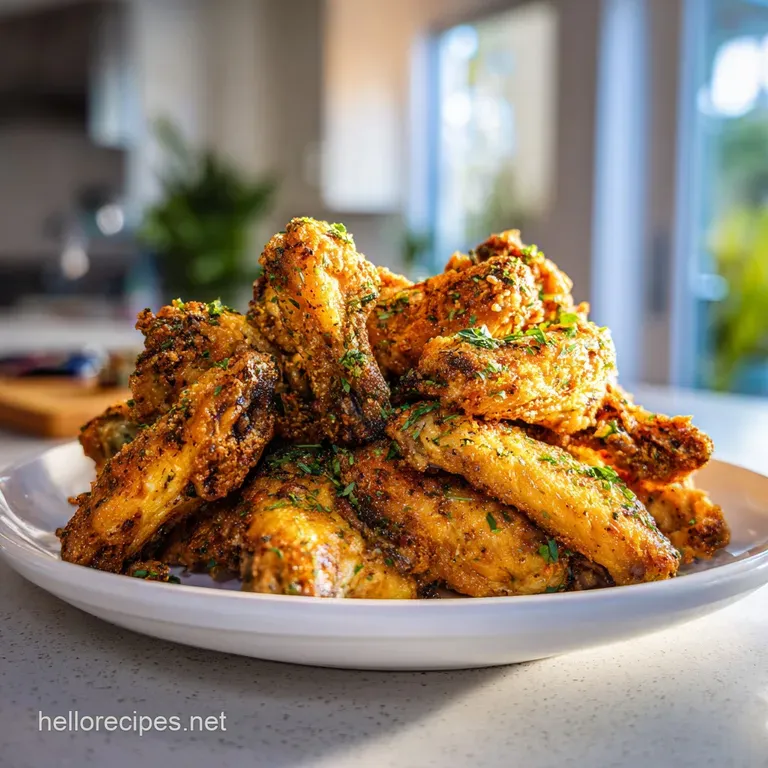
- Flavor/Texture Hook: Shatter crisp skin with a velvety, spicy sweet glaze
- Perfect for: Game day gatherings or a low carb weeknight treat
- Master This Crispy Baked Chicken Wings Recipe
- Achieving the Ultimate Shatter Crisp Skin
- The Chemistry of the Crunch
- Official Specs and Timing
- Component Analysis Deep Dive
- Essential Components and Smart Swaps
- Tools for Gastronomic Success
- Foolproof Method for Crispy Results
- Avoiding Soggy Skin Scenarios
- Adjusting for Different Batches
- Flavor Chemistry Myths
- Creative Flavor Profile Variations
- Smart Storage and Sustainability
- Serving the Perfect Wing Platter
- Critical High in Sodium
- Recipe FAQs
- 📝 Recipe Card
Master This Crispy Baked Chicken Wings Recipe
Can you hear that? It is the literal "shatter" of a wing tip that just came out of the oven. I used to think the only way to get a real crunch was to drop wings into a vat of bubbling oil, making my house smell like a fast food joint for three days.
But then I stumbled upon a bit of kitchen technology involving a pantry staple, and it changed everything.
The contrast here is what makes it work. You get that incredibly brittle, salty exterior that gives way to tender, juicy meat inside. When you toss them in the zesty glaze made with apple cider vinegar and a hint of monk fruit, it creates a bright yet-rich flavor profile that keeps you coming back for just one more.
It's much cleaner than frying, and honestly, way more satisfying to pull off.
Achieving the Ultimate Shatter Crisp Skin
Forget what you know about soggy oven chicken. We are using a specific dehydration technique that mimics the results of a professional kitchen. By alkalizing the skin, we accelerate the browning process while drawing out every last drop of moisture that would otherwise cause steam. This is similar to the approach I use for my How to Bake recipe, focusing on surface area and heat distribution.
The goal is a texture that rings against the plate. We want bubbles, we want blisters, and we want that deep mahogany color that signals a properly rendered fat layer. It is a simple set of steps, but the precision in how you prep the meat makes the difference between "okay" and "incredible."
The Chemistry of the Crunch
The pH Shift: Baking powder raises the skin's pH level, breaking down peptide bonds so the surface can brown and crisp more efficiently.
Moisture Evaporation: This chemical reaction creates tiny CO2 bubbles on the surface, increasing the total surface area for the heat to hit.
| Thickness | Internal Temp | Rest Time | Visual Cue |
|---|---|---|---|
| Standard Wing | 165°F (74°C) | 3 mins | Skin is blistered and golden |
| Large Drumette | 170°F (77°C) | 5 mins | Juices run clear when pierced |
| Extra Large | 175°F (79°C) | 5 mins | Meat pulls easily from bone |
Testing for doneness is about more than just a timer. If you don't see those tiny micro bubbles on the skin, the baking powder hasn't finished its work yet.
Official Specs and Timing
To get this right, we have to respect the thermodynamics of the oven. We are aiming for over high heat roasting that renders the fat while the baking powder works its magic on the exterior proteins.
Baking Powder pH Magic
The baking powder acts as a catalyst. It's not there for leavening like in a cake; it’s there to restructure the skin’s surface at a molecular level.
Strategic Airflow Technology
Cooking these on a wire rack is non negotiable. If the wings sit directly on a baking sheet, the underside will sit in its own rendered fat and steam, resulting in a rubbery texture.
Moisture Evaporation Prep
If you have the time, letting the coated wings sit uncovered in the fridge for an hour before baking will result in an even louder crunch.
Component Analysis Deep Dive
| Ingredient | Science Role | Pro Secret |
|---|---|---|
| Baking Powder | Increases alkalinity | Must be aluminum free to avoid a metallic aftertaste |
| Kosher Salt | Draws out moisture | Use Diamond Crystal for better surface coverage |
| Smoked Paprika | Promotes Maillard reaction | Provides a deep hue that mimics wood fired cooking |
Essential Components and Smart Swaps
For this recipe, we are using exactly 2 lbs chicken wings, party style with flats and drumettes separated. This ensures every piece cooks at roughly the same rate.
- 2 lbs chicken wings: The star of the show. Why this? Wings have the highest skin to meat ratio for maximum crunch.
- 1 tbsp aluminum free baking powder: This is the secret weapon. (Sub: omit if needed, but skin will be less crispy).
- 1 tsp kosher salt: For seasoning and moisture draw. (Sub: 3/4 tsp sea salt).
- 1 tsp freshly cracked black pepper: Provides a sharp bite. (Sub: White pepper for a more floral heat).
- 1 tsp garlic powder: Adds a savory baseline. (Sub: Onion powder).
- 1 tsp smoked paprika: For color and depth. (Sub: Cayenne for more heat).
- 1/2 cup hot sauce: Use your favorite vinegar based sauce. (Sub: Sriracha for a thicker glaze).
- 2 tbsp unsalted butter, melted: Adds a velvety mouthfeel. (Sub: Ghee or coconut oil).
- 1 tsp apple cider vinegar: Brightens the heavy fats. (Sub: Lemon juice).
- 1 pinch stevia or monk fruit: Balances the acidity. (Sub: 1/2 tsp honey).
The balance of the hot sauce and the sweetener creates a glaze that clings to the wings without making them soggy.
Tools for Gastronomic Success
You don't need a lot of gear, but the right setup is vital. A large rimmed baking sheet lined with parchment paper makes cleanup much easier, but the real hero is a sturdy wire cooling rack that fits inside the pan.
This setup allows hot air to circulate under the wings, ensuring the bottom is just as crispy as the top. You'll also want a large stainless steel bowl for tossing the wings in the dry rub and later the sauce.
A digital meat thermometer is also a great investment to ensure the drumettes are cooked through without becoming dry.
Foolproof Method for Crispy Results

Phase 1: Dehydration Prep
- Dry the chicken. Pat the 2 lbs chicken wings with paper towels until bone dry. Note: Any surface moisture will create steam and prevent crisping.
- Mix the rub. Combine 1 tbsp baking powder, 1 tsp salt, 1 tsp pepper, 1 tsp garlic powder, and 1 tsp smoked paprika in a small bowl.
- Coat the wings. Place wings in a large bowl and sprinkle the mixture over them, tossing until every nook is covered.
- Arrange the rack. Place the wings on a wire rack over a lined baking sheet, skin side up and not touching.
Phase 2: over High heat Roast
- Bake the wings. Put them in a preheated 425°F (220°C) oven for 20 minutes.
- Flip carefully. Turn the wings over until you hear a light sizzle from the rendered fat.
- Continue roasting. Cook for another 20 to 25 minutes until the skin is deep golden and rigid.
Phase 3: Flavor Toss
- Prepare the glaze. Whisk 1/2 cup hot sauce, 2 tbsp melted butter, 1 tsp apple cider vinegar, and a pinch of stevia.
- Combine. Transfer the hot wings to a clean bowl and pour the sauce over them, tossing quickly to coat.
- Rest and serve. Let them sit for 2 minutes until the sauce thickens and clings to the skin.
Avoiding Soggy Skin Scenarios
Why Your Wings Aren't Crunchy
If your wings come out soft, the most common culprit is crowding. When wings touch, they trap steam between them. It’s better to use two pans than to jam them all onto one.
| Problem | Root Cause | Solution |
|---|---|---|
| Bitter aftertaste | Regular baking powder | Always use aluminum free powder |
| Soggy bottoms | No wire rack used | Elevate wings so air flows underneath |
| Skin is pale | Temperature too low | Ensure oven hits 425°F before roasting |
Common Mistakes Checklist
- ✓ Never skip the paper towel pat down; moisture is the enemy of the crunch.
- ✓ Use aluminum free baking powder or you will taste a metallic tang.
- ✓ Don't use baking soda by mistake; the flavor is far too harsh.
- ✓ Avoid saucing the wings too early; the liquid will soften the skin.
- ✓ Ensure the oven is fully preheated for at least 15 minutes.
Adjusting for Different Batches
If you're scaling down for a solo snack, keep the ratios the same but use a smaller toaster oven pan. For a large party (doubling the recipe to 4 lbs), you'll need two separate baking sheets.
When doubling, don't just double the spices start with 1.5x the salt and paprika, then taste. You can always add more, but you can't take it away. If you find yourself wanting more of a breaded texture rather than a skin focus, you might enjoy the technique used in The Crispy Chicken recipe.
| Method | Time | Texture | Best For |
|---|---|---|---|
| Oven Bake | 45 mins | Shatter crisp skin | Large batches/Healthier |
| Stovetop Fry | 12 mins | Traditional oily crunch | Small batches/Speed |
| Air Fryer | 20 mins | Very dry and crispy | 1-2 people |
Flavor Chemistry Myths
One of the biggest myths is that you need oil to get crispy skin. In reality, chicken wings have enough subcutaneous fat to "self fry" as they roast. Adding extra oil actually creates a barrier that can prevent the baking powder from interacting with the skin proteins.
Another misconception is that the baking powder will make the wings taste like biscuits. At this concentration, the flavor disappears entirely during the roasting process, leaving behind only the structural benefits.
Creative Flavor Profile Variations
Lemon Pepper Wing Twist
Skip the hot sauce glaze. Instead, toss the roasted wings in 2 tbsp melted butter mixed with 1 tbsp cracked black pepper and the zest of two lemons. It’s bright, sharp, and incredibly refreshing.
Keto Friendly Spice Kick
If you want to lean into the heat without the vinegar tang, use a dry rub of cumin, chili powder, and a tiny bit of cayenne. This creates a "dry wing" style that pairs perfectly with a cooling ranch dip.
Smart Storage and Sustainability
Storage: Keep leftovers in an airtight container in the fridge for up to 4 days. To revive the crunch, don't use the microwave. Toss them back into a 400°F oven or an air fryer for 5 minutes.
Sustainability Tip: Don't throw away the wing tips if you buy whole wings and break them down yourself. Keep a bag of tips in the freezer. Once you have a pound or two, simmer them with veggie scraps to make a collagen rich chicken stock that's far better than anything in a carton.
Serving the Perfect Wing Platter
Classic Pub Style Spread
Serve these with the traditional celery and carrot sticks. The cold, watery crunch of the vegetables offers a necessary break from the intense heat and salt of the wings.
Building a Full Meal
If you want to turn this into a complete dinner, these wings pair beautifully with a hearty side. I often serve them alongside a vegetable heavy dish like my Whole 30 Meal recipe to keep the plate balanced and colorful.
Whether you're making these for a big game or just a Tuesday night craving, the science of the bake ensures a result that's far more innovative than your standard tray of chicken. Trust the process, keep them dry, and enjoy that incredible shatter crisp finish.

Critical High in Sodium
1745 mg mg of sodium per serving (76% of daily value)
American Heart Association recommends limiting sodium intake to no more than 2,300mg per day for overall cardiovascular health.
Smart Swaps for Lower Sodium Wings
-
Low-Sodium Hot Sauce-20%
Select a low-sodium hot sauce to replace your current brand. Many brands offer reduced sodium options that can significantly cut down on sodium without sacrificing flavor. Check the nutrition label carefully!
-
Reduce Added Salt-15%
Cut back on the amount of kosher salt added to the recipe. Start by using only 1/2 tsp and adjust to taste. You can always add more later, but you can't take it away! Experiment with other flavors to compensate.
-
Skip the Salt-15%
Eliminate the added kosher salt entirely. The other spices will contribute enough flavor to make up for the loss. Taste after cooking and only add salt if absolutely necessary.
-
Unsalted Butter-10%
Ensuring that the butter you are using is unsalted is crucial for sodium reduction, as even a small amount of sodium can add up.
-
ACV Impact-5%
While apple cider vinegar (ACV) has minimal sodium, its tangy flavor enhances the perception of saltiness, allowing you to further reduce added salt without compromising the overall taste.
-
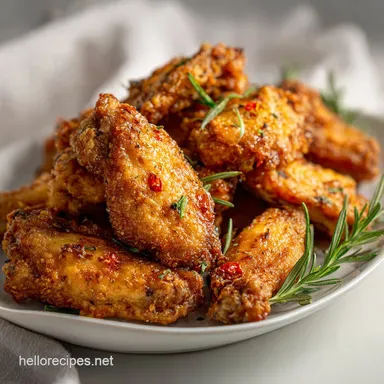
Flavor Boost
Experiment with fresh and dried herbs like oregano, thyme, and rosemary to enhance the flavor of your wings without adding sodium. A blend of herbs can create a complex and satisfying taste profile.
Recipe FAQs
What is the best method for cooking wings in the oven for maximum crispiness?
Bake on a wire rack set over a rimmed baking sheet at high heat. This ensures hot air circulates underneath the wings, preventing the bottom from steaming in rendered fat. We use baking powder to raise the skin’s pH, which dries and crisps the surface effectively.
Should chicken wings be at 350 or 400 degrees Fahrenheit when baking?
Use 425°F (220°C) or higher for the best crisp. Lower temperatures cause the chicken fat to render too slowly, resulting in softer skin. The high heat blast promotes rapid moisture evaporation and skin blistering.
Should you cover chicken wings when baking in the oven?
No, never cover them during the initial baking process. Covering traps steam, which immediately softens the skin you are trying to crisp. The glaze should only be added after they are fully cooked and rigid.
How long do I put wings in the oven at 400 degrees Fahrenheit?
Bake for 40 to 45 minutes total at 425°F (220°C). Start at 20 minutes, flip them, and continue roasting for another 20 to 25 minutes until the internal temperature reaches 165°F (74°C).
Is it true that I must use a large amount of oil to get crispy baked wings?
No, this is a common misconception. Chicken wings contain enough natural fat to self baste and crisp during roasting, especially when treated with baking powder. Adding extra oil can actually inhibit the skin drying process required for the shatter crunch.
What is the secret ingredient that makes oven baked chicken skin truly shatter crisp?
Aluminum free baking powder is the key ingredient. It chemically raises the skin's pH, which promotes the breakdown of proteins and accelerates browning while drawing out moisture. If you enjoy mastering surface texture chemistry like this, you’ll see similar principles applied to achieving perfect texture in our Black Eyed Peas Recipe to enhance starch structure.
How should I prepare the wings before seasoning for the crispiest results?
Thoroughly pat the raw wings completely dry with paper towels first. Surface moisture is the number one enemy of crispiness, as it creates steam during cooking. Once dry, toss them generously with the baking powder and salt mixture.
Crispy Baked Chicken Wings
Ingredients:
Instructions:
Nutrition Facts:
| Calories | 428 kcal |
|---|---|
| Protein | 40.2 g |
| Fat | 29.4 g |
| Carbs | 1.8 g |
| Fiber | 0.4 g |
| Sugar | 0.2 g |
| Sodium | 1745 mg |
