Gluten Free Fried Chicken: the Crispiest Recipe Ever Made
- Mastering The Crispiest Gluten Free Fried Chicken At Home
- Why This Gluten-Free Recipe Guarantees Maximum Crunch
- Essential Ingredients and Gluten-Free Substitutions
- Detailed Steps: How To Make This Gluten-Free Fried Chicken Recipe
- Expert Techniques and Common Frying Mistakes to Avoid
- Making Ahead: Storage, Freezing, and Reheating Instructions
- Perfect Pairings for Your Homemade Gluten Free Fried Chicken
- Recipe FAQs
- 📝 Recipe Card
Mastering The Crispiest gluten-free Fried Chicken At Home
Can you hear that sound? That unmistakable, deep, and utterly satisfying CRUNCH that signals perfect deep frying. When you sink your teeth into one of these pieces, the coating shatters immediately, giving way to perfectly seasoned, unbelievably juicy meat beneath.
Honestly, the aroma alone is enough to drag neighbors out of their houses; it smells like pure, nostalgic comfort food, but better.
For years, making truly Crispy gluten-free Fried Chicken felt like an impossible dream. The coatings were either bland, too brittle, or they’d simply slough right off the minute they hit the hot oil. That is a truly devastating kitchen fail.
This recipe, however, is the exact opposite: it’s simple, uses standard cupboard ingredients, and delivers those restaurant quality, craggy pieces we all crave, proving that GF recipes don't have to be depressing.
Forget every soggy disappointment you’ve ever experienced. I've broken down every single trick, every ratio adjustment, and every temperature secret I learned making this over and over again until it was perfect.
This guide will walk you through the proper buttermilk brine, the crucial double dredge, and the secret to keeping the oil temperature stable. Grab your thermometer; let’s crack on and master this gluten-free Dinner .
Why This gluten-free Recipe Guarantees Maximum Crunch
Why Traditional Wheat Coatings Fail (and Ours Doesn't)
Standard flour, specifically wheat flour, contains gluten which builds a strong, stretchy network when wet. While that’s great for bread, it often results in a dense, heavy crust when fried. Our blend uses rice flour and corn starch, which contain no gluten, preventing that toughness.
Rice flour is the star here because its structure fries up incredibly crisp, and the addition of corn starch ensures a light, shatteringly brittle shell.
We also sneak in baking powder, which provides a tiny bit of necessary lift, resulting in the gorgeous craggy texture we associate with the best fried chicken.
A Quick Overview of the Brine-to-Fry Process
We aren't just slapping a coating on dry pieces; we are layering flavour and moisture protection. First, the chicken takes a short, acidic bath in buttermilk this tenderizes the meat like nothing else.
Next, we use a technique called the "double dredge," which sounds fancy but simply means dipping the chicken twice to build a truly robust crust. Finally, we must let the coating rest for 15 minutes before it hits the oil.
That resting time is non-negotiable ; it ensures the coating adheres and won't strip away during cooking.
Difficulty Level: What to Expect When Deep Frying
While the prep is easy, deep frying requires your full attention. This is a solid medium difficulty recipe. Why? Because temperature control is king . If your oil is too cold, the chicken becomes greasy and heavy; if it's too hot, the coating burns before the meat is safely cooked.
You absolutely need a proper deep fry thermometer to nail this, but once you master that temperature sweet spot (325°F/165°C), you're unstoppable.
The Magic of the Buttermilk Brine
The buttermilk brine is the real secret to achieving perfectly juicy fried chicken every time. Buttermilk, being slightly acidic, helps to gently break down the muscle fibers in the meat without making it rubbery, unlike some marinades.
Plus, it acts as a phenomenal binder, sticking all that delicious seasoning and dry coating right to the surface of the meat. Even a quick two-hour soak makes a huge difference.
Achieving the Perfect gluten-free Flour Blend Ratio
After trying countless iterations (believe me, I had some truly awful powdery experiments), I landed on a 2:1 ratio of white rice flour to cornstarch. This ratio provides the perfect balance: the rice flour gives the overall structure and crunch, while the cornstarch keeps everything ultra light and helps prevent dense spots.
Don't forget the celery salt in the blend that’s the one ingredient that really gives you that classic, savory Southern flavour profile.
Temperature Control: The Key to Juicy Interiors
I cannot stress this enough: your oil must start at 350°F (175°C) before you drop the chicken. Once the pieces go in, the temperature will immediately drop. You are aiming for the oil to hold steady at 325°F (165°C) while the chicken fries.
This specific range allows enough time for the bone-in pieces to cook completely through before the coating turns mahogany brown.
Chef's Note: If you are frying boneless tenders or thinner pieces, you can bump the frying temperature slightly to 350°F (175°C) and reduce the cooking time to about 6– 8 minutes, as they cook much faster.
Essential Ingredients and gluten-free Substitutions
To make truly incredible gluten-free Fried Chicken , you need a well stocked spice cupboard and the right blend of flours. Here is what you need and how to swap things out if necessary.
Choosing the Best Cut of Chicken for Frying
For a classic gluten-free Fried Chicken recipe , bone-in pieces (thighs, drumsticks, and wings) are the best choice. The bone and the higher fat content (especially in thighs) act as an internal shield, preventing the meat from drying out while it fries.
If you prefer to use gluten-free Fried Chicken Tenders or boneless breasts, just remember to reduce your frying time significantly.
Customizing Your Spice Blend for Maximum Flavour
The dry dredge needs to deliver a flavor punch because the cooking time is relatively short. I rely heavily on onion and garlic powders, but the secret weapon is smoked paprika . It adds a depth and richness that you just don't get from plain sweet paprika. Want it spicier?
Bump up the cayenne or add a dash of chipotle powder for a smoky heat.
Navigating gluten-free Flour Blends (Xanthan Gum Notes)
I strongly recommend using specific white rice flour and cornstarch rather than an all-in-one commercial GF blend. Why? Because most commercial blends already contain xanthan gum , and when you use them for frying, that gum can sometimes create a gummy, strange texture instead of a crisp one.
If you must use a pre-mixed GF AP flour, choose one that is labeled 'for baking' and reduce the cornstarch by half, as it will likely already contain binders.
dairy-free Alternatives for the Brine and Coating
| Ingredient | Substitute/Alternative | Notes |
|---|---|---|
| Buttermilk | Whole Milk + White Vinegar/Lemon Juice (2 Tbsp per 2 cups milk) | Mix and let it sit for 10 minutes until it curdles slightly. |
| Buttermilk (dairy-free) | Non-Dairy Milk (Oat/Soy) + 2 Tbsp Apple Cider Vinegar | Avoid overly sweet milks like vanilla almond. |
Detailed Steps: How To Make This gluten-free Fried Chicken Recipe
Stage 1: The Essential Buttermilk Brine
- Prep the Chicken: Pat the pieces completely dry residual moisture is the enemy of a good crust. Trim any large, loose flaps of skin.
- Mix the Brine: Whisk together the buttermilk, kosher salt, pepper, and hot sauce in a large bowl. I often use a gallon Ziploc bag for this; it saves space in the fridge.
- Brine Time: Drop the chicken into the brine, ensuring every piece is submerged. Refrigerate for at least 2 hours, but 4– 6 hours is ideal for maximum tenderness. Do not brine longer than 12 hours or the meat might start to break down too much.
Stage 2: Setting Up the Triple Dip Coating Station
- Prepare the Dredge: Combine the rice flour, corn starch, all the spices (paprika, onion, garlic, celery salt, oregano, thyme, cayenne), salt, pepper, and crucially, the baking powder. Whisk thoroughly until the colour is uniform.
- First Coat: Remove one piece of chicken from the brine and let the excess liquid drip off. Place it in the dry dredge, pressing firmly until covered.
- The Double Dip: Dip the coated piece lightly back into the residual buttermilk (just a quick dunk).
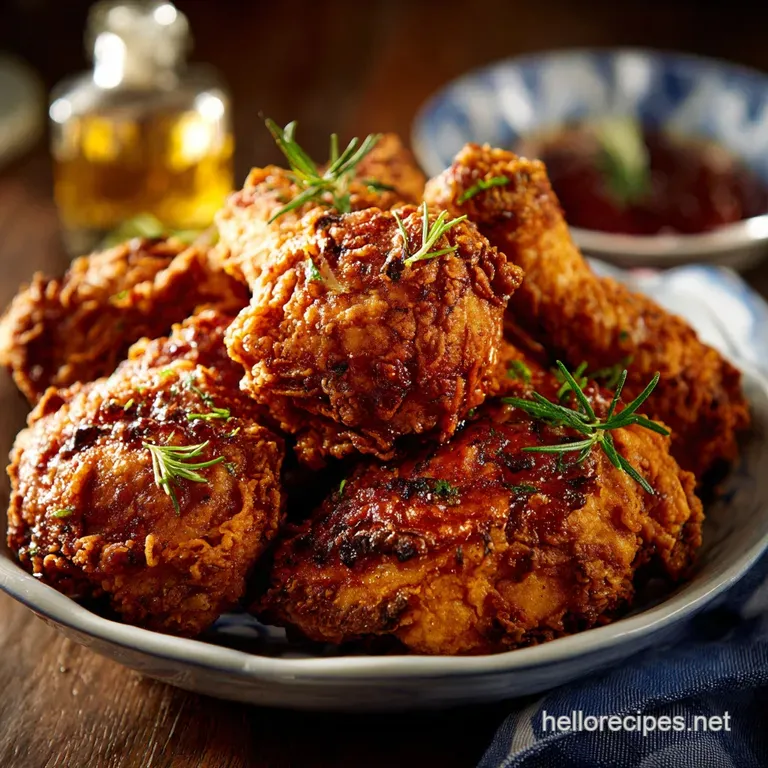
- Second Coat (The Craggy Layer): Return the piece to the dry dredge and press firmly again. Use your fingers to pat and clump the coating onto the surface; these clumps are what create that gorgeous, craggy texture when fried.
- Rest: Place the fully coated piece onto a clean cooling rack and repeat with the remaining pieces. Let everything sit uncovered for 15 minutes at room temperature . Trust me, this rest is vital for crisp adhesion!
Stage 3: Deep Frying Safety and Technique
- Heat the Oil: Pour the neutral oil into a heavy bottomed pot or Dutch oven, making sure it’s at least 3 4 inches deep. Clip your deep fry thermometer to the side and heat the oil to 350°F (175° C) .
- Fry in Batches: Carefully lower 2 3 pieces into the hot oil using tongs. Do not overcrowd! Overcrowding drops the temperature too quickly, leading to soggy, pale chicken.
- Monitor Temperature: As soon as the chicken is added, the temperature should drop and ideally settle around 325°F (165° C) . Adjust the heat as needed to maintain this range throughout the cooking process.
- Cook and Turn: Fry the pieces, turning them occasionally, until they are deep golden brown. Bone-in pieces usually take 10– 15 minutes.
Stage 4: Proper Draining and Resting for Crispness
- Check Doneness: Remove the chicken when the internal temperature reaches 165°F (74° C) in the thickest part of the meat (avoiding the bone).
- Drain: Immediately place the cooked chicken onto a clean cooling rack set over a baking sheet. Do not use paper towels! Paper towels trap steam, making the bottom soggy instantly.
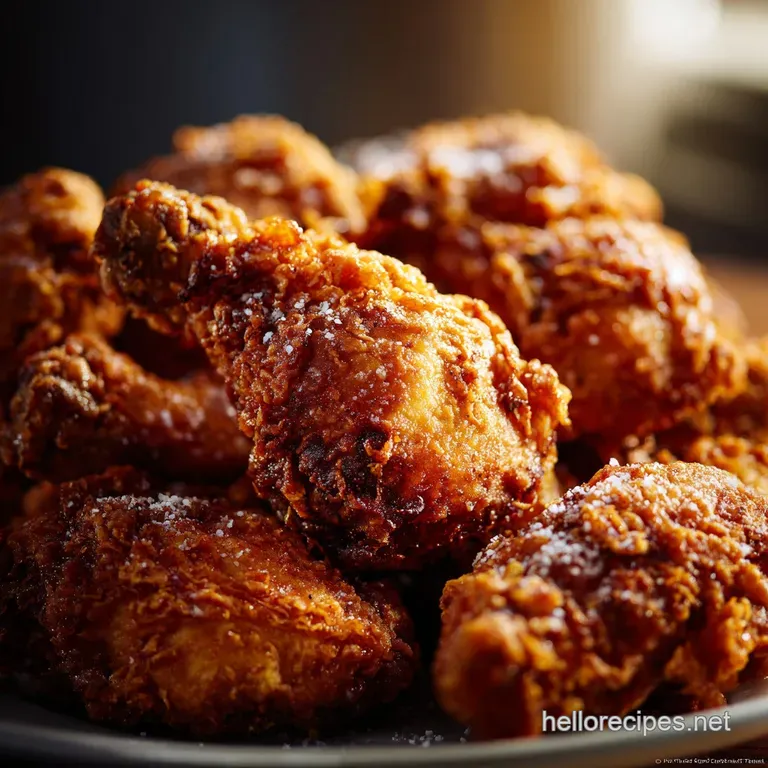
- Season: Sprinkle lightly with a pinch of salt right after removing it from the oil.
- Serve: Let the chicken rest for 5 minutes to let the juices settle before serving hot and crunchy.
Expert Techniques and Common Frying Mistakes to Avoid
Dealing with Soggy Coating Issues
Soggy coating almost always comes down to two issues: resting time or oil temperature . If you skip the 15 minute rest after dredging, the coating is too wet and will fall off.
If your oil temperature is too low (below 300°F/150°C), the chicken absorbs oil rather than crisping up. If you see the coating starting to look pale and greasy, crank up the heat slightly to maintain that 325°F baseline.
How to Know When the Oil is Ready (The Wood Spoon Trick)
Don't have a thermometer yet? (Seriously, get one, but fine, in a pinch...) Stick the handle of a dry wooden spoon into the oil. If tiny, rapid bubbles stream steadily around the handle, the oil is ready for frying (325°F to 350°F). If it bubbles violently, it's too hot. If it barely bubbles, it's too cold.
Quick Fixes for Under Seasoned Chicken
Did you skip the salt in the brine? Big mistake. The easiest fix after the fact is to sprinkle the cooked chicken immediately with a flakey sea salt and a little more smoked paprika right when it comes out of the oil. The residual oil will help the seasonings adhere perfectly.
Making Ahead: Storage, Freezing, and Reheating Instructions
One of the best things about this easy gluten-free Fried Chicken is that it stores remarkably well, provided you treat it right!
Best Practices for Storing Cooked Fried Chicken
Allow the cooked chicken to cool completely on the rack before storing it. Store it in an airtight container in the refrigerator for up to 3 days. Never cover hot fried chicken, as that will instantly trap steam and turn the crust mushy.
Freezing Uncooked Coated Pieces for Later Use
This is a fantastic meal prep hack! After the double dredge (Stage 3), place the coated chicken pieces on a baking sheet lined with parchment paper. Freeze them completely until solid (about 2 hours). Once frozen, transfer the pieces to a freezer safe bag or container.
They will last for up to 3 months. When ready to cook, fry them straight from frozen, increasing the cook time by about 5– 8 minutes.
Reheating for Maximum Crispness (Avoid the Microwave!)
The microwave is the mortal enemy of crispy gluten-free Fried Chicken . It heats the interior but steams the coating.
- Preheat: Preheat your oven or air fryer to 375°F (190°C).
- Reheat: Place the chicken on a clean cooling rack set over a baking sheet.
- Cook Time: Bake for 10– 15 minutes (or air fry for 6– 8 minutes), until the skin is piping hot and has regained its crisp snap.
Perfect Pairings for Your Homemade gluten-free Fried Chicken
This hearty, flavorful main dish needs some strong side players. I love serving this with creamy coleslaw (the tang cuts the richness perfectly) and maybe some crispy, double fried chips.
If you’re hosting a big group and need a fantastic gluten-free main dish that isn't fried, try my [Chicken Broccoli Rice Casserole: Ultra Creamy, No Condensed Soup] recipe it’s pure comfort.
If you’re leaning into the Southern vibe, serving this with a GF-friendly country gravy is a must. And, naturally, you’ll need a perfect GF dessert to follow up all that crunch.
My [gluten-free Chocolate Chip Cookies: Proper Thick Chewy Brown Butter Recipe] always hits the spot and is easy to make while the chicken is brining!

Recipe FAQs
Why is my gluten-free coating falling off or turning soggy?
This usually happens if the chicken wasn't properly patted dry before the final dusting, or if the oil temperature dropped too low, slowing the crisping process. Ensure the oil stays consistently between 325°F and 350°F (160°C and 175°C) and avoid overcrowding the pot, which lowers the temperature quickly.
Can I use a different gluten-free flour blend for the coating?
Yes, but results vary; a high starch blend (like a rice flour and cornstarch mix) provides the best crunch and texture adherence. Avoid overly gritty flours like coconut or almond flour, as they tend to burn easily and absorb too much oil during frying.
I can't use buttermilk. What is a good dairy-free alternative for the brine?
You can substitute traditional buttermilk with equal parts non-dairy milk (like almond or oat) mixed with one tablespoon of white vinegar or lemon juice per cup, allowing it to curdle for 10 minutes. This acidulation tenderizes the meat just as effectively, ensuring the chicken remains juicy.
How can I guarantee the chicken remains juicy and not dry?
The initial buttermilk brine is crucial for moisture retention, so do not skip this step, and ensure the chicken is brined for at least four hours. Additionally, monitor the oil temperature carefully; fry until the internal temperature reaches precisely 165°F (74°C) using a probe thermometer, which prevents overcooking.
What is the best way to store leftovers and reheat them while maintaining the crispness?
Store completely cooled leftovers in an airtight container in the refrigerator for up to 3 days. To restore the crunch, reheat the chicken in a preheated oven or toaster oven at 375°F (190°C) for 10-15 minutes, or use an air fryer, rather than microwaving, which steams the coating.
Can I air fry or bake this recipe instead of deep frying?
Yes, this coating performs well in an air fryer at 375°F (190°C), requiring about 18-25 minutes depending on the chicken size, turning halfway. If baking, lightly spray the coating with oil and bake at 400°F (200°C) until golden brown, though the deep fried texture will be slightly diminished.
Can I freeze the chicken before or after frying?
It is best to fry the chicken completely before freezing to maintain texture integrity. Let the pieces cool completely, then arrange them on a sheet pan to flash freeze before transferring them to a freezer bag; they keep for up to 3 months. Reheat directly from frozen in a 400°F (200°C) oven until piping hot.
Crispiest gluten-free Fried Chicken

Ingredients:
Instructions:
Nutrition Facts:
| Calories | 600 kcal |
|---|---|
| Fat | 40 g |
| Fiber | 1.5 g |
