Cheesy Manicotti: Velvety Three Cheese
- Time: Active 20 minutes, Passive 35 minutes, Total 55 minutes
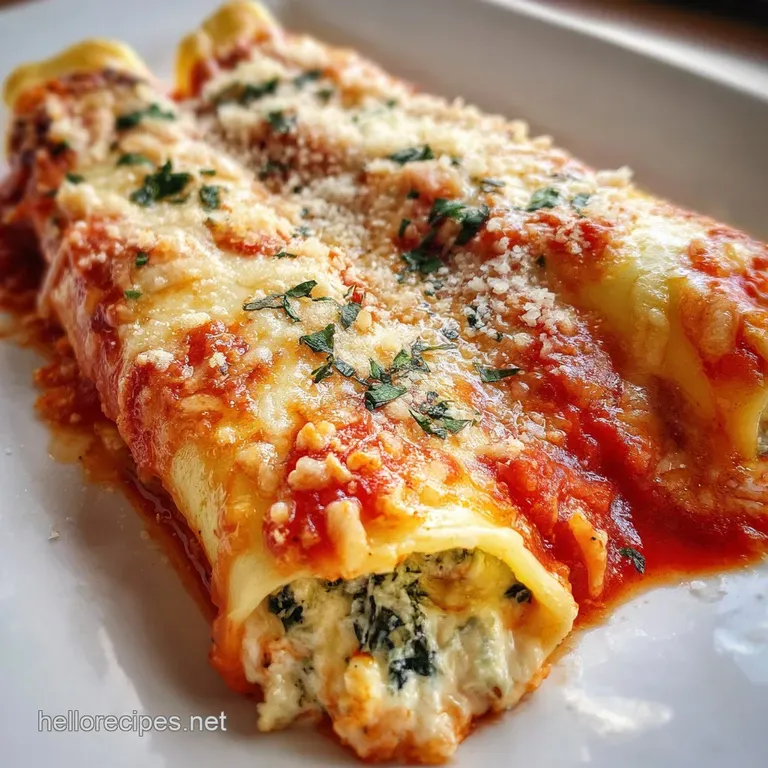
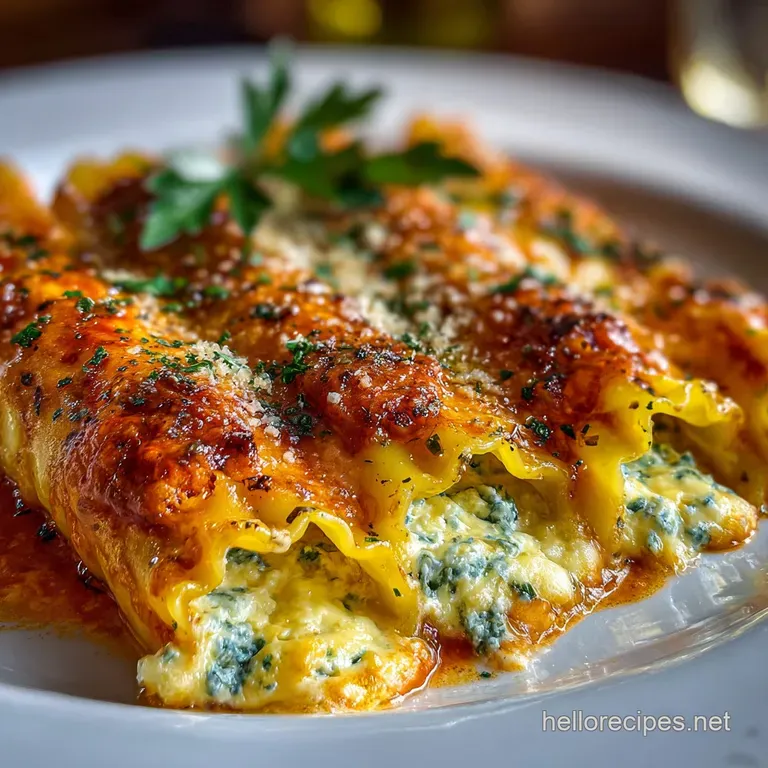
- Flavor/Texture Hook: Silky ricotta filling with a golden, molten cheese pull
- Perfect for: Cozy Sunday dinners or a vegetarian crowd pleaser
- Mastering My Favorite Easy Cheesy Manicotti
- Science Behind the Perfect Melt
- Ingredient Deep Dive Table
- Components for a Vibrant Filling
- Essential Tools for Pasta Success
- From Prep to Golden Plate
- Fixing Common Baked Pasta Issues
- Creative Swaps and Dietary Tweaks
- Scaling Guidelines
- Cooking Myths Debunked
- Storage and Zero Waste Tips
- Vibrant Pairings and Serving Ideas
- High in Sodium
- Recipe FAQs
- 📝 Recipe Card
Mastering My Favorite Easy Cheesy Manicotti
I still remember the first time I tried making this. I was nineteen, living in my first apartment, and I thought I could just cram dry cheese into hard, uncooked pasta tubes. It was a disaster. I ended up with shards of dry pasta all over my counter and a "sauce" that looked more like tomato soup with floaties.
But that mess taught me the most important lesson in Italian American comfort food: it is all about the layers. When you get the texture of the filling just right, and the pasta is supple enough to hold it, the result is pure magic.
Now, whenever I pull a tray of this Cheesy Manicotti out of the oven, the sizzle of the marinara hitting the hot glass takes me back to my grandmother's kitchen. The aroma of dried oregano and fresh parsley fills the room, making it impossible to wait the required five minutes for it to set.
This isn't just a meal, it's a hug in a baking dish. We've refined the process so it's actually manageable for a weeknight but feels special enough for a birthday.
We're going for a vibrant, herbaceous profile here. By using high-quality whole milk ricotta and a hit of sharp Parmesan, we create a filling that doesn't just sit there it sings. Trust me, once you see that first velvety forkful stretch with molten mozzarella, you'll never go back to the frozen stuff.
Let's get into the nitty gritty of why this works and how you can nail it on your first try.
Science Behind the Perfect Melt
Protein Binding: The large egg acts as a structural bridge, coagulating during the bake to hold the ricotta and mozzarella together so the filling stays creamy rather than weeping liquid.
Starch Gelatinization: Par boiling the manicotti shells just until pliable allows them to absorb a small amount of the marinara's moisture while baking, finishing the cook without becoming mushy or structuraly weak.
Maillard Reaction: High heat on the top layer of mozzarella and Parmesan creates those brown, toasted spots that provide a complex, nutty flavor profile to contrast the sweet acidity of the tomato sauce.
| Pasta Stage | Texture Goal | Cooling Time | Visual Cue |
|---|---|---|---|
| Par boiled | Flexible/Firm | 5 minutes | Shells bend without snapping |
| Stuffed | Bulging/Full | N/A | Filling reaches both ends |
| Fully Baked | Tender/Silky | 10 minutes | Edge of shell cuts with a fork |
If you find yourself looking for a different kind of weekend project, you might enjoy the texture of the dough in The Crispy Crust recipe, which uses similar thermal principles to achieve that perfect bite.
Ingredient Deep Dive Table
| Ingredient | Science Role | Pro Secret |
|---|---|---|
| Whole Milk Ricotta | Provides the primary creamy moisture and soft structure. | Drain in a fine mesh sieve for 10 minutes to prevent a watery bake. |
| Shredded Mozzarella | Adds the essential "pull" and fat content for a rich mouthfeel. | Grate your own from a block to avoid anti caking agents that hinder melting. |
| Large Egg | Emulsifies the fats and proteins in the cheese filling. | Lightly beat the egg before folding it in to ensure even distribution. |
| Fresh Italian Parsley | Adds a bright, grassy acidity to cut through the heavy fats. | Chop the stems finely too; they hold more flavor than the leaves alone. |
Adding these layers of flavor is what transforms a simple pasta dish into something truly vibrant and multicultural, reflecting the best of home style cooking.
Components for a Vibrant Filling
To get started with this easy cheesy manicotti recipe, you'll need to gather these specific items. I always recommend checking your pantry for the spices first, as fresh oregano makes a massive difference compared to that dusty jar from three years ago.
- 8 oz manicotti shells: You'll get about 12-14 shells per box. Why this? They provide the perfect vessel for maximum cheese to pasta ratio.
- 24 oz high-quality marinara sauce: Look for one with olive oil and garlic.
- 15 oz whole milk ricotta cheese: Please, don't use fat free here; it becomes grainy. Why this? Whole milk fat creates the velvety texture we're after.
- 2 cups low moisture shredded mozzarella cheese: Divided into two portions.
- 0.5 cup freshly grated Parmesan cheese: The salty, nutty backbone of the filling.
- 1 large egg: Lightly beaten to bind everything together.
- 0.5 tsp sea salt: To pop the flavors of the cheese.
- 0.25 tsp freshly cracked black pepper: Adds a subtle heat.
- 1 tsp dried oregano: The classic "pizza shop" aroma.
- 2 tbsp fresh Italian parsley: Finely chopped for a burst of green.
| Original Ingredient | Substitute | Why It Works |
|---|---|---|
| Ricotta Cheese | Small Curd Cottage Cheese | Similar moisture level, but much higher in protein. Note: Pulse in a blender for a smoother texture. |
| Marinara Sauce | Crushed Tomatoes + Herbs | Provides a fresher, more acidic base. Note: You will need to add extra salt and garlic. |
| Manicotti Shells | Large Jumbo Shells | Same volume and flavor profile. Note: These are actually much easier to stuff for beginners. |
Essential Tools for Pasta Success
You don't need a professional kitchen, but a few specific tools will make this process a whole lot cleaner. I’ve tried stuffing these with a small spoon, and honestly, it’s a test of patience I usually fail.
- Large Stockpot: You need plenty of room for the shells to dance so they don't stick and tear.
- 9x13 Inch Baking Dish: The standard size that fits all 12-14 shells perfectly in a single layer.
- Large Piping Bag (or gallon Ziploc): This is the real "pro tip." Cutting the corner off a bag to pipe the cheese into the shells is 100 times faster than using a spoon.
- Fine Mesh Sieve: For draining that ricotta.
- Aluminum Foil: To trap the steam during the first half of the bake, ensuring the pasta edges soften.
From Prep to Golden Plate
1. The Par Boil and Cool
Bring a large pot of salted water to a rolling boil. Add 8 oz manicotti shells and cook for about 2 minutes less than the package directions. Boil until they are flexible but still have a firm "snap" when bitten. Drain them carefully and lay them out flat on a greased baking sheet or parchment paper so they don't touch and fuse together.
2. Creating the Velvety Filling
In a medium mixing bowl, combine 15 oz whole milk ricotta cheese, 1 cup of the mozzarella, 0.5 cup Parmesan, the beaten egg, 1 tsp dried oregano, 0.5 tsp sea salt, and 0.25 tsp black pepper. Fold in the 2 tbsp fresh Italian parsley.
Mix until the colors are uniform and the texture looks like thick frosting.
3. The "No Mess" Stuffing Hack
Transfer your cheese mixture into a large piping bag or a heavy duty gallon plastic bag. Snip off about half an inch from the corner. Insert the tip into one end of a par boiled shell and squeeze until the filling reaches the center. Flip the shell and repeat from the other side.
This ensures no air pockets and a perfectly plump manicotti.
4. The Sauce and Bake
Spread about 1 cup of the marinara sauce across the bottom of your 9x13 dish. Arrange the stuffed shells in a single layer. Pour the remaining sauce over the center of the shells, leaving the very tips exposed if you like a little crispy edge. Cover tightly with foil.
Bake at 375°F for 25 minutes until the sauce is vigorously bubbling at the edges.
5. The Golden Finish
Remove the foil and sprinkle the remaining 1 cup of mozzarella cheese over the top. Return to the oven for another 10 minutes. If you want those gorgeous charred spots, turn on the broiler for the last 2 minutes. Watch it like a hawk!
Remove when the cheese is melted, golden, and crackling with heat. Let it sit for 10 minutes before serving.
Fixing Common Baked Pasta Issues
Even with a simple recipe for easy manicotti, things can go sideways. The most common heartbreak is a watery filling. This usually happens because ricotta is packed in whey, which releases as it heats up. If you see a pool of liquid at the bottom, don't panic!
It often re absorbs as it cools, or you can simply use a slotted spatula to serve.
Why Your Manicotti Shells Tearing
If your shells are shredding before you can even get the cheese in, they are likely overcooked. You want them just barely "al dente" or even slightly under. They will finish cooking in the steam of the marinara sauce.
Solving Excess Pan Liquid
Sometimes the marinara and the cheese release too much moisture. This creates a "soupy" dish.
| Problem | Root Cause | Solution |
|---|---|---|
| Shells Tearing | Overboiled pasta | Reduce boiling time by 3 minutes next time. Use a gentle simmer, not a violent boil. |
| Watery Sauce | Ricotta not drained | Strain ricotta through cheesecloth for 20 minutes before mixing. |
| Tough Edges | Not enough sauce | Ensure the sauce covers the ends of the pasta completely before covering with foil. |
Common Mistakes Checklist
- ✓ Don't skip the egg - it's the only thing keeping your cheese from running out of the shells.
- ✓ Ensure you salt the pasta water heavily; it's your only chance to season the dough itself.
- ✓ Let the manicotti rest for 10 full minutes after baking to allow the cheese to "set."
- ✓ Never crowd the pot when boiling; if the shells overlap, they will stick and rip.
- ✓ Avoid pre shredded cheese if possible; the starch coating prevents a silky melt.
Creative Swaps and Dietary Tweaks
If you are looking to change things up, this homemade cheese manicotti is incredibly forgiving. I often find that adding a handful of sautéed spinach to the ricotta mix is a great way to sneak in some greens without ruining the decadent vibe.
For a different take on stuffed comfort food, you might want to try My Family's Favorite recipe, which uses jumbo shells and a slightly different herb blend.
Adding Meat for Flavor
While this is a fantastic easy cheese manicotti without meat, you can certainly add some. Browned Italian sausage or lean ground beef mixed into the marinara sauce adds a bold, savory layer that meat lovers will appreciate. Just make sure to drain the grease thoroughly so the dish doesn't become oily.
gluten-free Pasta Alternatives
There are some surprisingly good gluten-free manicotti shells made from brown rice or corn flour. Note that these are much more fragile than wheat pasta. I recommend not boiling them at all just soak them in very hot water for 5 minutes until pliable, then stuff and bake with an extra half cup of sauce to provide the necessary hydration.
Adding Vibrant Garden Vegetables
Fine diced zucchini or mushrooms sautéed until all their moisture is gone make a great addition to the three cheese stuffed manicotti. The key is the "moisture gone" part. If you add raw veggies, they will release water inside the shells and turn your filling into a soggy mess.
Scaling Guidelines
Working with Small Batches
To make a half batch (3 servings), use a square 8x8 pan. You'll use about 6-7 shells. Since you can't easily use half an egg, beat the egg in a small bowl and measure out 2 tablespoons to use in your filling. Reduce the initial covered bake time by about 5 minutes.
Cooking for a Crowd
If you're doubling this for a party, don't just stack them. Use two separate 9x13 dishes. If you try to layer them on top of each other, the middle shells will stay cold and the bottom ones will turn to mush. You can usually bake both dishes at once if your oven has the space; just rotate them halfway through.
| Servings | Shells Needed | Ricotta Amount | Pan Size |
|---|---|---|---|
| 2-3 People | 6-7 Shells | 8 oz | 8x8 Inch |
| 6 People | 12-14 Shells | 15 oz | 9x13 Inch |
| 12 People | 26-28 Shells | 30 oz | Two 9x13 Inch |
Cooking Myths Debunked
One common misconception is that you must cook the pasta all the way through before stuffing. This is actually the fastest way to ruin the dish. Fully cooked pasta is too soft to handle the pressure of the piping bag and will almost certainly tear. The "par boil" is a crucial step for structural integrity.
Another myth is that "fresh is always better" for the sauce. While I love a slow simmered sauce, for a 5 cheese manicotti bake, a high-quality bottled marinara often has the consistent acidity and thickness needed to stand up to the heavy cheeses. Don't feel guilty about using a shortcut if it's a good one!
Finally, many people believe you can't freeze cheese filled pasta. You absolutely can! The trick is to freeze them "soul to soul" stuffed but unbaked. This prevents the pasta from getting that grainy, twice cooked texture that happens when you freeze pre baked leftovers.
Storage and Zero Waste Tips
Storage: Leftovers will stay fresh in the fridge for up to 4 days. Store them in an airtight container. When reheating, add a tiny splash of water or extra sauce to the dish and cover it with a damp paper towel in the microwave. This prevents the pasta edges from turning into "pasta jerky."
Freezing: You can freeze the entire assembled dish (unbaked) for up to 2 months. Wrap it in a double layer of plastic wrap and then a layer of foil. Bake it directly from frozen at 350°F, but you'll need to add about 20-30 minutes to the covered bake time.
Zero Waste: If you have leftover ricotta, don't let it sit in the fridge to die. Mix it with a little honey and berries for a quick breakfast, or dollop it onto a The Crispy Chicken recipe for an extra layer of creaminess. Leftover marinara can be frozen in ice cube trays for when you just need a tablespoon or two for a sandwich.
Vibrant Pairings and Serving Ideas
This cheesy manicotti is a heavy hitter, so I like to pair it with things that provide a sharp contrast. A crisp arugula salad with a lemon tahini dressing is my go to. The bitterness of the greens and the acidity of the lemon cut through the richness of the three cheese blend perfectly.
If you want to go full "Italian feast" mode, a side of roasted broccoli with plenty of red pepper flakes and garlic adds a vibrant color and a nice crunch to the plate. And of course, you can't go wrong with garlic bread.
I like to rub a toasted baguette with a raw garlic clove and a drizzle of spicy olive oil to keep things simple but punchy.
For a final touch, garnish the dish with a few more sprigs of fresh parsley or even some chiffonaded basil right before it hits the table. The heat from the cheese will wake up the oils in the fresh herbs, creating a beautiful aromatic experience as you serve.
It's these little multicultural touches and flavor layers that make a "simple" pasta bake feel like a restaurant quality meal. Enjoy your cozy, cheesy masterpiece!

High in Sodium
1059 mg mg of sodium per serving (46% % of daily value)
The American Heart Association recommends limiting sodium intake to about 2,300mg per day for most adults.
Tips to Reduce Sodium in Your Manicotti
-
Low-Sodium Marinara-20%
Choose a low-sodium marinara sauce. Many brands offer versions with significantly less sodium, reducing the overall sodium content of the dish.
-
Reduce Parmesan-15%
Parmesan cheese is high in sodium. Reduce the amount of Parmesan cheese by half or substitute with a lower sodium cheese variety.
-
Low-Sodium Mozzarella-10%
Opt for low-moisture, part skim mozzarella with a reduced sodium content. Check the nutrition labels and compare brands to find the best option.
-
Skip Added Salt-25%
Eliminate the added sea salt from the recipe. The cheeses and marinara sauce already contribute a significant amount of sodium.
-
Boost Flavor with Herbs
Enhance the flavor of the manicotti filling and sauce by using fresh herbs and spices like garlic, basil, and oregano to compensate for the reduced sodium.
Recipe FAQs
What cheese goes on top of manicotti?
Use a blend of mozzarella and Parmesan. Mozzarella provides the classic melty pull, while Parmesan adds a sharp, nutty depth of flavor that complements the rich filling.
What is the secret to a good manicotti filling?
Drain your ricotta thoroughly and use whole milk. Excess moisture in the ricotta will make the filling watery and can lead to a soggy bake. Whole milk ricotta ensures a creamy, velvety texture that holds its structure.
Should manicotti shells be cooked before stuffing?
Yes, par-boil them until pliable but still firm. Cooking them partially, or "par-boiling," makes them flexible enough to stuff without tearing and ensures they finish cooking perfectly in the sauce without becoming mushy.
What are common manicotti mistakes?
Overcooking the shells and not draining the ricotta. Overcooking leads to torn shells, while watery ricotta results in a liquidy filling. Also, avoid crowding the pot when boiling; shells stick and rip.
Can I use a piping bag to stuff manicotti?
Yes, a piping bag (or a ziploc bag with a corner cut) is highly recommended. It's significantly faster and cleaner than using a spoon, allowing you to fill the shells evenly and efficiently.
How do I prevent my manicotti from tearing when stuffing?
Par-boil them correctly and handle gently. Ensure the shells are pliable but still have a slight firmness. If they are too soft, they will tear easily. Use a piping bag for even pressure.
What's the best way to reheat leftover manicotti?
Reheat gently in the oven or microwave with a little added moisture. Cover with foil and bake at 350°F until heated through, or microwave with a splash of water and a damp paper towel. This prevents the pasta from drying out.
Cheesy Manicotti

Ingredients:
Instructions:
Nutrition Facts:
| Calories | 477 kcal |
|---|---|
| Protein | 26.6 g |
| Fat | 22.7 g |
| Carbs | 40.5 g |
| Fiber | 3.4 g |
| Sugar | 6.6 g |
| Sodium | 1059 mg |
