Pumpkin Pie: Chefs Brown Butter and Maple Filling with Flaky Crust
- Elevating the Classic: The Ultimate Brown Butter Pumpkin Pie Recipe
- Solving the Three Biggest Pumpkin Pie Problems
- Essential Ingredients for the Flakiest Crust and Richest Filling
- Detailed Step and by-Step: Baking the Ultimate Maple Pumpkin Pie
- Troubleshooting and Expert Tips from the Test Kitchen
- Make and Ahead Strategy and Long and Term Storage of Baked Goods
- Perfect Pairings and Presentation for Your Fall Dessert
- Recipe FAQs
- 📝 Recipe Card
Elevating the Classic: The Ultimate Brown Butter Pumpkin Pie Recipe
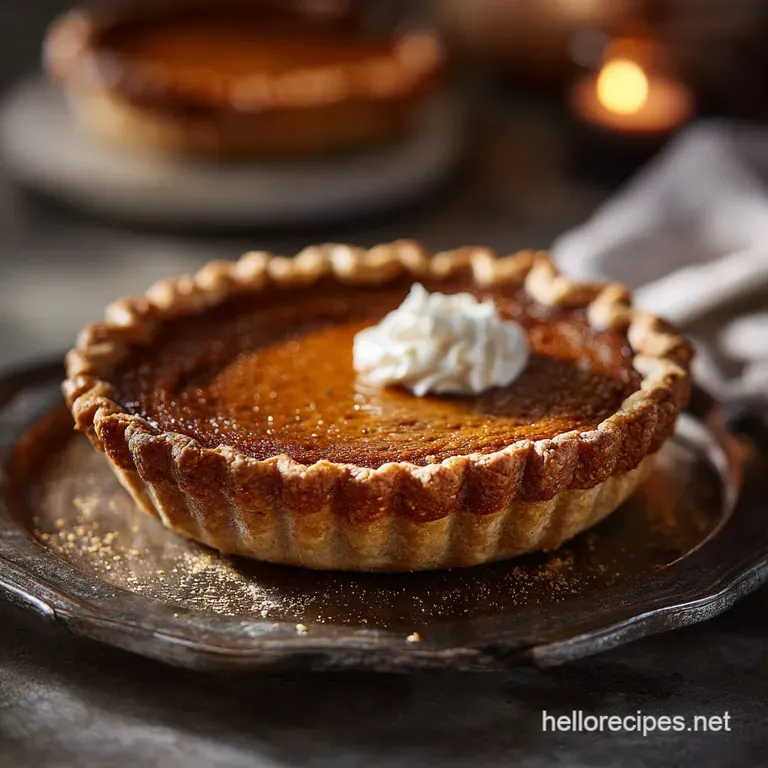
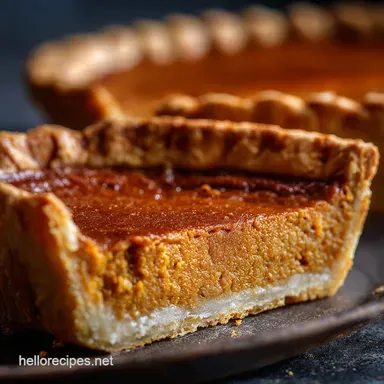
You know that specific moment in the fall when the air smells like woodsmoke and cinnamon? That is what this pie tastes like. It’s got that unbelievably silky, creamy texture that melts on your tongue, wrapped in a crust so flaky it shatters when you slice it.
If you’ve ever had a dry, dense, or overly sweet pumpkin pie, prepare to be absolutely converted.
We all need a back and pocket holiday recipe that performs beautifully under pressure, and this Best Pumpkin Pie Recipe is my reliable MVP. It’s ridiculously easy, honestly. The filling requires no mixer, just a whisk, and the active cooking time is surprisingly short.
Plus, making it yourself is much cheaper than buying a fancy bakery version, and the flavor depth is incomparable.
So, let's ditch the notion that baking is stressful and focus on the good stuff: the brown butter . This seemingly minor step completely transforms the basic custard, giving it a depth and nuttiness that makes people ask, "Wait, what's your secret?" Let’s crack on and get you the silkiest, most flavorful pumpkin pie you’ll ever make.
Solving the Three Biggest Pumpkin Pie Problems
Every home baker runs into the same three issues: a soupy filling, a soggy bottom, or a massive crack down the middle. This recipe specifically targets and eliminates all of them through temperature control and one very important piece of kitchen chemistry.
What Makes Brown Butter the Secret Ingredient?
Brown butter (or beurre noisette ) isn't just about melting butter; it's about lightly toasting the milk solids until they turn amber and smell like hazelnuts. When you incorporate this liquid gold into the pumpkin custard, it adds layers of nutty, caramelized flavor that complement the warm spices perfectly.
This richness eliminates the need for excessive sugar, allowing the natural flavor of the pumpkin to shine through.
A Note on Maple Syrup vs. Refined Sugar
Most traditional recipes rely solely on granulated or brown sugar, resulting in a flavor that can be cloyingly sweet. Here, we use a mix of dark brown sugar and maple syrup. Maple syrup is hydroscopic (it attracts water), which helps keep the custard incredibly moist and soft, preventing that dry, almost grainy texture some pies develop.
Trust me, the difference is noticeable.
Before You Start: Equipment Checklist
You don't need much, but having the right tools makes a huge difference. You must have a 9 inch deep and dish pie plate and either pie weights or dried beans for the blind and bake. I also highly recommend a simple, heavy and bottomed saucepan for browning the butter safely.
The Science of the Silky Filling: Why Low and Slow is Key
Pumpkin pie is a custard pie, meaning it's set by gently heating egg proteins. If you cook it too fast or too hot, those proteins seize up, squeeze out the moisture, and you end up with a dry, cracked surface. We bake this pie at a low 325°F (160° C). This ensures the custard sets slowly from the edges inward, leading to that creamy, Pumpkin Pie: The Ultimate Silky Smooth Classic Holiday Pie Recipe texture we are looking for.
Preventing the Dreaded Soggy Bottom: Full Blind Baking Method
If you pour a wet custard filling directly into raw dough, the dough will never fully cook; it just steams. We are fully blind and baking the crust first. That means baking the shell completely (with weights, then without) until it's set and lightly golden.
This step is non and negotiable for a truly flaky, sturdy crust. You want that foundation to be solid!
The Perfect Spice Blend Ratio for Maximum Pumpkin Flavor
I’ve found that many commercial pumpkin pie spice blends are heavy on the nutmeg and light on the ginger. My bespoke mix emphasizes warm cinnamon and bright ginger. This ratio cuts through the richness of the brown butter and the cream, making the overall flavor balanced and vibrant, not muddy.
Essential Ingredients for the Flakiest Crust and Richest Filling
Canned vs. Homemade Pumpkin Puree: Making the Right Choice
I’m giving you permission to use canned! Seriously. Canned pumpkin purée (100% pure pumpkin, not pie filling) is more reliable because the moisture content is consistent.
If you use homemade purée, make sure you roast it and drain it thoroughly in cheesecloth for several hours, or your filling will be watery.
| Ingredient | My Recommendation | Quick Substitute |
|---|---|---|
| Pumpkin Purée | 100% Canned Pumpkin | Roasted Butternut Squash Purée |
| Heavy Cream | Heavy Cream (35%) | Evaporated Milk (for richness) |
| Butter (Crust/Browning) | Unsalted, high and quality | Shortening or clarified butter (for browning) |
| Sweetener | Dark Maple Syrup | Honey or Blackstrap Molasses (use less) |
| Flour | All and Purpose Flour | 1:1 Gluten and Free Blend (with Xanthan Gum) |
Mastering Brown Butter: The Exact Point of Nutty Perfection
The key to browning butter is watching the tiny milk solids. Cook the butter over medium heat until it melts, foams up, and then the foam subsides. At the bottom of the pan, you will see tiny brown bits forming. When the butter turns a deep amber and smells distinctly nutty, take it off the heat immediately!
If you go even thirty seconds too long, it will burn and taste awful.
Dairy Details: Choosing the Best Cream for Ultimate Richness
While you can technically use half and half, I strongly recommend full and fat heavy cream or evaporated milk. The higher fat content prevents the custard from becoming rubbery and creates that dense, rich mouthfeel we crave. Heavy cream is always the winner for a pie this decadent.
Customizing Your Spices: Cardamom and Ginger Variations
If you're feeling adventurous, add a half teaspoon of finely ground cardamom to the mix. It adds a gorgeous floral note that plays beautifully with ginger. If you love a spicy kick, increase the fresh or ground ginger slightly.
You could even swap the allspice for a pinch of ground cloves, but be careful cloves are very strong!
Detailed Step and by-Step: Baking the Ultimate Maple Pumpkin Pie

Step 1: Preparing and Fully Blind and Baking the Pie Shell
This is the foundation; don't rush it. Make sure your dough is always cold. When you roll it out, roll from the center outward to create a uniform thickness. Once you fit the dough into the pie plate and crimp it, put the entire plate in the freezer for 15 minutes. This final freeze ensures a Apple Pie Recipe: Classic All and Butter Flaky Crust (No Soggy Bottom!) texture and locks the crimp in place.
Preheat your oven to 400°F (200°C). Line the frozen shell with parchment and fill with pie weights. Bake for 15 minutes. Remove the weights and paper, then pierce the bottom lightly with a fork (docking).
Bake for another 5– 7 minutes until it looks dry and pale gold.
Chef's Note: The second bake without weights is vital. It allows the bottom crust to fully cook through and brown slightly, creating a waterproof barrier against the custard.
Step 2: Infusing the Filling with Brown Butter and Maple
While the crust is cooling slightly, brown your butter as described above. In a large bowl, whisk together the brown butter, canned pumpkin purée, maple syrup, brown sugar, eggs, and egg yolk until smooth. Then, whisk in your heavy cream, vanilla, salt, and all your beautiful spices.
Stop mixing the second everything is combined. Over and whisking incorporates air, which expands during baking and often causes cracks.
Step 3: The Critical Water Bath Technique for Crack and Free Baking
Okay, this might sound fussy, but it’s a game and changer, especially if you tend to get cracked surfaces. Place your pie plate inside a larger roasting pan. Pour the filling into the pre and baked crust.
Now, place the entire roasting pan into the oven, and carefully pour hot water into the roasting pan, making sure the water comes about halfway up the sides of the pie plate. The ambient steam regulates the internal temperature, guaranteeing a gentle, even set.
Step 4: Recognizing the Perfect Set and Carryover Cooking
Bake at 325°F (160°C) for 50– 60 minutes. Don't go by time alone! Gently nudge the baking sheet. The pie edges should be puffy and completely firm, but the absolute center (about the size of a quarter) should still look slightly glossy and wobble like firm jello.
Pull it immediately! The residual heat (carryover cooking) will finish setting that small center area perfectly as it cools.
Troubleshooting and Expert Tips from the Test Kitchen
Sometimes things just don't go according to plan, and that's okay! I once pulled a pie out too soon and had a sinking custard valley in the middle. Live and learn, right?
Crust Shrinking? How to Dock and Crimp Properly
If your dough shrinks, it usually means it wasn't cold enough before baking. When fitting the dough, never stretch it to fit the plate that tension causes spring and back. After fitting and crimping, use the tines of a fork to lightly dock the sides of the crust near the edges before baking.
This gives the steam a path to escape and prevents bubbles and shrinkage.
Preventing a Cracked Surface After Cooling
Cracks happen for two main reasons: 1) Baking too high/too long, or 2) Oven shock. If your edges are browning rapidly, gently cover them with foil strips (a pie shield). After pulling the pie from the oven, do not move it rapidly or expose it to a cold draft.
Let it cool slowly on the countertop for an hour before transferring it to the fridge. Low and slow cooling is just as important as low and slow baking.
Handling Pie Dough When It's Too Warm or Sticky
If your dough gets sticky during rolling, stop immediately. Wrap it up and stick it in the freezer for five minutes. If you try to compensate for sticky dough by adding more flour, you’ll end up with a tough, dry crust. Keep everything cold!
Can I Make the Filling Ahead of Time?
Yes, but only slightly. You can mix the filling up to 24 hours ahead of time and store it in an airtight container in the fridge. However, do not pour it into the crust until you are ready to bake.
The acid and moisture in the filling will start degrading the crust immediately, guaranteeing a soggy bottom.
Make and Ahead Strategy and Long and Term Storage of Baked Goods
Best Practices for Freezing and Thawing a Whole Baked Pumpkin Pie
Yes, Mini Pumpkin Pies: Creamy, Spiced Muffin Tin Dessert Recipe freeze beautifully, and so does a whole standard pie! Once the pie is fully chilled and set, wrap it tightly in plastic wrap (two layers) and then a final layer of aluminum foil. Label and freeze for up to one month. Thaw the pie overnight in the refrigerator do not thaw it at room temperature, as the custard can become watery.
How Long Does Homemade Pumpkin Pie Last?
Because this recipe contains eggs and cream, it must be stored in the refrigerator. Properly covered, it will last 3 4 days. Any longer than that, and you should consider freezing slices.
Perfect Pairings and Presentation for Your Fall Dessert
Nothing beats a classic slice of pumpkin pie, but a little presentation goes a long way.
Serve it cold (custard is always best cold!) with a generous dollop of freshly whipped cream. For an adult twist, skip the powdered sugar in the cream and use a splash of high and quality bourbon or dark rum instead it adds an incredible aromatic complexity.
Sprinkle a few toasted pecans over the top right before serving for crunch. The deep flavors in this pie also pair perfectly with a strong, dark coffee or even a spiced sparkling cider.

Recipe FAQs
Why did my pumpkin pie filling crack on top?
Cracking is typically caused by overbaking or cooling the pie too rapidly. To prevent this, remove the pie from the oven when the center jiggles slightly like firm gelatin, and let it cool very slowly at room temperature before refrigerating.
Is browning the butter essential, and what does it add to the flavor?
Browning the butter is essential to the complexity of this specific recipe, adding a deep, nutty, and caramel like depth that plain melted butter cannot achieve. This technique enhances the natural spices and complements the maple syrup beautifully.
How do I prevent a soggy bottom crust?
The best defense against a soggy bottom is strict adherence to the blind baking step outlined in the recipe instructions. Ensure your crust is fully chilled and use pie weights to keep the sides crisp while baking the base until it is lightly set and golden.
How can I tell if my pumpkin pie is fully cooked?
The pie is done when the edges are firm and slightly puffy, but the very center (about a one-inch diameter) still has a slight wobble when gently shaken. You can also insert a sharp knife one inch from the edge; if it comes out clean, the pie is ready to be removed.
Can I use fresh pumpkin puree instead of canned?
You can substitute fresh puree, but it must be exceptionally dry, or your filling will not set properly. If using homemade pumpkin, strain it thoroughly or simmer it down to remove excess water before measuring out the required amount.
How long does homemade pumpkin pie last, and can I freeze it?
Due to the eggs and dairy in the custard, a finished pie must be refrigerated immediately after cooling and is best consumed within 3 to 4 days. While you can freeze the pie, the custard texture may become slightly grainy or weep a little moisture upon thawing.
Can I substitute granulated sugar for the maple syrup in the filling?
Yes, you can substitute granulated or brown sugar for the maple syrup, but you may need to increase the liquid content slightly, as maple syrup is thinner. Note that this substitution will significantly alter the nuanced flavor profile this specific recipe is known for.
Brown Butter Maple Pumpkin Pie
Ingredients:
Instructions:
Nutrition Facts:
| Calories | 327 kcal |
|---|---|
| Protein | 8.0 g |
| Fat | 12.0 g |
| Carbs | 48.0 g |
