Blue Velvet Cake Recipe: the Royal Treatment
- Discovering the Magnificent Blue Velvet Layer Cake
- The Science of "Velvet": Achieving the Perfect Crumb and Brilliant Hue
- Essential Ingredients and Expert Swaps for Your Blue Velvet Cake
- Baking the Brilliant Blue Velvet Cake: A Step-by-Step Guide
- Troubleshooting and Chef Secrets for a Flawless Royal Cake
- Maximizing Freshness: Storage and Freezing the Layer Cake
- Elegant Pairings: What to Serve Alongside This Showstopper
- Recipe FAQs
- 📝 Recipe Card
Discovering the Magnificent Blue Velvet Layer Cake
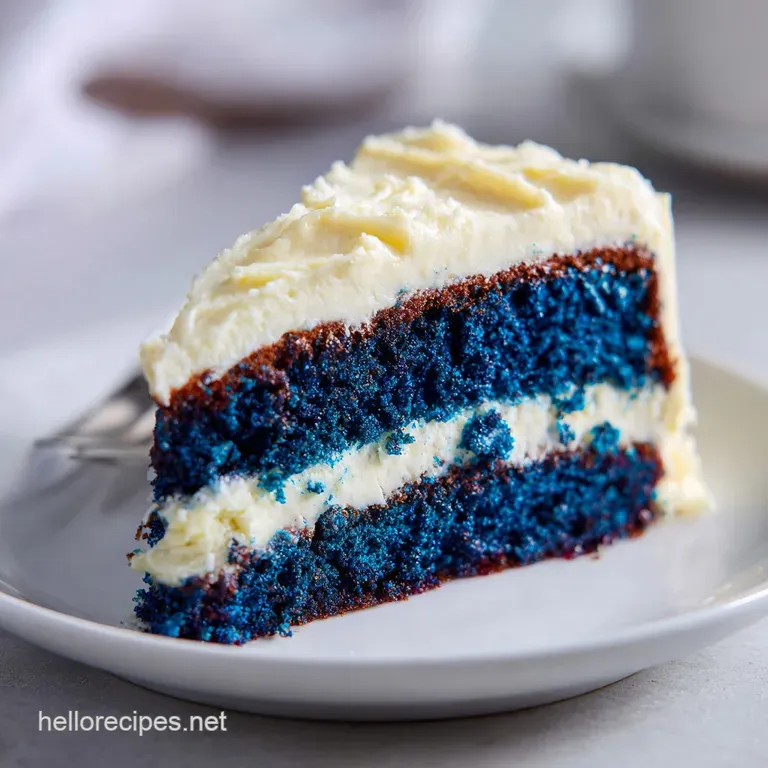
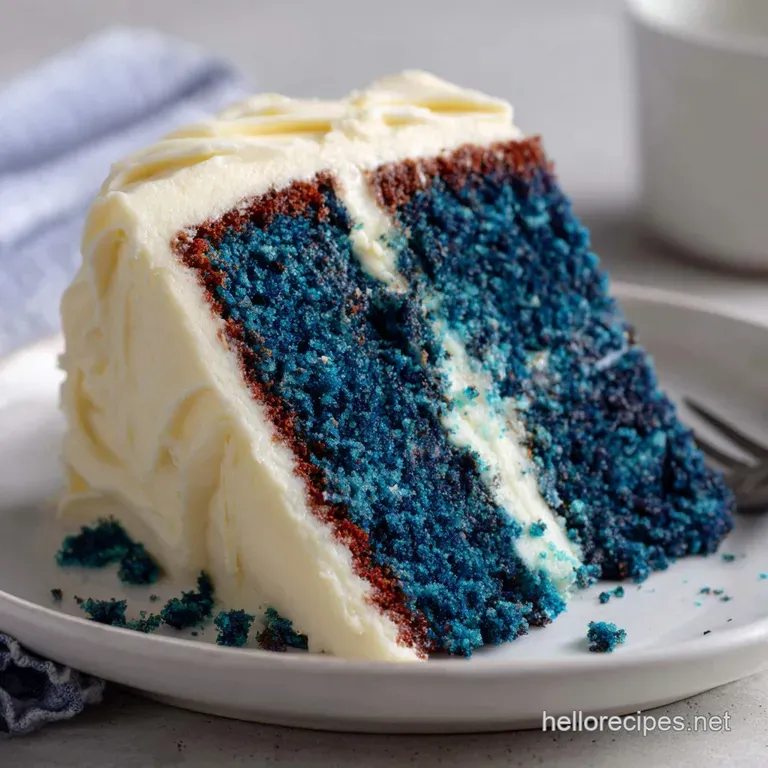
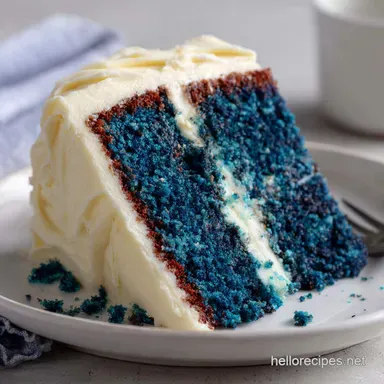
Listen, nothing delivers pure, stunning drama quite like this dessert. That electric sapphire crumb, perfectly tender beneath a cloud of tangy white frosting it's truly mesmerizing. The first slice of this perfect, blue velvet cake is always a moment, trust me.
You get the slight cocoa richness, the intense moisture, and that signature cream cheese zing.
While it looks like a high maintenance showpiece reserved for bakeries, this recipe is incredibly forgiving and surprisingly straightforward. Mastering the moist crumb is all about smart chemistry, not complicated technique.
You’ll be baking a towering masterpiece that looks like it took three days, but really only requires patience for cooling.
I've fixed all the common pitfalls (dry layers, weeping frosting, grey cake syndrome) so you can skip straight to the applause. Ready to give your friends the royal treatment? Let’s crack on and create the best blue velvet cake you’ve ever tasted.
What Sets Our Brilliant Blue Cake Apart?
Most cakes use fat and sugar to carry moisture, but the secret to any great velvet cake is the buttermilk/vinegar/soda trio. This blend creates countless tiny air pockets that translate into that signature tender, almost plush texture we’re aiming for.
We also use a touch more fat than usual to ensure this beauty stays ridiculously moist for days.
A Brief History of the Velvet Cake Family
The original red velvet wasn't about the dye; it was about the subtle red hue that emerged when natural cocoa powder reacted with acid. This tradition carries through to our brilliant blue version.
We're keeping that same fundamental flavor profile a light, acidic chocolate but swapping the historically dubious red coloring for a vivid, unapologetic blue. This blue velvet cake is simply the modern evolution of a classic, maintaining that perfect, soft crumb.
Overview of the Recipe Process and Timeline
This isn't a 30 minute bake, mostly because you absolutely cannot rush the cooling and frosting process. Active mixing takes about 30 minutes. Baking is another 30- 35 minutes.
But then you must wait the full 90 minutes (or more!) for the layers to cool completely. If you skip this, your beautiful cream cheese frosting will melt, slide, and create a giant mess. Patience yields perfection.
The Science of "Velvet": Achieving the Perfect Crumb and Brilliant Hue
The term "velvet" is really a testament to the texture achieved through chemistry. We rely on the acid in the buttermilk and vinegar reacting with the alkaline baking soda. This reaction happens twice: once in the bowl, trapping air, and aggressively again in the heat of the oven, resulting in maximum lift and an incredibly fine, soft crumb.
This is why you must add the vinegar last, right before baking it’s the final activation spark!
This specific blue velvet cake requires precision with coloring. We aren’t trying for powder blue; we are aiming for deep, royal sapphire. I learned the hard way that liquid food coloring just won't cut it. It waters down the batter and the color looks weak.
You need the concentrated gel or paste to achieve truly stunning results without affecting the texture of your moist blue velvet cake .
Essential Ingredients and Expert Swaps for Your Blue Velvet Cake
Achieving the absolute best texture for your blue velvet cake recipe starts with room temperature ingredients and precise measuring. Seriously, weigh your flour!
The Buttermilk Vinegar Reaction for Tender Crumb
| Ingredient | Role | Substitution (If Needed) |
|---|---|---|
| Buttermilk | Acid source, crucial for moisture | 1 cup regular milk + 1 Tbsp white vinegar. Rest for 5 minutes. |
| Baking Soda | Leavening agent | No substitution must be used with the acid. |
| White Vinegar | Acid booster, final activator | Apple cider vinegar works fine, but white is standard. |
Selecting the Right Food Coloring for Sapphire Vibrancy
As mentioned, forget the cheap liquid bottles. Those will ruin the integrity of the batter and turn the final result dull or greenish. Always use highly concentrated gel or paste food coloring.
Start with 1 teaspoon of the gel, mix it in, and then decide if you need that second teaspoon for a deeper color. You are aiming for a hue slightly darker than you want the final cake to be, as the baking process often lightens the color a smidge.
Key Ingredients for the Moist Cake Layers
Make sure your butter and eggs are truly room temperature before you start creaming. If they are cold, they won't emulsify properly and you’ll end up with dense layers. My biggest mistake when first making blue velvet cake years ago was trying to cream cold butter and ending up with a lumpy, sad batter.
Sift your dry ingredients, including the tiny amount of cocoa powder. This ensures everything is incorporated smoothly and prevents lumps later.
Customizing the Classic Cream Cheese Frosting
This tangy cream cheese frosting balances the richness of the cake perfectly. To ensure it is stable and holds up to the layers, you need the right ratio and temperature control.
Chef's Note: The only ingredient that should be cold for the frosting is the cream cheese. If the cream cheese is soft, the frosting will turn soupy and slide right off your beautiful blue velvet cake . Keep the cream cheese in the fridge until you are ready to use it!
I use full fat cream cheese only. You can adjust the sugar slightly if you prefer it less sweet, but make sure to sift the icing sugar to avoid that gritty texture nobody wants.
Baking the Brilliant Blue Velvet Cake: A step-by-step Guide
Preparing the Batter for Deep Color Saturation
- Prep and Combine: Preheat the oven to 350°F (175°C). Prep your pans. Sift together the flour, cocoa, baking soda, and salt.
- Creaming is Critical: Cream the softened butter and sugar on medium high speed for a full 3– 5 minutes until the mixture is light, pale, and fluffy. This step incorporates the essential air for lift.
- Mixing Wet: Gradually beat in the room temperature eggs and vanilla. In a separate bowl, mix the buttermilk with your chosen amount of blue gel coloring.
- Alternate: Add the dry mixture and the colored buttermilk alternately, beginning and ending with the dry. Mix only until just combined; visible streaks of flour are better than an overmixed, tough cake.
- The Vinegar Fizz: Pour the vinegar directly into the batter and mix rapidly for just 5 10 seconds. You might see a slight bubble that's the magic. Divide the batter immediately and get it into the oven.
Perfecting the Texture: Baking and Cooling the Layers
Bake for 30– 35 minutes. If your oven tends to run hot, check early. The cake is done when a skewer inserted into the center comes out clean.
Allow the cakes to cool in the pan for 10 minutes. Then, gently invert them onto a wire rack to finish cooling completely. Do not attempt to level or frost a warm cake.
This is the number one cause of frosting failure when making blue velvet cake from scratch.
Crafting Silky Smooth Cream Cheese Frosting
- Beat Butter: Beat the softened butter until truly light and fluffy.
- Add Cold Cheese: Add the cold cream cheese cubes and beat only until the mixture is smooth and combined about 2 minutes. Stop before it gets too soft.
- Finish: Gradually add the sifted icing sugar and vanilla, beating on low speed until incorporated. Turn the mixer up to medium high and beat for one minute until the frosting is stiff, bright white, and spreadable.
The Art of Layering and Crumb Coating the Royal Dessert
Once the layers are completely cool, use a long serrated knife to level any domed tops. Place the first layer on your plate. Frost generously. Place the second layer on top. Apply a very thin layer of frosting all over the outside.
This is your crumb coat, and it traps any loose crumbs, ensuring your final layer is pristine. Chill the cake for 15 minutes to set the crumb coat firmly before applying the final, thicker coat of frosting.
Troubleshooting and Chef Secrets for a Flawless Royal Cake
Even seasoned bakers hit snags, but most can be fixed! Getting the proportions right is essential for a structurally sound and delicious blue velvet cake recipe .
Preventing Layers From Doming or Sinking
- The Problem: The cake layers dome excessively or sink in the middle after cooling.
- The Fix: Excessive heat causes doming. Try lowering your oven temperature by 10 15 degrees and increasing the bake time slightly. Sinking is usually caused by opening the oven door too early, or too much leavening. Use a kitchen scale to ensure you aren't accidentally over measuring the baking soda.
Fixing Runny or Grainy Cream Cheese Frosting
- The Problem: The frosting is too loose and won’t hold its shape, or it tastes grainy.
- The Fix: If the frosting is runny, it means the cream cheese got too warm, or you overbeat it. You can try adding a few more tablespoons of sifted icing sugar, or chilling the entire bowl for 20 minutes before beating again briefly. If it's grainy, you failed to sift the icing sugar.
Maximizing Freshness: Storage and Freezing the Layer Cake
Yes, you can absolutely make this stunning dessert ahead of time. This blue velvet cake actually benefits from resting overnight!
Storing Unfrosted vs. Frosted Cake Layers
Unfrosted layers (wrapped tightly in plastic wrap) can stay at room temperature for up to 2 days, or chilled for 5 days. Once frosted, the cake must be kept loosely covered in the refrigerator due to the cream cheese. It is best eaten within 3 4 days.
Best Practices for Freezing and Thawing the Dessert
You can freeze whole layers or slices. Wrap unfrosted, cooled layers individually and tightly in plastic wrap, then foil. They will last for 2 3 months.
Crucial Tip: Thaw the frozen cake (wrapped!) overnight in the refrigerator. This gradual thawing prevents the cake from sweating excessively and maintains maximum moisture. Once thawed, you can frost your perfect blue velvet cake .
Elegant Pairings: What to Serve Alongside This Showstopper
This magnificent blue velvet cake is intensely rich and sweet, demanding strong, slightly bitter or acidic pairings to cut through the richness of the frosting.
Complementary Beverage Selections
You want something robust. A strong, dark coffee is perfect, but if you want to stick with the velvety theme, I often recommend my recipe for Hong Kong Milk Tea: The Authentic Velvet Hammer Recipe . The sharp tea flavor and creamy texture are divine next to the blue velvet cake. Alternatively, a chilled glass of sparkling lemonade is fantastic for cleansing the palate between bites.
Garnishes to Enhance the Blue and White Aesthetic
Keep it simple to let the cake shine!
- A fine dusting of leftover, crumbled cake pieces sprinkled around the base of the cake.
- Fresh, dark berries like blackberries or blueberries scattered across the top.
- A few edible silver sprinkles for an extra royal sparkle.
Making this blue velvet cake is a celebration in itself, and I promise, once you nail this recipe, it will be the centerpiece of every event you host! Enjoy every magnificent, deep blue bite.

Recipe FAQs
Why is my Blue Velvet cake turning out dry or dense?
Overmixing the batter develops too much gluten, resulting in a dense and heavy crumb. Ensure you are measuring the flour correctly, preferably by weight, as an excess of dry ingredients is the most common cause of dryness.
Can I use liquid food coloring instead of gel paste to achieve the blue color?
For the brilliant sapphire shade, professional gel or paste food coloring is absolutely mandatory. Liquid coloring requires significantly more volume, which introduces excess moisture and dilutes the structure of the delicate velvet crumb.
How should I properly store or freeze leftover Blue Velvet cake?
Because this recipe uses cream cheese frosting, the finished cake must be stored in an airtight container in the refrigerator and is best consumed within 4 days. Unfrosted layers can be wrapped tightly in plastic wrap and aluminum foil and frozen for up to two months.
Why are buttermilk and vinegar essential for the 'velvet' texture?
Buttermilk and vinegar are acids that are crucial for activating the baking soda, which is an alkaline base. This specific acid base reaction creates the carbon dioxide gas that gives the cake its signature tender, fine crumb structure, minimizing gluten development.
Can I make this Blue Velvet cake gluten-free or dairy-free?
Yes, substitution is possible, though the texture may vary slightly. Use a 1:1 gluten-free baking blend that contains xanthan gum for the flour replacement. For dairy-free, substitute buttermilk with a mix of non-dairy milk and 1 tablespoon of vinegar, ensuring it curdles for 10 minutes before use.
My cake layers sank slightly in the middle; what caused this?
Layers typically sink due to inconsistent oven heat or opening the door too early, causing a sudden temperature drop before the structure is fully set. Always verify that your baking powder or soda is fresh, as old leavening agents fail to provide the necessary support for the rise.
Brilliant Blue Velvet Cake Recipe
Ingredients:
Instructions:
Nutrition Facts:
| Calories | 1254 kcal |
|---|---|
| Protein | 12.0 g |
| Fat | 37.0 g |
| Carbs | 225.0 g |
