The Crispy Crust Dream a Reliable Homemade Pizza Recipe Quick or Slow Rise

- Beyond Takeout: Why This Homemade Pizza Dough Rules Them All
- Setting the Stage for Pizza Perfection: Your Culinary Blueprint
- Assembling the Pillars of Flavour: What You Absolutely Need
- The Alchemy of Dough: Step-by-Step Mixing and Kneading
- Baking Brilliance: Achieving a Professional Oven Spring
- Customizing Your Creation: Topping Inspiration Beyond Pepperoni
- Recipe FAQs
- 📝 Recipe Card
Beyond Takeout: Why This Homemade Pizza Dough Rules Them All
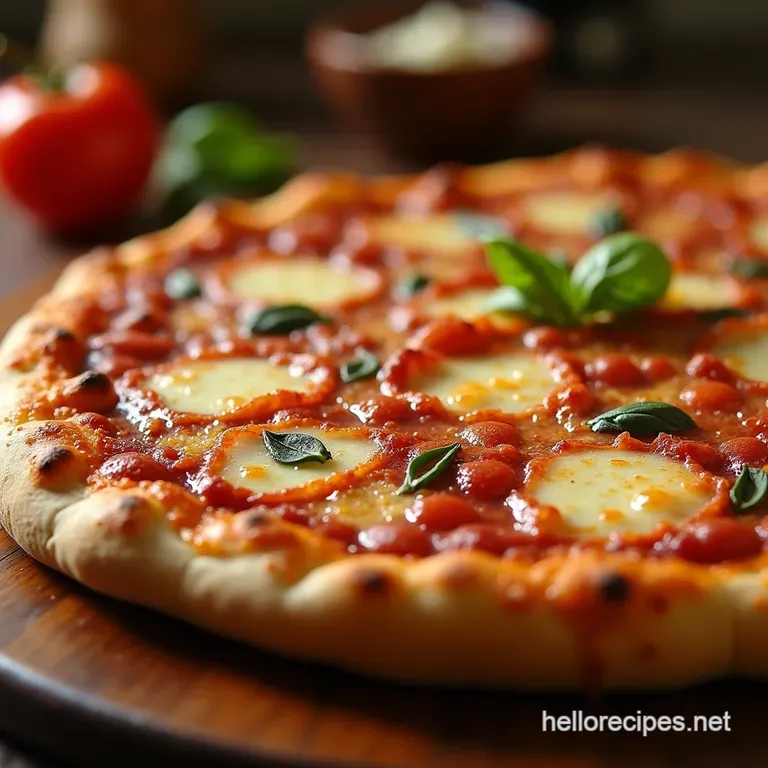
There are few culinary achievements as satisfying as pulling a perfectly blistered, bubbling Homemade Pizza from your own oven. Forget the floppy, lukewarm imitation of the corner shop; we are aiming for the crackle, the chew, and the deeply satisfying aroma that signals a true labor of love.
This isn't just about replicating a restaurant experience; it's about creating something inherently superior, built from the ground up with care. The foundation of any truly great pie is, naturally, the dough.
Mastering the Homemade Pizza Dough Recipe is the key differentiator between a good pizza night and an unforgettable one. Once you nail this base, the sky truly is the limit for your topping combinations.
Setting the Stage for Pizza Perfection: Your Culinary Blueprint
We understand that life moves fast, so this blueprint is designed for flexibility. Whether you have an evening to dedicate to slow fermentation or only forty five minutes before dinner needs to hit the table, this adaptable approach ensures you achieve the Best Homemade Pizza texture possible.
From the initial mixing to the final bake, every step is designed to build flavour and structure into your Homemade Pizza Crust .
The Secret to That Satisfying Charred Edge
That gorgeous, slightly leopard spotted char on a high end pizza isn’t accidental it’s heat management. In professional ovens, temperatures reach scorching levels that domestic ovens struggle to match. Our workaround involves super heating a pizza stone or steel.
This dense thermal mass absorbs and radiates intense, direct heat onto the base of the dough the moment it lands, triggering rapid oven spring and creating that signature blistered edge and crisp underside.
Choosing Your Tempo: Speedy Weeknight vs. Flavor Aged Dough
The magic of yeast is its versatility. For a swift dinner, the dough can rise in about an hour, providing a light, airy base perfect for your Easy Homemade Pizza Recipe .
However, if you plan ahead, the slow fermentation route placing the dough in the refrigerator for 12 to 24 hours is where the real complexity develops.
This cold period allows enzymes in the flour to break down starches into simpler sugars, resulting in a dough with far deeper, more nuanced flavour and superior texture.
A Note on Achieving Superior Texture in Your Homemade Pizza
Texture is everything. We strive for a balance: crispy exterior yielding to a chewy, slightly open interior crumb. This is primarily achieved through proper hydration (the water-to-flour ratio) and the aforementioned high heat.
Plus,, avoiding the temptation to aggressively roll the dough flat helps preserve the gas bubbles created during proofing, which expand dramatically when they hit that blast of heat.
Assembling the Pillars of Flavour: What You Absolutely Need
Creating the Best Homemade Pizza starts with ingredient quality, especially for the core components like the sauce and the cheese. For this recipe, which yields two 12 inch pizzas, we focus on simplicity so that the quality of the raw ingredients truly shines through.
The dough calls for 1 ½ cups of warm water (105- 115° F), 2 ¼ teaspoons of active dry yeast, 1 teaspoon of sugar, 3 ¾ cups of bread flour (preferred for chew), 1 ½ teaspoons of fine sea salt, and 2 tablespoons of olive oil.
For the Homemade Pizza Sauce Recipe , we deliberately avoid cooking. Taking a single 14.5 oz can of quality crushed San Marzano tomatoes, mixing them simply with two minced garlic cloves, ½ teaspoon of dried oregano, a splash of olive oil, and salt and pepper to taste, results in a bright, fresh sauce that beautifully complements rich, melted cheese.
Flour Power: Selecting the Right Grain for the Job
While all-purpose flour is accessible, bread flour is highly recommended for this Homemade Pizza Recipe . Bread flour contains a higher protein content (usually 12-14%), which translates to more gluten development during kneading.
More gluten means a stronger, more elastic dough structure capable of trapping more gas, giving you that desirable chewiness that resists sogginess.
The Humble Pantry Staples That Elevate Your Base
Never underestimate the power of salt and sugar in yeast doughs. The sugar serves as immediate food for the yeast, kick starting activity, while the salt regulates the yeast’s fermentation rate and is essential for flavour; don't reduce it!
The olive oil adds richness and helps tenderize the final crust, preventing it from becoming too tough or dry when baked at high temperatures.
Maximizing Cheese Performance: The Best Melts for Your Masterpiece
When topping your Cheesy Pizza With Fresh Ingredients , resist the urge to use fresh mozzarella packed in water unless you plan to dry it extensively beforehand. The excess moisture steams the dough rather than browning it.
Low-moisture mozzarella, shredded or diced, provides the perfect balance of flavour and meltability without compromising the crispness of the Homemade Pizza Crust .
Related Recipes Worth Trying
- The Best Homemade Peach Cobbler with Flaky Biscuit Topping — Forget soggy crusts Nail this easy peach cobbler recipe featuring a light buttery buttermilk biscuit topping that bakes up perfectly golden Your new...
- The Ultimate Homemade Pizza Crispy Crust Recipe — Ditch the takeaway Learn how to make the Best Homemade Pizza Dough Recipe with a chewy crisp crust and fresh tomato sauce Your Friday night just got an upgrade
- The Only Pizza Dough Recipe Youll Ever Need — Master the best basic pizza dough recipe for a chewy blistered Neapolitan crust Forget storeboughtthis is truly homemade pizza perfection
The Alchemy of Dough: step-by-step Mixing and Kneading
The process begins by waking up the yeast: combine the warm water, sugar, and yeast, allowing it to bloom until foamy about five to ten minutes. This confirms viability. Next, whisk your flour and salt together, then slowly introduce the dry mixture to the wet, incorporating the olive oil as you mix until a shaggy mass forms.
The real work begins with kneading. Whether you use a stand mixer with a dough hook or turn it out onto a lightly floured surface, you must knead for a full 8 to 10 minutes.
The goal is a dough that feels smooth, tacky but not sticky, and passes the windowpane test a small piece should stretch thin enough to briefly see light through it without tearing.
After kneading, lightly oil your bowl, place the dough inside, cover tightly, and begin the proofing process based on your chosen tempo.
Baking Brilliance: Achieving a Professional Oven Spring
Success in Making Homemade Pizza hinges on two things: proper proofing and aggressive heat. Once your dough has doubled (or completed its cold ferment), gently punch it down, divide it into two equal portions, and let those balls rest for 30 minutes.
This crucial rest allows the gluten to relax, making the dough pliable for shaping.
Proofing Strategies: From Rapid Rise to Overnight Cold Fermentation
As mentioned, the rapid rise method sees the dough double in about an hour in a warm spot, perfect for when time is scarce. For superior flavour, the cold ferment involves placing the dough balls in individual oiled containers in the refrigerator for up to 24 hours.
This extended, slow development builds incredible depth, transforming a simple dough into something worthy of artisanal praise.
Shaping Without Stress: Stretching Your Dough Like a Pro
Resist the temptation to use a rolling pin for the entire process, as this compresses all the beautiful air pockets you developed. Instead, lightly dust your workspace with semolina or cornmeal. Start by gently pressing the centre of the dough ball outwards with your fingertips, leaving a raised border for the crust.
Once flattened slightly, pick it up and gently stretch it over your knuckles, allowing gravity to pull it into a 12 inch circle.
Building Altitude: Layering Sauce and Toppings for Optimal Bake
Transfer the stretched dough swiftly onto your pizza peel dusted with semolina. Spread only half your fresh, uncooked sauce thinly, ensuring you leave a generous 1 inch border. Scatter the low-moisture mozzarella evenly. Remember, heavier toppings sink and steam the crust.
If you are aiming for a Homemade Pepperoni Pizza , place the pepperoni slices on top of the cheese.
The Crucial Heat Element: Optimal Temperature Settings for Homemade Pizza
This cannot be overstated: your oven must be screaming hot. Place your pizza stone or steel inside and preheat your oven to its absolute maximum ideally 500° F ( 260° C) or higher for a minimum of 45 minutes.
This ensures the stone is fully saturated with heat. Launching the dough onto this surface immediately initiates the professional style spring and char, cooking the base quickly before the toppings overcook. Bake for 10 to 15 minutes, rotating once halfway through for even browning.
Customizing Your Creation: Topping Inspiration Beyond Pepperoni
While a Homemade Pepperoni Pizza is a timeless classic, the beauty of Making Homemade Pizza is the freedom to experiment. The simplicity of the base sauce and crust supports nearly any flavour profile you can imagine.
Creative Topping Combinations for Your Next Bake
For something earthy, try thinly sliced mushrooms sautéed briefly beforehand, combined with smoked scamorza cheese and fresh thyme. Another winner involves creamy ricotta dolloped across the sauce, topped with shaved Parmesan, thinly sliced prosciutto added after the bake, and a final drizzle of hot honey.
Mastering the Art of the Par-Bake for Crispier Results
If you are using extremely wet vegetables (like fresh sliced tomatoes or peppers) or want an exceptionally sturdy crust for a heavily loaded Homemade Pizza , consider a partial bake. Bake the dough with just the sauce on it for about 5 minutes until it sets slightly.
Remove it, add your toppings, and return it to the oven to finish baking. This traps steam and ensures the base remains crisp.
Stashing Success: Storing and Reheating Leftover Slices
Leftover pizza is excellent, but reheating improperly ruins the texture. Avoid the microwave if possible. The best method is to reheat slices directly on a stovetop skillet (cast iron is ideal) over medium low heat until the bottom crust is crisp again, then cover briefly to allow the cheese to re-melt, resulting in near fresh quality.
When Chicken Makes the Cut: Incorporating Cooked Meats Successfully
If you are using cooked meats like pre-shredded rotisserie chicken or cooked sausage, always add them sparingly and distribute them evenly among the cheese layer. Because they are already cooked, you are only heating them through.
Overloading with pre-cooked items can steam the crust; remember, the oven’s primary job is to cook the dough, not just melt the toppings.

Recipe FAQs
How can I make sure my Homemade Pizza dough doesn't end up soggy in the middle?
That dreaded soggy bottom is a right pain, but it’s usually down to temperature. Make sure you preheat your baking stone or steel for a full 45 minutes at your oven's highest setting we want it scorching hot! Also, go easy on the sauce; too much moisture will steam the dough instead of baking it properly.
My yeast isn't frothing up! Can I still use the dough for my Homemade Pizza?
If your yeast doesn't bubble up after 10 minutes, it’s likely past its prime and won't give your dough the lift it needs, so start again with fresh yeast it’s the only way to get that proper airy crust.
The water temperature is often the culprit; it needs to be warm (like a hot bath), not scalding hot, or it kills the yeast.
Can I make the dough ahead of time, or does it need to be baked right away?
Absolutely, making the dough ahead is highly encouraged for better flavour development! After the initial rise, you can pop the dough balls into lightly oiled, sealed containers in the fridge for up to three days.
Just remember to pull them out about an hour before you plan to shape them so they come up to room temperature.
What’s the trickiest part about getting a crispy crust in a standard home oven?
The trickiest part is replicating the intense heat of a professional pizza oven. Using a pizza stone or steel placed on a middle or upper rack helps tremendously by retaining and transferring heat directly into the base of your pizza.
Cook it quick and hot; anything under 500°F (260°C) is likely to result in a slightly doughy centre.
What’s the best cheese to use for classic Homemade Pizza topping?
For that classic, bubbly texture without excess grease, stick to low-moisture mozzarella; it melts beautifully without releasing gallons of water onto your pie. If you're feeling fancy, grating a bit of Parmesan or Provolone over the top near the end of the bake adds a lovely salty sharpness.
Best Homemade Pizza Dough

Ingredients:
Instructions:
Nutrition Facts:
| Calories | 3702 kcal |
|---|---|
| Protein | 58.4 g |
| Fat | 41.9 g |
| Carbs | 293.1 g |
| Fiber | 57.6 g |
| Sodium | 21007 mg |
