Bake Crème Brûlée Cookies with Shortbread

- Time: 20 min active + 60 min chilling
- Flavor/Texture Hook: Shattering sugar crust with a rich, creamy center
- Perfect for: Dinner party finales or a high effort treat for guests
Quick Recipe Specs
These cookies are a balance of rich fats and sharp sweetness. The base behaves like a shortbread, which means it doesn't spread much, provided you follow the chilling rule. We are making 17 cookies total, which is just enough to share without feeling too guilty about the cream cheese.
The process involves three distinct phases: the bake, the fill, and the torch. You cannot rush the cooling phase. If you fill the cookies while they are still hot, the cream cheese will melt and slide right off the side. Trust the process and let them cool completely on the pan.
Gathering Your Essentials
Ensure the unsalted butter for the cookie base is soft but not greasy, which allows air to be whipped in properly during creaming. Since it is the main aromatic component, choose a high-quality vanilla extract.
In the filling, cream cheese serves as the stabilizer, giving it a thicker body than a typical custard so it doesn't run. Adding heavy cream provides the fat content required to achieve a mouthfeel similar to a traditional brûlée.
- 1 large egg Purpose
- Binds the dough for stability (Substitute: 1/4 cup applesauce for a softer bite)
- 1 tsp (5ml) vanilla extract Purpose
- The primary aromatic (Substitute: Almond extract)
- 1/2 tsp (2g) baking powder Purpose
- Adds a touch of lift (Substitute: 1/4 tsp baking soda + pinch of cream of tartar)
- 1/4 tsp (1.5g) salt Purpose
- Balances the sugar (Substitute: Fine sea salt)
- 1/4 cup (60ml) heavy cream Purpose
- Creates a luxurious creaminess (Substitute: Full fat coconut cream)
- 1 cup (120g) powdered sugar Purpose
- Dissolves quickly for a smooth texture (Substitute: Finely ground granulated sugar)
- 1 tsp (5ml) vanilla extract Purpose
- Aligns with the base flavor (Substitute: Vanilla bean paste)
- 3 tbsp (38g) granulated sugar Purpose
- Caramelizes when torched (Substitute: Turbinado sugar for bigger crystals)
Equipment Needed
You will need a standard stand mixer or a hand mixer to get the butter and sugar fluffy. A baking sheet and parchment paper are mandatory, as these cookies have a high sugar content and can stick if you only grease the pan.
The most important tool here is the small glass. Find a shot glass or a small spice jar with a flat bottom that is slightly smaller than the diameter of your cookie. This is what creates the divot. Finally, a kitchen torch is required for the finish.
Key Steps
Preparing the Cookie Base
- Cream the softened butter and granulated sugar until the mixture is light and airy. Note: Beat for approximately 3 minutes to ensure proper aeration.
- Incorporate the egg and vanilla extract, mixing until smooth.
- Gently stir in the salt, baking powder, and flour until a soft dough develops.
- Chill the dough in the refrigerator for 60 minutes to avoid over spreading. Note: Serious Eats' research indicates that chilling the dough prevents the fats from melting too quickly during baking.
Baking and Forming the Well
- Shape the cold dough into balls and space them 2 inches apart on a parchment lined baking sheet.
- Bake at 350°F (175°C) for a duration of 10–12 minutes until the centers remain pale while the edges are just golden.
- Immediately after removing from the oven, coat the bottom of a small glass in sugar and press it firmly into the center of each hot cookie to form a deep indentation.
- Let the cookies cool completely on the baking sheet. Note: Moving them prematurely may warp the divot.
Filling and Torching
- Beat the heavy cream and softened cream cheese until the mixture is smooth.
- Gradually whip in the vanilla and powdered sugar until the consistency is stiff and velvety.
- Fill each cookie well to the top with the cream, using a spatula to smooth the surface.
- Apply a thin, even dusting of granulated sugar over the filling.
- With a kitchen torch, move the flame in consistent circles over the sugar until it transforms into a mahogany colored glaze. Let it set for 2 minutes before serving.
The Logic Behind It
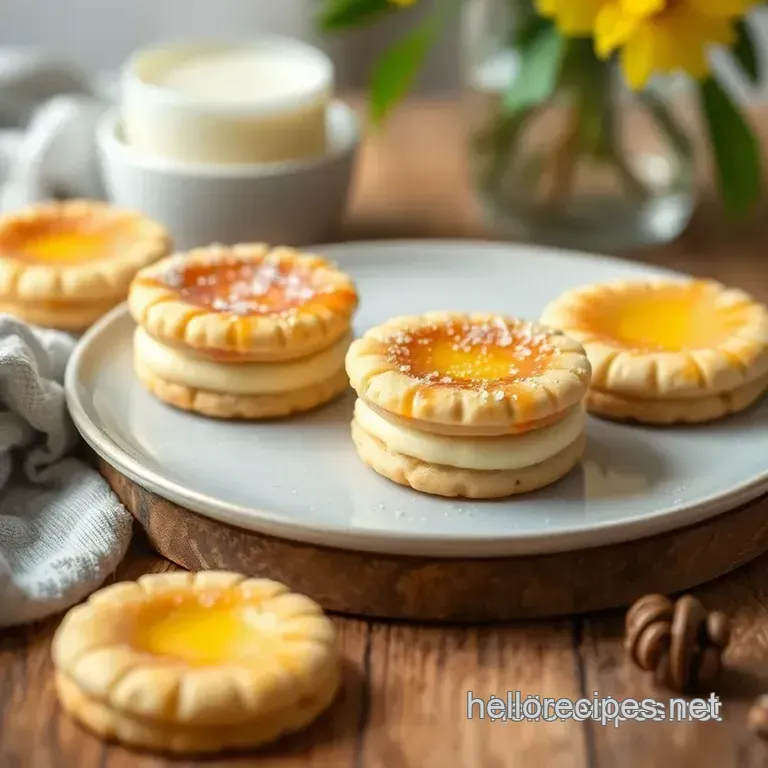
These cookies work because they play with temperature and density. By creating a structural "cup," we can use a stabilized filling that stays put without needing to be baked into the cookie.
- The Cold Start: Chilling the dough solidifies the butter, which slows down the spread. This ensures the cookie stays thick enough to hold a deep divot.
- Stabilized Filling: Using cream cheese instead of a liquid custard creates a silky texture that is stable at room temperature. This is similar to the logic used in a homemade whipped cream where fat provides the structure.
- Sugar Caramelization: The torch applies intense, localized heat that melts the sugar crystals into a glass like sheet without heating the cold filling underneath.
Fixing Common Issues
The most common struggle with these is the sugar topping. If you hold the torch in one spot too long, the sugar goes from golden to black in a split second. The key is a constant, sweeping motion.
Another issue is the filling. If your cream cheese is too cold, the filling will be lumpy. If it is too warm, it will be runny and overflow the cookie cup. Ensure it is exactly room temperature before you start whipping.
Fixing a Bitter Crust
If the sugar tastes burnt, you used too much heat or stayed in one spot. Scrape off the black layer with a knife and re torch carefully.
Fixing Runny Filling
If the mixture doesn't hold a peak, it likely needs more powdered sugar. Whip in an extra tablespoon at a time until it stiffens.
Avoiding Flat Cookies
If your cookies spread into disks, they weren't chilled long enough or the oven was too cool. Ensure your oven is a true 350°F.
| Problem | Root Cause | Solution |
|---|---|---|
| Bitter/Black Sugar | Torch held too still | Keep flame moving in circles |
| Filling Overflowing | Cream cheese too warm | Chill filling 15 mins before piping |
| No Divot Formed | Pressed after cooling | Press glass while cookie is hot |
| Cracking Base | Over mixed flour | Stir until just combined |
Storage Guidelines
Due to the cream cheese and torched sugar, these cookies have a limited shelf life. Keep them chilled in an airtight container for up to 3 days, making sure they aren't stacked.
Note that the sugar crust will gradually soften because of the humidity in the fridge. For the best results, torch them immediately before serving. Any leftover filling is delicious as a fruit dip or a topping for a crème anglaise cake.
To prevent waste, any extra cookie dough can be baked as regular cookies just omit the glass pressing step. You can also store unbaked dough balls in the freezer for up to 2 months.
Creative Twist Ideas
You can easily change the flavor profile of these. For a winter version, add a pinch of cinnamon to the dough and a drop of maple syrup to the filling.
For those who want a different base, try using a shortbread recipe with a higher butter content. This makes the cookies even more fragile but adds a richer taste. If you prefer something less sweet, swap the powdered sugar in the filling for a mix of powdered sugar and a tablespoon of lemon zest.
- For a firmer set
- chill dough for 2 hours instead of 1.
- For a deeper flavor
- use vanilla bean paste instead of extract.
- For a crunchier base
- bake for an extra 2 minutes until edges are golden brown.
Method Comparison:
| Feature | Stovetop Custard (Traditional) | Cream Cheese Filling (This Recipe) |
|---|---|---|
| Prep Time | 45+ minutes | 10 minutes |
| Stability | Requires refrigeration | Stable at room temp |
| Texture | Soft and wobbly | Stiff and creamy |
Best Pairing Suggestions
Because these are so rich, a bit of acidity helps balance the flavor. Serving them with fresh raspberries or tart Granny Smith apple slices provides that necessary contrast.
When including these in a larger dessert spread, try pairing them with a bold espresso or a glass of chilled Prosecco. The effervescence of the wine refreshes the palate between mouthfuls of buttery shortbread and cream cheese.
For a truly luxurious platter, accompany them with sliced strawberries and a bowl of fresh whipped cream. The interplay between the cold fruit and the torched sugar creates a sophisticated, restaurant style experience.
Recipe FAQs
How to stop the cookies from spreading too much?
Chill the dough for 60 minutes before shaping. This firms up the butter to ensure the cookies hold their shape during baking.
Is it true that 400°F is the ideal temperature for these cookies?
False. Bake them at 350°F (175°C) to ensure the edges are barely golden while the centers remain pale.
Should I bake these cookies at 350 or 400 degrees?
Stick with 350°F for this recipe. This temperature prevents the cookies from browning too quickly before the centers are fully set.
What is the secret to making the filling divot?
Press the sugar dipped bottom of a small glass into the hot cookie center immediately after baking. This creates a deep well to hold the velvety cream mixture.
Will the caramelized sugar topping stay crisp if refrigerated?
No, and here's why. The moisture in the fridge eventually softens the sugar crust. These treats pair wonderfully with a slice of Southern Pecan Pie.
Bake Creme Brulee Cookies Rich Creamy