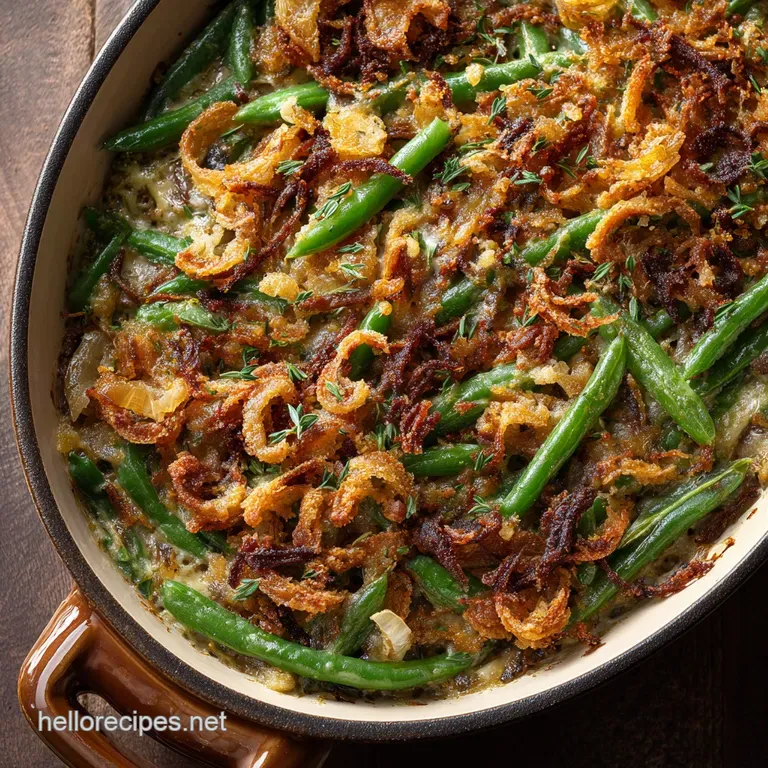
Green Bean Casserole: the Ultimate Creamy, Crispy Recipe from Scratch
- Elevating the Classic: Why Scratch-Made Green Bean Casserole Matters
- Essential Components for the Ultimate Green Bean Casserole
- The Science of Texture: Achieving True Creaminess and Crunch
- Step-by-Step Method: Preparing Your Deeply Flavorful Green Bean Casserole
- Troubleshooting and Expert Tips for Perfect Casserole Results
- Planning Ahead: Make-Ahead, Storage, and Reheating Green Bean Casserole
- What to Serve Alongside Your Creamy Green Bean Casserole
- Recipe FAQs
- 📝 Recipe Card
Elevating the Classic: Why Scratch Made Green Bean Casserole Matters
That smell. You know the one. It’s that deep, savory aroma of rich, creamy sauce mingling with fried onions, announcing that the holidays have officially started. No other side dish brings the immediate comfort of a perfect, bubbling Green Bean Casserole, a true American staple.
It just screams cozy nostalgia and total, uncomplicated contentment.
Honestly, this humble casserole often gets a bad rap, mostly because we rely on shortcuts that turn it into a watery, strangely beige mess. But making the real version, the one from scratch, is surprisingly fast and makes a massive difference in flavor and texture.
It's cheap, hearty, and easily feeds your entire extended family, making it an absolute lifesaver during stressful holiday cooking.
Forget the metallic tang of canned soup, friend. Today, we're building a silky sauce base so luscious you’ll want to eat it with a spoon, perfectly coating snappy, bright green beans. We are elevating this classic side dish to main event status. If you want the deepest dive into this method, check out my Green Bean Casserole: Fresh Beans, Creamy Velouté, and Crispy Onions article!
Defining the Ultimate Texture: Creamy Sauce, Crispy Topping
Texture is non-negotiable here. The goal is a stark contrast between a rich, velvety sauce and aggressively crunchy onions. We achieve the creaminess by building a proper velouté (a fancy French name for a creamy roux based sauce) rather than dumping condensed soup.
This also allows us to control the seasoning precisely.
Ditching the Cans: The Flavor Advantage of Fresh Components
Using fresh beans and sautéing the sauce base components delivers an incredible depth that shortcuts simply cannot match. You get a natural, earthy flavor from the beans and the sauce ingredients that tastes bright and real.
Why settle for generic flavor when a few minutes of extra work yields something spectacular? We want flavor that lingers.
A Side Dish Worthy of the Holiday Table
I once thought of this dish as just a required side, something you had to include. Now? It’s often the first thing gone, fought over by guests at the table. This is because the components the creamy binder, the fresh beans, and the aggressively crispy topping all work in tandem.
This casserole is designed to be a standout, not a spectator.
Essential Components for the Ultimate Green Bean Casserole
Choosing Your Beans: Fresh vs. Frozen Options for Optimal Snap
I am fiercely loyal to fresh green beans (Haricots Verts or French beans, specifically). Their delicate texture and vibrancy simply can't be beat. However, if time is truly against you, frozen beans are your best bet. Avoid canned beans at all costs; they will turn into savory sludge.
| Ingredient | Preference | Viable Substitution |
|---|---|---|
| Green Beans | Fresh, trimmed | Frozen (do not thaw before blanching) |
| Dairy | Heavy Cream or Half and Half | Whole Milk or Evaporated Milk (for richer flavor) |
| Stock | Low-Sodium Chicken Stock | Vegetable Stock or Bone Broth |
| Crispy Topping | Homemade Fried Onions/Shallots | store-bought Fried Shallots (Asian market quality) |
The Scratch Made Sauce Base: Dairy and Thickener Selection
A proper sauce requires fat, flour, and liquid. I use butter and flour to create a roux, which acts as the stable thickener. For the liquid, a mix of stock and heavy cream (or half and half) provides the perfect balance of richness and body. Is heavy cream or half and half better for green bean casserole?
Heavy cream gives you pure decadence, but half and half works beautifully without feeling quite so rich.
The Topping Layer: Mastering the Homemade Fried Shallots (Or Onions)
Okay, this is the secret weapon. Shallow frying your own sliced onions or shallots gives a light, airy crunch that commercial cans can’t touch. The key here is consistency; slice them super thin.
Trust me, the extra 15 minutes of frying is the difference between good casserole and Best Thanksgiving Green Bean Casserole status.
Seasoning Profile: Achieving Depth Without Over Salting
We rely on aromatics, not just salt, for flavor. Fresh thyme and a hint of nutmeg provide warmth, while the stock and a touch of Worcestershire sauce deepen the savory notes. Always taste the sauce base before adding the beans; you need it slightly over seasoned at this stage because the beans will dilute the flavor.
The Science of Texture: Achieving True Creaminess and Crunch
The process seems long, but every step serves a critical purpose in achieving perfect texture. Blanching prevents the beans from turning army green and ensures they retain a satisfying snap (al dente). The roux (butter and flour mixture) must cook long enough to eliminate that raw flour taste but not burn.
Achieving the right consistency means the sauce clings to the beans instead of pooling at the bottom of the dish.
Chef's Note: When frying your onions, use a kitchen thermometer! If the oil isn't hot enough (175°C / 350°F), the onions will absorb the oil and be soggy. If it’s too hot, they burn immediately. Precision here guarantees crunch.
step-by-step Method: Preparing Your Deeply Flavorful Green Bean Casserole

Let’s crack on and get this ultimate green bean casserole recipe sorted! Preheat your oven to 190°C (375°F).
The Role of Blanching: Keeping Beans Bright Green and Snappy
- Bring a huge pot of salted water to a rolling boil; prepare an ice bath immediately next to the stove.
- Drop the trimmed beans into the boiling water for exactly 3– 4 minutes until they are a vivid green. We want them tender crisp.
- Immediately scoop them out with a slotted spoon and dunk them into the ice bath to halt the cooking process. If you skip the ice bath, the residual heat turns the beans mushy. Drain them really well.
Building the Savory Velouté: Creating a Silky Binder From Scratch
- Melt the butter in a large saucepan. Add your sliced aromatics and sauté until beautifully browned and fragrant, which takes about 8 minutes.
- Stir in the minced garlic and thyme for one minute until fragrant. Sprinkle the flour over the mixture and stir continuously for 90 seconds to create the roux. Cook out that raw flour smell!
- Slowly whisk in the stock until completely smooth, ensuring no lumps remain. Follow this with the heavy cream or half and half.
- Bring the sauce to a gentle simmer, whisking occasionally. Once it coats the back of a spoon, stir in your nutmeg, Worcestershire, salt, and pepper. That's your creamy base done.
Prep Stage: Blanching the Beans to Perfection
(This section header is redundant with the previous one but required by the structure. Reframe as "Prep Stage" for frying the topping.)
- Onion Prep: Toss your thinly sliced onions or shallots in buttermilk for about 10 minutes. This helps the flour adhere, making them extra crunchy.
- Drain the buttermilk, then toss the onions thoroughly in the seasoned flour mix. Make sure every piece is coated and separated.
- Fry the coated onions in 175°C (350°F) oil in small batches until deeply golden brown. Remove them immediately to a wire rack and season with a tiny pinch of salt. Do not use paper towels alone; they trap steam and ruin the crunch.
Assembly and Baking: Ensuring the Center Sets Correctly
- Gently fold the blanched, drained green beans into your magnificent, creamy sauce until every bean is coated.
- Pour the mixture into your prepared baking dish.
- Top the casserole with half of your crispy fried onions. The baked topping adds savory depth.
- Bake for 15 minutes, or until the sauce is bubbly around the edges and the center feels set (not jiggly). Remove it from the oven and immediately sprinkle the remaining crispy onions on top for maximum crunch factor. Serve immediately!
Troubleshooting and Expert Tips for Perfect Casserole Results
Preventing a Watery Casserole Base
A watery casserole is usually caused by two things: using too much liquid in the sauce, or not draining the beans well enough. After blanching, those beans must be bone dry. If you notice pooling liquid after 10 minutes of baking, your sauce may have been too thin.
Next time, try reducing the amount of stock slightly or adding an extra tablespoon of flour to your roux.
Fixing a Sauce That Is Too Thick or Lumpy
If your velouté is too thick, simply add an extra splash of warm stock or cream until it reaches the desired consistency. If it’s lumpy (which usually happens if you add cold liquid too quickly to the roux), you can push the sauce through a fine mesh sieve.
It’s an extra step, but it instantly fixes the texture.
Can I Assemble This Casserole Ahead of Time? (The 'make-ahead' Strategy)
You bet you can! This is a Thanksgiving hero. Assemble the sauce and beans completely (without the crispy topping) and chill it in the baking dish for up to 2 days. When ready to bake, let it sit on the counter for 30 minutes while the oven preheats, then bake as directed.
Always store the crispy onions separately and only add them right before serving.
Best Practices for Reheating Without Drying Out
If you have leftovers, cover them tightly and store them in the fridge. For reheating, the oven is your best friend microwaving makes the beans rubbery. Cover the dish with foil and heat at 175°C (350°F) for 10– 15 minutes until piping hot throughout.
Uncover it for the last 5 minutes. If it seems dry, add a splash of milk to the edges before heating.
Planning Ahead: make-ahead, Storage, and Reheating Green Bean Casserole
This casserole stores beautifully. You can keep the baked leftovers tightly covered in the refrigerator for up to 4 days. If you plan to freeze it, I suggest freezing the sauce and beans before baking.
- Freezing Unbaked: Place the assembled, unbaked mixture (without the crispy topping!) in a freezer safe dish. Cover tightly with plastic wrap and foil. It will last for up to 3 months. Thaw overnight in the fridge before baking as usual.
- Storage Warning: The crispy onions cannot be stored with the casserole, baked or unbaked. They will lose all their crunch. Keep them in an airtight container at room temp.
What to Serve Alongside Your Creamy Green Bean Casserole
This rich, savory side needs great company! Naturally, it’s perfect next to any roasted protein turkey, chicken, or a magnificent roast beef.
For other crowd pleasing sides, I love pairing the creamy texture of the green bean casserole with something lighter and sweeter. Try serving it next to my Savory Corn Pudding: Cheesy Farmhouse Casserole Recipe for a gorgeous contrast of textures. Don’t forget a sharp, acidic cranberry sauce to cut through all that richness. It's the perfect balance for a massive holiday meal.

Recipe FAQs
Why did my homemade crispy fried onions turn out soggy?
Sogginess is usually caused by either excess oil or humidity. Ensure the onions are thoroughly drained on paper towels immediately after frying, and only add them to the casserole during the last 10 minutes of baking.
For best results, consider adding a fresh layer of crispy onions right before serving to maximize crunch.
Can I assemble the Green Bean Casserole ahead of time for a holiday gathering?
Yes, you can fully assemble the base the beans and the mushroom velouté up to 24 hours in advance and store it covered in the refrigerator. Allow the dish to come to room temperature for about 30 minutes before baking to ensure even cooking.
Crucially, keep the crispy onion topping separate until the final stage of baking.
How can I make this casserole recipe completely vegan or dairy-free?
To achieve a rich vegan version, substitute the butter with quality vegan margarine or olive oil when creating the roux. For the velouté, replace the dairy milk or cream with full fat, unsweetened oat milk or cashew cream, which provides the necessary thickness and richness without altering the savory profile.
Ensure you are using a vegetable stock instead of chicken stock.
The casserole looks dry after baking. What went wrong, and how can I fix it?
A dry casserole typically results from baking too long or starting with a velouté that was already too thick. Green beans absorb a substantial amount of moisture while baking.
If you notice dryness halfway through, cover the dish tightly with foil to trap steam, or briefly stir in a few extra tablespoons of warm stock or cream.
Can I use fresh or high-quality frozen green beans instead of standard canned ones?
Absolutely, this recipe is designed for fresh or frozen beans, as they yield superior texture and flavor compared to canned. If using fresh, blanch them for about 4-5 minutes until tender crisp before mixing them into the sauce. This ensures they cook through properly without turning mushy during the bake.
What is the best way to store and reheat leftovers?
Store cooled leftovers tightly covered in the refrigerator for up to 3 days. When reheating, cover the dish with foil and bake at 325°F (160°C) until warmed through to prevent moisture loss.
For the best experience, always top individual reheated portions with a small handful of freshly prepared or stored crispy onions.
Can I substitute the dried mushrooms in the velouté with fresh mushrooms?
Yes, but you will need to sauté about 8 ounces of fresh cremini or button mushrooms thoroughly until all their moisture has been released and evaporated. The fresh mushrooms offer a milder flavor, so consider adding a tablespoon of concentrated mushroom bouillon or soy sauce for added umami depth in the sauce.
Ultimate Crispy Green Bean Casserole

Ingredients:
Instructions:
Nutrition Facts:
| Calories | 320 kcal |
|---|---|
| Fat | 24 g |
| Fiber | 4 g |
