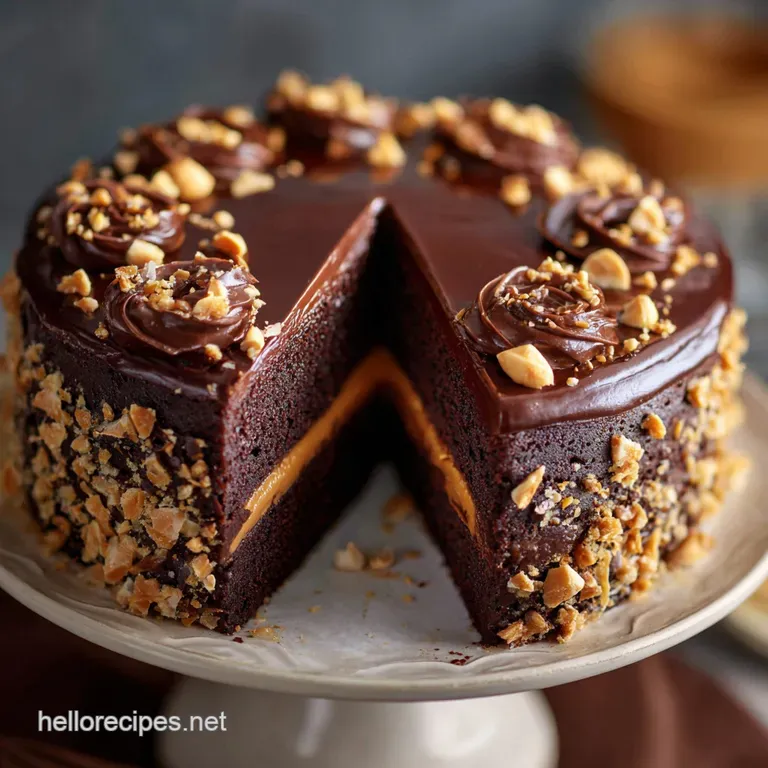
The Ultimate Chocolate Salted Peanut Butter Showstopper Cake

- Elevating the Classic: Why This Chocolate Peanut Butter Cake Is Different
- Gathering Your Pantry and Pro-Grade Equipment
- Master the Process: Baking and Building Your Ultimate Chocolate Peanut Butter Cake
- Troubleshooting and Customizing Your Chocolate Peanut Butter Creation
- Expanding the Experience: Recipe Variations and Swaps
- Recipe FAQs
- 📝 Recipe Card
Elevating the Classic: Why This Chocolate Peanut Butter Cake Is Different
This particular Chocolate Peanut Butter Cake transcends the typical overly sweet bakery offering by focusing on textural contrast and flavor depth. We specifically engineered this recipe to deliver a deeply rich, almost black chocolate flavor that stands up beautifully to the creamy, salty peanut butter frosting.
The resulting dessert is a perfect harmony of sweet and salty, delivering an experience far more sophisticated than expected.
The Science Behind the Perfect Moist Chocolate Crumb
This is not just any chocolate sponge; we utilize hot coffee to activate the cocoa powder and thin the batter slightly. This crucial step results in an intensely dark flavor profile and a remarkably moist crumb structure.
The reaction between the baking soda, baking powder, and acidic buttermilk also ensures a perfect, tender lift. Achieving this level of decadence makes this specific chocolate peanut butter cake recipe a true standout.
Understanding the Essential Salted Peanut Butter Balance
The key to truly magnificent frosting lies in managing the sweetness and achieving the optimal salty counterpoint. We use commercial, stabilized peanut butter, which guarantees a creamy, non-greasy texture for the buttercream.
Adding a precise amount of fine sea salt enhances the rich peanut flavor, ensuring the frosting perfectly balances the sweetness of the sugar. This careful combination elevates the Peanut Butter Chocolate Cake Recipe From Scratch above standard versions.
How We Achieved the Showstopper Look
A professional, polished appearance relies entirely on technique, particularly through chilling and leveling. By using three thinner 8 inch layers, the cake achieves significant height and presence.
The finish is perfected with a striking chocolate peanut butter cake with ganache drizzle, which provides a dramatic visual flow down the sides. This attention to structural stability transforms a simple dessert into a celebratory centerpiece.
Gathering Your Pantry and Pro-Grade Equipment
Before you begin, gathering your mise en place and the necessary professional tools ensures a seamless baking experience. Preparation starts by confirming all necessary wet ingredients are tempered to room temperature, which is essential for proper emulsion.
Having three matching cake pans ready and lined will guarantee your layers bake evenly and release easily.
Essential Elements for the Dark Chocolate Sponge Layers
Quality ingredients are non-negotiable for superior results, starting with Dutch process cocoa powder for its deep, less acidic flavor. Buttermilk is vital as its acidity reacts with the baking soda, guaranteeing a high, tender rise.
Never substitute cold ingredients here; ensure your eggs and buttermilk are truly at room temperature. The vegetable oil provides lasting moisture, keeping the cake tender for days.
| Ingredient Choice | Rationale |
|---|---|
| Dutch Process Cocoa | Richer, darker chocolate color and color |
| Hot Coffee | Deepens cocoa flavor; promotes light texture |
| Vegetable Oil | Keeps the cake moist and tender longer than butter |
Structuring the Stable Salted Peanut Butter Buttercream
For this robust frosting, the choice of peanut butter is critical for stability. Natural or organic varieties separate too much oil, which destroys the structure of the buttercream, leading to weeping. We rely on standard, smooth peanut butter and very soft unsalted butter to create a light, fully emulsified base.
Accurate measurements of sifted powdered sugar are then added gradually to build body and smooth texture.
Pre-Baking Prep: Measuring and Temperature Checklists
Preparation starts long before mixing, ensuring all necessary components are ready simultaneously. Use three 8 inch pans to ensure quick, even baking and easy layer stacking without excessive leveling.
Accurately measuring the dry ingredients, especially flour and cocoa, is crucial; use the scoop and level method for precision.
Expert Tip: Preheat your oven 20 minutes before baking and use an oven thermometer. Consistent heat prevents sunken centers or uneven browning, ensuring your layers bake perfectly flat.
Related Recipes Worth Trying
- Ultimate Salted Caramel Shortbread Cookies Recipe Buttery Chewy — Forget Tunnocks these truly are the best salted caramel shortbread cookies Buttery crumb meets silky homemade caramel Perfect for your cuppa or Best...
- Proper Classic Apple Crisp Recipe Buttery Oats Custard Ready — The ultimate Classic Apple Crisp recipe This simple English crumble features a thick cinnamonspiced base and a crunchy classic apple crisp topping Serve warm
- Buttery Shortbread Cranberry Orange Tart An Elegant Holiday Dessert — This proper jolly Cranberry orange shortbread tart features a tender buttery shortbread crust Its the perfect elegant holiday baking projectvibrant zesty...
Master the Process: Baking and Building Your Ultimate Chocolate Peanut Butter Cake
The execution phase is where expertise truly shines, transforming simple ingredients into a breathtaking baked good. Paying close attention to mixing times and temperatures will ensure both layers and frosting reach their full potential.
This carefully developed process ensures your chocolate peanut butter cake easy preparation yields spectacular results.
Creating the Aerated and Rich Chocolate Batter
The unique preparation method involves first mixing the dry ingredients thoroughly to distribute leaveners, then blending the wet components. The crucial final step is incorporating the hot coffee; this is mixed quickly just until smooth.
This technique creates a thin batter, which facilitates the moist texture and prevents gluten development often caused by over mixing.
Achieving Perfect Dome Free Cake Layers (Baking Secrets)
Baking three layers rather than two thicker layers naturally minimizes the doming effect, making leveling simple. To ensure perfectly flat tops, avoid opening the oven door before the 25-minute mark.
Check for doneness by inserting a wooden skewer; it should come out clean or with minimal moist crumbs attached, indicating a fully baked but still tender crumb. Once cooled for 10 minutes in the pan, invert them onto a wire rack immediately to halt the baking process.
Whipping the Buttercream to Silky, Spreadable Perfection
Start by creaming the softened butter and peanut butter vigorously for three full minutes until the mixture is visibly lighter in color and fluffy. Incorporate the powdered sugar slowly on the lowest speed to avoid a kitchen cloud, then beat the mixture on medium high.
Add the heavy cream sparingly, only enough to achieve a light, spreadable consistency that holds a firm peak.
Stacking and Crumb Coating for a Flawless Finish
Stability is paramount during assembly, beginning with leveling any slight domes off the cooled layers using a long serrated knife. Apply a thin, tight layer of frosting, known as the crumb coat, which traps any loose cake particles.
Chilling the cake immediately after the crumb coat sets this base layer, guaranteeing a pristine, smooth final coat of frosting without migrating crumbs. The final step involves the beautiful drape of the chocolate ganache, completing the tiered structure.
Troubleshooting and Customizing Your Chocolate Peanut Butter Creation
Even expert bakers occasionally face challenges, but most issues are easily remedied with simple adjustments. Recognizing the signs of an issue early can save significant time and ingredients.
Mastering the texture of both the batter and the buttercream is the key to consistent success with the Chocolate Peanut Butter Cake .
One frequent issue is a grainy buttercream, often caused by cold butter or peanut butter. Ensure all dairy ingredients are genuinely soft to the touch before mixing to ensure a smooth emulsion.
If your cake layers stick to the pan, ensure you grease, flour, and line the bottom with parchment paper a triple defense against sticking.
If your chocolate ganache sets up too hard before drizzling, gently warm it over a double boiler for 30 seconds to restore its flowable consistency. Conversely, if the ganache is too runny, let it rest longer at room temperature until it thickens to the consistency of warm syrup before applying the drizzle.
This attention to detail will help you achieve a truly professional Peanut Butter Cake Recipe With Chocolate Glaze .
| Issue | Quick Fix |
|---|---|
| Batter looks curdled | Mix in the dry ingredients; the flour will stabilize the emulsion. |
| Frosting is too greasy | Beat on medium high speed for 5 minutes; warming the bowl slightly helps re-emulsify the fat. |
| Cake is dry | Check oven calibration; next time, reduce baking time by 2- 3 minutes. |
Expanding the Experience: Recipe Variations and Swaps
Once you have mastered the original three layer Chocolate Peanut Butter Cake , you can easily adapt the recipe to suit different occasions or dietary needs. These variations maintain the core rich flavor profile while offering flexibility in presentation and ingredients.
Experimenting with different textures, like adding crushed peanuts to the filling, can take the enjoyment to another level.
Pro Tips for Slice Worthy Presentation and Clean Cutting
For those picture perfect slices, the cake must be fully chilled before cutting, ideally for at least 30 minutes. Use a very large, sharp knife, warming it slightly under hot water before each cut.
Wipe the knife blade completely clean between every single slice to prevent dragging frosting across the crumb, ensuring a beautiful presentation every time.
Shelf Life and Optimal Storage: Keeping Your Cake Fresh
Due to the high sugar and fat content in the buttercream, this cake stores beautifully at room temperature for up to three days if kept tightly covered under a dome. For longer storage, refrigerate the cake in an airtight container for up to a week, ensuring the frosting does not absorb refrigerator odors.
Always allow refrigerated slices to warm up slightly (about 15 minutes) before serving for the best flavor and softest texture.
Scaling the Recipe and High Altitude Baking Adjustments
This specific formulation is easily doubled for a grand four layer presentation, using four 8 inch pans or three 9 inch pans, keeping the proportions consistent. If baking at high altitude (above 3,500 feet), you may need to increase liquids slightly (1 2 tablespoons) and decrease the leavening agents by about 1/4 teaspoon each to compensate for pressure changes.
For a simple format, consider converting this to an Easy Peanut Butter Bundt Cake by using a 10-cup Bundt pan and reducing the baking time to around 45– 55 minutes for a spectacular Chocolate Peanut Butter Bundt Cake Easy .
dairy-free and gluten-free Substitutions That Actually Work
It is completely possible to create an incredible version of this cake while accommodating dietary needs without sacrificing flavor or texture. For gluten-free baking, use a high-quality, cup-for-cup gluten-free flour blend that already contains xanthan gum for structure.
When replacing dairy, use full fat alternatives that mimic the rich mouthfeel of heavy cream and butter. To create a stellar cake that is fully dairy-free, substitute the buttermilk with a full fat oat milk blended with lemon juice.
| Original Ingredient | Effective Substitution | Notes |
|---|---|---|
| Buttermilk | dairy-free Milk + Lemon/Vinegar | Use oat or soy milk for richness |
| All-Purpose Flour | Cup-for-Cup GF Blend | Requires no additional xanthan gum |
| Unsalted Butter | high-quality Vegan Butter Sticks | Essential for stable buttercream texture |

Recipe FAQs
Can I bake the Chocolate Peanut Butter Cake layers ahead of time, and how should I store them?
Absolutely, it's a brilliant way to break up the work for this showstopper! Wrap the fully cooled cake layers tightly in cling film and store them at room temperature for up to two days, or freeze them for up to a month before you assemble and frost.
My peanut butter frosting always goes a bit wrong any tips for a perfectly stable buttercream?
The secret is using a stable, non-natural peanut butter that won't separate oil, plus ensuring your butter is truly soft and at the same temperature as the peanut butter for proper emulsification.
Why on earth do I need hot coffee in my chocolate cake mix?
That hot coffee is a proper chef's trick; it doesn't make the cake taste of coffee, but it dissolves the cocoa powder thoroughly and deepens the chocolate flavour, resulting in an incredibly dark, rich crumb.
I need a non-dairy option for the buttermilk. Will a substitute throw the whole recipe out of whack?
Not at all, you won't be in a spot of bother! Simply substitute the buttermilk with a cup of plant based milk mixed with one tablespoon of vinegar or lemon juice, as this creates the necessary acidity to activate the rising agents.
Can I freeze slices of this cake once it’s fully assembled and frosted?
Yes, provided it's wrapped well to avoid freezer burn! Freeze individual slices first on a tray, then wrap them tightly in foil and place them in an airtight container for up to three months for a quick emergency sugar fix.
Ultimate Chocolate Peanut Butter Layer Cake
Ingredients:
Instructions:
Nutrition Facts:
| Calories | 6135 kcal |
|---|---|
| Protein | 19.6 g |
| Fat | 85.3 g |
| Carbs | 218.9 g |
| Fiber | 14.7 g |
| Sugar | 134.7 g |
| Sodium | 253 mg |
