Sweet Golden Honey Bread

- The Sweet Story of Honey Bread
- Recipe Overview: A Slice of History
- The Sweet Benefits of Baking with Honey
- Essential Ingredients Guide for Baking Sweet Golden Honey Bread
- Mastering Professional Cooking: Your Guide to Sweet Golden Honey Bread
- Pro Tips & Secrets to Perfect Homemade Honey Bread
- Perfect Presentation for Fluffy Bread Texture
- Storage & Make-Ahead Tips for Your Sweet Creation
- Creative Variations for a Twist on Traditional Honey Bread
- Complete Nutrition Guide for a Guilt-Free Indulgence
- Expert FAQ Solutions to Your Baking Dilemmas
- Conclusion: Get Baking!
- 📝 Recipe Card
The Sweet Story of Honey Bread
You know, there’s something magical about walking into a kitchen filled with the warm scent of honey bread baking in the oven.
It takes me back to my grandma’s house, where the air was always thick with cozy smells. she’d whip up a batch of her famous sweet golden honey bread, and i could barely wait to sneak a slice while it was still warm.
Honestly, that sweet, buttery goodness is comfort food at its finest! i mean, who can resist a slice of fluffy, golden crust bread slathered with a pat of butter? just thinking about it makes me smile!
But let’s get real, baking doesn’t have to be scary or complicated. this homemade bread recipe is perfect for anyone, whether you're a seasoned pro or a newbie looking to impress.
Plus, it’s a great way to bond with the fam! believe me, if you’re searching for a fun kitchen project, try your hand at this sweet bread.
With just a handful of ingredients, it’s doable and oh-so-rewarding.
Recipe Overview: A Slice of History
So, where did this delightful bread come from? well, traditional honey bread has a long history in many cultures, often appearing in festive celebrations and special occasions.
Honey has been used as a sweetener for thousands of years, with various honey flavored recipes popping up all over the globe.
Today, though, it's all about that sweet spot between history and heartwarming family memories.
In today’s world, this bread is more relevant than ever. think about it: we’re always looking for ways to bring a bit of warmth into our busy lives, and what better way than with a slice of homemade honey bread ? you can bake it for breakfast, brunch, or even as a simple afternoon snack.
This recipe doesn't just hit the taste buds; it fills the heart and the belly, making it a staple in many households.
Now, don’t worry about spending half your day in the kitchen. the time requirements aren’t too daunting: around 1 hour and 45 minutes from start to finish, with just about 15 minutes of active prep.
Plus, the level of difficulty is medium; it just requires a little kneading and patience. but trust me, the yield of about 10 slices? totally worth it!
The Sweet Benefits of Baking with Honey
Alright, let’s chat about the perks of this special loaf. first off, honey is not just tasty; it’s health packed too! it has antioxidants and can help soothe a sore throat.
So in a way, when you bake this nutritious homemade bread , you’re also making a healthy snack option for your loved ones.
One of the unique selling points of honey bread is its versatility. you can serve it for breakfast, of course, but also bring it to gatherings or holiday celebrations it fits in anywhere!
This isn’t just your typical yeast bread recipes ; it’s a sweet treat that’s great for a cozy dinner or even a coffee date.
Imagine slicing it up for your guests; they’re going to rave about that fluffy bread texture !
And here’s a bonus: if you use different types of honey, each loaf can taste different. so, each batch is a new adventure! don't be scared to play around with flavors by adding a pinch of cinnamon or even some dried fruits.
You’ll quickly find your go-to combo.
So, are you ready to take the plunge into easy bread baking ? stick around, ‘cause we’re about to get into the heart of this recipe, starting with the ingredients you’ll need to make this delicious loaf.
Trust me, your kitchen is going to smell heavenly!
Essential Ingredients Guide for Baking Sweet Golden Honey Bread
So, you’re ready to dive into the delightful world of homemade bread? awesome! but before you get rolling, let’s break down some essential ingredients you’ll need for baking, especially that delicious honey bread you have your heart set on.
Premium Core Components
First things first, let’s talk measurements. you’ll want to have 3 cups (360g) of all-purpose flour ready. if you’re working in metric, there it is! for the liquids, gather 1/4 cup (60ml) of warm water it should be about 110° f ( 43° c) to keep your yeast happy.
You’ll also need 1/2 cup (120ml) of milk and 1/4 cup (85g) of melted unsalted butter.
Quality matters! Look for honey that’s raw if you can. It gives your bread that lovely, rich flavor. And trust me, you’ll want the finest ingredients for the best results .
When storing your ingredients, keep flour in an airtight container in a cool, dark place to maintain its freshness. honey? just keep it sealed and it’ll last forever.
Seriously, honey doesn’t spoil! be mindful that your yeast should be stored in a cool place too.
Signature Seasoning Blend
Now, let’s sprinkle in those flavors. you might want to add a teaspoon of cinnamon if you’re into that sweet aroma.
It pairs beautifully with honey, trust me! want something different? go for vanilla extract . just a half teaspoon goes a long way!
This is your chance to get creative! Think about regional variations too. In the South, they might love a dash of nutmeg or even cream cheese spread on top!
Smart Substitutions
Sometimes, life happens, right? if you’re missing an ingredient, don’t stress! if you don’t have honey, maple syrup can do the trick, although it'll give you a different flavor.
Out of milk? try almond milk or any other dairy-free option. and if you don’t have butter , olive oil could come to the rescue!
Speaking of alternatives, if you wanna skip the eggs due to dietary restrictions, a combination of flaxseed meal and water acts like a magic trick.
But keep an eye on the texture; it might feel a bit different.
Kitchen Equipment Essentials
Alright, now for the tools of the trade! you’ll need a mixing bowl , measuring cups, and a loaf pan (preferably 9x5 inches).
A wooden spoon or spatula will help mix everything up nicely. if you're serious about that airy bread texture , knead it well on a floured surface for a smooth finish.
Pro tip: Wanna keep that warm bread cozy while it rises? Use a damp kitchen towel to cover your bowl. That moisture is key!
Cooking Up Comfort
With your ingredients prepped and your tools at the ready, it’s time to turn your kitchen into a sweet smelling bakery.
Think about those cozy mornings with fresh sweet bread for breakfast or that comforting slice with your afternoon tea. trust me, baking homemade bread isn’t just about food; it’s about the moments you create!
If you’re looking to impress, serving up Soft Honey Bread with creamy butter or a fruit jam makes for a presentation that’ll have everyone saying, “Wow, did you really bake that?” Spoiler alert: they might even ask for the recipe!
So, ready to start mixing that dough? Let’s get into the instructions for that delicious Sweet Golden Honey Bread and bring some of that golden crust bread into your life! Here we go!
Mastering Professional Cooking: Your Guide to Sweet Golden Honey Bread
Alright, folks, if you’ve ever thought about diving into easy bread baking , it’s time to pull up your sleeves.
Today, we’re diving into the world of professional cooking, using our star ingredient: honey bread ! this isn’t just any bread; it’s a sweet, golden wonder that blends comfort and nostalgia into every slice.
But before we get into the nitty gritty of our homemade bread recipe , let’s get prepared to set the stage.
Essential Preparation Steps
You don’t just jump into bread making, right? first up is mise en place . this fancy term just means “everything in its place.
” gather your ingredients: all-purpose flour, honey, milk, yeast, and more. trust me; it makes the process smoother!
Time management is key. you need to know how long each step takes. for our sweet golden honey bread , set aside about 15 minutes for prep, and don’t forget that 60-minute rise time.
Keep your kitchen organized. i found that labeling bowls helps - you know, “wet ingredients,” “dry ingredients.” it’s like a cooking game! lastly, never forget safety considerations .
Hot water (around 110° f ) can be tricky. you want it warm enough to wake up your yeast, but not so hot that it kills it.
Step-by-step Process
Ready to roll? Here’s how to get that fluffy bread texture we all crave!
- Activate the yeast : Mix 1/4 cup warm water with yeast and a teaspoon of honey. In about 5- 10 minutes , it should be frothy.
- Mix wet ingredients : In a bowl, whisk together the melted butter, milk, eggs, and the rest of your honey.
- Combine dry ingredients : Grab another bowl and mix your flour, salt, and optional cinnamon.
- Combine mixtures : Stir the yeast mix into your wet ingredients then add the dry mix gradually. Don’t rush this!
- Knead the dough : Get your hands messy! Knead for 5- 7 minutes until the dough is smooth. It’s such a satisfying process.
- First rise : Place in a greased bowl, cover it, and let it rise for about 1 hour . Go grab a coffee or binge watch a show!
- Shape the loaf : After it doubles, punch it down (yes, it's okay to express your feelings), shape it into a loaf, and place it in a greased pan.
- Second rise : Cover again and let it rise for another 30- 40 minutes until it’s nice and puffy.
- Bake : Preheat to 350° F and bake for 30- 35 minutes . The smell will drive you wild!
- Cool and serve : Let it cool before slicing. Seriously, patience pays off here.
Expert Techniques
Now that you’re getting cozy with your bread, let’s talk expert methods . one critical step? kneading! it’s not just about mixing; you want to build that gluten structure for a chewy delight.
Quality checkpoints include looking for that beautiful golden crust. when you tap it, it should sound hollow. if it doesn't, you might need to troubleshoot maybe a longer bake or a hotter oven was needed.
Success Strategies
Mistakes happen, but let’s avoid the common ones. One biggie? Not letting your dough rise enough. Seriously, don’t rush it! Check your baking measurements and always trust your instincts with timing.
For perfect results, consider make-ahead options . You can prep your dough and pop it in the fridge for up to 24 hours before baking. This can enhance the flavor!
Transitioning to the Next Bite
So, there you have it, everything from activating your yeast to baking your sweet bread for breakfast or an afternoon snack.
The world of honey flavored recipes is at your fingertips, and i promise, once you try this traditional honey bread , you’ll wonder why you waited so long.
Next up, let’s dive into Additional Information to give your baking journey even more depth. Happy baking, friends!
Pro Tips & Secrets to Perfect Homemade Honey Bread
Let’s sprinkle in some golden nuggets of wisdom for making your Sweet Golden Honey Bread shine even brighter! We all know that homemade bread is comforting, but there are little tweaks and hacks that can take your baking game from “meh” to wow!
First off, make sure you get your yeast activated properly. trust me; nobody wants dense bread! mix that warm water (around 110° f ) with a teaspoon of honey and your yeast.
Give it about 10 minutes and watch for that frothy magic. it’s all about getting the yeast party started!
If you want some extra flavor enhancement , add a teaspoon of cinnamon to your dry ingredients. oh my gosh, it’s like a warm hug in bread form.
And don’t skimp on kneading! aim for about 5- 7 minutes. the dough should be smooth and elastic like a good pair of yoga pants.
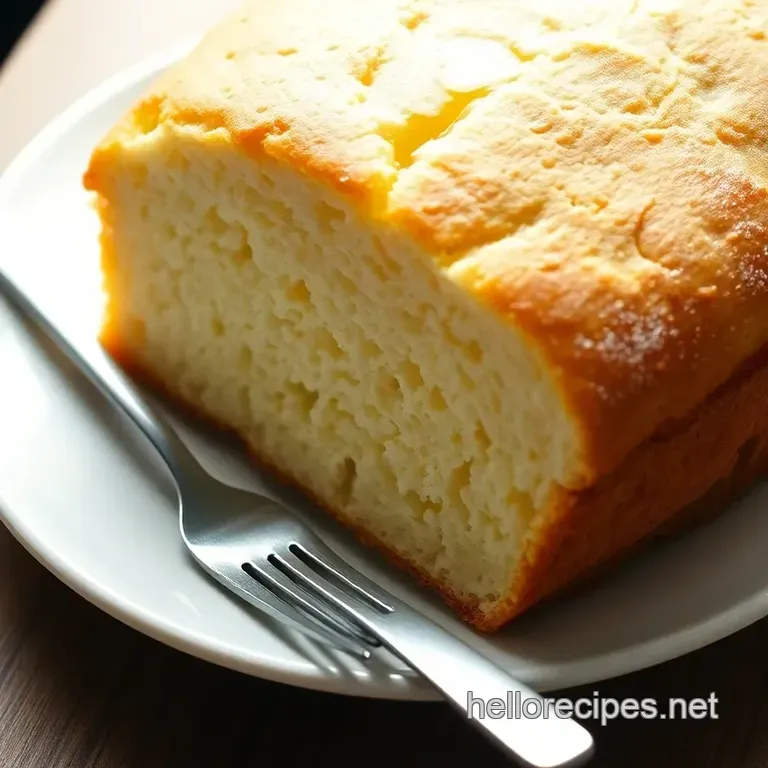
Perfect Presentation for Fluffy Bread Texture
Presentation matters, even with something as homey as honey bread . a golden crust is a sight to behold! once your loaf is baked to perfection, let it cool for a bit.
A quick tip for a show stopping finish? brush the top with melted butter right when it comes out of the oven.
It brings out a glossy shine that’s downright irresistible.
For plating, slice the bread up and arrange it on a rustic wooden board. maybe sprinkle some nuts or fruit for a pop of color.
And don’t forget those garnish ideas! a light drizzle of honey or a dusting of powdered sugar can take your presentation from ordinary to extraordinary .
People will be taking photos before they take a bite!
Storage & make-ahead Tips for Your Sweet Creation
Now, let’s talk about practical stuff like how to keep that delicious honey bread fresh. it’s easy! store it in an airtight container at room temperature, and it should last about 3-4 days .
If you’re thinking ahead (which we should all aspire to do), you can freeze your bread too! just wrap it tightly in plastic wrap, then pop it in a zip-top bag.
When you’re ready for a slice of comfort food, let it thaw at room temperature or reheat it in the oven for about 10- 15 minutes .
This method makes for quick afternoon snack ideas when you need something special.
Creative Variations for a Twist on Traditional Honey Bread
Feeling adventurous? don’t hesitate to mix things up a bit! consider trying some unique honey types. lavender honey adds a floral note, while buckwheat honey brings in a rich, malty flavor.
Both are divine !
If you want to adapt for dietary preferences, you can easily switch to a dairy-free alternative like almond milk or even coconut milk for a tropical twist.
And hey, if you're in the mood for some fruits, throw in some dried cranberries or walnuts totally your call!
Baking is all about experimentation , right? So why not try this as a base for your own creations? Maybe a touch of orange zest? The world of sweet bread recipes is at your fingertips!
Complete Nutrition Guide for a Guilt Free Indulgence
When you dive into homemade bread, knowing your numbers can be helpful. each slice of honey bread packs about 180 calories , with 4 grams of protein and a bit of healthy sweetness from the honey.
It has its perks too honey is known for its energy boosting properties. enjoying a slice alongside your morning coffee or tea can make for a feel good breakfast or snack.
But be mindful about portion sizes this is comfort food, after all! you can easily go overboard if you’re not careful.
Stick to about 1-2 slices, especially if you’re pairing it with butter or jam. always keep an eye on balance!
Expert FAQ Solutions to Your Baking Dilemmas
You might have questions, and that’s completely normal! a big one is, “what if my bread didn’t rise?” no worries! it might be that your yeast was a little too cold or needed more time to work its magic.
Don’t let that bring you down; try again!
Also, remember, if you run into sticky dough, just add a sprinkle of flour while kneading. It’s all part of the fun process!
In the end, baking isn’t just about following a recipe, it’s about crafting something with love and care. Don’t shy away from mistakes they often lead to the best kitchen stories!
Conclusion: Get Baking!
So, what are you waiting for? grab those ingredients and get ready to whip up your very own sweet golden honey bread .
Whether it’s for breakfast with your family or an afternoon treat, the warm, fluffy texture and sweet aroma filled with honey will surely make it a hit.
Remember to embrace the process and savor each bite. happy baking, friends!
Sweet Golden Honey Bread

