Stottie Cake Recipe Bread Machine: Easy & Delicious Comfort Baking!
- The Complete Guide to Authentic Stottie Cake
- What Makes This Recipe Special
- Health and Nutrition Highlights
- Recipe at a Glance
- Perfect Ingredients Selection
- Kitchen Equipment Essentials
- Stottie Cake in a Bread Machine: Master Chef's Method
- Master Chef's Advice
- Perfect Presentation
- Storage and Make-Ahead
- Creative Variations
- Complete Nutrition Guide
- Expert FAQ Solutions
- 📝 Recipe Card
Have you ever wondered why some bread just hits differently? like, you take a bite, and it transports you straight to a cozy kitchen in a quaint village, where the smell of freshly baked loaves wraps around you like a warm hug? today, we’re diving into the delightful world of the stottie cake.
Not only is it soft, fluffy, and perfect for making the best sandwiches, but this recipe is special for its ease and the incredible taste you can whip up with your bread machine.
Honestly, if you’re short on time but craving that homemade goodness, this is your go-to recipe! it requires just about 10 minutes of your active time and is as easy as pie well, actually, easier than pie.
Alright, let’s take a little trip back in time. the stottie cake hails from the northeast of england, particularly around county durham, and it’s not your typical loaf of bread.
Picture this: bakers would make this bread in the local ovens, its name believed to come from the word “stot,” which means to bounce.
And that’s not just for show! growing up, i’d often hear my grandparents reminisce about their memories of enjoying stottie cake with their dinners.
It was that comforting, hearty bread you could sink your teeth into.
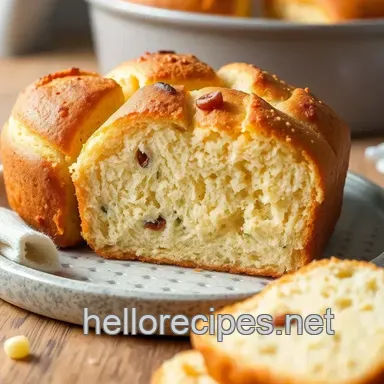
What sets this stottie cake apart, you ask? besides its rich history, it's the impressive texture that gets folks coming back for more.
It's flat, a bit thicker than your average loaf, and oh-so-ideal for sandwiches or just slathering with butter and homemade jam.
Plus, with the rise of baking at home in recent years, using a bread machine has become a game changer. it bridges a gap between tradition and modern convenience, giving you a soft bread recipe with minimal fuss.
The Complete Guide to Authentic Stottie Cake
The stottie cake boasts a rich culinary heritage, perfectly representing the heart of british baking. originating in the north east, this bread was traditionally baked in wood fired ovens, allowing it to develop that unique, chewy crust while staying wonderfully soft inside.
Its origins are soaked in community ties, often made for large gatherings or sunday roasts. nowadays, you’ll find it widely appreciated and super popular in delis and bakeries across the country.
Why is stottie cake so significant in british culture? it’s more than just a side of bread; it’s a symbol of comfort, practicality, and culinary pride.
You can prop it up against a hearty stew, and it won’t let you down! over the years, its popularity has soared, especially with those looking for homemade bread alternatives using a bread machine.
What Makes This Recipe Special
Oh my gosh, where do i even begin? the unique flavor combinations just blow my mind! it’s not just flour and water; it’s about a marriage of texture and taste.
Plus, i’ve perfected the foolproof techniques i picked up from trial and (let’s be honest) error which, believe me, is a solid stepping stone in mastering this recipe.
By following these expert tested methods, you’ll see just how fun and rewarding bread machine baking can be.
I know some of you might be worried about fluffing up your bread making techniques. don’t stress! i’ve got a few time saving tips that will get you through this stottie cake recipe without breaking a sweat.
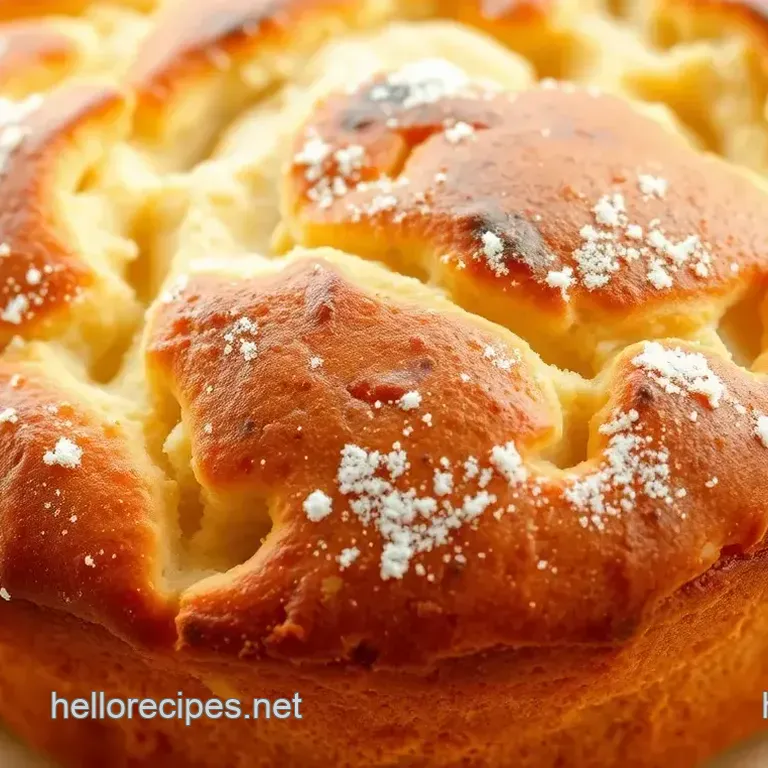
The way it fills the kitchen with that warm, yeasty aroma? absolutely unbeatable.
Health and Nutrition Highlights
Now, i’d be remiss if i didn’t mention the nutritional highlights! each slice of this stottie cake is packed with energy and a good source of carbohydrates, making it an excellent addition to your meals.
If you’re looking for dietary considerations, feel free to swap in whole wheat flour or get creative with healthful add-ins.
Baking your own bread has wellness advantages too! it’s generally lower in preservatives compared to store-bought options, plus you can customize it with healthier ingredients.
Thinking of cooking with herbs? go for it! this is your canvas.
Recipe at a Glance
- Preparation Time: 10 minutes
- Cooking Time: 1 hour 30 minutes
- Total Time: 1 hour 40 minutes
- Serving Size: Makes one large Stottie Cake, approximately 10 servings
- Difficulty Level: Easy
- Cost Efficiency: Very wallet friendly!
So, are you ready to get flour on your hands? i promise it’s worth the adventure. here’s where we’ll dive into the ingredients section.
Hang tight, as we gather up what we need for our tasty journey into the world of stottie cake. let’s bring that rich history into your own kitchen!
Perfect Ingredients Selection
Oh my gosh, let’s talk about the heart and soul of any amazing homemade bread, especially when diving into something as delightful as a stottie cake! behind every perfectly baked loaf, there’s a tale of choosing the right ingredients.
So, if you're sitting comfy with a cuppa, i promise you’ll love where this is heading!
Premium Core Ingredients
When it comes to crafting your Stottie Cake, here’s the rundown on your core ingredients the ones you really wanna pay attention to.
Measurements matters: for this scrumptious stottie cake recipe bread machine, you'll need 500 g (that's about 4 cups) of strong white bread flour, which is our base.
Then, get your hands on 300 ml (1¼ cups) of warm water at around 110°f/43°c. you know it’s just perfect when it feels warm to the touch, like a sunny day!
Quality indicators: when selecting breadcrumbs, always reach for the ‘strong’ stuff! it’s got higher gluten content which gives your bread that beautiful rise and chew.
Oh, and make sure your dried yeast is fresh; expired yeast is like showing up to a party without cake really disappointing!
Selection tips: head to your local bakery or supermarket for the freshest ingredients! and if the flour’s been sitting on a dusty shelf for ages, it’s time to move on.
Trust your instincts; if it looks a bit… stale, just say no!
Storage guidance: keep your flour in a cool, dry place to avoid unwanted pests. an airtight container is ideal! same goes for your yeast store it in a cool cupboard, or even better, in the fridge if you want it to last longer.
Signature Seasoning Blend
Now let’s spice things up (not literally, because we're keeping it simple for this Stottie Cake).
Spice combinations: it might seem atypical, but i love adding a hint of freshly cracked black pepper to the mix, just a pinch really.
It enhances that hearty flavor without making it spicy.
Herb Selections: For Stottie Cakes, stay true to tradition. However, you can get playful with herbs! Stirring in a bit of rosemary or thyme can add depth think Scottish bread with a twist.
Flavor Enhancers: Why not throw in a smidgen of sugar? Just 7 g (that’s 2 tsp) gives a touch of sweetness, balancing the salt like a good friend would!
Aromatic Additions: A splash of olive oil instead of vegetable oil can add that rich, nutty flavor we all crave. It’s a little change that can make such a big difference!
Smart Substitutions
Let’s face it we’re all learning in the kitchen! If you don’t have all of the exact ingredients, don’t sweat it. I’ve had those moments, trust me.
Alternative Options: If you’re missing that good ol’ bread flour, you can swap in all-purpose flour but don’t expect quite the same heft.
Dietary Swaps: Watching your carbs? Try half whole wheat flour for added nutrition without sacrificing too much in taste it’ll give your bread a wholesome touch!
Emergency Replacements: No sugar lying around? Honey does the trick! Just reduce the water a touch since it’s liquid.
Seasonal Variations: Add in seasonal goodies like pumpkin puree for autumn vibes! Get creative with what you have because that’s where the fun lies.
Kitchen Equipment Essentials
With your ingredients ready and waiting, let’s make sure you’ve got the right tools. You wouldn’t go to battle without a shield, right?
Must Have Tools: You’ll definitely need your trusty bread machine it's a game changer! Oh, and a good kitchen scale to measure your flour accurately.
Recommended Appliances: If you don't have a bread machine, fret not! A stand mixer with a dough hook can also do wonders.
Helpful Gadgets: A good thermometer to check water temperatures can save your dough from becoming a sad, flat disaster!
Home Alternatives: No bread pan? No problem! A deep baking dish or even a casserole dish can work if you improvise a little after all, who said we can’t be resourceful?
Pro Ingredient Tips
Ah, the secrets of the trade! Here are my favorite little nuggets of wisdom from my years of baking.
Selection Secrets: Freshness is king! Always check expiration dates on your yeast and ensure your flour smells sweet, with no rancidity.
Quality Markers: Look for high protein flour for optimal gluten development it makes fluffy, soft bread that feels like a hug!
Storage Solutions: Store your flour in the freezer for long term storage; it keeps pests out and your flour fresh. And remember to bring it back to room temp before using!
Money Saving Tips: Buy in bulk when you can! Flour and yeast have longer shelf lives and they're cheaper in larger quantities.
With all this talk of ingredients, you’re well prepped for the fun part the cooking! i can’t wait to share the step-by-step on making that stottie cake in your bread machine.
Trust me, it’s gonna be delicious! get ready for some savoury goodness in your kitchen.
Stottie Cake in a Bread Machine: Master Chef's Method
Oh my gosh, let me tell you about my latest kitchen adventure! i recently decided to whip up a traditional stottie cake using my bread machine, and let me tell you, it turned out absolutely divine.
This fluffy, soft bread hails from the chilly north east of england, and it's perfect for everything from sandwiches to serving with soup.
So grab your bread machine, and let's get baking!
Essential Preparation Steps
Before you dive in, let's chat about mise en place. it sounds fancy, but all it means is getting your ingredients lined up.
For this stottie cake, you'll need 500 grams of strong white bread flour, which really gives it that lovely texture.
You also want warm water (about 110°f or 43°c definitely use a thermometer for this), salt, sugar, instant yeast, and vegetable oil or melted butter.
Next up: prep techniques! just make sure to measure your flour accurately. i can’t stress this enough if you guess, your bread could turn out too dry or too sticky.
And timing is everything; set aside about 10 minutes for prep and an hour and a half for the bread machine to do its magic.
As far as organization goes, have your measuring cups, spoons, and kitchen scale handy. Trust me, having everything like your bread flour and Stottie cake ingredients at arms’ reach makes life so much easier!
Professional Cooking Method
Now, onto the fun part the step-by-step process. Here we go:
Prepare the Bread Machine: Make sure it’s clean and the kneading blade is in place.
Add ingredients: start with warm water at the bottom, add the oil or melted butter, then sprinkle the sugar and salt (keeping the salt away from the yeast).
Follow that with your flour, and don’t forget to create a little well in the center for your yeast.
Select the Program: Pop the bread pan back into the machine, choose the “Basic” or “White Bread” program, and opt for the “Medium” crust if you've got that option.
Start the Machine: Hit the Start button and let it do its thing. Seriously, sit back and relax your bread machine is about to make some magic happen.
Check the Dough (Optional): If your machine lets you, peek in after the first knead. The dough should feel smooth and elastic. Adjust with flour or water as needed.
Cooling: Once it's baked, remove the pan but be careful it's hot! Let the bread cool for about 5-10 minutes in the pan, then transfer it to a wire rack to cool completely.
Expert Techniques
Here are some pro tips I learned during this baking escapade:
Precision Points: When dealing with yeast, freshness is key! Use your instant yeast within its shelf life to ensure that perfect rise and fluffy texture we're after.
Critical Steps: Don’t skimp on the cooling time. Give your bread the time it needs to set properly; slicing too early can spoil that fluffy soft goodness.
Quality Checks: If the crust isn’t quite right, check your machine settings next time. Sometimes the crust can be too thick or too soft, depending on how the machine bakes.
Success Strategies
Now, what if things don’t go as planned? No worries, friend! Here are troubleshooting tips:
If your Stottie cake isn’t rising, check that your yeast is fresh. That stuff is crucial!
If the bread comes out too dense, you may have added too much flour. Next time, weigh it accurately for best results.
To ensure perfect results, always give the bread a gentle poke after cooling it should spring back without leaving a dent.
Now that you've mastered this delightful stottie cake recipe bread machine , you can experiment! try adding herbs or seeds for a bit of flair, or maybe swap in whole wheat flour for a healthier take.
Pair it with a hearty soup or pile it high with your favorite fillings for sandwiches this bread is downright versatile!
Ready for more? In the next section, we’ll discuss some tasty variations you can experiment with and how to incorporate it into your meals! Get ready to inspire your taste buds even further!
Master Chef's Advice
So, you wanna make some magical stottie cake using a bread machine? trust me; it’s a total game changer! i’ve always wrestled with bread baking kneading dough can be a workout, and sometimes it just doesn’t rise the way you hope.
But with that trusty bread machine, the struggle transforms into a relaxed vibe of sipping tea while the machine works its magic.
Isn’t that bliss?
Professional insights tell us using strong white bread flour is key to getting that lovely chewiness. you need the gluten, my friend! and if you’re up for it, learning a few expert techniques can make all the difference.
For instance, adding the yeast last (and avoiding direct contact with salt) is essential for a proper rise. that’s kitchen wisdom from baking veterans that i’ve learned through trial and error!
And here’s a pro tip: measuring ingredients accurately is crucial. i used to eyeball everything until i learned that precision equals success.
Go get yourself a kitchen scale, and prepare to be amazed! your stottie cake recipe will be foolproof now that’s a success guarantee if i’ve ever heard one!
Perfect Presentation
Let’s chat about the unappreciated beauty of bread plating is just as important as taste! sure, a loaf of stottie cake looks fantastic fresh out of the bread machine, but how you present it can elevate it even more.
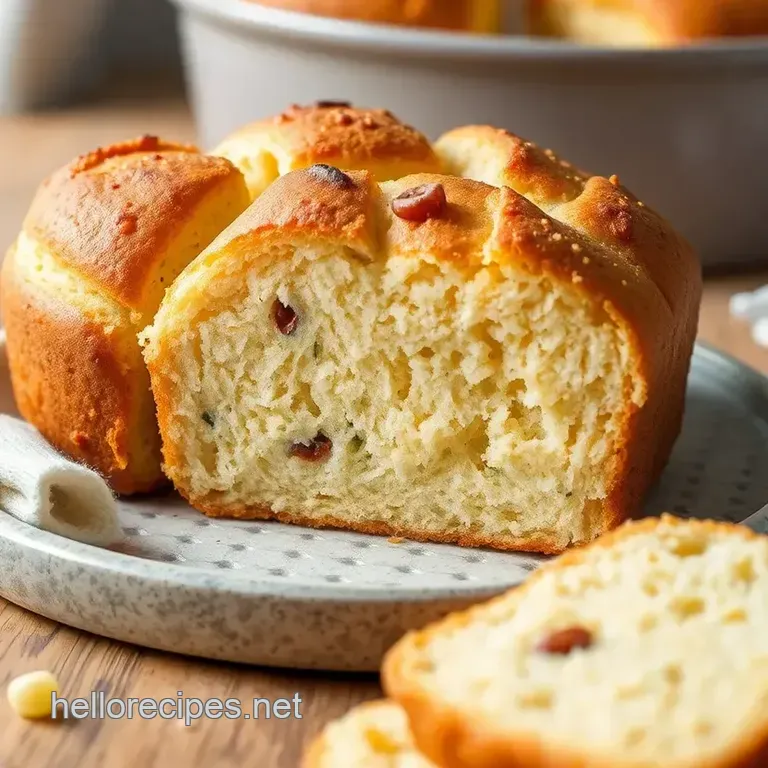
Plating techniques are surprisingly simple. slice the loaf to reveal that fluffy, white inner goodness there's something so inviting about that first slice! for garnish, fresh herbs make a delightful touch think rosemary or thyme.
They not only look elegant but also complement the homemade bread perfectly.
And let’s not forget serving suggestions! pair your stottie cake with a cozy soup on a chilly evening, or serve it alongside a colorful salad for brunch.
Make it visually appealing by stacking slices on a rustic wooden board. trust me; people will dig into your bread like it’s a treasure!
Storage and make-ahead
Sometimes I wish I had a stash of fresh homemade bread hidden away for those late night snack cravings. Luckily, storing your Stottie Cake right is a breeze.
Storage guidelines typically recommend keeping it in an airtight container this helps with freshness. but, if it’s for longer than a couple of days, consider slicing and freezing pieces.
I do this all the time with my bread machine recipes! they defrost beautifully, and it’s the perfect way to avoid waste.
When it comes to preservation methods , always let your bread cool completely before wrapping it up. trust me; if you forget this step (like i often did), you’ll end up with a soggy loaf.
And for reheating, just pop it into the toaster for a few minutes, and voilà a soft bread recipe reborn!
Creative Variations
Okay, so you’ve nailed the classic stottie cake, but what’s stopping you from getting creative? life's too short for just one flavor! you can turn this traditional scottish bread into whatever floats your boat.
Think about flavor adaptations ! swap out some of that strong white bread flour for whole wheat flour to make it a bit healthier.
Don’t be shy to mix in herbs or even sun-dried tomatoes! those flavored bread recipes are what take your homemade creations over the top.
If you’re feeling adventurous with dietary modifications , go gluten-free with a proper mix. As for seasonal twists , try adding cinnamon and raisins in the fall “the taste of autumn,” I tell ya!
Complete Nutrition Guide
Now, i'm no dietitian, but i do know a taste of sustainability in our snacking! your stottie cake can pack a nutritional punch.
Here’s a detailed breakdown per serving 120 calories, a low 2 grams of fat, and a decent hit of carbs make it satisfying without the guilt.
Don’t forget about those health benefits . with a solid amount of protein and fiber, this bread fits right into balanced meals.
Portion guidance? keep it reasonable; two slices topped with a spread of butter or avocado can be perfect for brunch!
Expert FAQ Solutions
I get it bread baking can seem daunting, and questions pop up like daisies in spring. That’s why I've compiled some common concerns!
Why didn’t my bread rise? Ah, the heartache! Ensure your instant yeast is fresh and that you’ve followed the recipe steps accurately.
What if I have excess dough? You can always make mini rolls with leftover dough. They are excellent for sandwich bread ideas or just for snacking.
And if you need troubleshooting tips, always trust your instincts. if the dough doesn’t feel right at any point, ask yourself what your eyes and hands are telling you.
Bread making tips from my kitchen have come from simply paying attention.
What really seals the deal? I can assure you every loaf teaches you something new.
Conclusion
Making stottie cake in a bread machine is a journey worth taking. with the magic of baking technology on your side, fresh homemade bread can become a staple in your kitchen.
From master chef advice to the creative variations, every step gives you ample opportunity to express yourself in the kitchen.
So grab those ingredients, choose a cozy weekend, and let your bread machine do the heavy lifting. happy baking!
Stottie Cake Recipe Bread Machine Easy Delicious