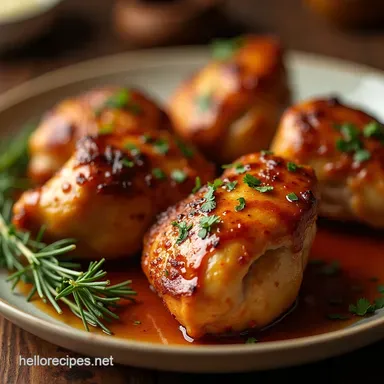
Sticky Sensation the Ultimate Honey Garlic Chicken Thighs

- The Secret to Glazed Perfection: Why This Chicken Thigh Recipe Dominates
- Elevating Dinner: Introducing Our Signature Honey Garlic Chicken Thighs
- Assembling Your Sticky Glaze Components
- Essential Pantry Stock for Maximum Flavor Impact
- Mastering the Sear: Building the Flavor Base
- Troubleshooting and Pro-Tips for Next-Level Results
- Beyond the Basics: Creative Twists and Pairings
- Recipe FAQs
- 📝 Recipe Card
The Secret to Glazed Perfection: Why This Chicken Thigh Recipe Dominates
When it comes to weeknight dinners that truly deliver on flavor without demanding hours in the kitchen, few things rival the sheer satisfaction of perfectly executed poultry bathed in a sticky, sweet, and deeply savory coating.
We’re talking about the quintessential Honey Garlic Chicken Thighs , a dish that sounds elementary but achieves complexity through precise technique. The dominance of this particular preparation lies in leveraging high heat for texture contrast crisp skin against moist flesh all married together by a bubbling, caramelized glaze.
This isn't just another chicken recipe; it's the blueprint for achieving that craveable East meets-West comfort food experience that elevates simple ingredients into something truly special.
Elevating Dinner: Introducing Our Signature Honey Garlic Chicken Thighs
Forget those tired takeaway tubs! This recipe delivers unbelievably juicy chicken thighs coated in a rich, bubbling sauce that balances the floral sweetness of honey with the deep umami punch of garlic and soy sauce. It’s quick enough for a Tuesday night supper but spectacular enough for a weekend gathering.
It’s East meets-West comfort food, perfectly portioned and utterly irresistible. This is an Easy Honey Garlic Chicken that promises a guaranteed win, requiring only about 10 minutes of active prep time before it heads to the stovetop to transform.
Ditching Dryness: The Advantage of Using Bone-In, Skin-On Cuts
While many look for speed by choosing Honey Garlic Chicken Thighs Boneless Skinless , we champion the use of bone-in, skin-on thighs for superior texture and flavor. The bone acts as an insulator, slowing down the cooking process near the center, which prevents overcooking the meat.
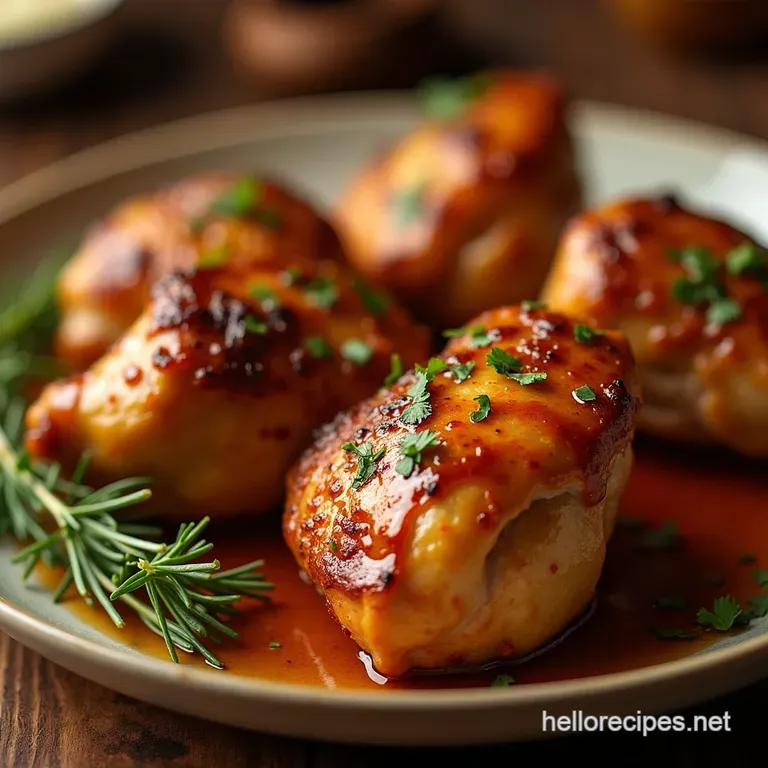
Meanwhile, the skin renders its fat during the searing process, creating pockets of deep flavor and a delightful textural counterpoint to the smooth glaze. This deliberate choice ensures the resulting Sticky Honey Garlic Chicken remains succulent, providing far better results than leaner cuts.
The Perfect Ratio: Balancing Sweetness and Savoury Depth
The magic of any great glaze is balance. Our signature Honey Garlic Chicken Thighs Recipe hinges on hitting that sweet spot between cloying sweetness and salty depth.
We achieve this using a foundation of pure honey, complemented by low-sodium soy sauce for its necessary umami, and a splash of apple cider vinegar. The acid from the vinegar is crucial it cuts through the richness of the chicken fat and prevents the honey from tasting overwhelmingly sugary, resulting in a sauce that is both rich and bright.
From Weeknight Quick Fix to Culinary Centerpiece
With a total time commitment hovering around 40 minutes, this dish earns its stripes as a reliable weeknight staple. However, the deep golden brown sear and the glossy, bubbling finish make it presentable enough for company.
Whether you are searching for Honey Garlic Chicken Thighs Oven directions or exploring alternatives like the Honey Garlic Chicken Thighs Air Fryer method, this foundational pan-sear technique delivers maximum flavor in minimal time, positioning it as a true culinary centerpiece.
Assembling Your Sticky Glaze Components
A phenomenal sauce requires thoughtful assembly, even if the ingredients are simple. Before the searing begins, it’s vital to have your components measured and ready. This preparation mindset ensures that when the chicken is done cooking, the sauce can come together rapidly without you scrambling for ingredients.
Related Recipes Worth Trying
- Quick Zesty LemonGarlic Zucchini Noodles Recipe — Stop making soggy zoodles This foolproof guide to healthy zucchini noodles is tossed in bright lemon and garlic ready in 25 minutes
- Classic Honey Butter Dinner Rolls Recipe Fluffy Homemade Bread — Whip up truly fluffy dinner rolls that vanish faster than the last scone at the fête This easy homemade rolls recipe delivers a golden crust Find out how now
- Hearty Chicken Leek Pot Pie Best Meals to Take to a Friend — A proper comfort casserole This Chicken Leek Pot Pie with flaky cheddar biscuits is one of the best makeahead meals to take to a friend in need So easy to...
Essential Pantry Stock for Maximum Flavor Impact
To create this irresistible glaze, we rely on a handful of pantry staples that provide layered flavor. You will need 4 large, bone-in, skin-on chicken thighs (approximately 1.5 lbs total), seasoned simply with ½ teaspoon of kosher salt and ¼ teaspoon of freshly ground black pepper, along with 1 tablespoon of olive oil for that initial sear.
Crafting the Sauce: Honey, Garlic, and Umami Boosters
The heart of this glaze involves combining ½ cup of honey with ¼ cup of low-sodium soy sauce. To boost the aromatic profile, we incorporate 4 cloves of finely minced garlic (yielding about 2 tablespoons) and 2 tablespoons of apple cider vinegar for necessary acidity.
For an extra layer of warmth often skipped in basic recipes, we highly recommend incorporating 1 teaspoon of freshly grated ginger. Finally, to ensure the sauce achieves that sticky thickness essential for coating every crevice we prepare a simple slurry made from 1 teaspoon of cornstarch whisked thoroughly into 2 teaspoons of cold water.
Tools of the Trade: Necessary Kitchen Equipment
The ideal vessel for this recipe is a large, heavy bottomed skillet, ideally cast iron, as it retains heat superbly, facilitating an even, deep sear on the chicken skin. You will also need kitchen tongs for flipping, a small bowl and whisk for combining the glaze components, and, for absolute peace of mind, a reliable meat thermometer to confirm internal doneness.
Mastering the Sear: Building the Flavor Base
The most critical step in developing a truly decadent Honey Garlic Chicken Thighs Baked or pan-finished dish is the initial searing phase. This process not only crisps the skin but also creates the fond —those flavorful browned bits stuck to the bottom of the pan which will become the backbone of your sauce later.
Prepping the Chicken for Optimal Browning
Before any heat is introduced, patting the chicken thighs absolutely dry with paper towels is non-negotiable. Any residual moisture will steam the skin rather than render the fat and promote crisping. Once dry, season generously with salt and pepper.
Heat the olive oil in your skillet over medium high heat until it begins to shimmer, indicating it’s ready to create a swift, hot contact with the skin.
Step-by-step Guide to Developing the Deepest Glaze
Place the thighs skin side down into the hot oil and allow them to cook undisturbed for a full 8 to 10 minutes. Resist the urge to peek or move them! This dedicated time allows the fat to render and the skin to achieve a deep, mahogany brown color.
Next, flip the thighs and reduce the heat to medium low, continuing to cook for an additional 10 to 12 minutes. During this stage, the internal temperature should steadily climb toward 160° F ( 71° C).
Once the chicken is nearly cooked, remove the thighs to a warm plate. Carefully pour off all but about 1 tablespoon of the rendered chicken fat from the skillet. Return the pan to medium heat and immediately pour in your pre-whisked honey soy mixture.
Use your tongs or a wooden spoon to scrape up all those browned bits from the bottom this is flavor gold! Allow the sauce to gently simmer, then slowly whisk in the cornstarch slurry. Cook for one to two minutes until the sauce thickens noticeably and displays a beautiful, glossy sheen.
Achieving Perfect Internal Temperature and Rest Time
Continue cooking the chicken until the internal temperature registers 160° F ( 71° C). Remember, the thighs will continue cooking slightly off the heat. Return the seared thighs to the thickened glaze, turning them to coat evenly.
If using an oven safe pan, a quick 1-2 minute stint under a hot broiler will caramelize the glaze beautifully, creating that ultimate sticky finish, but watch closely, as honey burns fast! After removing them, allow the Honey Garlic Chicken Thighs to rest for 5 minutes.
This crucial step allows the juices to redistribute, ensuring maximum tenderness.
Serving Suggestions to Complement Your Honey Garlic Chicken Thighs
To truly complete the meal, the sauce must be utilized. Serve the chicken immediately, spooning the extra, thickened glaze generously over the top. This dish pairs wonderfully with fluffy Basmati rice or even sticky coconut rice, which perfectly absorbs the remnants of the sauce.
For a vibrant textural contrast, accompany it with quickly charred green beans or a crisp Asian slaw to cut through the richness.
Troubleshooting and Pro-Tips for Next Level Results
While this recipe leans toward beginner friendly execution, a few minor tweaks can prevent common pitfalls. If your glaze seems too thin after adding the cornstarch slurry, simply simmer it for an extra minute or two; alternatively, if it thickens too quickly or looks murky, whisk in a teaspoon of warm water to loosen it up.
Always remember that using a gentle simmer when caramelizing the honey prevents scorching, especially if you are exploring alternative cooking methods like the Honey Garlic Chicken Thighs Crockpot or Honey Garlic Chicken Thighs Instant Pot variations where simmering times differ.
Beyond the Basics: Creative Twists and Pairings
While our primary method focuses on the stovetop, it’s valuable to know this flavor profile translates well across appliances. Whether you are looking for Honey Garlic Chicken Thighs Oven instructions (baking at 400° F until done, then glazing near the end) or exploring the speed of the Honey Garlic Chicken Thighs Air Fryer approach, the glaze remains the star.
Storage Secrets: Keeping Leftovers Flavorful for Days
Store any remaining Honey Garlic Chicken Thighs in an airtight container in the refrigerator for up to three days. Reheat gently in a skillet over low heat, adding a tiny splash of water or chicken broth to help loosen the glaze and prevent the sugars from burning during reheating.
FAQs from Fellow Home Cooks (Addressing Common Concerns)
Q: Can I use chicken breast instead? A: You certainly can, but chicken breast dries out much faster. If using boneless, skinless breasts, reduce the initial cooking time significantly, and consider finishing them off entirely in the sauce to maximize moisture retention.
Q: My honey crystallized; what happened? A: Crystallization occurs when honey is exposed to fluctuating temperatures or high heat over time. Ensure you are using pure honey and that your storage area is consistent.
Gluten-free Adaptations and Low-Sugar Swaps
For those managing dietary restrictions, achieving an authentic flavor profile is straightforward. To create gluten-free Honey Garlic Chicken Thighs , simply substitute regular soy sauce with Tamari or a certified gluten-free soy sauce alternative.
If reducing sugar is a priority, you can swap half the honey for a zero calorie sweetener that measures 1:1 for sugar, like erythritol or monk fruit blend, though this may slightly alter the textural viscosity of the final glaze.
What Side Dishes Readers Frequently Pair With This Dish
Beyond the rice and green vegetable suggestions, many cooks rave about pairing these sticky, savory thighs with vibrant, cool sides. A simple cucumber salad dressed with sesame oil and rice vinegar provides a cooling contrast.
On top of that,, serving it alongside roasted sweet potatoes or creamy mashed potatoes creates a comforting, hearty meal that perfectly complements the intense flavor profile of the sticky glaze.
Recipe FAQs
Can I use boneless, skinless chicken thighs instead of bone-in for these Honey Garlic Chicken Thighs?
You certainly can, but the cooking time will need adjusting; boneless thighs cook much faster, usually in about 6-8 minutes per side. Just be extra vigilant, as they dry out quickly, so make sure you don't overcook them past 165°F (74°C).
My honey garlic sauce isn't sticking; how do I get that lovely sticky glaze I see in the photos?
The key to the stickiness is the cornstarch slurry added right at the end! Ensure your sauce comes to a gentle simmer before adding the slurry, and let it bubble for a minute or two until it coats the back of a spoon.
If you have an oven safe pan, a quick blast under the broiler (grill) will caramelize it beautifully, just keep a close eye on it!
Can I make the Honey Garlic Chicken Thighs glaze ahead of time, or should I make it fresh?
You can absolutely mix all the glaze ingredients (except the cornstarch slurry) ahead of time and keep them in the fridge for up to three days it’s dead easy! When you're ready to use it, give the honey mixture a quick warm-up before whisking in the cornstarch slurry to thicken it right before glazing the chicken.
My chicken skin didn't get crispy; what did I do wrong?
Ah, a common hiccup, but easily fixed! The absolute secret is patting the chicken skin bone dry with paper towels before seasoning; any moisture turns into steam and prevents crisping.
Also, make sure your pan and oil are properly hot before the chicken goes in, and resist the urge to move the thighs until they naturally release from the pan, usually after 8 10 minutes.
How long will leftovers of this sticky chicken last in the fridge?
These Honey Garlic Chicken Thighs are cracking hot the next day, too! Store any leftovers in an airtight container in the fridge for up to 3 or 4 days. To reheat, the microwave works fine, but for better texture, I recommend reheating them in a hot oven or air fryer for a few minutes to crisp up that lovely glaze again.
Sticky Honey Garlic Thighs