Gluten Free Cinnamon Rolls the Softest Yeastrisen Rolls Ever
- Mastering the Gluten-Free Yeast Dough Challenge
- Achieving the Perfect Sticky Swirl: Inside These Gluten Free Cinnamon Rolls
- Essential Tools and Pantry Provisions for Your Bake
- Deconstructing the Dough: Specialized Binders and Flour Choices
- Building the Perfect Dough Structure: Mixing and Proofing Steps
- Rolling, Slicing, and Achieving the Golden Bake
- Troubleshooting Common Missteps in Gluten Free Cinnamon Rolls Baking
- Preserving Freshness: Storage and Reheating Recommendations
- Recipe FAQs
- 📝 Recipe Card
Mastering the gluten-free Yeast Dough Challenge
If you’re reading this, chances are you’ve tried to make gluten-free cinnamon rolls before and ended up with a brick. Or maybe something that looks perfectly swirly but tastes like spiced sawdust. Been there, bought the T-shirt.
For years, I avoided yeast baking after going GF because the dough felt like a betrayal. It was sticky, sloshy, and utterly incapable of stretching.
But I finally cracked the code, mate. These aren’t just "good for gluten-free." These are soft, unbelievably pillowy, perfect cinnamon rolls that happen to be gluten-free. The trick isn't fighting the dough, but realizing it's a completely different beast.
You don't get stretchy elasticity; you rely on strategic binders and a metric ton of enrichment to create structure and prevent dryness. It's a science project, but one that tastes incredible.
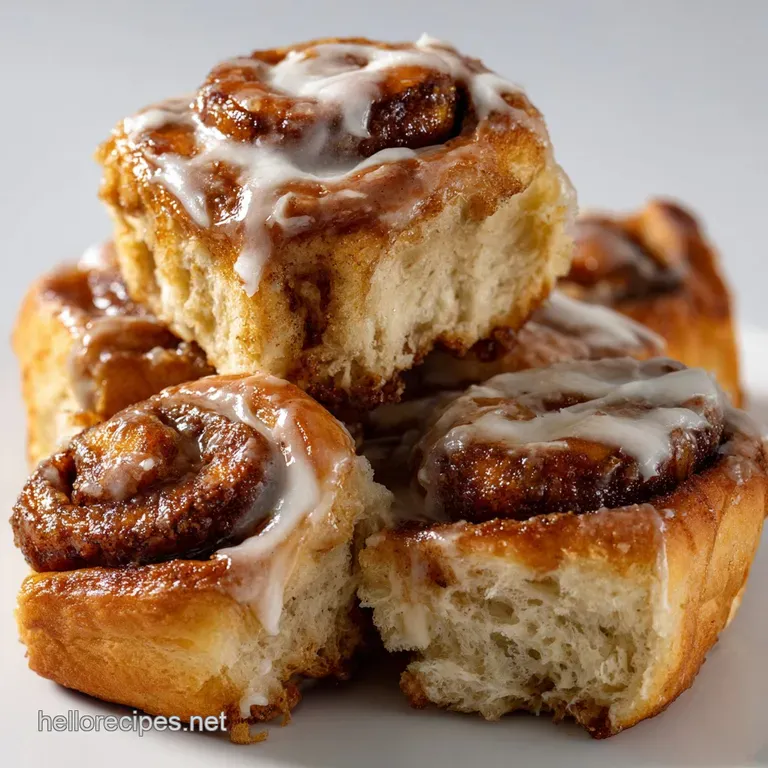
Achieving the Perfect Sticky Swirl: Inside These gluten-free Cinnamon Rolls
The main goal here is texture. We need that soft, almost squishy center and a proper sticky filling that doesn't leak out everywhere. That comes down to two major elements: the dough structure and the filling consistency.
We use softened butter for the filling (not melted!) which acts like glue, holding the sugar in place while it bakes and caramelizes.
The Role of Xanthan Gum and Psyllium Husk
Think of these ingredients as the temporary scaffolding crew for your rolls. Wheat flour has gluten, which builds a strong, elastic net to trap the gases released by the yeast. Since we don't have that net, we need powerful, sticky binders. Xanthan gum and psyllium husk powder are sponges.
They absorb moisture and become slightly viscous, mimicking that structural property of gluten. I always add a dedicated teaspoon of xanthan gum, even if my flour blend claims to have it. Trust me, more binder means a sturdier, less crumbly final roll.
Why Over Kneading is the Enemy Here
This is crucial. You know how traditional recipes tell you to knead, knead, knead until you get that smooth, springy ball? Forget all of that. Kneading develops gluten structure. Since we have no gluten, kneading just works the starches, potentially making the dough tough or simply over mixing the binders until they break down.
We mix our dough just long enough to incorporate everything about five to seven minutes in a stand mixer. The result should look like a very thick, sticky cake batter, not a tight bread dough. Stop the mixer when the ingredients are uniform. That’s it.
The Secret to a Proper GF 'Rise'
gluten-free dough is lazy. It needs a warm, humid environment to puff up correctly. I learned the hard way that just leaving it on the counter doesn't always cut it, especially in the winter. My secret? I use the "Proof" setting on my oven, if available.
If not, I warm my oven to the lowest possible setting (around 170°F or 75°C), turn it OFF, and place the covered dough bowl inside with the door slightly ajar. The warmth encourages the yeast to work overtime. Don't expect it to double exactly; GF dough often just gets noticeably puffy, maybe 50% bigger.
That’s success.
The Tangy Balance of the Cream Cheese Glaze
If you’re going to indulge in a sweet, sticky breakfast, you need something tangy to cut through the richness. That’s where the glaze comes in. Honestly, skip the straight powdered sugar icing. The cream cheese adds an essential richness and a gentle tang.
Make sure both your cream cheese and butter are super soft. Like, almost melted soft. This prevents clumps and ensures a super smooth, pourable icing that melts perfectly into the cracks of the warm rolls.
Enrichment: Milk, Butter, and the Perfect Fat Ratio
gluten-free flours are notoriously thirsty. They absorb moisture but they let it go quickly, which leads to those dry rolls we dread. The solution is enrichment. We load this dough up with two eggs, melted butter, and whole milk.
All that fat and liquid coats the starches, keeping the final product soft and moist long after it cools. This isn't health food, folks. This is a treat. Don't skimp on the butter.
Essential Tools and Pantry Provisions for Your Bake
A good bake relies on good gear. I consider a few tools non-negotiable for this recipe if you want easy success.
| Tool | Why You Need It |
|---|---|
| Stand Mixer (with dough hook) | GF dough is too sticky and thick to hand mix effectively. A mixer handles the seven minute workout needed. |
| Digital Thermometer | Absolutely vital for checking milk temperature (yeast activation) and internal roll temperature (doneness). |
| Parchment Paper | Your rolling surface savior! Prevents the sticky dough from welding itself to your counter. |
Beyond that, make sure your basic pantry provisions (cinnamon, sugars, fresh yeast) aren't expired. If that yeast packet has been hiding since last Christmas, toss it.
Deconstructing the Dough: Specialized Binders and Flour Choices

Sourcing the Right All-Purpose gluten-free Blend
Not all GF blends are created equal. You need a blend that is primarily rice flours and starches (tapioca, potato). Avoid blends that rely heavily on bean flours, as those can give an unpleasant, earthy flavor to sweet baking. Also, check the label.
If the blend doesn't contain xanthan gum, you must add it separately. If it says it does, still consider adding half the recommended amount just for extra security. I prefer blends that are designed 1:1 for baking, as they tend to have the right starch-to-flour ratio.
Is a Stand Mixer Truly Necessary?
I'm going to be straight with you: yes, mostly. Can you mix it by hand? Sure. But your arm will ache, and it’s much harder to achieve that thorough, vigorous mixing necessary to hydrate the binders properly.
Remember, we mix GF dough for time (5– 7 minutes) to hydrate the gums, not for stretch. That long mixing time is tough to replicate manually, and an under mixed dough will yield a weak, crumbly roll.
Prepping Your Ingredients (Mise en Place)
Mise en place (everything in its place) is always important, but with GF baking, ingredient temperature is paramount. Make sure your eggs are room temperature and your melted butter is cooled slightly before they meet the yeast. Cold eggs shock the yeast; hot butter kills it.
A few minutes of planning saves you an hour of disappointment.
Active Dry vs. Instant Yeast: Which is Superior?
I prefer Active Dry yeast for enriched doughs like these. Why? Because Active Dry must be proofed first (mixed with warm liquid and sugar). This gives you visual confirmation that your yeast is alive and kicking before you commit all your other expensive GF ingredients.
Instant yeast can be mixed straight into the dry ingredients, but if it's dead, your whole project is a dud. I like to see the foam. It’s comforting.
The Ideal Temperature for Melting Butter
We melt the butter for the dough, but you have to let it cool down slightly. The internal temp of the melted butter should be below 100°F (38°C). If it’s too hot, it will thermal shock the happy yeast you just activated in the warm milk, effectively killing its ability to help the rolls rise.
Just melt it first and set it aside while you activate the yeast.
Related Recipes Worth Trying
- The Great Nut Escape OOPS All Nuts Granola GrainFree Clusters — The proper crunch you crave This foolproof OOPS All Nuts Granola is a stunning GrainFree Granola Recipe delivering huge clusters and deep flavour in just 15...
- Foolproof Baked gluten-free Vanilla Cake Donuts for a Proper Cuppa — Get fluffy tender gluten-free Vanilla Cake Donuts without the fryer This easy gluten-free Donut Recipe is baked to perfection and drenched in a simple sweet...
- Paleo Pizza Sturdy Almond Flour Crust DairyFree Dinner — Master the ultimate Paleo Pizza This is the foolproof Paleo pizza crust recipe you needsturdy chewy and ready for all your favourite Paleo pizza toppings No...
Building the Perfect Dough Structure: Mixing and Proofing Steps
When you combine all the wet ingredients and then slowly add the dry blend, the dough should look like a very thick oatmeal or a heavy cake batter. It will not pull away from the sides of the bowl like wheat dough. It will remain soft, sticky, and slack. That's okay!
Do not add more flour just because it feels "wrong." If you add more flour, you will end up with a dry roll, and we have already established that dry rolls are the enemy. Scrape it down after mixing, cover it tight, and give it the warmth it deserves for that first proof.
CRITICAL WARNING: Your gluten-free dough will look stickier than you think it should. Do not be tempted to add more than the three cups of flour blend listed. Trust the stickiness!
Rolling, Slicing, and Achieving the Golden Bake
Activating the Yeast: The Temperature Sweet Spot
The ideal temperature for the milk is between 105 115°F (40 46°C). If you don't have a thermometer, aim for tepid warmer than lukewarm, but still easily touchable. Too cold and the yeast sleeps; too hot and the yeast dies.
The five to ten minutes you let it sit should result in a creamy, frothy layer on top, like a foamy latte. If you don't see foam, stop right there and restart with new yeast.
Folding and Shaping: Handling Sticky gluten-free Dough
This is where the parchment paper really shines. Dust your parchment paper lightly with GF flour, then dump your slack dough right onto it. Dust the top of the dough, too. Roll it out into that 12x18 inch rectangle. When you roll the dough up into a log, the parchment paper is your helper.
Lift the edge of the paper and use it to roll the sticky dough tightly onto itself. This prevents the dough from ripping and sticking to your hands. It makes shaping manageable.
Techniques for Slicing Flawless Rolls (Without Squishing)
If you use a knife, even a sharp one, the soft, slack GF dough will squish, ruining the nice spiral. The solution is simple: unflavored, unwaxed dental floss (or thin thread). Slide a long piece of floss under the rolled log where you want to cut, cross the ends over the top, and pull.
The floss slices cleanly through the sticky dough and filling without any pressure. It’s brilliant.
Determining Oven Readiness (The Internal Temperature Check)
Take the guesswork out of baking. Overbaking by even five minutes can turn these soft beauties into cardboard. When they look gorgeously golden brown on top, insert your instant read thermometer into the center of the middle roll. When the core registers between 200 205°F (93 96°C), pull them out!
They will be perfectly done, moist, and gooey.
Whipping Up the Signature Cream Cheese Icing
The key to a light, airy glaze is to whip the softened cream cheese and butter first before adding any sugar. Get them nice and fluffy. Then, add the sifted powdered sugar slowly. If you don't sift, you risk having little hard sugar clumps in your glaze.
If the mixture is too thick, add milk or cream, a small splash at a time, until you hit that perfect drizzling consistency.
The Final Glaze Application: Timing is Everything
Do not glaze piping hot rolls. The glaze will instantly melt into a sugary puddle that runs off the sides. You want the rolls warm, but cool enough that you can touch the pan without burning yourself (about five to ten minutes out of the oven).
This warmth allows the icing to soften and seep into the cracks, maximizing stickiness, but it won't completely liquify.
Troubleshooting Common Missteps in gluten-free Cinnamon Rolls Baking
The main errors fall into two categories: yeast failure or dry texture. Did your rolls fail to rise? Your yeast was either dead, or the liquid was too hot/cold. Did your rolls come out dense and dry? You added too much flour, or you overbaked them (check that internal temp!).
GF baking is less forgiving than wheat, so be precise with measurements and temperatures.
Preserving Freshness: Storage and Reheating Recommendations
Why Your Rolls Are Too Dry (And How to Fix It)
As mentioned, dryness usually stems from adding too much flour to combat the initial stickiness, or baking past that 205°F sweet spot. If you find your leftovers are drying out the next day, a quick fix is to put them in the microwave for 10-15 seconds.
Or, cover them loosely in foil and reheat in a 300°F (150°C) oven for about five minutes. The steam helps restore moisture.
Making These Rolls Ahead: Overnight Proofing Secrets
This is my favorite trick for a lazy Sunday morning. After shaping and slicing the rolls and placing them in the baking dish, do not let them proof at room temperature.
Cover the dish tightly with plastic wrap and place them straight into the refrigerator (cold proofing) for 8 to 12 hours. The next morning, pull them out and let them sit at room temperature for 90 minutes while you preheat the oven.
They will rise slowly and be ready to bake.
dairy-free and Vegan Adaptation Swaps
It is surprisingly easy to make this recipe dairy-free without sacrificing much flavour.
- Substitute the whole milk with full fat oat milk or soy milk.
- Swap unsalted butter (in the dough, filling, and glaze) with a high-quality, plant based butter (like Miyoko’s or Earth Balance sticks).
- For the cream cheese, use a vegan cream cheese alternative.
Optimizing for Peak Flavor (When to Glaze)
If you plan to eat these all in one go (which, let’s be real, is likely), glaze them warm. If you plan on saving them for later, it’s actually better to save the glaze. Store the unglazed rolls covered at room temperature, and only glaze the individual portions right before serving.
This prevents the glaze from getting tacky or grainy upon reheating.
Freezing Baked Rolls for Future Cravings
Baked cinnamon rolls freeze beautifully. Bake them completely, let them cool entirely, but do not glaze them . Wrap the entire pan tightly in several layers of plastic wrap and then foil. Freeze for up to three months. To serve, unwrap the pan and let the rolls thaw at room temperature.
Reheat, covered, at 300°F (150°C) for 15- 20 minutes, then glaze liberally.
Understanding the Nutritional Snapshot
Look, these are cinnamon rolls. They are designed to be an indulgence, a special breakfast. They are packed with enriched ingredients and the perfect amount of sugar to create that beautiful gooey texture. We’ve swapped the gluten, but we haven't swapped the joy. Enjoy them fully.
They are worth every single calorie, especially when shared with people you love.

Recipe FAQs
My dough looks less like a traditional bread dough and more like sticky cake batter have I cocked it up?
No worries, that’s bang on! gluten-free yeast dough, lacking the stretchy protein, is naturally much stickier and slacker than traditional dough; rely on binders like xanthan gum and use a heavily floured piece of parchment paper to help you roll it out without sticking.
Can I prep these gluten-free Cinnamon Rolls the night before for a lovely Sunday morning bake?
Absolutely, you can use the "cold proof" method; prepare the rolls up to the second proofing stage, cover them tightly, and refrigerate overnight, allowing them to sit at room temperature for 45-60 minutes the next morning before baking as usual.
Is it truly essential to use Xanthan Gum when baking gluten-free yeast goods?
Yes, for successful GF yeast baking, a binder is crucial as it mimics gluten’s elasticity and structure, preventing the rolls from crumbling into oblivion; if your chosen flour blend doesn't already contain it, you must add the recommended amount.
How long do these keep their delightful freshness, and what’s the best way to store leftovers?
These are best enjoyed the day they are baked for maximum softness, but you can store cooled, glazed leftovers in an airtight container at room temperature for up to two days; a quick blast in the microwave will bring back some of their gorgeous softness before serving.
I'm after a variation can I adapt this recipe to be completely dairy-free as well?
You certainly can; simply substitute the dairy milk with oat or almond milk, and swap the butter and cream cheese for high-quality, plant based alternatives in equal measure, ensuring they are softened or melted as required by the recipe.
Soft gluten-free Cinnamon Rolls

Ingredients:
Instructions:
Nutrition Facts:
| Calories | 2796 kcal |
|---|---|
| Protein | 23.9 g |
| Fat | 37.6 g |
| Carbs | 64.2 g |
| Fiber | 3.9 g |
| Sodium | 606 mg |
