Pumpkin Pie: the Ultimate Silky Smooth Classic with No Soggy Bottom
- The Ultimate Silky Smooth Classic Pumpkin Pie: Overview
- The Science of Silkiness: Why This Pumpkin Pie Recipe Sets Perfectly
- Essential Components and Detailed Ingredient Notes
- Step and by-Step: Crafting Your World and Class Pumpkin Pie Filling
- Troubleshooting and Chef's Advanced Tips
- Practical Guide: Storage, Freezing, and Handling Leftovers
- Elegant Pairings: Serving Your Pumpkin Pie
- Recipe FAQs
- 📝 Recipe Card
The Ultimate Silky Smooth Classic Pumpkin Pie: Overview
When that incredible aroma hits you cinnamon, ginger, and a warm, earthy sweetness you know it’s officially the holiday season. But let’s be honest, a good pumpkin pie isn't just about the scent; it’s about the texture.
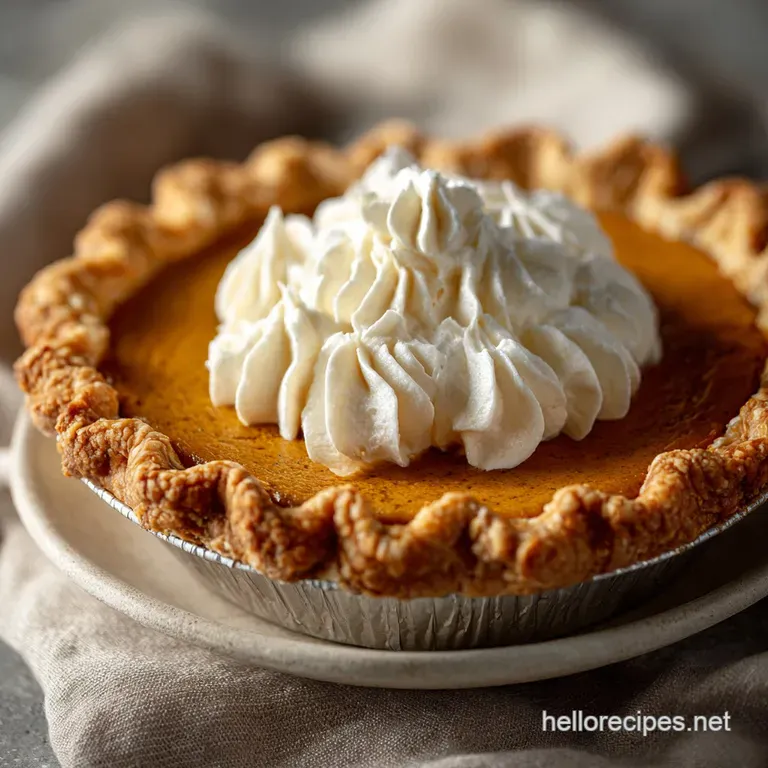
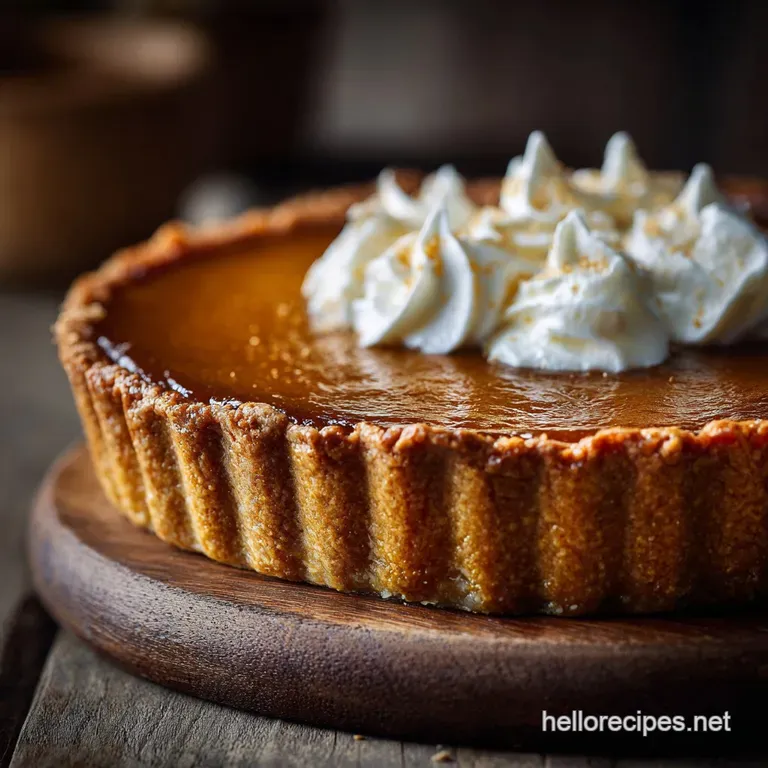
We’re aiming for a filling so silky it feels like liquid velvet, encased in a crust that is truly flaky and never, ever soggy.
This recipe is a lifesaver because it’s mostly just a dump and whisk situation. It requires minimal active time, and because we use canned pumpkin purée (the secret weapon for consistency), you can literally pull this off in the middle of a chaotic week.
It saves money, it saves stress, and it delivers maximum cozy points.
I’ve made all the mistakes, from cracked tops to grainy custard, so trust me when I say these small tweaks are monumental. Forget the wobbly, cracked versions you might remember.
We are going to nail this classic American pumpkin pie recipe and achieve that world and class, silky smooth pumpkin pie recipe status.
The Science of Silkiness: Why This Pumpkin Pie Recipe Sets Perfectly
I hear you: why does your perfectly measured homemade pumpkin pie sometimes come out grainy or cracked? It’s science, baby. Custard baking is all about controlling the proteins (eggs) and the heat. We need to set the eggs without scrambling or seizing them.
This method solves every single one of those problems.
Autumn's Best: Why Texture Matters in Pie
A great pie should offer contrast. You want the snap and flake of the crust against a filling that melts in your mouth. If your filling is too dry, it loses that luxurious mouthfeel; if it’s too wet, the bottom turns to glue. This recipe manages moisture and heat perfectly to create dense, creamy bliss.
Evaporated Milk vs. Heavy Cream: Achieving Custard Perfection
This is the hill I will die on: Evaporated milk is superior for classic holiday pie fillings. Heavy cream adds richness, sure, but evaporated milk has been reduced, concentrating its flavor and, crucially, making it denser.
This density allows the custard to set firmer and creamier without becoming overly fatty or soupy. Trust me, it’s the key to that dense, perfect slice.
The Secret Weapon Against the Soggy Bottom
The enemy of every pumpkin pie is moisture migration. The wet filling releases steam and moisture right into the dry crust during baking, turning the bottom gummy.
My secret weapon is twofold: blind baking the crust until it's actually dry, and then brushing the warm blind and baked crust with a thin layer of egg white before adding the filling. It creates a tiny, invisible moisture shield.
Temperature Control: Baking Low and Slow
You have to think of this pie as a delicate opera singer. You can’t just blast the heat. We start the oven high to set the crust (blind baking) but drop the temperature low (325°F/160°C) for the filling. Low heat ensures the edges don't overbake before the center sets.
The Perfect Spice Blend Ratios (No Under and Spiced Pie)
Don’t just dump pre and mixed spice in. You need specific ratios. Cinnamon is the lead singer, ginger adds warmth, and nutmeg provides depth. The crucial warning is cloves. Cloves are potent. A little bit too much and your pie tastes like medicine cabinet potpourri.
Stick to that quarter teaspoon!
Pre and Baking the Crust: A Barrier Against Moisture Migration
We already talked about the soggy bottom, but let me stress this: The crust needs to be pre and baked (or blind baked) almost completely. It acts as a waterproof barrier. I treat my pumpkin pie crust the same way I treat my [Homemade Apple Pie: The Flaky All and Butter Classic Recipe] crust I fully bake it first, then fill it.
Essential Components and Detailed Ingredient Notes
Canned vs. Homemade Pumpkin Puree: Which is Best for Texture?
I know some purists will come for me, but for a truly silky, perfect pie, canned pumpkin purée is king. Why? Consistency. Homemade purée often has too much variable water content, meaning your final pie may be too loose or too grainy.
Make sure you buy pure pumpkin, not pre and seasoned pumpkin pie filling.
| Ingredient | Substitute Option | Notes |
|---|---|---|
| Evaporated Milk | Heavy Cream or Half and Half | Will result in a slightly less dense filling, but still good. |
| Dark Brown Sugar | All Light Brown Sugar | You lose some molasses depth, but the pie will still sweeten correctly. |
| All and Butter Crust | Store and bought Crust | For time saving, grab a quality deep and dish shell. No shame! |
Selecting the Best Pie Shell: Store and Bought or All and Butter Flaky Dough
If you’re pressed for time, a store and bought, high and quality pie shell is absolutely okay. If you want supreme flavor, use an all and butter crust. It bakes up flaky and provides an incredible savory counterpoint to the sweet, spiced filling. The butter is key!
Sugar Balance: Molasses, Brown Sugar, and White Sugar Roles
We use a blend of dark brown sugar and white granulated sugar. The brown sugar, thanks to the added molasses, provides moisture and a deep, caramel and like complexity that white sugar alone can't achieve. The white sugar ensures the custard structure sets up cleanly. It’s a flavor team!
Dairy Choice: Evaporated Milk (The Key to Density)
If you absolutely must substitute the evaporated milk, use heavy cream, but you must realize the texture will be slightly less dense and more wobbly. Evaporated milk provides the structural integrity and richness we need in this pumpkin pie filling .
Step and by-Step: Crafting Your World and Class Pumpkin Pie Filling
Prepping the Crust: Blind Baking and Cooling Properly
After chilling and crimping your crust, it needs to be fully blind and baked. Use plenty of pie weights. I made a mistake once by only using weights in the center, and the sides slid down completely!
Bake it until lightly golden, then let it cool on a rack for at least 15 minutes before pouring in the filling. Thermal shock is the enemy.
Mixing the Filling: Techniques for Avoiding Air Bubbles
Do not use an electric mixer. I repeat: Do not use an electric mixer! Aggressive mixing incorporates air, and those air bubbles rise to the surface during baking, creating ugly holes and, eventually, cracks. Whisk the filling gently by hand until just combined and smooth.
The Water Bath Method: Ensuring Even Baking
This step takes 30 seconds to set up and saves you from 100% of pie cracking drama. The water bath (or bain and marie) surrounds the pie with gentle steam heat. This prevents the edges from seizing up before the middle is done.
Chef's Note: Always place your pie plate into the roasting pan before you add the boiling water. Pouring boiling water into a crowded oven is recipe drama you don't need. Pour the filling into the crust in the pan , and then add the water.
Checking for Doneness: The Center Jiggle Test
The pie is ready when the edges look completely set, and the center 2 3 inches still has a noticeable, light wiggle. It should look like slightly firm Jell-O. If the whole thing jiggles like water, give it another 5- 10 minutes.
If there’s no jiggle at all, you’ve likely overbaked it and that’s how you get a grainy filling.
Troubleshooting and Chef's Advanced Tips
Preventing Cracking: Why Rapid Cooling is the Enemy
Cracks happen because the surface of the custard cools and shrinks faster than the center. This causes tension. The biggest fix? The water bath. The second fix? When the pie comes out of the oven, don't rush it straight into the cold room air.
Let it cool on the counter for 30 minutes, then move it to the fridge.
The Ultimate Solution to a Grainy Filling (Too Much Heat or Not Enough Liquid?)
A grainy filling almost always means you’ve overcooked the eggs. The proteins seize up and separate from the liquid. Solution: Use the water bath, follow the low and slow temperature (325°F!), and always pull the pie when it still has a slight wiggle.
How to Fix a Runny Filling After Baking
Nine times out of ten, a "runny" filling just means you were impatient. Pumpkin pie must cool and set for a minimum of 2 hours, preferably 4. If it’s still runny after a full, cool overnight rest in the fridge, it needed 10 more minutes in the oven initially.
Achieving Deep Flavor: Toasting Your Spices
Want next and level depth? Gently toast your ground spices (cinnamon, ginger, nutmeg) in a dry pan over low heat for about 30 seconds, until you smell that nutty aroma. Then mix them into the filling.
It awakens the oils and gives your best pumpkin pie a flavor profile that blows away the competition.
Practical Guide: Storage, Freezing, and Handling Leftovers
Refrigeration Timeline: Maximizing Freshness
Because this is a custard pie (egg and based), it must be refrigerated. Once completely cool, cover it loosely with plastic wrap or foil. It will last beautifully for 3 to 4 days. If you're hosting, I recommend baking it the day before, so it has plenty of time to set perfectly overnight.
Freezing the Uncut Pie: Best Practices for Thawing
But does it freeze well? You bet. If you want to freeze the whole pie, bake it completely, cool it, and then wrap it tightly in a layer of plastic wrap followed by aluminum foil. Freeze for up to 1 month. To thaw, unwrap the foil/plastic and let it sit in the fridge overnight.
You can briefly warm slices in a low oven (300°F/150°C) for 10 minutes to refresh the crust.
Elegant Pairings: Serving Your Pumpkin Pie
Presentation matters just as much as flavor, darling.
- Classic Cream: Serve with fresh whipped cream, maybe spiked with a little maple syrup or bourbon.
- A Spoon of Spice: For a sophisticated edge, sprinkle a tiny pinch of flaky sea salt or ground cardamom on top of the whipped cream just before serving.
- Coffee Pairing: A simple cup of black coffee or a strong espresso provides the perfect bitter foil to the sweet filling.
- Small Bites: If you love this recipe, try adapting it for smaller portions. Sometimes I make [Mini Pumpkin Pies: Creamy, Spiced Muffin Tin Dessert Recipe] when I need individual servings!

Recipe FAQs
Why did my pumpkin pie filling crack after cooling?
Cracking is almost always caused by overbaking, which causes the custard proteins to tighten excessively, or by cooling the pie too rapidly. Ensure you remove the pie when the center 1 inch circle is still visibly wobbly and allow it to cool slowly at room temperature for at least two hours before refrigerating.
How do I prevent a soggy bottom crust when baking a pumpkin pie?
Blind baking the crust is the most effective method; prick the dough with a fork (docking) and partially bake the shell until lightly set before adding the filling. Also, ensure your oven rack is set on the lowest position to maximize direct heat exposure to the bottom of the pie plate during the main bake.
Can I use fresh pumpkin puree instead of canned for this recipe?
Yes, but you must take care to reduce and drain the fresh puree thoroughly to match the consistency of canned pumpkin. If the puree is too watery, it will dilute the custard mixture, resulting in a thin, unset, or grainy texture.
How do I know when the pumpkin pie is perfectly cooked without overbaking?
The pie is done when the outer edges of the filling look set and slightly puffed, while the very center, about an inch in diameter, jiggles slightly when the pie dish is gently nudged. The pie will finish setting completely during the cooling process, resulting in that desired silky smooth texture.
Why does this recipe specify evaporated milk instead of heavy cream or regular milk?
Evaporated milk is crucial for the ultra silky texture because it has a significantly higher concentration of milk solids and protein than regular milk, helping to stabilize the custard. If you must substitute, use heavy cream but consider adding a teaspoon of cornstarch to aid in binding.
Can I make this Classic Pumpkin Pie recipe vegan or dairy-free?
To make it vegan, replace the evaporated milk with canned full fat coconut cream (using only the thick solids) and substitute the eggs with a commercial liquid egg replacer. While the flavor will remain excellent, be aware that the final set texture will likely be slightly denser than the classic custard.
How should I store leftover pumpkin pie, and can it be frozen?
Due to the custard filling, pumpkin pie must be refrigerated once it has completely cooled down, usually within two hours of baking, and it will keep well for 3 to 4 days. Freezing is generally not recommended as the custard base tends to separate and become watery or grainy upon thawing.
Silky Smooth Pumpkin Pie Recipe

Ingredients:
Instructions:
Nutrition Facts:
| Calories | 767 kcal |
|---|---|
| Protein | 5.8 g |
| Fat | 33.0 g |
| Carbs | 111.6 g |
