The Ultimate Silky Smooth Homemade Vanilla Pudding

- Elevating Dessert: Why This Silky Vanilla Pudding Reigns Supreme
- The Definitive Guide to Truly Aromatic Homemade Custard
- Curating Excellence: Selecting Premium Components for Richness
- Demystifying the Components of Superior Vanilla Pudding
- The Crafting Process: Mastering the Art of Custard Cooking
- Step-by-Step Precision for Unforgettable Results
- Troubleshooting and Tweaks for Culinary Confidence
- Recipe FAQs
- 📝 Recipe Card
Elevating Dessert: Why This Silky Vanilla Pudding Reigns Supreme
There are desserts that strive for complexity, demanding esoteric ingredients and precise timing. And then there is Vanilla Pudding . This humble classic, when executed correctly, transcends its simple nature to become something truly sublime.
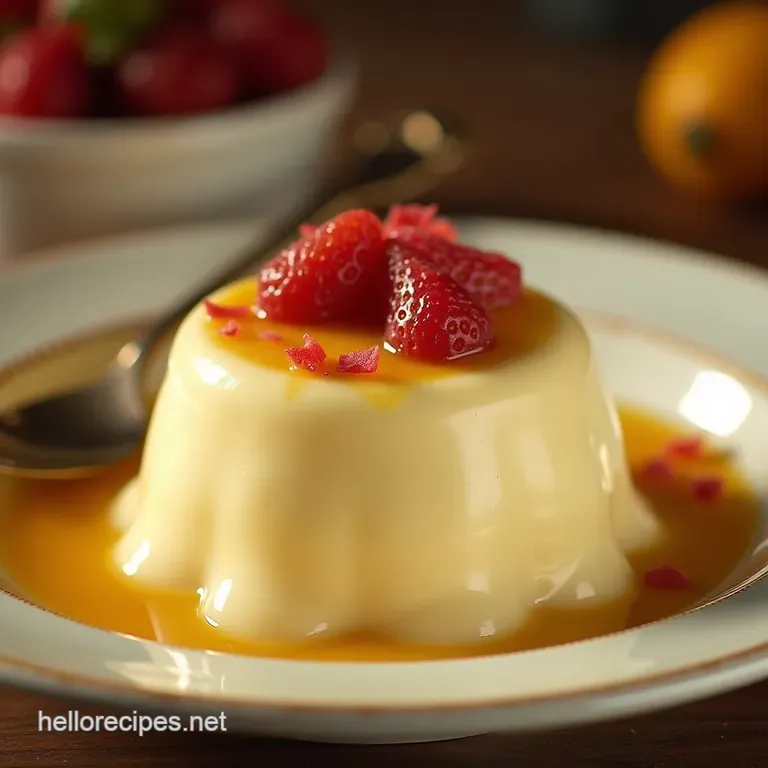
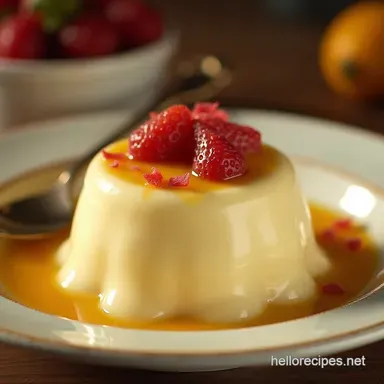
Forget those pale, gelatinous imitations you find pre-packaged; we are diving deep into Homemade Vanilla Pudding , creating a luscious texture so rich it barely qualifies as 'pudding' it’s a true baked style custard made simple.
This isn't just a recipe; it’s the foundation for understanding creamy dessert architecture. When you master this Vanilla Pudding Recipe From Scratch , you unlock the secret to countless other luxurious treats.
We aim for a Silky Vanilla Pudding that coats the back of a spoon with authority, providing deeply satisfying comfort with every spoonful.
The Definitive Guide to Truly Aromatic Homemade Custard
Creating a perfect custard involves managing heat, understanding starch activation, and respecting the quality of your primary flavouring agents. This Easy Vanilla Pudding Recipe focuses on ensuring every stage supports the final goal: a smooth, intensely flavoured dessert.
Beyond the Box Mix: A Truly Grown-Up Vanilla Experience
The key differentiator between standard store-bought fare and the Best Vanilla Pudding Dessert you can make at home lies in the aromatic depth. Box mixes rely on artificial flavouring to mask a thin texture.
By using high-quality dairy and genuine vanilla we're talking about the flecks of a bean or a premium paste you transform a nostalgic treat into an elegant, aromatic experience. This commitment to quality elevates the entire process.
Setting the Stage: Tools Essential for Perfect Pudding Consistency
While this is an Easy Vanilla Pudding Recipe , the right equipment prevents frustration. A medium sized, heavy bottomed saucepan is non-negotiable; its thickness distributes heat evenly, drastically reducing the risk of scorching the milk or scorching the bottom layer of starch.
On top of that,, a reliable balloon whisk is your main ally. You must be prepared to whisk constantly and confidently when the mixture is heating. Finally, always have a fine mesh sieve ready.
Even the most careful cook can sometimes end up with a minuscule speck of cooked egg; straining is the safety net that guarantees the final, desired silkiness.
The Philosophy of Comfort: Why Scratch Matters
The concept behind great Homemade Pudding Recipes rests on texture. When you cook cornstarch with milk and egg yolks, you are creating a stable colloidal suspension. This suspension, when cooked to the correct temperature, thickens dramatically.
This transformation, occurring right before your eyes on the stovetop, is inherently rewarding. Understanding this transformation is what separates the casual baker from the confident home cook who knows precisely How To Make Vanilla Pudding that never fails.
Curating Excellence: Selecting Premium Components for Richness
Success in any recipe begins at the market. For a dessert where the flavour profile is so direct, the quality of your Vanilla Pudding Ingredients dictates the final outcome. We are aiming for richness, balance, and profound vanilla notes.
Related Recipes Worth Trying
- Easy NoBake Vanilla Cream Cake Recipe No Oven Needed — Forget the oven This Elegant No Bake Cake is layers of crisp biscuits and silky vanilla cream A foolproof light dessert perfect for summer
- Foolproof Vanilla Custard The Ultimate Crème Anglaise — Learn how to make rich silky vanilla custardthe proper Crème Anglaise recipethat coats the spoon perfectly Nail the nappe stage every time
- Foolproof Classic Vanilla Custard Crème Anglaise — Learn how to make silky smooth custard from scratch This foolproof crème anglaise recipe masters tempering egg yolks for a luscious lumpfree base
Demystifying the Components of Superior Vanilla Pudding
Our structure relies on four main pillars: the aromatic component, the sweetener/thickener, the dairy base, and the finishing fat. Each plays a critical role in achieving that signature mouthfeel.
The Vanilla Dilemma: Bean Paste Versus High Grade Extract
When it comes to flavour, you have a choice. If you can source high-quality vanilla bean paste, use it generously. The paste provides both the intense flavour and those beautiful, tiny black specks that visually scream "this is real Vanilla Pudding !" If paste is unavailable, ensure your extract is pure, not imitation.
A tablespoon of high grade extract, paired with a pinch of scraped vanilla bean seeds if you have them, ensures that deep, complex profile we are chasing.
Sweeteners and Thickeners: Achieving the Ideal Structure
For this recipe, we rely on granulated white sugar for clean sweetness and cornstarch as the primary thickener. Cornstarch creates a characteristic glossy, somewhat jiggly, yet creamy set when properly cooked the hallmark of a superior custard.
The ratio of 1/4 cup cornstarch to 2 cups of liquid is precisely calibrated to yield a thick, pudding like set, rather than a sauce.
Dairy Foundation: Milk and Cream Ratios Explained
While some recipes use heavy cream exclusively, we opt for whole milk. Whole milk provides a wonderful, round body without the heaviness that can sometimes mute the delicate vanilla flavour.
The three large egg yolks are crucial here; they emulsify the fats and liquids, adding luxurious richness, colour, and further stability to our Classic Vanilla Pudding . We finish with butter, which melts in off the heat, adding a final, velvety sheen and mouthfeel.
The Crafting Process: Mastering the Art of Custard Cooking
The cooking phase is where technique shines. We must slowly introduce the heat to the delicate egg yolks without shocking them into coagulation while simultaneously activating the starch. This balancing act is what ensures we achieve that perfect Silky Vanilla Pudding consistency.
step-by-step Precision for Unforgettable Results
Following the instructions methodically ensures that the chemical reactions necessary for thickening occur correctly and safely. Pay close attention to the gentle heating phases.
Tempering the Yolks: Avoiding the Scrambled Fate
The first critical action is tempering. Before any real heat is applied to the main mixture, you must temper your egg yolks. This involves slowly drizzling a small amount (about half a cup) of the cold milk into the whisked yolks while whisking vigorously.
This slowly raises the temperature of the eggs, ensuring they integrate smoothly into the main pot without seizing up into clumps of cooked egg.
The Crucial Simmer: Activating the Thickening Power
Once the tempered yolk mixture is combined with the remaining milk in the saucepan and placed over medium heat, you must whisk constantly. As the mixture heats, it will begin to coat the back of your spoon. Keep going until it reaches a full, heavy boil. Crucially, maintain that heavy boil for a full 60 seconds.
This seemingly harsh step is necessary to fully cook the cornstarch granules, eliminating any raw, chalky taste and guaranteeing the final set of your Homemade Vanilla Pudding .
Straining Secrets: Ensuring Absolutely Zero Graininess
After removing the custard from the heat and stirring in the butter and vanilla, the mixture is ready for its final smoothing pass. For true silkiness, pour the hot mixture through a fine mesh sieve into a clean bowl.
This simple action catches any stray egg threads or undissolved bits of starch, guaranteeing a perfectly smooth finish a non-negotiable step for truly superior Homemade Pudding Recipes .
The Rapid Chill: Setting Your Vanilla Pudding Perfectly
To prevent the formation of that unpleasant, rubbery skin on the surface, you must cover the pudding immediately. Lay a piece of plastic wrap directly onto the surface of the hot custard before transferring the bowl to the refrigerator. Allow it to chill for at least three hours.
This slow, cold set allows the starches to fully hydrate and lock in the structure, yielding the final, firm yet creamy texture.
Troubleshooting and Tweaks for Culinary Confidence
Even experts sometimes run into minor cooking hurdles. Knowing how to recover is key to confident cooking when attempting this Vanilla Pudding Recipe From Scratch .
Diagnosing and Curing Common Cooking Setbacks
If your pudding seems thin after boiling, it means the cornstarch hasn't fully activated or the boil wasn't sustained long enough. Return it to medium heat and whisk gently until it boils heavily again for 30 seconds more. If you see small lumps, don't panic; this is usually undissolved starch or egg.
Immediately pass the mixture through the fine mesh sieve before chilling. If the mixture curdled slightly due to too high heat, stirring in an extra teaspoon of cold milk or cream off the heat can sometimes help bind the fats back together, though straining remains the best option.
Maximizing Freshness: Optimal Storage Techniques
When properly stored with the plastic wrap touching the surface, this Classic Vanilla Pudding will maintain its exquisite texture for up to five days in the refrigerator. The flavour deepens slightly overnight, making overnight chilling highly recommended.
Flavor Explorations: Infusing Beyond Basic Vanilla
While pure vanilla is our focus, this base is incredibly adaptable. Try infusing the milk before Step 1 with a strip of lemon zest or orange peel for a brighter note. Allow the zest to steep in the cold milk for 30 minutes before continuing with the recipe, then strain the milk out before proceeding.
Alternatively, substitute half the milk with strong brewed coffee for a rich mocha pudding.
Pairing Perfection: Accompaniments That Complement the Creaminess
The beauty of this rich, Silky Vanilla Pudding is its versatility. For an easy treat, it pairs wonderfully with salty, crisp cookies, like shortbread. For a more decadent presentation, try topping it with homemade salted caramel sauce or thinly sliced, macerated strawberries.
If you choose to serve it warm (though it sets better cold), a sprinkle of toasted, slivered almonds adds a welcome textural contrast to the inherent creaminess.

Recipe FAQs
Why is my homemade Vanilla Pudding lumpy or grainy?
Lumps are usually caused by two things: either the cornstarch didn't fully dissolve initially, or the eggs scrambled slightly during heating. To guarantee silkiness, always strain the mixture through a fine mesh sieve right after cooking, and remember to temper those eggs slowly!
How can I stop that awful skin from forming on top of my Vanilla Pudding when it chills?
Ah, the dreaded pudding skin! It’s a classic baker's nightmare, caused by evaporation. The trick is simple: press a sheet of plastic wrap directly onto the surface of the hot pudding before you pop it in the fridge. That way, nothing can touch the top layer.
Can I make this Vanilla Pudding ahead of time, and how long does it keep?
Absolutely, it tastes even better the next day once the vanilla flavour has truly steeped in. It keeps wonderfully in an airtight container in the fridge for up to four days. Just remember to give it a good, vigorous whisk before serving to bring back that smooth texture.
My mixture didn't thicken up properly did I miss a step?
The most likely culprit is failing to achieve a proper boil for a full minute after the mixture starts bubbling. Cornstarch needs that sustained heat to fully activate and thicken properly. Keep whisking until it’s thick enough to coat the back of a spoon heavily, and then boil it for sixty seconds sharp!
I only have egg whites left over; what can I do with them instead of yolks?
Unfortunately, egg yolks are essential here for the richness and colour of this specific custard style pudding. However, if you have whites leftover from this batch, don't chuck them out!
They are perfect for making a simple meringue topping to bake over the pudding for a delightful crème brûlée effect.
Silky Homemade Vanilla Pudding
Ingredients:
Instructions:
Nutrition Facts:
| Calories | 471 kcal |
|---|---|
| Protein | 7.0 g |
| Fat | 22.2 g |
| Carbs | 37.1 g |
| Fiber | 1.2 g |
| Sodium | 186 mg |
