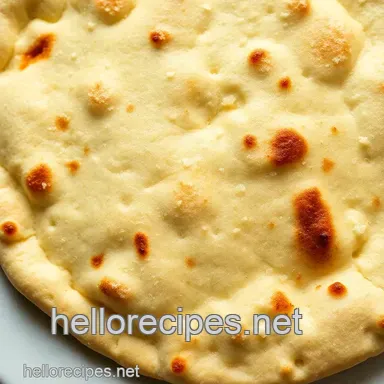
Quick & Easy Homemade Pita Bread

- Let’s look into Into Perfect Pita Bread!
- A Quick Glance at Pita’s History and Popularity
- The Good Stuff: Key Benefits of Homemade Pita
- Your Go-To Guide for Essential Ingredients
- Mastering Professional Cooking: The Art of Pita Bread
- Pro Tips & Secrets for a Fluffy Pita
- Perfect Presentation: Let’s Make it Pretty
- Storage & Make-Ahead: Keeping it Fresh
- Creative Variations: Play With the Recipe
- Complete Nutrition Guide: Healthy Eats
- Final Thoughts
- Frequently Asked Questions
- 📝 Recipe Card
Let’s look into Into Perfect Pita Bread!
Oh my gosh, do you remember the first time you bit into a warm, fluffy pita bread? i totally do! i was at this little mediterranean spot, and as soon as i tore into that cloud like bread, it felt like a food hug.
I mean, what’s better than a pita bread recipe easy enough for a weeknight dinner?
Now, let’s break it down. the pita bread is a classic. originating from the middle east, it’s got this amazing pocket that just begs to be filled.
It’s like the bread version of a superhero cape ready to take on all those tasty fillings! whether it’s roasted veggies or grilled chicken, this is the bread that makes every meal feel special.
Plus, it’s super easy to whip up at home! if i can do it, trust me, you can too.
A Quick Glance at Pita’s History and Popularity
So, you might be wondering, “where did this deliciousness come from?” pita bread has a long history, tracing back to ancient civilizations.
It’s been a favorite across mediterranean countries for centuries. fast forward to today, and pita is everywhere! from trendy food trucks serving flavorful fillings to fancy brunch spots, it’s made a name for itself in the food world.
But let’s be real; making your own homemade pita bread ? that’s kinda trendy too! it’s super approachable, taking about 1 hour and 10 minutes from start to finish.
Easy peasy, right? you don’t need a degree in baking just some simple ingredients and a lil' patience while it rises.
The Good Stuff: Key Benefits of Homemade Pita
Now let’s talk about why you’ll absolutely want to make this pocket pita recipe at home. first off, health benefits! these little breads are a great source of carbohydrates and pair perfectly with healthier fillings.
Plus, they’re often lighter than heavy sandwich bread, especially if you stick to whole wheat flour.
Did i mention versatility? seriously, the best pita bread can be dressed up or down, making it perfect for any occasion.
Family dinner? check! sunday brunch with friends? yes, please! plus, it’s a fun way to involve the kids. who doesn’t love rolling out dough and waiting for it to puff up in the oven?
When compared to store-bought options, a homemade pita often comes out on top. it’s fresh, customizable, and you can experiment with flavors like garlic or herbs.
If you’re feeling adventurous, try a pita bread recipe sourdough for some tangy goodness or an air fried pita bread twist for a healthier crunch.
Now that i’ve whetted your appetite, you're probably itching to know what it takes to create your very own soft pita bread at home.
Thankfully, the ingredients are common pantry staples. so let’s check that out next!
Ready to roll up your sleeves and create the magic of pita bread in your kitchen? I’m excited to share the simple ingredient list that'll get you started on your very own quick & easy homemade pita bread adventure! 🥙
Your Go-To Guide for Essential Ingredients
When it comes to whipping up the best homemade recipes, having the right ingredients is key! Let’s dive into the essential components that will make your cooking chaos more delightful.
Premium Core Components
Alright, first up, let’s talk about measurements . it’s super important to get these right. for your pita bread recipe easy , you’ll want 2 cups (250g) of all-purpose flour and a few other bits.
Don’t sweat it if you’re more into grams just remember, the basics stay the same.
Now, the quality indicators . look for flour that feels silky and soft in your hand. fresh yeast should smell a little like beer yeah, that’s good! for storage, make sure to keep your flour in a cool, dry place.
It usually keeps well for about six months. remember, freshness matters! always check expiration dates, and if your flour smells off, toss it out.
Signature Seasoning Blend
Now, let’s spice things up! for your pita, think of a signature seasoning blend . a pinch of salt and a dash of sugar makes a world of difference.
Maybe try adding garlic powder or dried oregano for that pop of flavor. these guys break the monotony of regular bread and elevate it to a foodie fantasy!
Herbs can be your best buddy in the kitchen. Think oregano and mint ! Fresh herbs rock, but if you're feeling low on supplies, dried ones still do a stellar job.
Smart Substitutions
Life happens! if you’re out of yeast or flour, don’t sweat it. you can experiment with some smart substitutions . for instance, if you’re missing olive oil, melted butter works wonders in your pita bread recipe with yogurt.
Or say goodbye to gluten a gluten-free pita recipe using almond flour or chickpea flour is possible! fancy technique, eh?
Also, if time is tight, toss in some seasoned Greek yogurt into your dough for that extra fluff without any extra wait time.
Kitchen Equipment Essentials
Before you jump into mixing dough, let’s make sure you have the must have kitchen equipment . you’ll definitely need a mixing bowl and a rolling pin, but did you know that a baking stone is a game changer for a nice crust? if you don’t have one, don’t sweat it.
A baking sheet works just fine!
For prep, just grab a clean kitchen towel and you're golden. and remember, once those pitas are baked, they need to cool out a bit on a wire rack.
This little detail can make or break that soft pita bread texture you’re aiming for.
Bring It All Together
Now that you’re fully equipped with essential ingredients and tools, you're ready to create something delicious! imagine those fresh, fluffy pitas puffing up in the oven, just begging to be filled with your favorite stuff think shawarma, veggies, or even a tzatziki dip.
So go ahead, roll up your sleeves, and let’s make some dough! the aroma wafting through your kitchen will have everyone asking, “what’s cooking?” and trust me, once you've mastered this homemade pita recipe , there’s no going back.
You'll find new ways to enjoy your bread like trying a sourdough greek pita bread next.
Ready to dig in? Let’s dive into the instructions and make your cooking experience unforgettable. Happy baking!
Mastering Professional Cooking: The Art of Pita Bread
Let’s dive right into the world of cooking i’m talking about that kind of cooking that feels a bit like art.
Say hello to pita bread! seriously, with a pita bread recipe easy to follow, you’ll be impressing friends and family in no time.
Buckle up; we’re about to get deliciously serious!
Essential Preparation Steps
Before you even think about hitting that dough, let’s make sure you’re set up for success. one word: mise en place .
It’s fancy french for "everything in its place." gather your ingredients before you start mixing. no one wants to run for flour when dough is just sitting there looking sad!
Time management tips ? give yourself about 10- 15 minutes for prep, then set a timer. because trust me, once you get into the flow, you might lose track of time, and we don’t want burnt pitas.
Now, here’s a nugget of wisdom: keep your workspace organized. have your mixing bowl, rolling pin, and baking sheet ready to go.
It makes everything flow like a smooth jazz cut. oh, and don’t forget safety! hot ovens and gleaming knives can be a real party pooper.
Step-by-step Process
Alright, roll up those sleeves! Here’s the step-by-step on how we turn simple ingredients into pocket pitas that will make you go “wow.”
Activate yeast: mix 1 tablespoon of active dry yeast into 3/4 cup of warm water (about 110° f/ 43° c ) after stirring in 1 teaspoon of sugar .
Let it foam for about 5- 10 minutes . it’s like magic!
Combine Dry Ingredients: In a large bowl, toss together 2 cups of flour , 1 teaspoon salt , and any additional spices you fancy, like garlic or dried oregano.
Make the Dough: Pour the foamy yeast mix and 1 tablespoon of olive oil into the dry mixture. Stir that baby until you’ve got a shaggy dough.
Knead: On a floured surface, knead for about 5- 7 minutes. You want it silky smooth and elastic like your favorite pair of yoga pants.
First rise: pop that dough in a greased bowl, cover it with a towel, and let it sit in a warm place for about 45 minutes to 1 hour .
It should double in size, and honestly, watching it rise is like witnessing a miracle.
Shape Pitas: Punch that dough down (therapeutic, right?) and divide it into 8-10 pieces. Roll them into flat circles (about 1/4 inch thick ).
Preheat Oven: Crank it up to 475° F ( 245° C) . If you have a pizza stone, toss it in there for 30 minutes. Good times ahead!
Bake: Place your circles on the baking sheet or directly on the stone and bake for 5- 7 minutes until puffy and slightly brown.
Cool: Transfer to a wire rack. Patience is key here; waiting is half the fun!
Expert Techniques
You know, getting the best pita bread is all about those tiny details. a high temp is critical it's the golden ticket! don’t come running to me if the pitas aren’t puffing.
Oh and speaking of puffing, that first rise? do not skip it!
For a pro trick, check for doneness if they’re slightly golden, you’re golden! And if things go sideways? Flour sticking to everything? Just dust your surface lightly, and it’ll be smooth sailing again.
Success Strategies
We all mess up once in a while, right? so here are some common mistakes that’ll help you steer clear of pitfall city.
Not measuring ingredients precisely could lead to dense pitas, and nobody wants those rock hard flatbreads.
Quality assurance? Use fresh yeast and good flour. You’ll thank me later. Also, perfect results require practice. Don’t hesitate to give it another go!
Wrap-Up
Homemade pita? super easy to whip up, and all the more rewarding when you’ve nailed it! plus, with options like gluten-free pita recipe or tossing stuffed options in there, the possibilities are endless!
And whether you opt for sourdough greek pita bread or go modern with air fried pita bread for a healthier spin, you’re on to something great.
In the world of bread making, there’s always more to learn. flipping that delicious dough just leads us to tasty new adventures like dips, spreads, and, oh i don’t know, possibly pairing it all with that best pita bread from your favorite mediterranean spot.
Now, let’s transition into some additional information there’s always more to explore in the kitchen! So hang tight!
Pro Tips & Secrets for a Fluffy Pita
Alright, let’s jump into the world of homemade pita bread trust me, it’s much easier than you think! i’m all about the simplicity when it comes to cooking, and making this pita bread recipe easy will have you looking like a kitchen rockstar in no time.
First things first, don’t rush the rising time . i’ve skipped this in the past, and my pitas turned out like sad little disks.
Give it at least an hour to puff up nicely. you want to see that dough double in size; it’s like magic!
When you’re rolling out your dough, keep it even. not-thick enough pitas will end up flat, and no one wants a?! pocket pita recipe that’s more of a pancake! aim for about a quarter of an inch thick.
And speaking of thickness, i’ve learned that a little sprinkle of garlic powder or oregano can elevate your pitas. just mix it into your flour, and your pita will carry that flavor right through!
Perfect Presentation: Let’s Make it Pretty
So, you’ve got your warm pita fresh from the oven but what’s next? presentation, friends! let's make it beautiful. for a simple yet stunning display, arrange your pitas on a colorful platter.
Add some vibrant dips like hummus or tzatziki and toss in a handful of fresh veggies . it’ll look like a mediterranean feast right in your living room!
Garnish with some fresh herbs too. a sprinkle of parsley can add that nice pop of green and makes everything taste fresher.
And don’t forget about colorful combinations! the reds of tomatoes, greens of cucumber, and earthy tones of hummus paint a beautiful picture.
You eat with your eyes first, right?
Storage & make-ahead: Keeping it Fresh
If you happen to have some pitas left over (which is rare, let’s be honest), here’s how to store them.
Make sure they cool completely, then wrap them up in a clean kitchen towel or stash them in a sealed plastic bag.
Stored like this, you can keep your soft pita bread fresh for about 2-3 days.
Want to make them ahead of time? no problem! you can freeze them. layer each cooled pita with parchment paper, toss them in a freezer bag, and pop them in the freezer.
They’ll be good for up to a month. just make sure to thaw them in the fridge before re-heating.
Creative Variations: Play With the Recipe
Now let’s get creative! you can do so many fun things with this pita bread recipe . craving something different? try a pita bread recipe with yogurt for a tangy twist.
Just substitute some of the water with plain yogurt; it’ll add flavor and moisture. if you're feeling adventurous, go for a sourdough greek pita bread by using sourdough starter instead of yeast.
It might take a little longer to rise, but oh, that flavor!
Let’s not forget seasonal twists! in fall, i love to throw in some pumpkin puree or spices like cinnamon. you can even make a gluten-free pita recipe if you swap in your favorite gluten-free flour mix.
Get inspired by your region too! southern states might enjoy a cornbread twist, while northeasterners might favor a more dense bread.
Complete Nutrition Guide: Healthy Eats
When it comes to nutrition, this easy homemade pita is a decent choice! each pita has about 100 calories and offers a little protein without breaking the calorie bank.
But don’t just look at numbers think about the health benefits. whole grains can work wonders, so if you’re grinding up whole wheat flour, bonus points for added fiber!
As you’re serving these up, consider the size. Each pita is a pretty perfect portion for snacks or meals. You can fill them with lean proteins, fresh salads, or tons of veggies the options are endless! It’s about balance and variety!
Final Thoughts
So there you have it! an easy way to dive into homemade pita bread and elevate your meals. whether you keep it simple with a classic pita bread recipe or explore variations for fun and flair, you’re in for a treat.
Just remember, cooking is all about experimentation and making it your own. go out there and get flour on your hands you’ve got this! happy baking! 🥙
Frequently Asked Questions
How do I make this pita bread recipe easy for beginners?
This pita bread recipe is quite straightforward! Just focus on the steps: activate the yeast, mix ingredients, knead the dough, and let it rise. Remember, practice makes perfect your first batch might not be bakery level, but they’ll still taste great!
What should I do if my pita bread doesn't puff up?
If your pita doesn't puff, it could be due to insufficient oven temperature or unevenly rolled dough. Make sure your oven is preheated to a whopping 475°F (245°C), and try rolling your dough evenly to about 1/4 inch thickness for optimal puffiness!
Can I freeze the pita bread from this recipe?
Absolutely! You can freeze the cooked pitas for up to 3 months. Just make sure to let them cool completely, then wrap them in plastic wrap or foil and place them in a zip-top bag. Pop them in the oven or toaster when you’re ready to enjoy!
What are some variations I can try with this pita bread recipe easy?
There are loads of tasty variations! Consider adding herbs like rosemary or thyme to the dough for a fragrant twist, or swap half of the all-purpose flour for whole wheat for a nuttier flavour. You could even try integrating spices like cumin or coriander for an extra kick!
What’s the best way to store homemade pita bread?
Store your pita bread wrapped in a clean kitchen towel or in a sealed plastic bag at room temperature for up to 2 days. If you want to keep them longer, freezing is your best bet just be sure to separate them with parchment paper to prevent sticking.
Are there any nutritional considerations for homemade pita bread?
This homemade pita bread is relatively low in calories, with around 100 calories per piece. If you're watching your carbs, consider using whole wheat flour for a healthier alternative, as it has more fiber and nutrients compared to all-purpose flour.
Quick Easy Homemade Pita Bread