Cookie Icing: Perfect Royal Glaze for Piping Flooding
- Achieving Flawless Surfaces: Why Royal Icing is the Industry Standard
- The Science Behind the Perfect Glaze Consistency
- Essential Supplies and Ingredients for The King's Glaze
- Mastering the Method: Step-by-Step Icing Creation
- Troubleshooting Your Royal Icing Batch
- Preparing Ahead: Storage and Shelf Life of Decorated Treats
- Beyond the Sugar Cookie: Ideal Uses for This King's Glaze
- Recipe FAQs
- 📝 Recipe Card
Achieving Flawless Surfaces: Why Royal Icing is the Industry Standard
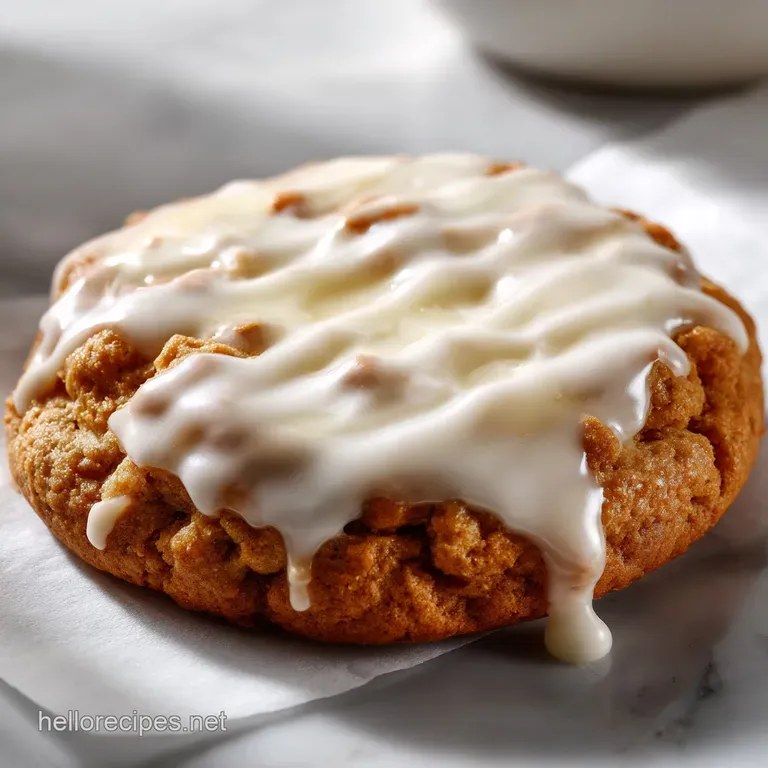
Have you ever gazed longingly at those picture perfect biscuits the ones with the high gloss, the sharp edges, and the impeccable detail? That smooth, polished surface that somehow never smudges?
That is the magic of true Royal Icing, and trust me, it’s the only way to get next level results when decorating. Forget sticky buttercreams and plain drizzles; this professional grade Cookie Icing dries completely hard, allowing you to stack, store, and even ship your creations without fear of disaster.
Making this isn't difficult, but it requires precision; it's less about baking skill and more about listening to your mixture. This incredible Cookie Icing is reliable, cost effective, and uses simple ingredients you likely already have stashed away, assuming you keep meringue powder on hand.
It provides a sturdy canvas for all your decorative dreams, whether you are creating intricate patterns for Christmas or simple, elegant flooded backgrounds for wedding favors.
So, let's ditch the frustration and embrace the structure. We are going to master the two necessary consistencies piping and flooding that turn simple cut-outs into edible masterpieces.
Once you understand the simple science, you'll see why this Cookie Icing recipe is the only one you'll ever need.
The Science Behind the Perfect Glaze Consistency
The secret to why Royal Icing hardens beautifully lies in its structure, primarily powdered sugar suspended in a protein (meringue powder) base. Unlike simple glaze, which often remains sticky, Royal Icing cures into a solid shell. This shell protects the cookie and gives it that glorious, glossy shine.
Getting the texture right is the critical step, especially because you need two very different textures from the same batch of Cookie Icing .
Defining the Difference: Glaze Icing vs. True Royal Icing
Many people confuse a simple powdered sugar glaze with Royal Icing. The basic glaze uses powdered sugar and milk or lemon juice, and while it tastes great, it often remains slightly tacky and definitely won't support detailed piping.
True Royal Icing requires meringue powder or fresh egg whites (we are using meringue powder for safety and convenience) to introduce albumen protein. This protein is what allows the mixture to be whipped to volume and dry completely hard, making it the superior Cookie Icing option for stability.
The Role of Meringue Powder for Stability and Food Safety
Meringue powder is your best friend here. It’s essentially pasteurized, dehydrated egg white, often mixed with sugar and stabilizers. Using it eliminates the food safety concerns associated with raw egg whites, which is essential if you plan on gifting or selling your decorated treats.
Do not skip the meringue powder if you want that true hard, stackable finish. It locks the structure in place and gives the Cookie Icing its signature matte (but slightly glossy) finish when fully cured.
Understanding 'Piping' Consistency (The 20 Second Rule)
Piping consistency is thick the stiff base you achieve after whipping. This consistency is used to create sharp lines, borders, and tiny details like script or flower petals.
For a perfect outline on your biscuits, you want the icing to be stiff enough to hold its shape when piped, but not so stiff that it tears when pressure is applied.
Chef's Note: The "20 Second Rule" actually applies to the flooding consistency, but it’s helpful to understand the spectrum. If you drop a spoonful of piping consistency icing back into the bowl, it won't disappear at all. It will just sit there, proud and structural. That’s your barrier for all the great Cookie Icing details you’ll be adding.
Adjusting Flow and Stiffness for Fine Detail Work
The most common point of failure when making homemade Cookie Icing is getting the consistency wrong for flooding. We want the Flood Consistency to merge seamlessly and fill the outlined area without running over the edges.
The way we test this is with the "10 Second Rule." Drop a line of icing onto the surface of the bowl. If that line fully smooths and disappears back into the main body of icing within 10 seconds, you’ve hit the sweet spot for easy flooding.
If it takes 15 seconds, it’s a slower flood for better control; if it takes 5 seconds, it’s too runny and will run over your beautiful border!
The Chemistry of a Hard, Smooth Shell
The magic happens during the drying process. As the water evaporates, the sugar molecules recrystallize and the meringue powder proteins harden, creating a strong matrix. The result? A smooth, rock hard exterior. This process requires patience you absolutely must let your Cookie Icing dry completely, which takes 6 to 8 hours minimum, or ideally, overnight. Rushing this stage leads to soft spots, smudging, and cratering. If you've ever tried my Sugar Cookie Icing: Rock Hard Royal Glaze for Cookies , you know the importance of letting that shell set!
Essential Supplies and Ingredients for The King's Glaze
Making this perfect Cookie Icing starts with good prep. You really need to make sure your ingredients are top-notch and your tools are ready. While you can make this by hand, using a stand mixer saves your biceps and produces far superior results by incorporating more air evenly.
Choosing the Right Powdered Sugar (Sifting Recommendations)
The most important ingredient here is confectioners' sugar, also known as icing sugar. You absolutely must sift it. Why? Because powdered sugar lumps are notoriously stubborn. If you skip this step, those little sugar pebbles will clog your piping tips and give your flooded areas a lumpy, ugly texture.
Sifting guarantees a flawless, silky smooth finish for your amazing Cookie Icing .
Expert Notes on Meringue Powder Quality and Freshness
Meringue powder is usually found in the baking aisle, near specialty decorating supplies. It is vital for the structure of this royal Cookie Icing . While it has a long shelf life, if your meringue powder is ancient and dusty, it won't whip up as effectively. Always check the expiration date.
A good quality brand will yield higher, glossier peaks and a more reliable set.
Water Temperature and Icing Activation
Use slightly warm water not hot, but definitely not ice cold. Warm water helps dissolve the sugar and activate the meringue powder faster, reducing the total whipping time needed to achieve those stiff peaks.
Filtered water is always best if you have mineral heavy tap water; sometimes hard water can slightly affect the color or drying time of delicate Cookie Icing .
Necessary Equipment for Whipping the Perfect Batch
While a hand mixer will work, a stand mixer with a whisk attachment is truly ideal. You need sustained, high speed beating to incorporate the air necessary to build volume and strength in the icing.
Trying to hold a hand mixer for 7 straight minutes is a recipe for a tired arm and inconsistent results. You’ll also need good piping bags or squeeze bottles for the final application of your Cookie Icing .
| Ingredient | Substitution | Notes |
|---|---|---|
| Meringue Powder | Aquafaba (Chickpea Liquid) | Requires longer whipping time and the drying time may be extended. Best for vegan alternatives. |
| Clear Vanilla Extract | Clear Butter Extract | Maintains the pure white color while adding a richness often missed in royal icing. |
| Water | Lemon or Lime Juice | Adds a tart flavor and a bit of shine, though you may need a tiny bit less liquid. |
Mastering the Method: step-by-step Icing Creation

This homemade Cookie Icing tutorial is broken down into two distinct phases: making the base, and then adjusting the consistency. If you master the base, the rest is just hydration.
Mixing the Foundation: Initial Wet and Dry Steps
First, sift your mountain of powdered sugar and meringue powder together into the bowl. Give it a gentle whisk by hand just to combine everything lightly. Next, add the warm water and extracts. Now, here is where most people go wrong: they hit high speed immediately. Don't do it!
Start the mixer on the lowest speed possible (Speed 1 or 2). This prevents the sugar from exploding all over your kitchen (the dreaded "sugar snowstorm") and ensures the water fully saturates the powder. Mix on low for 90 seconds until a thick, clumpy paste forms.
The Whipping Stage: Achieving Stiff Peaks in Royal Icing
Okay, now we turn up the heat! Increase the mixer speed to medium high (I usually go 6 or 8 on my KitchenAid). Let it beat, and I mean really beat, for 5 to 7 minutes. You'll hear the sound change as the mixture becomes thick.
Watch the sides of the bowl; the Cookie Icing will transform from dull to intensely bright white and glossy. When you lift the whisk, the peaks should stand straight up like little white mountains and refuse to flop over. This is your stiff base the Outline Icing .
Diluting the Batch: Creating Flooding and Outlining Consistencies
Immediately remove some of the stiff icing and set it aside; this is your permanent Outline Icing for all details and borders. Now, for the rest, we create the Flood Consistency. You must dilute carefully, adding water only one teaspoon at a time. Mix each spoonful fully. Scrape the sides down.
Test the flow: drop a ribbon of Cookie Icing back into the bowl and count. One Mississippi, Two Mississippi... Stop adding water when that ribbon sinks entirely back into the surface at precisely 10 seconds. This perfect consistency is the secret to a smooth finish.
Tinting and Dividing Batches for Color Work
Use high-quality gel or paste food coloring only. Liquid food coloring will instantly ruin your carefully adjusted consistency, turning your perfect 10 second flood into a 3 second watery mess. Divide your prepared flood icing into small bowls.
Start with a tiny speck of color on a toothpick a little goes a very long way, especially for vibrant colors. When you tint, mix slowly and deliberately until the color is uniform.
This is also a fantastic way to check if your Cookie Icing needs a final minor consistency tweak before filling the piping bags.
Troubleshooting Your Royal Icing Batch
Every dedicated cookie decorator has had a batch go wrong. It happens! The crucial thing is knowing how to fix it fast. Never throw out a batch of Cookie Icing before attempting these simple fixes.
Curing the Cratering Effect (When Icing Sinks)
If your Cookie Icing sinks in the middle after drying, leaving an ugly divot, that's called cratering. This usually happens because the flood icing was applied too thickly or the air was too humid.
To prevent it, try to apply the flood icing in slightly thinner layers, or use a dehydrator to quickly set the surface. A thin layer of white base flood applied first can also help prevent the dreaded crater when decorating large areas of the cookie.
Preventing Color Bleeding After Application
Color bleeding is the absolute worst. You put down a gorgeous dark blue outline, and the white flood starts turning grey where they meet. This happens because the dark color was too concentrated or the Cookie Icing wasn't given enough time to dry between layers.
ALWAYS let your outline dry for at least 30 minutes before flooding the center. For tricky colors like red or black, dilute the gel color slightly with a drop of clear vanilla extract before adding it to the icing.
Dealing with Icing That’s Too Runny or Too Stiff
If your Cookie Icing is too runny (it disappears in 5 seconds), don’t panic. Simply add more sifted powdered sugar, one teaspoon at a time, and mix well until you hit that 10 second mark again.
If the icing is too stiff for piping (it tears and crumbles when you push it), add water, literally one drop at a time. The shift between stiff and perfect can happen rapidly, so be cautious.
Preparing Ahead: Storage and Shelf Life of Decorated Treats
You can absolutely prepare your Cookie Icing ahead of time! It's actually a great idea because it gives the colors time to deepen. This is far better than trying to make a batch of Cookie Icing while you're also trying to bake 10 dozen cookies.
How Long Does Prepared Icing Keep on the Counter?
Unused Royal Icing, when stored correctly, can last for up to two weeks in the refrigerator. The key is storage. Place the Cookie Icing in an airtight container and lay a piece of cling film directly onto the surface of the icing before sealing the lid.
This prevents the exposed surface from crusting over. When you pull it out of the fridge, it will look separated and need a vigorous stir but it will be fine!
Safe Freezing Techniques for Unused Icing
Yes, you can freeze royal icing, though some people swear against it. I’ve found that it freezes well for up to three months. Put the icing in a freezer safe zip-top bag, squeezed completely free of air, and lay it flat. When thawing, let it sit in the fridge overnight.
The structure will likely separate and look weird, but a good whip with a hand mixer or in the stand mixer will bring your Cookie Icing back to life.
Storing Fully Decorated Biscuits for Maximum Freshness
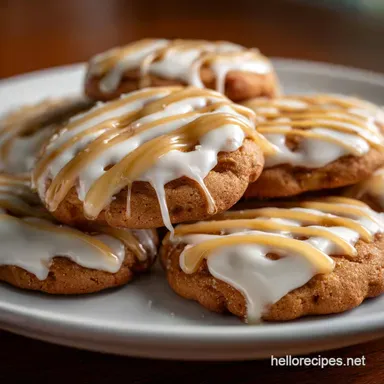
Once your cookies are fully decorated and the Cookie Icing is completely dry (usually overnight), they become incredibly sturdy. Store them in an airtight container at room temperature. They stack beautifully because the royal glaze is so hard. They will stay fresh and beautiful for 2 to 3 weeks. If you’re looking for a softer cookie to pair with this glaze, you have to try my Crinkle Cookies: Best Fudgy Chocolate Recipe next!
Beyond the Sugar Cookie: Ideal Uses for This King's Glaze
While we usually think of traditional sugar cookies, this versatile Cookie Icing is useful in so many other ways. I often use the stiff consistency as an edible "glue." It works perfectly for sticking sprinkles, nonpareils, or larger candies onto cakes and cupcakes because it sets fast and strong.
Use it to hold together large pieces of gingerbread houses. If you need a structural cement for those festive builds, the stiff Cookie Icing is infinitely stronger than any buttercream.
It’s also fantastic for creating transfers: pipe your designs onto wax paper, let them dry fully, and then peel them off to place them onto a cake or cookie surface later. Mastering this Cookie Icing means you've unlocked a whole new dimension of decorating. You’ve got this!
Now go forth and create something beautiful.

Recipe FAQs
How do I adjust "The King's Glaze" for piping versus flooding consistency?
For fine piping and outlines, the icing should be stiff enough to hold a sharp peak but still flow smoothly through the tip. To thin it for flooding, add water gradually, one teaspoon at a time, until a line drawn across the surface disappears within an 8-10 second count.
If it becomes too runny, thicken it again by whipping in a small spoonful of powdered sugar or meringue powder.
Why is my royal icing drying dull, brittle, or taking too long to harden?
Slow drying is often caused by high humidity or accidentally incorporating too much water into the mix during the thinning stage. Ensure you are not decorating on a rainy day and consider using a small desk fan to circulate air over the cookies, which significantly speeds up the crusting process.
Avoid using too much liquid extract, as oil-based flavourings can also inhibit the drying process.
Can I use fresh egg whites instead of meringue powder in this recipe?
While traditional royal icing uses fresh egg whites, this recipe specifically calls for meringue powder because it offers superior stability and is safer, eliminating the risk of salmonella.
If you must substitute, use three large pasteurized egg whites per batch, ensuring they are whipped stiff before gradually incorporating the powdered sugar. Meringue powder offers greater consistency and a much longer shelf life.
How should I store leftover royal icing, and how long does it last?
Royal icing can be stored in an airtight container at room temperature for up to three days, or refrigerated for up to two weeks. Always press plastic wrap directly onto the surface of the icing before sealing the container to prevent a hard crust from forming.
If refrigerated, the icing may separate; stir it vigorously or re-whip it briefly before use, adjusting the consistency as needed.
Why did the colors bleed or run into each other after I decorated the cookies?
Color bleeding usually occurs when the first layer of icing (the flood coat) is not fully dry before adding the second layer of detail. Humidity can also worsen this effect by trapping moisture between the layers.
Ensure that your base flood layer has dried for at least 6-8 hours, or ideally overnight, before attempting fine line work or adding wet color next to another wet color.
Can this royal icing recipe be made vegan or egg-free?
Since the structural integrity comes from the meringue powder, direct substitution is complicated but achievable using specific vegan products. The most common substitute is aquafaba (whipped chickpea liquid), which mimics the stabilizing properties of egg whites when beaten to stiff peaks.
Alternatively, you can seek out pre-made commercial vegan royal icing mixes designed for this purpose.
Why does my finished icing sometimes have small air bubbles, and how can I fix them?
Air bubbles form either during the initial mixing process when the icing is beaten too quickly or as the thin flood coat settles on the cookie. To minimize them, always mix the icing on a low speed once the ingredients are incorporated.
After flooding the cookie, gently tap the cookie on the counter several times before setting it aside to dry, allowing trapped air to rise and pop.
Perfect Royal Cookie Icing Recipe
Ingredients:
Instructions:
Nutrition Facts:
| Calories | 814 kcal |
|---|---|
| Protein | 0.1 g |
| Fat | 0.3 g |
| Carbs | 214.1 g |
